


Flutter智能手表表盘配置插件watchface_config的使用
Flutter智能手表表盘配置插件watchface_config的使用
该插件帮助你在Flutter中创建智能手表表盘的配置活动。
描述
该插件的优势在于,它允许你在Flutter中为不同的表盘创建配置活动,而无需为每个表盘在清单文件中写额外的代码。在Flutter端,你有一个提供者小部件来获取和设置复杂功能,并且还有一个小部件用于确定给定的Flutter应用对应的表盘。
该插件使用了wearable_flutter_fragment_application,因此你需要在你的应用中也使用它:详情见设置部分。
提供了两个小部件:
ComplicationReceiver: 可以访问表盘的复杂功能,并直接启动复杂选择器活动。WatchFaceInfoProvider: 提供一些关于表盘的信息以便唯一标识。它有一个可以在Android端自定义的名称参数。
示例
基本示例
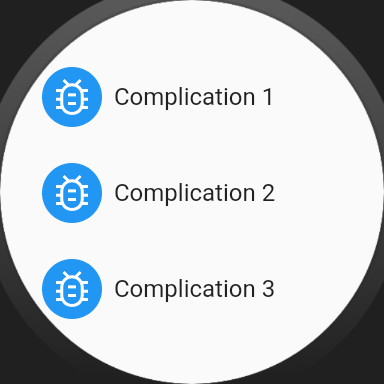
这是如何在一个表盘上获取和设置静态数量的复杂功能的基本示例。
多个配置示例
这展示了如何为多个表盘创建不同的活动。这里使用了WatchFaceInfoProvider小部件。
复杂示例
动态数量的复杂功能被使用。数量在Flutter端处理,Android端根据数量调整复杂功能的位置。通常,可穿戴应用程序不使用此功能,实现起来可能比较复杂。
| 添加复杂功能 | 移除复杂功能 |
|---|---|
 |
 |
设置
Android
在清单文件中,你的表盘服务必须包含以下元数据,值为CONFIG_ACTIVITY,以便使用插件提供的配置活动。
<service
    android:name=".watchface.WatchFaceExample"
    ...>
    <meta-data
        android:name="com.google.android.wearable.watchface.wearableConfigurationAction"
        android:value="CONFIG_ACTIVITY"/>
    ...
</service>
要为某些表盘使用自定义配置活动,必须从ConfigActivity()继承,并使用自定义值(如CUSTOM_CONFIG_ACTIVITY)作为上面的元数据。这个新类也需要在清单文件中声明。
<activity
    android:name=".CustomConfigActivity"
    android:exported="true">

    <intent-filter>
        <!-- 同样的自定义值 -->
        <action android:name="CUSTOM_CONFIG_ACTIVITY"/>
        <category android:name="com.google.android.wearable.watchface.category.WEARABLE_CONFIGURATION"/>
        <category android:name="android.intent.category.DEFAULT"/>
    </intent-filter>
</activity>
Flutter
使用wearable_flutter_fragment_application需要在pubspec.yaml文件中添加它作为依赖项。设置WearableFragmentApplication().observers为navigatorObservers是必需的,建议将DismissibleContainer()作为MaterialApp的子组件,以便于取消活动,但不是必需的。
MaterialApp(
    title: 'Watchface config example',
    theme: ThemeData(),
    navigatorObservers: WearableFragmentApplication().observers,
    home: DismissibleContainer(child: Container())
);
重要提示
不要扩展MainActivity : FlutterActivity()的功能(例如用于MethodChannel),应用程序不会使用它。可以通过继承ConfigActivity来访问FlutterEngine。更多细节参见wearable_flutter_fragment_application。
完成的应用程序不必有MainActivity(所以可以从清单文件中删除它并设置应用程序不使用默认活动),但在调试应用程序时可能会有所帮助。插件为WatchFaceInfoProvider和ComplicationReceiver类提供了默认值,以便在没有表盘的情况下运行。如果你的项目中有独立的应用程序和表盘,强烈建议使用wearable_flutter_fragment_application包而不是使用MainActivity。
支持
- 最低系统要求是Android 7.1 - Wear OS 2.0
测试
- Moto 360 gen 2 - Android 7.1 - Wear OS 2.0
待办事项
- 交换复杂功能
示例代码
import 'package:collection/collection.dart';
import 'package:flutter/material.dart';
import 'package:watchface_config/complication_receiver.dart';
import 'package:watchface_config/model/complication_type.dart';
import 'package:wearable_flutter_fragment_application/wearable_fragment_application_observers.dart';
import 'package:wearable_flutter_fragment_application/dismissible_container.dart';

import 'buttons.dart';

void main() {
  runApp(const MyApp());
}

class MyApp extends StatelessWidget {
  const MyApp({super.key});

  [@override](/user/override)
  Widget build(BuildContext context) {
    return MaterialApp(
        debugShowCheckedModeBanner: false,
        title: 'Watchface config example',
        theme: ThemeData(),
        navigatorObservers: WearableFragmentApplication().observers,
        home: DismissibleContainer(child: ComplicationSelectorScreen()));
  }
}

class ComplicationSelectorScreen extends StatelessWidget {
  final List<List<ComplicationType>> supportedTypeList =
      List.generate(3, (index) => acceptableComplicationTypesByExample.toList());

  static const acceptableComplicationTypesByExample = [
    ComplicationType.shortText,
    ComplicationType.rangedValue,
    ComplicationType.icon,
    ComplicationType.smallImage,
    ComplicationType.largeImage
  ];

  ComplicationSelectorScreen({super.key});

  [@override](/user/override)
  Widget build(BuildContext context) {
    return Scaffold(
        body: ComplicationReceiver(
            supportedTypeList: supportedTypeList,
            builder: (context, complications) => SizedBox(
                  width: MediaQuery.of(context).size.width,
                  child: SingleChildScrollView(
                      child: Padding(
                          padding: const EdgeInsets.fromLTRB(12, 36, 12, 36),
                          child: Column(children: [
                            ...complications.mapIndexed((index, complication) =>
                                ComplicationButton(complication: complication, title: "Complication ${index + 1}")),
                          ]))),
                )));
  }
}
更多关于Flutter智能手表表盘配置插件watchface_config的使用的实战教程也可以访问 https://www.itying.com/category-92-b0.html

更多关于Flutter智能手表表盘配置插件watchface_config的使用的实战系列教程也可以访问 https://www.itying.com/category-92-b0.html
watchface_config 是一个用于 Flutter 的插件,旨在帮助开发者为智能手表创建和配置表盘。这个插件通常用于与 Wear OS 设备进行交互,允许开发者动态地更改表盘的外观、布局和其他设置。
以下是使用 watchface_config 插件的基本步骤和示例:
1. 添加依赖
首先,在你的 pubspec.yaml 文件中添加 watchface_config 插件的依赖:
dependencies:
  flutter:
    sdk: flutter
  watchface_config: ^0.1.0  # 请检查最新版本
然后运行 flutter pub get 来获取依赖。
2. 导入插件
在你的 Dart 文件中导入 watchface_config 插件:
import 'package:watchface_config/watchface_config.dart';
3. 初始化插件
在使用插件之前,通常需要对其进行初始化。你可以在 main.dart 中进行初始化:
void main() async {
  WidgetsFlutterBinding.ensureInitialized();
  await WatchfaceConfig.initialize();
  runApp(MyApp());
}
4. 配置表盘
使用 WatchfaceConfig 类的方法来配置表盘。以下是一些常见的操作示例:
更改表盘背景颜色
await WatchfaceConfig.setBackgroundColor(Colors.blue);
更改表盘时间格式
await WatchfaceConfig.setTimeFormat(TimeFormat.twentyFourHour);
添加或移除表盘组件
await WatchfaceConfig.addComponent(WatchComponent(
  type: WatchComponentType.secondsHand,
  color: Colors.red,
));

await WatchfaceConfig.removeComponent(WatchComponentType.secondsHand);
设置表盘布局
await WatchfaceConfig.setLayout(WatchLayout(
  mainHands: [WatchComponentType.hourHand, WatchComponentType.minuteHand],
  subDial: WatchComponentType.dateDisplay,
));
5. 处理回调
你可以监听表盘配置的变化,以便在用户更改表盘设置时更新 UI:
WatchfaceConfig.onConfigChanged.listen((config) {
  // 处理配置变化
  print('表盘配置已更改: $config');
});
6. 获取当前配置
你可以获取当前的表盘配置,以便在应用启动时恢复用户的首选项:
WatchConfig currentConfig = await WatchfaceConfig.getCurrentConfig();
print('当前表盘配置: $currentConfig');
7. 错误处理
在使用插件时,建议添加错误处理,以便在出现问题时能够及时捕获并处理异常:
try {
  await WatchfaceConfig.setBackgroundColor(Colors.green);
} catch (e) {
  print('设置背景颜色时出错: $e');
}
8. 构建 UI
最后,你可以在 Flutter 应用中构建 UI,允许用户通过按钮、滑块等控件来配置表盘:
class MyApp extends StatelessWidget {
  [@override](/user/override)
  Widget build(BuildContext context) {
    return MaterialApp(
      home: Scaffold(
        appBar: AppBar(title: Text('智能手表表盘配置')),
        body: Center(
          child: ElevatedButton(
            onPressed: () async {
              await WatchfaceConfig.setBackgroundColor(Colors.blue);
            },
            child: Text('设置背景颜色为蓝色'),
          ),
        ),
      ),
    );
  }
}