Flutter内嵌网页浏览插件simple_in_app_webview的使用
Flutter内嵌网页浏览插件simple_in_app_webview的使用
SimpleInAppWebView
| Android | IOS | |
|---|---|---|
| Requirement | min 20+ | min 9.0 |
开始使用
这个包可以在Android和iOS上渲染一个网页,并且实现起来非常简单。对于Web应用,它会重定向或打开一个新的标签页。
有什么特别之处?
这个包是一个即插即用的解决方案,无需编写复杂的WebView代码。该包提供了以下功能:
- 从指定的URL加载网页。
- 将URL分享给第三方应用程序。
- 可选择在浏览器中打开URL。
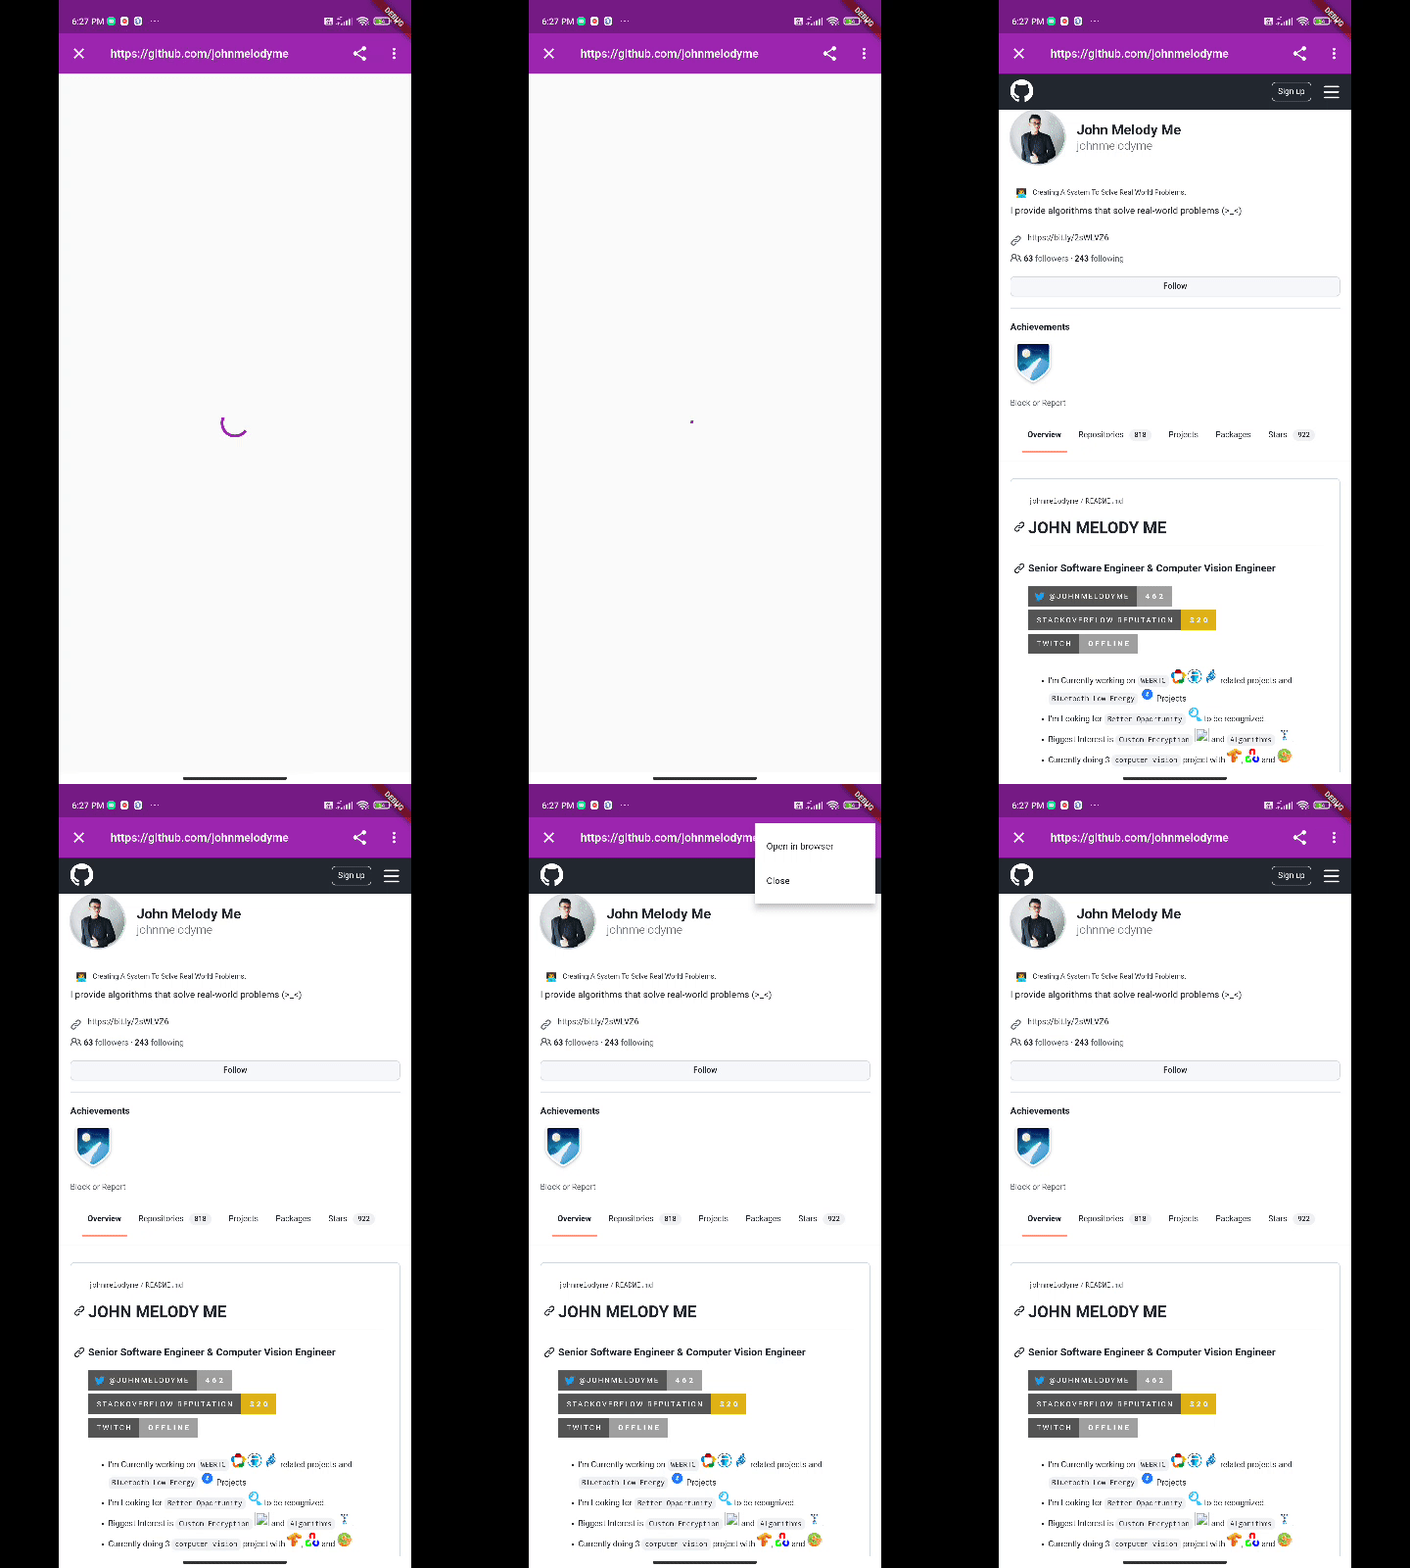
示例演示

如何使用?
1. 安装
将simple_in_app_webview添加到pubspec.yaml文件中,并运行flutter pub get命令。
dependencies:
  simple_in_app_webview: any
或者直接运行:
flutter pub add simple_in_app_webview
2. 实现
在实现之前,确保你理解了参数的含义。
SimpleWebView({
  Key? key,
  @required this.url,
  @required this.title,
  @required this.message,
  this.isUrlCentered = false,
  this.fontColour = Colors.white,
  this.appBarColour = Colors.white,
  this.shareButtonColour = Colors.black,
  this.loadingIndicatorColour = Colors.black,
}) : super(key: key);
导入必要的包:
import 'package:simple_in_app_webview/simple_in_app_webview.dart';
调用Widget的示例代码:
SimpleWebView(
  title: '我的GitHub个人资料',
  message: '这是描述信息',
  url: 'https://github.com/johnmelodyme',
  appBarColour: Colors.purple,
  isUrlCentered: false,
  fontColour: Colors.white,
  loadingIndicatorColour: Colors.purple,
  shareButtonColour: Colors.white,
)
示例代码
import 'package:flutter/material.dart';
import 'package:simple_in_app_webview/simple_in_app_webview.dart';

void main() {
  runApp(const Example());
}

class Example extends StatelessWidget {
  const Example({Key? key}) : super(key: key);

  [@override](/user/override)
  Widget build(BuildContext context) {
    return MaterialApp(
      title: 'Flutter Demo',
      theme: ThemeData(
        primarySwatch: Colors.blue,
      ),
      home: const MyHomePage(title: 'Flutter Demo Home Page'),
    );
  }
}

class MyHomePage extends StatefulWidget {
  const MyHomePage({Key? key, required this.title}) : super(key: key);

  final String title;

  [@override](/user/override)
  State<MyHomePage> createState() => _MyHomePageState();
}

class _MyHomePageState extends State<MyHomePage> {
  [@override](/user/override)
  Widget build(BuildContext context) {
    return Scaffold(
      appBar: null,
      body: SimpleWebView(
        title: '我的GitHub个人资料',
        message: '这是描述信息',
        url: 'https://github.com/johnmelodyme',
        appBarColour: Colors.purple,
        isUrlCentered: false,
        fontColour: Colors.white,
        loadingIndicatorColour: Colors.purple,
        shareButtonColour: Colors.white,
      ),
    );
  }
}
更多关于Flutter内嵌网页浏览插件simple_in_app_webview的使用的实战教程也可以访问 https://www.itying.com/category-92-b0.html
更多关于Flutter内嵌网页浏览插件simple_in_app_webview的使用的实战系列教程也可以访问 https://www.itying.com/category-92-b0.html
simple_in_app_webview 是一个用于在 Flutter 应用中嵌入网页浏览功能的插件。它提供了一个简单的 API,可以轻松地在应用中展示网页内容。以下是使用 simple_in_app_webview 的基本步骤:
1. 添加依赖
首先,在你的 pubspec.yaml 文件中添加 simple_in_app_webview 依赖:
dependencies:
  flutter:
    sdk: flutter
  simple_in_app_webview: ^1.0.0  # 请使用最新版本
然后运行 flutter pub get 来安装依赖。
2. 导入插件
在你的 Dart 文件中导入 simple_in_app_webview:
import 'package:simple_in_app_webview/simple_in_app_webview.dart';
3. 使用 SimpleInAppWebView
你可以使用 SimpleInAppWebView 来展示网页内容。以下是一个简单的示例:
import 'package:flutter/material.dart';
import 'package:simple_in_app_webview/simple_in_app_webview.dart';

class WebViewExample extends StatelessWidget {
  @override
  Widget build(BuildContext context) {
    return Scaffold(
      appBar: AppBar(
        title: Text('Simple InApp WebView Example'),
      ),
      body: SimpleInAppWebView(
        initialUrl: 'https://flutter.dev',  // 设置初始URL
        onPageStarted: (String url) {
          print('Page started loading: $url');
        },
        onPageFinished: (String url) {
          print('Page finished loading: $url');
        },
        onProgressChanged: (int progress) {
          print('Loading progress: $progress%');
        },
      ),
    );
  }
}

void main() {
  runApp(MaterialApp(
    home: WebViewExample(),
  ));
}
4. 自定义 SimpleInAppWebView
SimpleInAppWebView 提供了多个可选参数,允许你自定义 WebView 的行为和外观。以下是一些常用的参数:
initialUrl: 初始加载的 URL。onPageStarted: 当页面开始加载时调用的回调。onPageFinished: 当页面加载完成时调用的回调。onProgressChanged: 当页面加载进度发生变化时调用的回调。javascriptEnabled: 是否启用 JavaScript(默认为true)。userAgent: 自定义 User-Agent 字符串。initialOptions: 初始 WebView 选项,例如是否启用缩放、是否允许文件访问等。
5. 运行项目
保存文件并运行你的 Flutter 项目。你应该能够看到在应用中嵌入的网页内容。
6. 处理导航
SimpleInAppWebView 还支持导航操作,例如前进、后退、刷新等。你可以通过 WebViewController 来控制这些操作:
class WebViewExample extends StatefulWidget {
  @override
  _WebViewExampleState createState() => _WebViewExampleState();
}

class _WebViewExampleState extends State<WebViewExample> {
  SimpleInAppWebViewController? _webViewController;

  @override
  Widget build(BuildContext context) {
    return Scaffold(
      appBar: AppBar(
        title: Text('Simple InApp WebView Example'),
        actions: [
          IconButton(
            icon: Icon(Icons.arrow_back),
            onPressed: () async {
              if (await _webViewController?.canGoBack() ?? false) {
                _webViewController?.goBack();
              }
            },
          ),
          IconButton(
            icon: Icon(Icons.arrow_forward),
            onPressed: () async {
              if (await _webViewController?.canGoForward() ?? false) {
                _webViewController?.goForward();
              }
            },
          ),
          IconButton(
            icon: Icon(Icons.refresh),
            onPressed: () {
              _webViewController?.reload();
            },
          ),
        ],
      ),
      body: SimpleInAppWebView(
        initialUrl: 'https://flutter.dev',
        onWebViewCreated: (SimpleInAppWebViewController controller) {
          _webViewController = controller;
        },
      ),
    );
  }
}
7. 处理错误
你还可以处理 WebView 加载过程中可能出现的错误:
SimpleInAppWebView(
  initialUrl: 'https://flutter.dev',
  onReceivedError: (int errorCode, String description, String failingUrl) {
    print('Error loading $failingUrl: $description');
  },
);


