Flutter图片处理插件img的使用
Flutter图片处理插件img的使用
pub.dev Listing | API Doc | GitHub
API References:
🙋♂️ I’m an Image Too!
Easily paint mirror-tiling images for seamless edge-to-edge textures from any source. Defines Repeat, an expansion on ImageRepeat that enables mirroring, as well as the Widgets, extensions, and methods to support it.
An ImageToo or DecorationImageToo is used to render images from the expected array of sources, but their repeat property is expanded.
The secret sauce is the Repeat enum with the standard options from ImageRepeat, such as noRepeat and repeatX, as well as bespoke mirror values, spanning mirrorX, mirrorY, and global mirror.

这个包修改了几个Flutter原生的类和Widget,通过重新实现一个替代的绘制方法来实现核心功能。
名为paintImageToo()的方法与内置的paintImage()方法类似,但对重复样式做了一些考虑。
- 特别地,在标准的平铺生成方法中,为每个生成的平铺返回一对额外的值。
- 这些“邻近性”值的奇偶性(偶数/奇数)决定了在绘制前是否需要镜像图像。具体来说,画布本身会被镜像,然后绘制图像,最后恢复画布。
- 最初的源图像是
Proximity(0,0),而直接在其右侧的矩形是Proximity(1,0)。
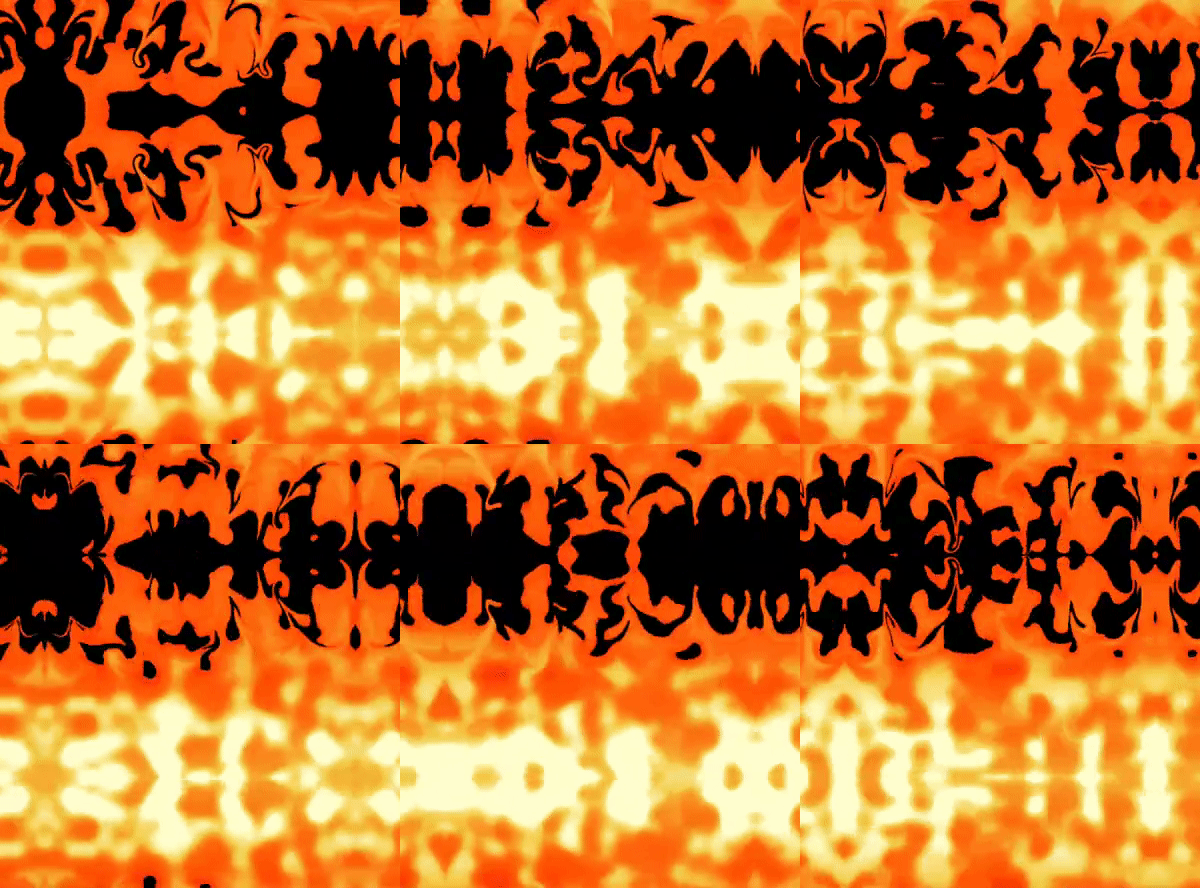
一些图像在作为无缝纹理使用时表现得更好。大多数情况下会显得像万花筒一样,但在最好的情况下则会显得神奇。
考虑到很少有图像设计用于简单的ImageRepeat.repeat模式进行边缘到边缘平铺,这种功能大大扩展了使用任何图像作为无缝纹理的灵活性。
Getting Started
要将图像直接放入应用程序中作为Widget,可以使用new ImageToo(...)。
示例代码
void main() => runApp(const Example());

class Example extends StatelessWidget {
  const Example({Key? key}): super(key: key);

  Widget build(BuildContext context) {
    return MaterialApp(
      home: Scaffold(
        backgroundColor: Colors.black,
        body: Center(
          child: ImageToo(
            image: NetworkImage(
              'https://gifimage.net/wp-content/uploads/2017/08/transparent-fire-gif-22.gif',
              scale: 1,
            ),
            repeat: Repeat.mirror,
            width: 600,
            height: 600,
          ),
        ),
      ),
    );
  }
}
| 样例代码输出 | 原始图像(1x平铺) |
|---|---|
 |
 |
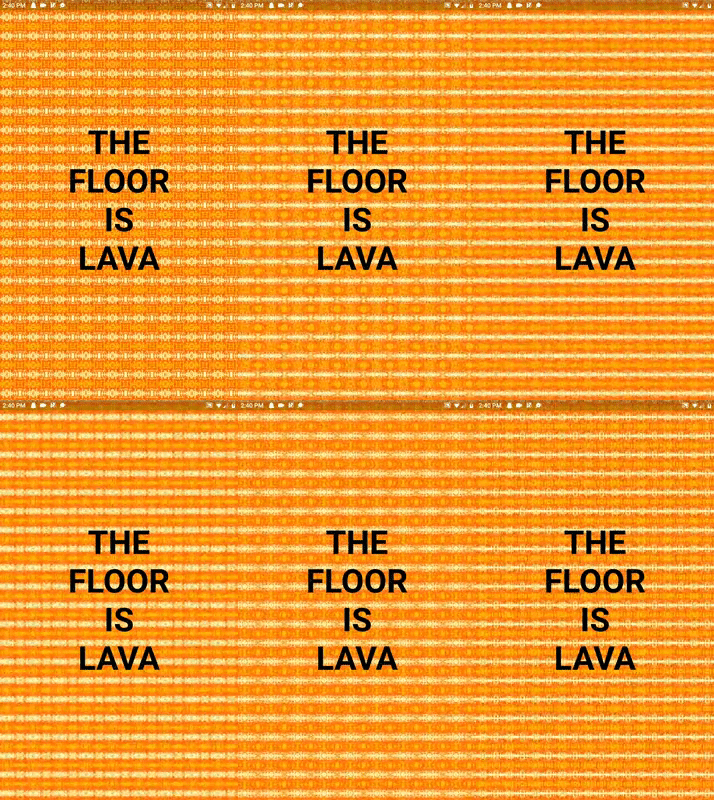
这个带有镜像值的新Repeat也可以用来装饰Container或其他任何可以放置DecorationImage的地方。
只需将普通的DecorationImage对象替换为DecorationImageToo对象,并将ImageRepeat repeat属性替换为Repeat repeatMode。
示例代码
void main() => runApp(const FloorIsLava());

class FloorIsLava extends StatelessWidget {
  const FloorIsLava({Key? key}) : super(key: key);

  Widget build(BuildContext context) => const MaterialApp(
        debugShowCheckedModeBanner: false,
        home: Scaffold(
          backgroundColor: Colors.black,
          body: ExampleBody(),
        ),
      );
}

class ExampleBody extends StatelessWidget {
  const ExampleBody({Key? key}) : super(key: key);

  @override
  Widget build(BuildContext context) {
    return Center(
      child: Container(
        width: MediaQuery.of(context).size.width,
        height: MediaQuery.of(context).size.height,
        decoration: const BoxDecoration(
          color: Colors.amber,
          image: DecorationImageToo(
            image: NetworkImage(
              'https://gifimage.net/wp-content/uploads/2017/08/transparent-fire-gif-22.gif',
              scale: 14,
            ),
            repeatMode: Repeat.mirror,
          ),
        ),
        child: const Center(
          child: Text(
            'THE\nFLOOR\nIS\nLAVA',
            textAlign: TextAlign.center,
            style: TextStyle(
              fontSize: 75,
              color: Colors.black,
              fontWeight: FontWeight.bold,
            ),
          ),
        ),
      ),
    );
  }
}
| 样例代码输出 | 原始图像(1x平铺) |
|---|---|
 |
 |
Advanced Usage
扩展方法
考虑一下从单个URL创建快速纹理表面的扩展方法String.toSeamlessTexture()。
/// 链接到Tatsuro Yamashita专辑封面的URL。
const tatsu = 'https://spice.eplus.jp/images/KefMrp9J1bM7NGRvFqK64ZNOfbTGUDKVCC8ePaiKB1cOcOJz1rEN3DQUJMBZhQJ2.jpg';

/// 扩展方法
final extensionExamples = [
  tatsu.toSeamlessTexture(),
  tatsu.toSeamlessTexture(scale: 10),
  InteractiveViewer(
    maxScale: 150,
    child: tatsu.toSeamlessTexture(scale: 75),
  );
];
预期输出类似于以下内容:

除了'https://url.to/image.png'.toSeamlessTexture(),还可以尝试:
'https://url.to/image.png'.toSeamlessRow();
'https://url.to/image.png'.toSeamlessColumn();

'res/image.gif'.toSeamlessTexture(isAsset: true, package: 'package_name');

File.toSeamlessColumn();
Uint8List.toSeamlessRow();
更多关于Flutter图片处理插件img的使用的实战教程也可以访问 https://www.itying.com/category-92-b0.html
更多关于Flutter图片处理插件img的使用的实战系列教程也可以访问 https://www.itying.com/category-92-b0.html
在 Flutter 中,image 和 image_picker 是常用的插件,用于加载、选择和展示图片。如果你想对图片进行处理(如裁剪、缩放、滤镜等),可以使用 image 这个 Dart 包来处理图片数据。
1. 添加依赖
首先,在 pubspec.yaml 文件中添加 image 插件的依赖:
dependencies:
  flutter:
    sdk: flutter
  image: ^3.0.1
然后运行 flutter pub get 来获取依赖。
2. 使用 image 插件处理图片
image 插件提供了许多功能来处理图片,比如裁剪、缩放、旋转、应用滤镜等。以下是一些常见的用法:
加载图片
import 'dart:io';
import 'package:image/image.dart';

void loadImage() async {
  // 从文件加载图片
  File file = File('path/to/your/image.jpg');
  List<int> imageBytes = await file.readAsBytes();

  // 解码图片
  Image image = decodeImage(imageBytes)!;

  // 打印图片的宽高
  print('Image width: ${image.width}, height: ${image.height}');
}
缩放图片
Image resizeImage(Image image, int width, int height) {
  return copyResize(image, width: width, height: height);
}
裁剪图片
Image cropImage(Image image, int x, int y, int width, int height) {
  return copyCrop(image, x, y, width, height);
}
旋转图片
Image rotateImage(Image image, double angle) {
  return copyRotate(image, angle);
}
保存图片
void saveImage(Image image, String outputPath) async {
  List<int> pngBytes = encodePng(image);
  File(outputPath).writeAsBytesSync(pngBytes);
}
3. 示例:加载、缩放并保存图片
以下是一个完整的示例,展示如何加载图片、缩放图片并保存处理后的图片:
import 'dart:io';
import 'package:image/image.dart';

void main() async {
  // 加载图片
  File file = File('path/to/your/image.jpg');
  List<int> imageBytes = await file.readAsBytes();
  Image image = decodeImage(imageBytes)!;

  // 缩放图片
  Image resizedImage = copyResize(image, width: 300, height: 300);

  // 保存图片
  String outputPath = 'path/to/output/image_resized.jpg';
  List<int> jpegBytes = encodeJpg(resizedImage);
  File(outputPath).writeAsBytesSync(jpegBytes);

  print('Image saved to $outputPath');
}
4. 其他功能
image 插件还支持许多其他功能,如:
- 应用滤镜(如灰度、模糊等)
- 绘制形状和文字
- 调整亮度和对比度
- 等等
你可以查阅 image 插件的官方文档 来了解更多详细的功能和用法。
5. 结合 image_picker 使用
如果你需要从设备中选择图片,可以结合 image_picker 插件使用:
dependencies:
  flutter:
    sdk: flutter
  image: ^3.0.1
  image_picker: ^0.8.4+4
然后在代码中结合使用:
import 'dart:io';
import 'package:flutter/material.dart';
import 'package:image_picker/image_picker.dart';
import 'package:image/image.dart';

void pickAndResizeImage() async {
  final picker = ImagePicker();
  final pickedFile = await picker.pickImage(source: ImageSource.gallery);

  if (pickedFile != null) {
    File file = File(pickedFile.path);
    List<int> imageBytes = await file.readAsBytes();
    Image image = decodeImage(imageBytes)!;

    // 缩放图片
    Image resizedImage = copyResize(image, width: 300, height: 300);

    // 保存图片
    String outputPath = 'path/to/output/image_resized.jpg';
    List<int> jpegBytes = encodeJpg(resizedImage);
    File(outputPath).writeAsBytesSync(jpegBytes);

    print('Image saved to $outputPath');
  }
}


