Flutter自定义安装插件install_plugin_custom的使用
Flutter 自定义安装插件 install_plugin_custom 的使用
题记
—— 执剑天涯,从你的点滴积累开始,所及之处,必精益求精,即是折腾每一天。
重要消息
本文章将讲述:
- 在 Flutter 跨平台开发中,使用插件
install_plugin_custom,实现在 Android 平台调起自动安装,在 iOS 平台跳转 App Store 中更新。 - 本升级插件测试手机:
- iPhone 7, iOS 13.3.1
- 小米 Max, MIUI 11.0.3, Android 9
- 华为, EMUI 8.2.0, Android 8.10
- 红米, MIUI 11.0.2, Android 9
- vivo X6, Android 5.0
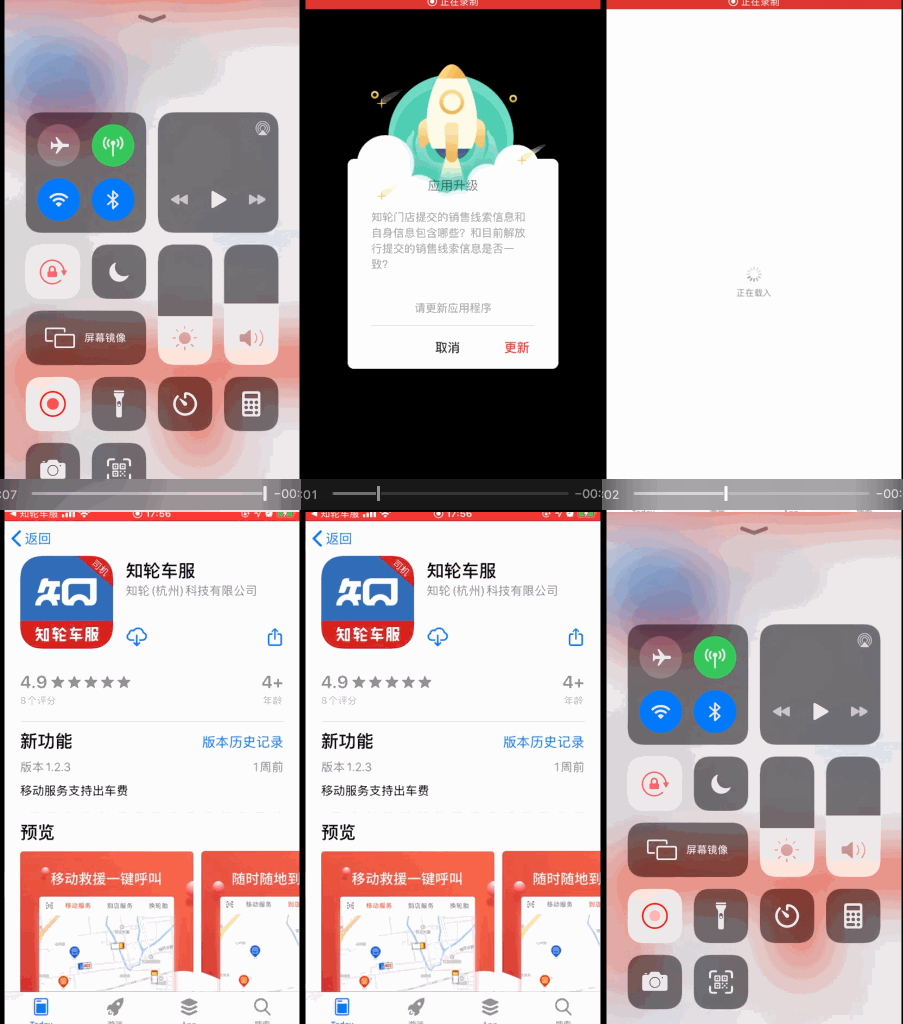
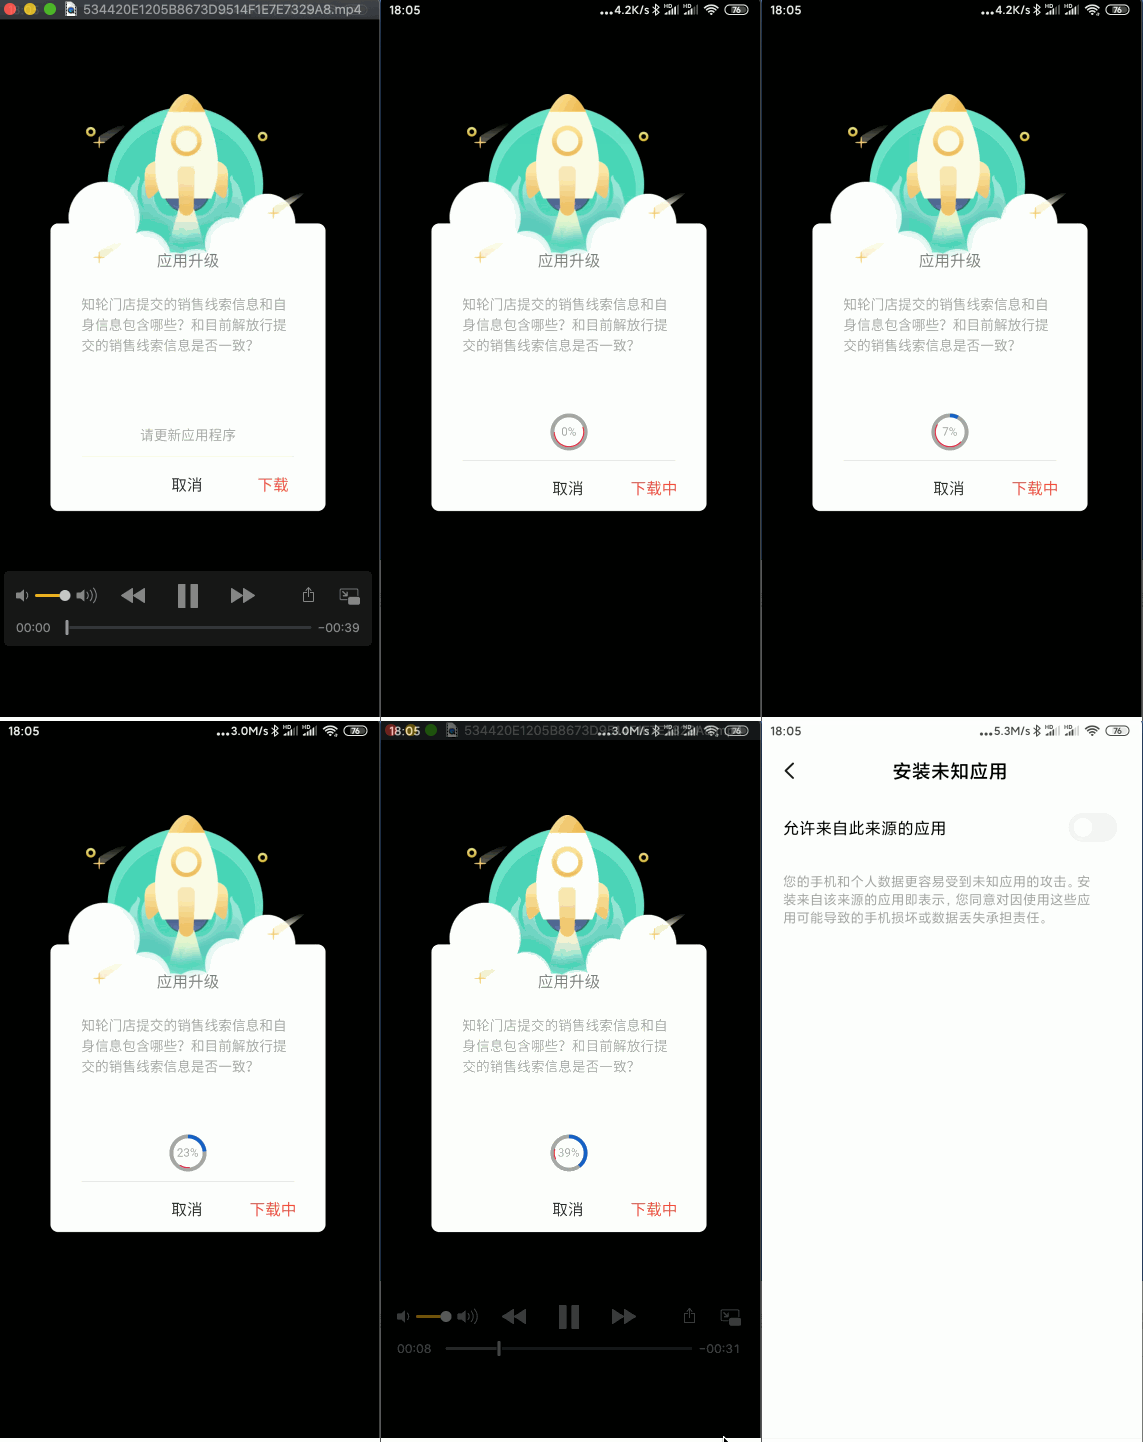
Flutter 跨平台实际应用开发中,App 的升级效果如下
iOS 平台:

Android 平台:

1 引言
在 APP 开发方案中,我们通常会通过访问自己的服务平台来获取 APP 的版本信息,例如版本号、版本名称、是否强制更新等。
在这里描述的是:
- 在 Android 平台下载 APK 然后调起应用程序的安装。
- 在 iOS 平台点击更新跳转 App Store 平台。
在这里,下载 APK 使用的是 Dio,安装 APK 使用的是 install_plugin_custom 插件,Flutter 项目中的依赖如下:
# 权限申请
permission_handler: 4.0.0
# 网络请求
dio: ^2.1.2
# APP 升级安装组件(Android 中调用自动安装 APK,iOS 跳转 App Store)
install_plugin_custom:
  git:
    url: https://github.com/zhaolongs/install_plugin_custom.git
    ref: master
2 Flutter 中 Android 平台的更新
2.1 SD 卡存储权限申请
Future<bool> _checkPermission(BuildContext context) async {
  if (Theme.of(context).platform == TargetPlatform.android) {
    PermissionStatus permission = await PermissionHandler()
        .checkPermissionStatus(PermissionGroup.storage);
    if (permission != PermissionStatus.granted) {
      Map<PermissionGroup, PermissionStatus> permissions =
          await PermissionHandler().requestPermissions([PermissionGroup.storage]);
      if (permissions[PermissionGroup.storage] == PermissionStatus.granted) {
        return true;
      }
    } else {
      return true;
    }
  } else {
    return true;
  }
  return false;
}
2.2 SD 卡存储路径获取
Future<String> _findLocalPath(BuildContext context) async {
  final directory = Theme.of(context).platform == TargetPlatform.android
      ? await getExternalStorageDirectory()
      : await getApplicationDocumentsDirectory();
  return directory.path;
}
2.3 使用 Dio 下载 APK
// APK 网络存储链接
String apkNetUrl = "";
// 手机中 SD 卡上 APK 下载存储路径
String localPath = "";

Dio dio = Dio();
// 设置连接超时时间
dio.options.connectTimeout = 1200000;
// 设置数据接收超时时间
dio.options.receiveTimeout = 1200000;
try {
  Response response = await dio.download(
    apkNetUrl,
    localPath,
    onReceiveProgress: (int count, int total) {
      // count 当前已下载文件大小
      // total 需要下载文件的总大小
    },
  );
  if (response.statusCode == 200) {
    print('下载请求成功');
    // "安装";
  } else {
    // "下载失败重试";
  }
} catch (e) {
  // "下载失败重试";
  if (mounted) {
    setState(() {});
  }
}
2.4 使用 install_plugin_custom 安装 APK
// APK 的包名
String apkPackageName = "";
// 安装
InstallPluginCustom.installApk(
        localPath,
        apkPackageName)
    .then((result) {
  print('install apk $result');
}).catchError((error) {
  // "重试";
  installStatues = 2;
  setState(() {});
});
3 Flutter 中 iOS 平台的更新
如果 Flutter 项目运行在 iOS 手机中,当有更新信息时,直接跳转到 App Store 中应用程序的页面更新。
if (Theme.of(context).platform == TargetPlatform.iOS) {
  InstallPluginCustom.gotoAppStore(
      "https://apps.apple.com/cn/app/id1472328992");
}
在使用时,直接替换这里的跳转链接即可。
完整示例 Demo
以下是一个完整的示例代码,展示了如何使用 install_plugin_custom 插件完成 Android 和 iOS 平台的更新功能。
import 'package:flutter/material.dart';
import 'dart:async';

import 'package:flutter/services.dart';
import 'package:install_plugin_custom/install_plugin_custom.dart';

void main() => runApp(MyApp());

class MyApp extends StatefulWidget {
  [@override](/user/override)
  _MyAppState createState() => _MyAppState();
}

class _MyAppState extends State<MyApp> {
  String _platformVersion = 'Unknown';

  [@override](/user/override)
  void initState() {
    super.initState();
  }

  [@override](/user/override)
  Widget build(BuildContext context) {
    return MaterialApp(
      home: Scaffold(
        appBar: AppBar(
          title: const Text('Plugin example app'),
        ),
        body: Center(
          child: Column(
            mainAxisAlignment: MainAxisAlignment.center,
            children: <Widget>[
              // 跳转到 App Store 更新
              FlatButton(
                child: Text("打开 App Store 更新"),
                onPressed: () {
                  InstallPluginCustom.gotoAppStore(
                      "https://apps.apple.com/cn/app/id1472328992");
                },
              ),
              // 模拟安装 APK
              FlatButton(
                child: Text("模拟安装 APK"),
                onPressed: () {
                  InstallPluginCustom.installApk(
                          "/storage/emulated/0/Android/data/com.learn.coalx/filesrk.apk",
                          'com.learn.coalx')
                      .then((result) {
                    print('install apk $result');
                  }).catchError((error) {
                    print('install apk $error');
                    // 安装失败
                  });
                },
              ),
            ],
          ),
        ),
      ),
    );
  }
}
更多关于Flutter自定义安装插件install_plugin_custom的使用的实战教程也可以访问 https://www.itying.com/category-92-b0.html
更多关于Flutter自定义安装插件install_plugin_custom的使用的实战系列教程也可以访问 https://www.itying.com/category-92-b0.html
在Flutter中,自定义插件通常用于扩展Flutter的功能,使其能够访问平台特定的API或执行一些自定义操作。install_plugin_custom 并不是Flutter官方提供的插件,因此它可能是一个社区维护的插件或者是你自己开发的插件。为了帮助你理解如何使用自定义插件,我将提供一个通用的步骤指南,假设你已经有一个自定义插件,并且想要在你的Flutter项目中使用它。
1. 添加插件依赖
首先,你需要在 pubspec.yaml 文件中添加插件的依赖。假设你的插件名为 install_plugin_custom,并且已经发布到 pub.dev,你可以这样添加依赖:
dependencies:
  flutter:
    sdk: flutter
  install_plugin_custom: ^1.0.0  # 请根据插件的实际版本号进行替换
如果插件是本地开发的,你可以通过路径来引用它:
dependencies:
  flutter:
    sdk: flutter
  install_plugin_custom:
    path: ../path_to_your_plugin  # 插件的本地路径
2. 获取依赖
运行以下命令来获取依赖:
flutter pub get
3. 导入插件
在你的Dart文件中导入插件:
import 'package:install_plugin_custom/install_plugin_custom.dart';
4. 使用插件
根据插件的功能和API文档,你可以在代码中调用插件提供的方法。以下是一个假设的示例:
void installCustomPlugin() async {
  try {
    String result = await InstallPluginCustom.installCustomPlugin();
    print('Install result: $result');
  } catch (e) {
    print('Failed to install custom plugin: $e');
  }
}
5. 处理平台特定的代码
如果插件涉及到平台特定的代码(如Android或iOS),你需要确保在相应的平台代码中实现了插件的功能。通常,插件的开发者在插件中已经处理了这些平台特定的代码,你只需要按照插件的文档来使用即可。
6. 运行项目
确保你的项目已经正确配置了插件,然后运行项目:
flutter run


