【HarmonyOS鸿蒙Next】HMRouter使用详解 路由拦截
【HarmonyOS鸿蒙Next】HMRouter使用详解 路由拦截
路由拦截器
新建拦截器类
通过继承IHMInterceptor接口实现生命周期接口的方法重写。 通过添加@HMInterceptor装饰器,来定义拦截器类的名称,然后在页面中使用。
IHMInterceptor接口
包含一个handle方法,接口拦截时,会执行当前方法。
export interface IHMInterceptor {
    handle(info: HMInterceptorInfo): HMInterceptorAction;
}
HMInterceptorInfo参数
拦截器获取到的数据对象。
export interface HMInterceptorInfo {
    srcName: string;
    targetName: string;
    isSrc?: boolean;
    type: HMActionType;
    routerPathInfo: HMRouterPathInfo;
    routerPathCallback?: HMRouterPathCallback;
    context: UIContext;
}
srcName:发起页面名称。targetName:目标页面名称。isSrc:是否是发起页面。type:路由跳转类型,push,replace,pop。routerPathInfo:路由跳转信息,HMRouterPathInfo。routerPathCallback:路由跳转回调,HMRouterPathCallback。context:UIContext,可以用来对UI界面进行操作。
HMInterceptorAction枚举值
方法的返回值,表示下一个拦截器的动作
DO_NEXT:继续执行下一个拦截器。DO_REJECT:停止执行下一个拦截器,并且不执行路由跳转动画,不执行路由栈操作。DO_TRANSITION:跳过后续拦截器,直接执行路由转场动画,执行路由栈操作。
@HMInterceptor装饰器
需要标记在继承了IHMInterceptor接口的对象上,声明此对象为一个拦截器。 在路由栈发生变化前,转场动画发生前进行回调。
interceptorName:拦截器名称,必填。priority:拦截器优先级,数字越大优先级越高,非必填,默认为9。按照优先级顺序执行,不区分自定义或者全局拦截器,优先级相同时先执行@HMRouter中定义的自定义拦截器。当优先级一致时,先执行srcPage>targetPage>global。global: 是否为全局拦截器,当配置为true时,所有跳转均过此拦截器;默认为false,当为false时需要配置在@HMRouter的interceptors中才生效。
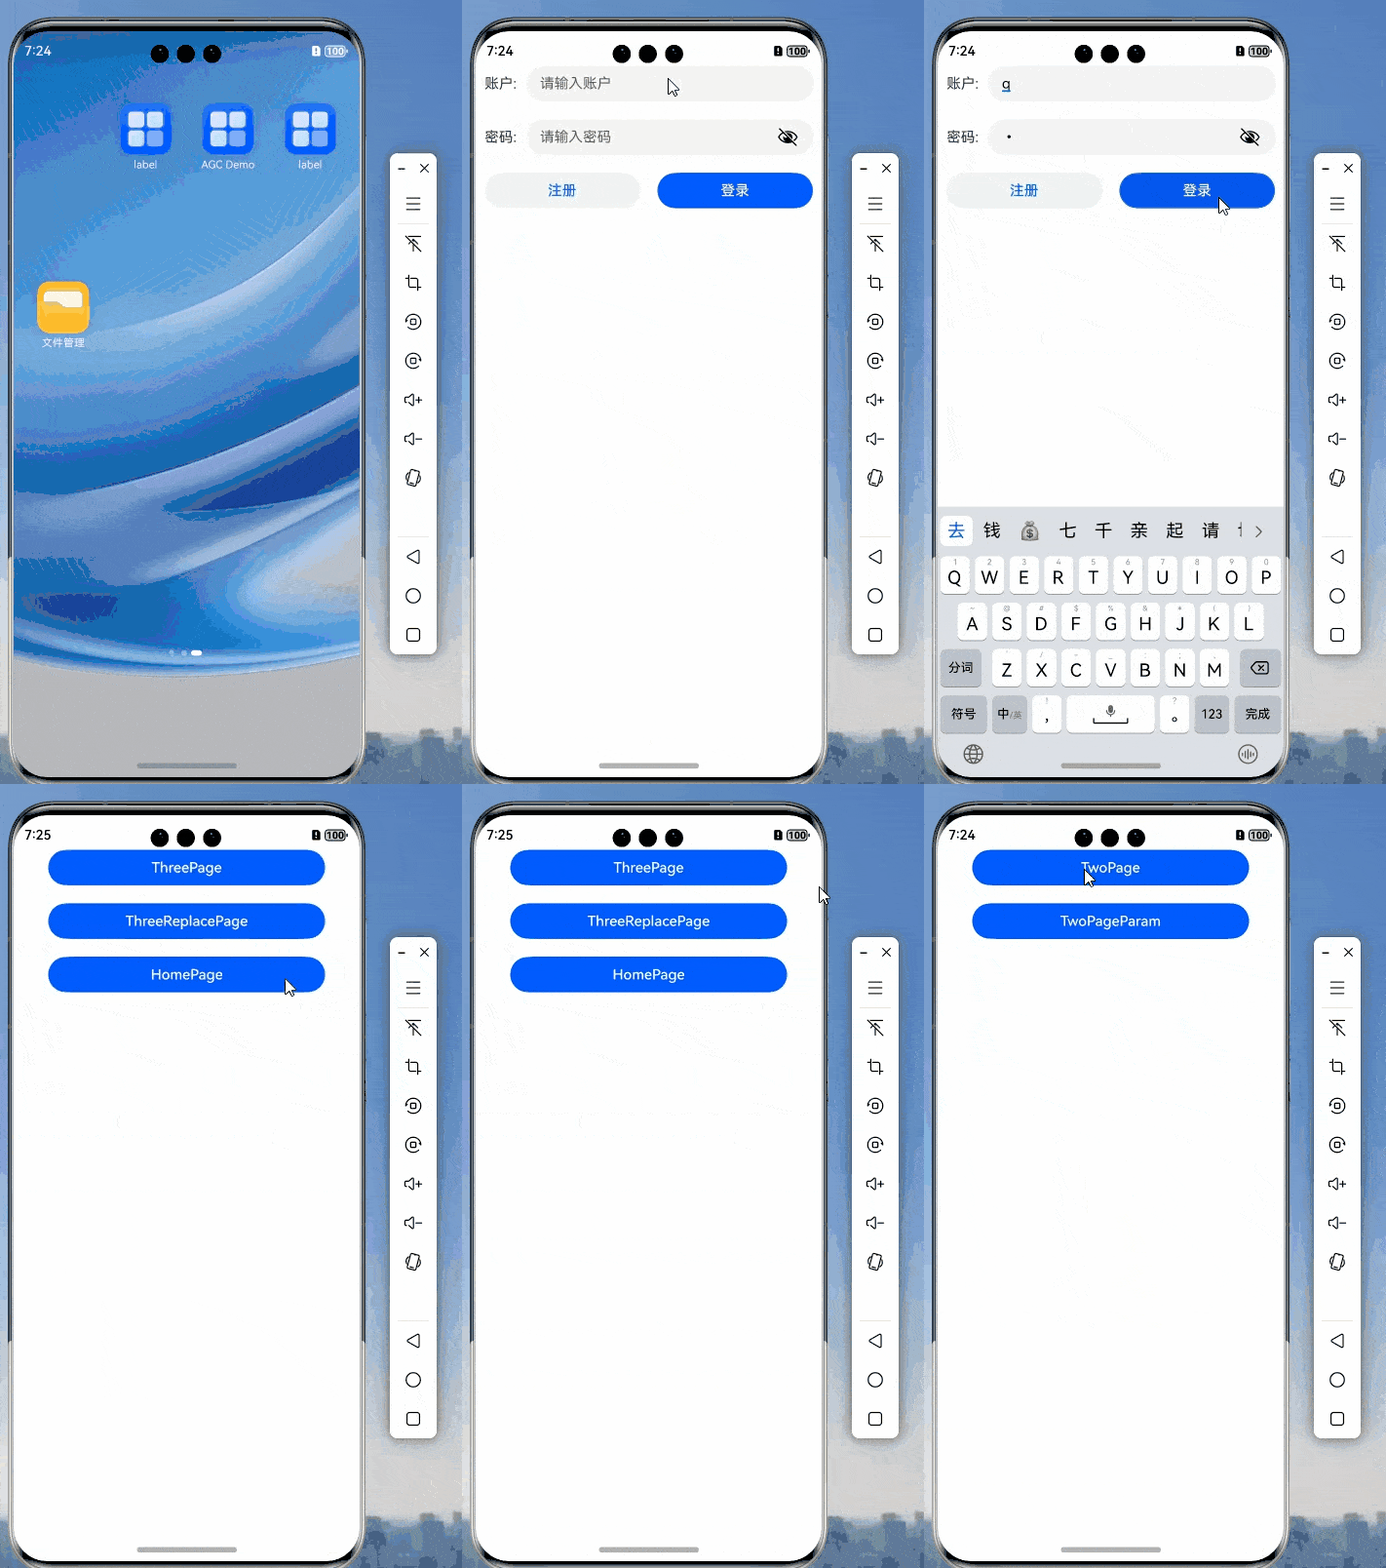
登录界面实现全局页面跳转拦截器
LoginModel
登录用的类,这里也当作是用户类来使用了。
@Observed
export class LoginModel {
  Name: string = "";
  Password: string = "";

  constructor(name: string, password: string) {
    this.Name = name;
    this.Password = password;
  }
}
User
定义一个全局类用来实现用户的登录操作,这里没有封装后续获取用户信息的方法。
import { LoginModel } from "../Models/LoginModel";

export class User {
  private static LoginUser?: LoginModel

  /**
   * 登录
   * @param username
   * @param password
   * @returns
   */
  public static Login(username: string, password: string): string {
    if (username == undefined || username == "" || password == undefined || password == "") {
      return "登录失败";
    }
    User.LoginUser = new LoginModel(username, password);
    return "登录成功";
  }

  /**
   *登出
   */
  public static Logout() {
    User.LoginUser = undefined;
  }

  /**
   * 是否登录
   * @returns
   */
  public static IsLogin(): boolean {
    return User.LoginUser != undefined;
  }
}
LoginPage
登录界面,实现页面跳转和携带参数跳转的操作。
import { HMInterceptorInfo, HMRouter, HMRouterMgr } from "@hadss/hmrouter";
import { User } from "../../Common/User";

[@HMRouter](/user/HMRouter)({ pageUrl: "LoginPage" })
@Component
export struct LoginPage {
  @State UserName: string = "";
  @State Password: string = "";
  TargetPath?: string;
  PathParam: ESObject;

  aboutToAppear(): void {
    let paramResult: HMInterceptorInfo = HMRouterMgr.getCurrentParam() as HMInterceptorInfo;
    if (paramResult == undefined) {
      return;
    }
    this.TargetPath = paramResult.targetName;
    this.PathParam = paramResult.routerPathInfo.param;
  }

  build() {
    Column() {
      Row() {
        Text("账户:")
          .fontSize(16)
          .margin({ left: 10, right: 10 })
        TextInput({ text: this.UserName, placeholder: "请输入账户" })
          .layoutWeight(1)
          .margin({ right: 10 })
          .onChange((value) => {
            this.UserName = value
          })
      }
      .width("100%")

      Row() {
        Text("密码:")
          .fontSize(16)
          .margin({ left: 10, right: 10 })
        TextInput({ text: this.Password, placeholder: "请输入密码" })
          .layoutWeight(1)
          .margin({ right: 10 })
          .type(InputType.Password)
          .onChange((value) => {
            this.Password = value
          })
      }
      .width("100%")
      .margin({ top: 20 })

      Grid() {
        GridItem() {
          Button("注册")
            .width("100%")
            .backgroundColor("#f1f2f3")
            .fontColor("#007dfe")
            .onClick(() => {

            })

        }
        .width("50%")
        .padding({ right: 10, left: 10 })

        GridItem() {
          Button("登录")
            .width("100%")
            .onClick(() => {
              let loginResult: string = User.Login(this.UserName, this.Password);
              if (loginResult === "登录成功") {
                HMRouterMgr.replace({
                  pageUrl: this.TargetPath,
                  param: this.PathParam
                })
              }
              console.info("登录结果:" + loginResult);
            })
        }
        .width("50%")
        .padding({ right: 10, left: 10 })
      }
      .rowsTemplate("1tf 1tf")
      .margin({ top: 10 })
      .width("100%")
      .height(60)
    }
    .width("100%")
    .height("100%")
  }
}
LoginInterceptor
登录拦截器
import { HMInterceptor, HMInterceptorAction, HMInterceptorInfo, HMRouterMgr, IHMInterceptor } from "@hadss/hmrouter";
import { User } from "../Common/User";

[@HMInterceptor](/user/HMInterceptor)({
  priority: 9,
  interceptorName: "LoginInterceptor",
  global: true
})
export class LoginInterceptor implements IHMInterceptor {
  handle(info: HMInterceptorInfo): HMInterceptorAction {
    if (User.IsLogin()) {
      // 跳转下一个拦截器处理
      return HMInterceptorAction.DO_NEXT;
    } else {
      HMRouterMgr.push({
        pageUrl: 'LoginPage',
        skipAllInterceptor: true
      })
      // 拦截结束,不再执行下一个拦截器,不再执行相关转场和路由栈操作
      return HMInterceptorAction.DO_REJECT;
    }
  }
}
实现效果如下

更多关于【HarmonyOS鸿蒙Next】HMRouter使用详解 路由拦截的实战教程也可以访问 https://www.itying.com/category-93-b0.html
求解:
@HMRouter({
  pageUrl: 'learnDetail',
  interceptors: ['LoginCheckInterceptor']
})
我在目标页面添加注解时加上了拦截器,但是断点调试拦截器方法都没有进
在入口处使用全局添加的方式却可以
HMRouterMgr.registerGlobalInterceptor({
  interceptor: new LoginCheckInterceptor(),
  interceptorName: 'LoginCheckInterceptor',
  priority: 9
})
请问这个是什么原因呢,我看官方给的demo里是目标页面添加的
更多关于【HarmonyOS鸿蒙Next】HMRouter使用详解 路由拦截的实战系列教程也可以访问 https://www.itying.com/category-93-b0.html
找到原因了,我将拦截器抽出来放到hsp包里了,结果没执行。demo中拦截器都是放到主工程目录下的,我换了个位置,就可以了,
按照这种方式集成Demo验证,LoginPage中调用HMRouterMgr.getCurrentParam()获取为空是什么原因呢?导致登录成功后未能正常跳转TwoPage页面。
可以断点调试一下,看数据是哪里传输有问题,
LoginInterceptor中HMRouterMgr.push中缺少param参数导致,修改后可正常使用。
【HarmonyOS鸿蒙Next】中的HMRouter是一个用于页面跳转和路由管理的模块。HMRouter支持路由拦截功能,允许开发者在页面跳转前进行自定义逻辑处理,如权限校验、参数验证等。
路由拦截通过实现RouterInterceptor接口来完成。开发者可以在intercept方法中编写拦截逻辑。intercept方法接收RouterRequest对象,开发者可以通过该对象获取跳转的目标页面、传递的参数等信息。如果拦截逻辑需要阻止跳转,可以返回false,否则返回true。
例如,以下代码展示了如何实现一个简单的路由拦截器:
import { RouterInterceptor, RouterRequest } from '@ohos.router';

class MyInterceptor implements RouterInterceptor {
  intercept(request: RouterRequest): boolean {
    // 自定义拦截逻辑
    if (request.uri === 'page/restricted') {
      console.log('Access to restricted page is blocked.');
      return false; // 阻止跳转
    }
    return true; // 允许跳转
  }
}

// 注册拦截器
Router.addInterceptor(new MyInterceptor());
在上述代码中,MyInterceptor类实现了RouterInterceptor接口,并在intercept方法中检查目标页面的URI。如果URI为page/restricted,则阻止跳转。
HMRouter的路由拦截功能为开发者提供了灵活的控制机制,可以根据业务需求在页面跳转前进行必要的检查和操作。


