HarmonyOS鸿蒙NEXT中分享二维码按钮案例
HarmonyOS鸿蒙NEXT中分享二维码按钮案例 HarmonyOS Next应用开发案例(持续更新中……)
本案例完整代码,请访问:代码仓库
本案例已上架 HarmonyOS NEXT 开源组件市场,如需获取或移植该案例,可安装此插件。开发者可使用插件获取鸿蒙组件,添加到业务代码中直接编译运行。
介绍
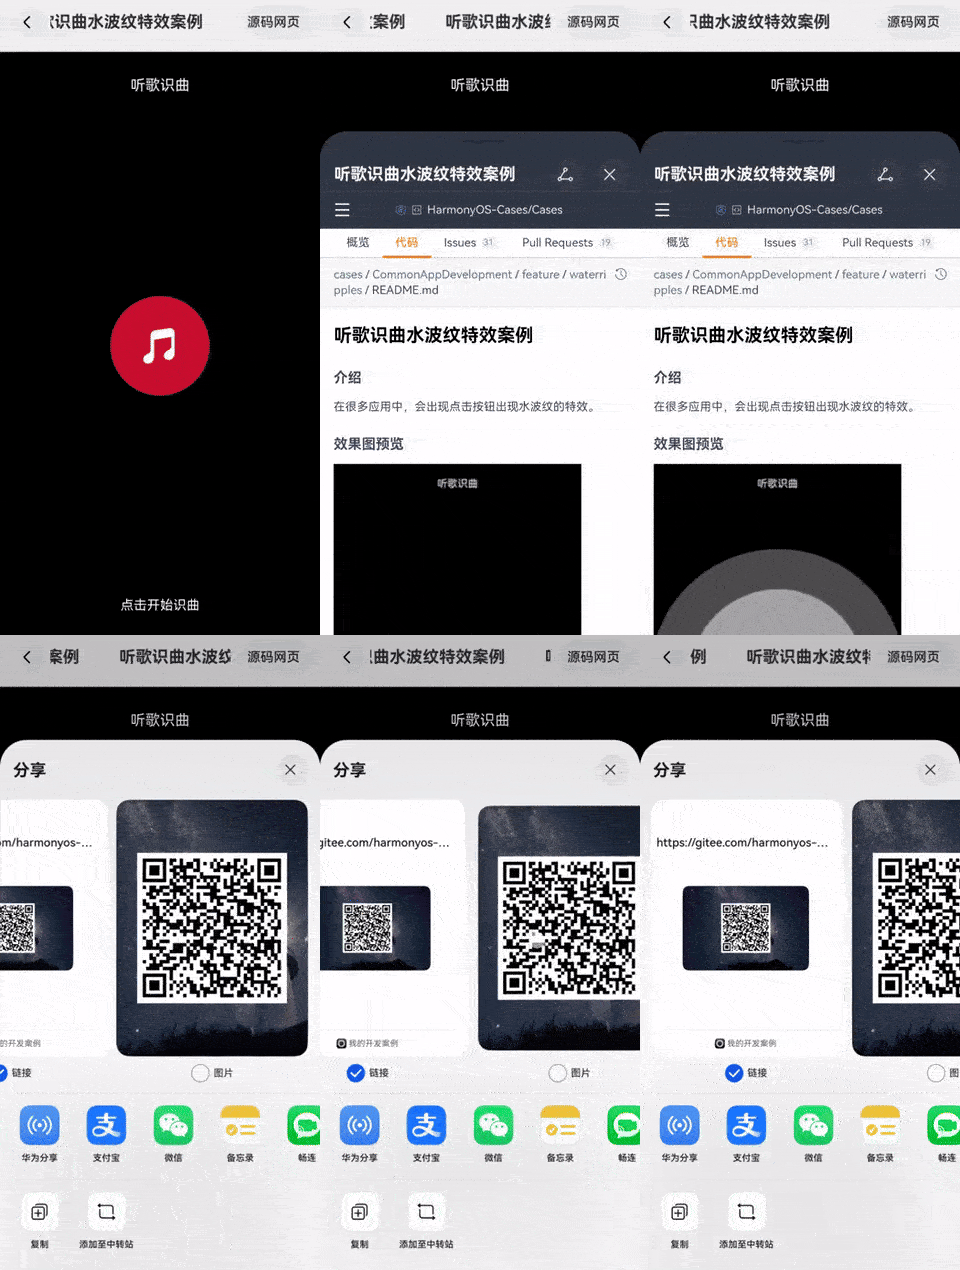
本示例介绍如何在应用中,通过url自动生成二维码,并通过Share Kit的接口拉起系统分享。

使用说明
- 点击任意案例。
- 点击按钮"源码网页"。
- 点击分享按钮,可以拉起系统的分享框。
实现思路
- 通过url生成二维码。
// TODO: 知识点:通过调用systemShare的接口指定号码并跳转到发送短信页面
async function createBarcode(content: string, size: number): Promise<image.PixelMap | null> {
  if (canIUse("SystemCapability.Multimedia.Scan.Core") && canIUse("SystemCapability.Multimedia.Scan.GenerateBarcode")) {
    try {
      // 以QR码为例,码图生成参数
      let options: generateBarcode.CreateOptions = {
        scanType: scanCore.ScanType.QR_CODE,
        height: size,
        width: size
      };
      let pixelMap: image.PixelMap = await generateBarcode.createBarcode(content, options);
      console.debug("生成码图成功");
      return pixelMap;
    } catch (error) {
      hilog.error(0x0001, '[generateBarcode]',
        `Failed to createBarcode by promise with options. Code: ${error.code}, message: ${error.message}`);
      return null;
    }
  } else {
    console.error("该设备暂不支持生成二维码");
    return null;
  }
}
- 将图片落盘成jpg格式图片,并包装成SharedData对象,作为分享的,供源数据分享使用
const file = fileIo.openSync(this.path,
  fileIo.OpenMode.READ_WRITE | fileIo.OpenMode.CREATE);
// 创建ImagePacker实例
const imagePackerApi = image.createImagePacker();
let picture = image.createPicture(this.generatedImage);
// 设置打包参数
let fullBuffer: ArrayBuffer = await imagePackerApi.packing(picture, {
  format: 'image/jpeg',
  quality: 98
});
let thumbnailBuffer: ArrayBuffer = await imagePackerApi.packing(picture, {
  format: 'image/jpeg',
  quality: 10
});
fileIo.writeSync(file.fd, fullBuffer);
fileIo.close(file.fd);
// 构造ShareData,需配置一条有效数据信息
this.shareData = new systemShare.SharedData({
  utd: utd.UniformDataType.JPEG,
  uri: fileUri.getUriFromPath(this.path),
});

this.shareData.addRecord({
  utd: utd.UniformDataType.HYPERLINK,
  content: this.url, // 仅为示例 使用时请替换为自己的链接
  thumbnail: new Uint8Array(thumbnailBuffer),
});
- 通过controller拉起分享页面
this.sharedController?.show(this.ctx as common.UIAbilityContext, {
   anchor: "ShareButton",
   selectionMode: systemShare.SelectionMode.SINGLE,
   previewMode: systemShare.SharePreviewMode.DETAIL
}).then(() => {
   console.info('ShareController show success.');
}).catch((error: BusinessError) => {
   console.error(`ShareController show error. code: ${error.code}, message: ${error.message}`);
});
高性能知识点
不涉及
工程结构&模块类型
sharedbutton                                     // har类型
|---src/main/ets/components/components
    |---ShareButton.ets                         // 分享按钮组件
模块依赖
[@ohos/routermodule(动态路由)](https://gitee.com/harmonyos-cases/cases/tree/master/CommonAppDevelopment/common/routermodule)
参考资料
更多关于HarmonyOS鸿蒙NEXT中分享二维码按钮案例的实战教程也可以访问 https://www.itying.com/category-93-b0.html
2 回复
在HarmonyOS(鸿蒙)NEXT中,实现二维码分享按钮的步骤如下:
-
生成二维码:使用
QRCodeUtil类生成二维码图片,传入需要分享的URL或文本。Bitmap qrCodeBitmap = QRCodeUtil.createQRCode("https://example.com", 300, 300); -
创建分享按钮:在布局文件中添加一个按钮,用于触发分享操作。
<Button android:id="@+id/shareButton" android:layout_width="wrap_content" android:layout_height="wrap_content" android:text="分享二维码" /> -
实现分享功能:在
Activity或Fragment中,监听按钮点击事件,调用系统分享功能。shareButton.setOnClickListener(v -> { Intent shareIntent = new Intent(Intent.ACTION_SEND); shareIntent.setType("image/png"); Uri uri = FileProvider.getUriForFile(this, "com.example.fileprovider", new File(qrCodeBitmapPath)); shareIntent.putExtra(Intent.EXTRA_STREAM, uri); startActivity(Intent.createChooser(shareIntent, "分享二维码")); }); -
处理文件权限:确保在
AndroidManifest.xml中配置了FileProvider,并授予适当的文件读写权限。
通过以上步骤,用户点击按钮后即可分享生成的二维码图片。


