HarmonyOS鸿蒙Next特效教程04-直播点赞动画效果实现教程
HarmonyOS鸿蒙Next特效教程04-直播点赞动画效果实现教程
鸿蒙特效教程04-直播点赞动画效果实现教程
在时下流行的直播、短视频等应用中,点赞动画是提升用户体验的重要元素。当用户点击屏幕时,屏幕上会出现飘动的点赞图标,感觉挺好玩的。
本教程适合HarmonyOS初学者,通过简单到复杂的步骤,通过HarmonyOS的Canvas组件,一步步实现这个好玩的点赞动画效果。
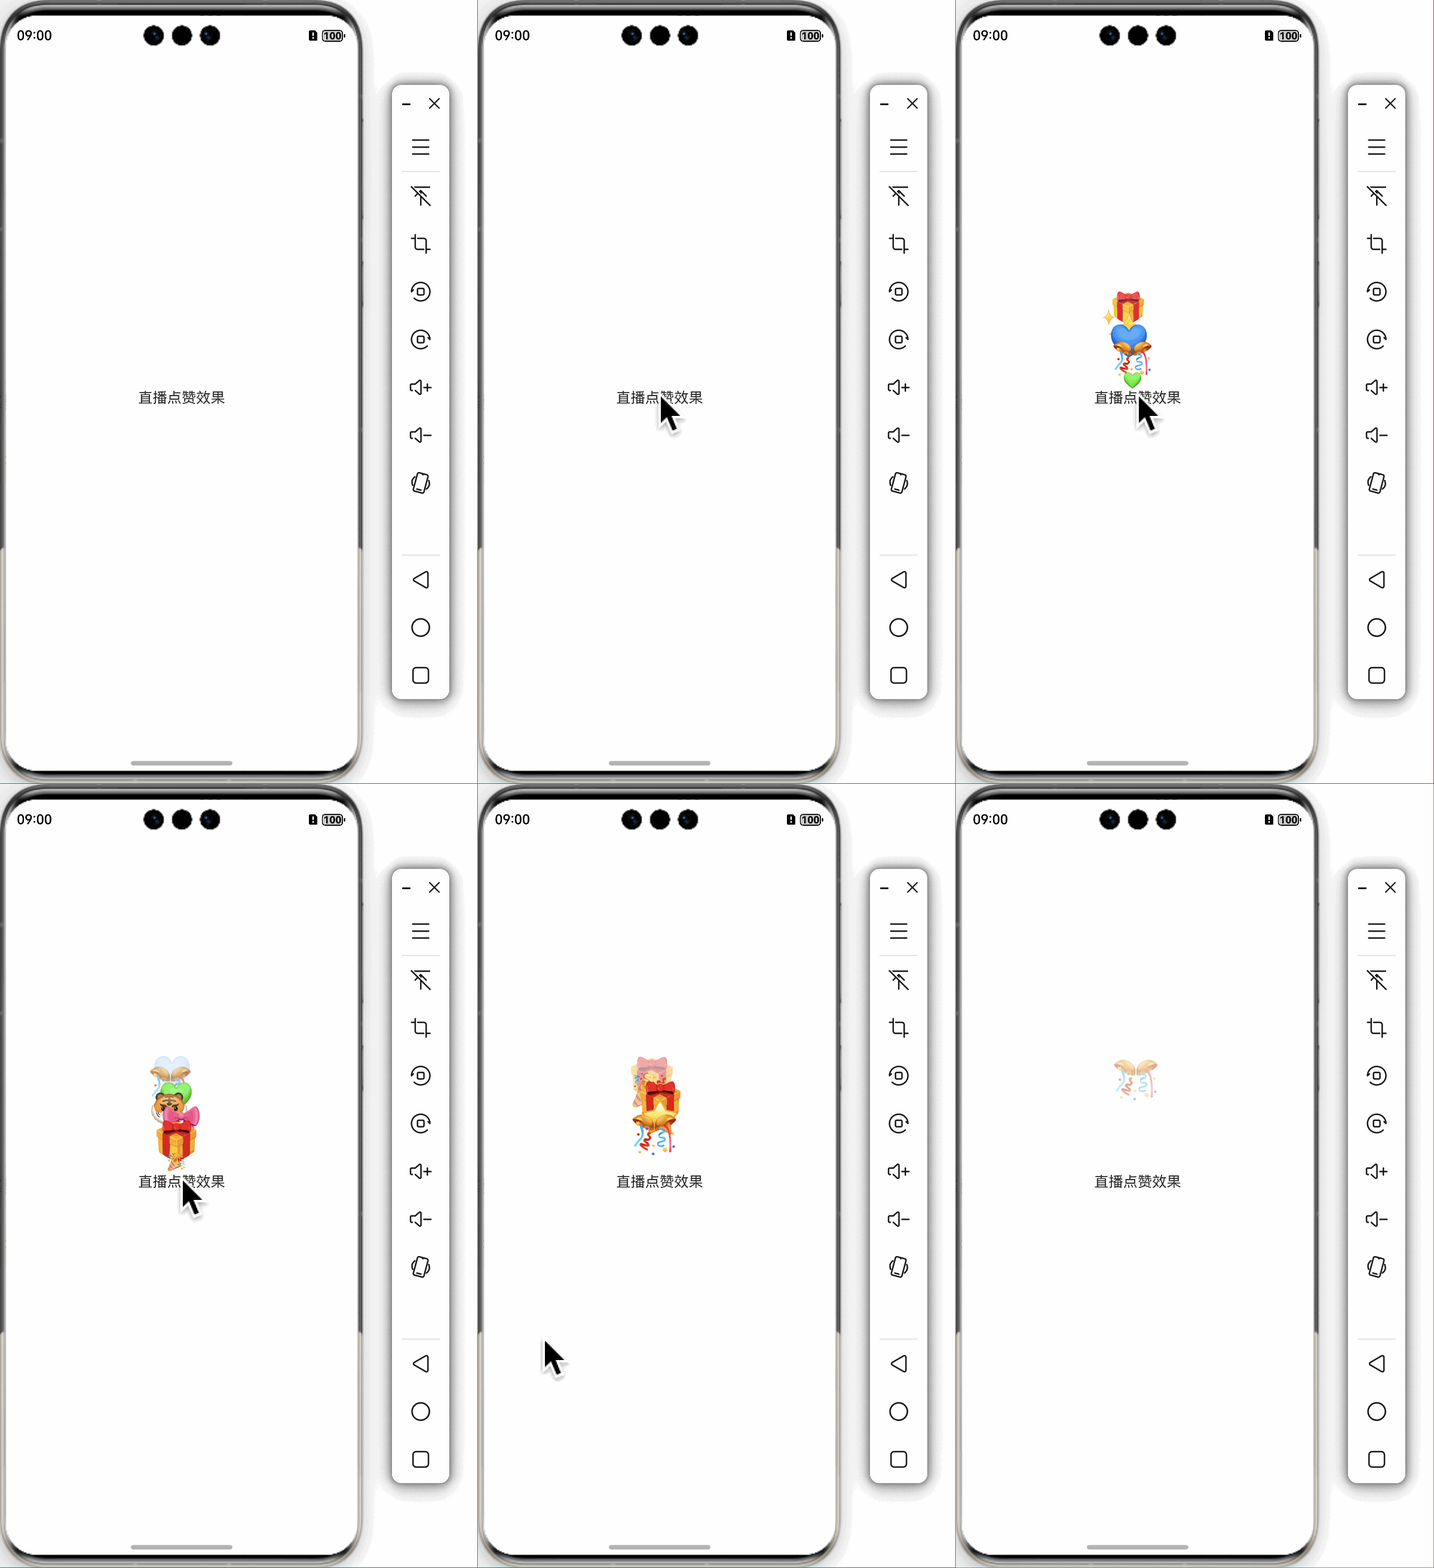
效果预览
我们将实现的效果是:用户点击屏幕时,在点击位置生成一个emoji表情图标,逐步添加了以下动画效果:
- 向上移动:让图标从点击位置向上飘移
- 非线性运动:使用幂函数让移动更加自然
- 渐隐效果:让图标在上升过程中逐渐消失
- 放大效果:让图标从小变大
- 左右摆动:增加水平方向的微妙摆动

1. 基础结构搭建
首先,我们创建一个基本的页面结构和数据模型,用于管理点赞图标和动画。
定义图标数据结构
// 定义点赞图标数据结构
interface LikeIcon {
  x: number // X坐标
  y: number // Y坐标
  initialX: number // 初始X坐标
  initialY: number // 初始Y坐标
  radius: number // 半径
  emoji: string // emoji表情
  fontSize: number // 字体大小
  opacity: number // 透明度
  createTime: number // 创建时间
  lifespan: number // 生命周期(毫秒)
  scale: number // 当前缩放比例
  initialScale: number // 初始缩放比例
  maxScale: number // 最大缩放比例
  maxOffset: number // 最大摆动幅度
  direction: number // 摆动方向 (+1或-1)
}
这个接口定义了每个点赞图标所需的所有属性,从位置到动画参数,为后续的动画实现提供了数据基础。
组件基本结构
@Entry
@Component
struct CanvasLike {
  private settings: RenderingContextSettings = new RenderingContextSettings(true)
  private context: CanvasRenderingContext2D = new CanvasRenderingContext2D(this.settings)
  @State likeIcons: LikeIcon[] = [] // 存储所有点赞图标
  private animationId: number = 0 // 动画ID
  private readonly emojis: string[] = [
    '❤️', '🧡', '💛', '💚', '💙', '💜',
    '🐻', '🐼', '🐨', '🦁', '🐯', '🦊',
    '🎁', '🎀', '🎉', '🎊', '✨', '⭐'
  ]

  aboutToAppear() {
    this.startAnimation()
  }

  aboutToDisappear() {
    clearInterval(this.animationId)
  }

  createIcon(x: number, y: number, radius: number, emoji: string): LikeIcon {
    const initialScale = 0.4 + Math.random() * 0.2 // 初始缩放比例0.4-0.6
    const maxScale = 1.0 + Math.random() * 0.3 // 最大缩放比例1.0-1.3
    const maxOffset = 8 + Math.random() * 7 // 最大摆动幅度8-15像素
    const direction = Math.random() > 0.5 ? 1 : -1

    return {
      x: x,
      y: y,
      initialX: x, // 记录初始X坐标
      initialY: y, // 记录初始Y坐标
      radius: radius,
      emoji: emoji,
      fontSize: Math.floor(radius * 1.2),
      opacity: 1.0,
      createTime: Date.now(),
      lifespan: 1000, // 1秒钟生命周期
      scale: initialScale, // 当前缩放比例
      initialScale: initialScale, // 初始缩放比例
      maxScale: maxScale, // 最大缩放比例
      maxOffset: maxOffset, // 最大摆动幅度
      direction: direction // 初始摆动方向
    }
  }

  getRandomEmoji(): string {
    return this.emojis[Math.floor(Math.random() * this.emojis.length)]
  }

  addLikeIcon(x: number, y: number) {
    const radius = 80 + Math.random() * 20 // 随机大小80-100
    const emoji = this.getRandomEmoji()

    this.likeIcons.push(this.createIcon(x, y, radius, emoji))
  }

  startAnimation() {
    this.animationId = setInterval(() => {
      this.updateIcons()
      this.drawAllIcons()
    }, 16) // 约60fps的刷新率
  }

  updateIcons() {
    const currentTime = Date.now()
    const newIcons: LikeIcon[] = []

    for (let icon of this.likeIcons) {
      const existTime = currentTime - icon.createTime

      if (existTime < icon.lifespan) {
        const progress = existTime / icon.lifespan

        // 1. 更新Y坐标 - 向上移动,速度变化更明显
        const verticalDistance = 120 * Math.pow(progress, 0.7) // 使用幂函数让上升更快
        icon.y = icon.initialY - verticalDistance

        // 2. 更新X坐标 - 快速的左右摆动
        // 每0.25秒一个阶段,总共1秒4个阶段
        let horizontalOffset = 0;

        if (progress < 0.25) {
          // 0-0.25s: 无偏移,专注于放大
          horizontalOffset = 0;
        } else if (progress < 0.5) {
          // 0.25-0.5s: 向左偏移
          const phaseProgress = (progress - 0.25) / 0.25;
          horizontalOffset = -icon.maxOffset * phaseProgress * icon.direction;
        } else if (progress < 0.75) {
          // 0.5-0.75s: 从向左偏移变为向右偏移
          const phaseProgress = (progress - 0.5) / 0.25;
          horizontalOffset = icon.maxOffset * (2 * phaseProgress - 1) * icon.direction;
        } else {
          // 0.75-1s: 从向右偏移回到向左偏移
          const phaseProgress = (progress - 0.75) / 0.25;
          horizontalOffset = icon.maxOffset * (1 - 2 * phaseProgress) * icon.direction;
        }

        icon.x = icon.initialX + horizontalOffset;

        // 3. 更新缩放比例 - 快速放大
        // 在生命周期的前20%阶段(0.2s),缩放从initialScale增大到maxScale
        if (progress < 0.2) {
          // 平滑插值从initialScale到maxScale
          icon.scale = icon.initialScale + (icon.maxScale - icon.initialScale) * (progress / 0.2)
        } else {
          // 保持maxScale
          icon.scale = icon.maxScale
        }

        // 4. 更新透明度 - 前60%保持不变,后40%逐渐消失
        if (progress > 0.6) {
          // 在最后40%的生命周期内改变透明度,使消失更快
          icon.opacity = 1.0 - ((progress - 0.6) / 0.4)
        } else {
          icon.opacity = 1.0
        }

        // 保留未完成生命周期的图标
        newIcons.push(icon)
      }
    }

    // 更新图标数组
    this.likeIcons = newIcons
  }

  drawAllIcons() {
    // 清除画布
    this.context.clearRect(0, 0, this.context.width, this.context.height)

    // 绘制所有图标
    for (let icon of this.likeIcons) {
      this.context.save()

      // 设置透明度
      this.context.globalAlpha = icon.opacity

      // 设置缩放(从中心点缩放)
      this.context.translate(icon.x, icon.y)
      this.context.scale(icon.scale, icon.scale)
      this.context.translate(-icon.x, -icon.y)

      // 绘制emoji
      this.context.font = `${icon.fontSize}px`
      this.context.textAlign = 'center'
      this.context.textBaseline = 'middle'
      this.context.fillText(icon.emoji, icon.x, icon.y)

      this.context.restore()
    }
  }

  build() {
    Column() {
      Stack() {
        Text('直播点赞效果')

        Canvas(this.context)
          .width('100%')
          .height('100%')
          .onReady(() => {
            // Canvas已准备好,可以开始绘制
            console.info(`Canvas size: ${this.context.width} x ${this.context.height}`)
          })
          .onClick((event: ClickEvent) => {
            console.info(`Clicked at: ${event.x}, ${event.y}`)
            this.addLikeIcon(event.x, event.y)
          })
      }
    }
    .width('100%')
    .height('100%')
    .justifyContent(FlexAlign.Center)
    .alignItems(HorizontalAlign.Center)
    .backgroundColor(Color.White)
    .expandSafeArea()
  }
}
总结
通过本教程,我们学习了如何使用HarmonyOS的Canvas组件实现直播点赞动画效果。我们从最基础的静态图标绘制开始,逐步形成了一个生动自然的点赞动画。在实现过程中,我们学习了以下重要知识点:
- Canvas的基本使用方法
- 动画循环系统的实现
- 图形变换(缩放、平移)
- 透明度控制
- 非线性动画实现
- 状态管理的重要性
通过这些技术,你可以创建出更多丰富多彩的动画效果,提升你的应用的用户体验。希望本教程对你有所帮助!
更多关于HarmonyOS鸿蒙Next特效教程04-直播点赞动画效果实现教程的实战教程也可以访问 https://www.itying.com/category-93-b0.html
在HarmonyOS鸿蒙Next中实现直播点赞动画效果,可以使用Animator和AnimatorPath来创建自定义动画。首先,定义点赞图标的路径和动画属性。通过AnimatorPath设置图标的移动路径,使用Animator控制动画的持续时间、插值器等属性。接着,通过AnimatorValue监听动画的进度,实时更新图标的位置和缩放比例。最后,将动画应用到UI组件上,触发点赞事件时启动动画。具体代码示例如下:
import animator from '@ohos.animator';

// 定义动画路径
let path = new animator.AnimatorPath();
path.moveTo(0, 0);
path.lineTo(100, 100);
path.curveTo(150, 200, 200, 150, 250, 100);

// 创建动画
let animator = new animator.Animator();
animator.duration = 1000; // 动画持续时间
animator.interpolator = animator.Interpolator.EASE_IN_OUT; // 动画插值器

// 监听动画进度
animator.on('update', (value) => {
  let point = path.getPoint(value);
  // 更新图标位置和缩放比例
  icon.setPosition(point.x, point.y);
  icon.setScale(1 + value * 0.5);
});

// 启动动画
animator.start();
通过上述代码,可以在鸿蒙Next中实现直播点赞的动画效果。
更多关于HarmonyOS鸿蒙Next特效教程04-直播点赞动画效果实现教程的实战系列教程也可以访问 https://www.itying.com/category-93-b0.html
在HarmonyOS鸿蒙Next中实现直播点赞动画效果,可以通过以下步骤进行:
- 创建动画资源:使用
animator定义点赞动画的关键帧,包括缩放、透明度等属性。 - 布局设计:在布局文件中添加点赞按钮,并为其绑定动画资源。
- 触发动画:在代码中监听点赞按钮的点击事件,调用
startAnimator()方法启动动画。 - 优化性能:使用硬件加速和动画缓存技术,确保动画流畅运行。
通过这些步骤,您可以轻松实现一个流畅的直播点赞动画效果,提升用户互动体验。


