


Flutter占位加载动画插件loading_skeleton的使用
Flutter占位加载动画插件loading_skeleton的使用
安装
首先,你需要在项目的 pubspec.yaml 文件中添加 loading_skeleton 包。打开你的项目文件夹,在 pubspec.yaml 文件中找到 dependencies 部分,并添加以下代码:
dependencies:
  loading_skeleton: 1.0.2
然后运行以下命令以安装依赖包:
flutter pub get
完成以上步骤后,你就可以开始使用 loading_skeleton 插件了。
开始使用
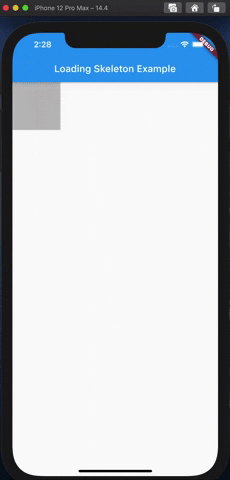
loading_skeleton 是一个非常灵活且可定制化的加载占位动画组件。只需设置宽度和高度即可快速创建一个简单的加载动画。例如:
基本用法
LoadingSkeleton(
  width: 200, // 设置宽度
  height: 100, // 设置高度
)
效果图
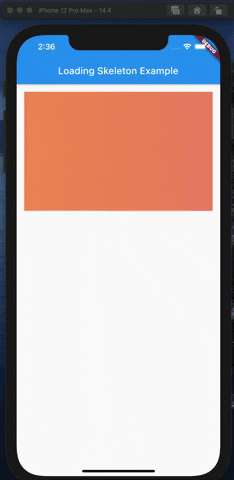
更多自定义选项
除了基本的宽度和高度,你还可以调整以下属性来实现更复杂的效果:
- margin: 设置组件的外边距。
- colors: 自定义加载动画的颜色列表。
- animationDuration: 动画持续时间(单位为毫秒)。
- animationEnd: 动画结束的位置。
- child: 在加载动画内部嵌入其他子组件。
示例代码
LoadingSkeleton(
  width: 400,
  height: 250,
  margin: EdgeInsets.all(16),
  colors: [Colors.blue, Colors.grey, Colors.lightBlue], // 自定义颜色
  animationDuration: 2000, // 动画时长为2秒
  animationEnd: AnimationEnd.BOTTOM, // 动画从顶部到底部
)
效果图
使用子组件
你可以将 LoadingSkeleton 包裹在其他组件中,甚至可以嵌套多个 LoadingSkeleton 来模拟复杂的页面布局。
示例代码
Row(
  mainAxisAlignment: MainAxisAlignment.start,
  crossAxisAlignment: CrossAxisAlignment.center,
  children: [
    LoadingSkeleton(
      width: 100,
      height: 100,
      margin: EdgeInsets.only(left: 16, top: 16),
      colors: [Colors.amber, Colors.purpleAccent, Colors.amber],
    ),
    LoadingSkeleton(
      width: 280,
      height: 100,
      margin: EdgeInsets.only(left: 16, top: 16, right: 16),
      colors: [Colors.blueAccent, Colors.deepOrangeAccent, Colors.blueAccent],
    ),
  ],
)
效果图
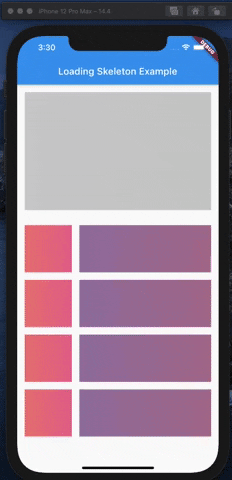
全页面加载示例
为了更好地展示效果,我们可以模拟一个完整的页面加载状态。假设页面包含一个大块区域和若干列表项,我们可以通过 LoadingSkeleton 模拟整个页面的加载过程。
示例代码
class MyApp extends StatelessWidget {
  [@override](/user/override)
  Widget build(BuildContext context) {
    return MaterialApp(
      title: 'Flutter Demo',
      theme: ThemeData(
        primarySwatch: Colors.blue,
        visualDensity: VisualDensity.adaptivePlatformDensity,
      ),
      home: MyHomePage(title: 'Loading Skeleton Example'),
    );
  }
}

class MyHomePage extends StatelessWidget {
  MyHomePage({Key key, this.title}) : super(key: key);
  final String title;

  [@override](/user/override)
  Widget build(BuildContext context) {
    return Scaffold(
      appBar: AppBar(
        title: Text(title),
      ),
      body: SafeArea(
        child: Column(
          children: [
            LoadingSkeleton(
              width: 400,
              height: 250,
              margin: EdgeInsets.all(16),
            ),
            ListView.builder(
              shrinkWrap: true,
              itemBuilder: (context, i) => ListItem(),
              itemCount: 4,
            ),
          ],
        ),
      ),
    );
  }
}

class ListItem extends StatelessWidget {
  [@override](/user/override)
  Widget build(BuildContext context) {
    return Row(
      mainAxisAlignment: MainAxisAlignment.start,
      crossAxisAlignment: CrossAxisAlignment.center,
      children: [
        LoadingSkeleton(
          width: 100,
          height: 100,
          margin: EdgeInsets.only(left: 16, top: 16),
          colors: [Colors.amber, Colors.purpleAccent, Colors.amber],
        ),
        LoadingSkeleton(
          width: 280,
          height: 100,
          margin: EdgeInsets.only(left: 16, top: 16, right: 16),
          colors: [Colors.blueAccent, Colors.deepOrangeAccent, Colors.blueAccent],
        ),
      ],
    );
  }
}
更多关于Flutter占位加载动画插件loading_skeleton的使用的实战教程也可以访问 https://www.itying.com/category-92-b0.html

更多关于Flutter占位加载动画插件loading_skeleton的使用的实战系列教程也可以访问 https://www.itying.com/category-92-b0.html
loading_skeleton 是一个用于在 Flutter 应用中实现占位加载动画的插件。它可以帮助你在数据加载时显示一个骨架屏,提升用户体验。以下是如何使用 loading_skeleton 插件的详细步骤:
1. 添加依赖
首先,你需要在 pubspec.yaml 文件中添加 loading_skeleton 插件的依赖:
dependencies:
  flutter:
    sdk: flutter
  loading_skeleton: ^1.0.0  # 请检查最新版本
然后运行 flutter pub get 来安装依赖。
2. 基本使用
loading_skeleton 提供了 Skeleton 和 SkeletonList 两个主要组件,分别用于单个占位和列表占位。
单个占位 (Skeleton)
import 'package:flutter/material.dart';
import 'package:loading_skeleton/loading_skeleton.dart';

class MyWidget extends StatelessWidget {
  @override
  Widget build(BuildContext context) {
    return Scaffold(
      appBar: AppBar(
        title: Text('Loading Skeleton Example'),
      ),
      body: Center(
        child: Skeleton(
          width: 200,
          height: 100,
          borderRadius: BorderRadius.circular(10),
        ),
      ),
    );
  }
}
列表占位 (SkeletonList)
import 'package:flutter/material.dart';
import 'package:loading_skeleton/loading_skeleton.dart';

class MyWidget extends StatelessWidget {
  @override
  Widget build(BuildContext context) {
    return Scaffold(
      appBar: AppBar(
        title: Text('Loading Skeleton Example'),
      ),
      body: SkeletonList(
        length: 5, // 列表项的数量
        builder: (context, index) => ListTile(
          leading: Skeleton(
            width: 50,
            height: 50,
            borderRadius: BorderRadius.circular(25),
          ),
          title: Skeleton(
            width: double.infinity,
            height: 20,
            borderRadius: BorderRadius.circular(5),
          ),
          subtitle: Skeleton(
            width: double.infinity,
            height: 15,
            borderRadius: BorderRadius.circular(5),
          ),
        ),
      ),
    );
  }
}
3. 自定义样式
你可以通过 Skeleton 和 SkeletonList 的参数来自定义占位样式,例如颜色、圆角、动画等。
Skeleton(
  width: 200,
  height: 100,
  borderRadius: BorderRadius.circular(10),
  color: Colors.grey[300], // 背景颜色
  highlightColor: Colors.grey[100], // 高亮颜色
  animationDuration: Duration(milliseconds: 1000), // 动画时长
)
4. 控制加载状态
你可以通过条件渲染来控制何时显示骨架屏。例如,在数据加载时显示骨架屏,加载完成后显示实际内容。
class MyWidget extends StatelessWidget {
  final bool isLoading = true; // 模拟加载状态

  @override
  Widget build(BuildContext context) {
    return Scaffold(
      appBar: AppBar(
        title: Text('Loading Skeleton Example'),
      ),
      body: isLoading
          ? SkeletonList(
              length: 5,
              builder: (context, index) => ListTile(
                leading: Skeleton(
                  width: 50,
                  height: 50,
                  borderRadius: BorderRadius.circular(25),
                ),
                title: Skeleton(
                  width: double.infinity,
                  height: 20,
                  borderRadius: BorderRadius.circular(5),
                ),
                subtitle: Skeleton(
                  width: double.infinity,
                  height: 15,
                  borderRadius: BorderRadius.circular(5),
                ),
              ),
            )
          : ListView.builder(
              itemCount: 5,
              itemBuilder: (context, index) => ListTile(
                leading: CircleAvatar(
                  child: Text('$index'),
                ),
                title: Text('Item $index'),
                subtitle: Text('Subtitle $index'),
              ),
            ),
    );
  }
}
5. 其他功能
loading_skeleton 还支持其他一些功能,例如自定义动画、渐变效果等。你可以查看插件的文档和示例代码来了解更多细节。
6. 运行项目
完成上述步骤后,运行你的 Flutter 项目,你应该能够看到骨架屏在数据加载时显示。
flutter run