


Flutter来电界面集成插件custom_flutter_callkit_incoming的使用
Flutter来电界面集成插件custom_flutter_callkit_incoming的使用
A Flutter plugin to show incoming call in your Flutter app(Custom for Android/Callkit for iOS).

⭐ 特性
- 显示来电
- 开始呼出电话
- 自定义安卓/呼叫套件(Callkit)的UI
- 示例使用Pushkit/VoIP进行iOS集成
iOS: 仅在真机上工作(模拟器不支持Callkit框架)
🚀 安装
1. 安装包
运行以下命令:
flutter pub add flutter_callkit_incoming
在pubspec.yaml中添加依赖:
dependencies:
  flutter_callkit_incoming: any
2. 配置项目
Android
在AndroidManifest.xml中添加权限:
<manifest...>
    ...
    <!--
        用于从互联网加载图像
    -->
    <uses-permission android:name="android.permission.INTERNET"/>
</manifest>
iOS
在Info.plist中配置:
<key>UIBackgroundModes</key>
<array>
    <string>processing</string>
    <string>remote-notification</string>
    <string>voip</string>
</array>
3. 使用
导入
import 'package:flutter_callkit_incoming/flutter_callkit_incoming.dart';
接收来电
this._currentUuid = _uuid.v4();
var params = <String, dynamic>{
  'id': _currentUuid,
  'nameCaller': 'Hien Nguyen',
  'appName': 'Callkit',
  'avatar': 'https://i.pravatar.cc/100',
  'handle': '0123456789',
  'type': 0,
  'textAccept': 'Accept',
  'textDecline': 'Decline',
  'textMissedCall': 'Missed call',
  'textCallback': 'Call back',
  'duration': 30000,
  'extra': <String, dynamic>{'userId': '1a2b3c4d'},
  'headers': <String, dynamic>{'apiKey': 'Abc@123!', 'platform': 'flutter'},
  'android': <String, dynamic>{
    'isCustomNotification': true,
    'isShowLogo': false,
    'isShowCallback': false,
    'isShowMissedCallNotification': true,
    'ringtonePath': 'system_ringtone_default',
    'backgroundColor': '#0955fa',
    'backgroundUrl': 'https://i.pravatar.cc/500',
    'actionColor': '#4CAF50'
  },
  'ios': <String, dynamic>{
    'iconName': 'CallKitLogo',
    'handleType': 'generic',
    'supportsVideo': true,
    'maximumCallGroups': 2,
    'maximumCallsPerCallGroup': 1,
    'audioSessionMode': 'default',
    'audioSessionActive': true,
    'audioSessionPreferredSampleRate': 44100.0,
    'audioSessionPreferredIOBufferDuration': 0.005,
    'supportsDTMF': true,
    'supportsHolding': true,
    'supportsGrouping': false,
    'supportsUngrouping': false,
    'ringtonePath': 'system_ringtone_default'
  }
};
await FlutterCallkitIncoming.showCallkitIncoming(params);
显示未接来电通知
this._currentUuid = _uuid.v4();
var params = <String, dynamic>{
  'id': this._currentUuid,
  'nameCaller': 'Hien Nguyen',
  'handle': '0123456789',
  'type': 1,
  'textMissedCall': 'Missed call',
  'textCallback': 'Call back',
  'extra': <String, dynamic>{'userId': '1a2b3c4d'},
};
await FlutterCallkitIncoming.showMissCallNotification(params);
开始呼出电话
this._currentUuid = _uuid.v4();
var params = <String, dynamic>{
  'id': this._currentUuid,
  'nameCaller': 'Hien Nguyen',
  'handle': '0123456789',
  'type': 1,
  'extra': <String, dynamic>{'userId': '1a2b3c4d'},
  'ios': <String, dynamic>{'handleType': 'generic'}
};
await FlutterCallkitIncoming.startCall(params);
结束来电
var params = <String, dynamic>{'id': this._currentUuid};
await FlutterCallkitIncoming.endCall(params);
结束所有来电
await FlutterCallkitIncoming.endAllCalls();
获取活跃通话
await FlutterCallkitIncoming.activeCalls();
输出:
[{"id": "8BAA2B26-47AD-42C1-9197-1D75F662DF78", ...}]
获取设备VoIP推送令牌
await FlutterCallkitIncoming.getDevicePushTokenVoIP();
输出:
<d6a77ca80c5f09f87f353cdd328ec8d7d34e92eb108d046c91906f27f54949cd>
确保在AppDelegate.swift中使用以下代码保存设备令牌:
func pushRegistry(_ registry: PKPushRegistry, didUpdate credentials: PKPushCredentials, for type: PKPushType) {
    print(credentials.token)
    let deviceToken = credentials.token.map { String(format: "%02x", $0) }.joined()
    // Save deviceToken to your server
    SwiftFlutterCallkitIncomingPlugin.sharedInstance?.setDevicePushTokenVoIP(deviceToken)
}

func pushRegistry(_ registry: PKPushRegistry, didInvalidatePushTokenFor type: PKPushType) {
    print("didInvalidatePushTokenFor")
    SwiftFlutterCallkitIncomingPlugin.sharedInstance?.setDevicePushTokenVoIP("")
}
监听事件
FlutterCallkitIncoming.onEvent.listen((event) {
  switch (event!.name) {
    case CallEvent.ACTION_CALL_INCOMING:
      // TODO: 收到来电
      break;
    case CallEvent.ACTION_CALL_START:
      // TODO: 开始呼出电话
      // TODO: 在Flutter中显示呼叫屏幕
      break;
    case CallEvent.ACTION_CALL_ACCEPT:
      // TODO: 接受来电
      // TODO: 在Flutter中显示呼叫屏幕
      break;
    case CallEvent.ACTION_CALL_DECLINE:
      // TODO: 拒绝来电
      break;
    case CallEvent.ACTION_CALL_ENDED:
      // TODO: 结束来电
      break;
    case CallEvent.ACTION_CALL_TIMEOUT:
      // TODO: 来电超时
      break;
    case CallEvent.ACTION_CALL_CALLBACK:
      // TODO: 仅安卓 - 点击未接来电通知中的“回拨”按钮
      break;
    case CallEvent.ACTION_CALL_TOGGLE_HOLD:
      // TODO: 仅iOS
      break;
    case CallEvent.ACTION_CALL_TOGGLE_MUTE:
      // TODO: 仅iOS
      break;
    case CallEvent.ACTION_CALL_TOGGLE_DMTF:
      // TODO: 仅iOS
      break;
    case CallEvent.ACTION_CALL_TOGGLE_GROUP:
      // TODO: 仅iOS
      break;
    case CallEvent.ACTION_CALL_TOGGLE_AUDIO_SESSION:
      // TODO: 仅iOS
      break;
    case CallEvent.ACTION_DID_UPDATE_DEVICE_PUSH_TOKEN_VOIP:
      // TODO: 仅iOS
      break;
  }
});
从原生代码调用(iOS PushKit)
// Swift
var info = [String: Any?]()
info["id"] = "44d915e1-5ff4-4bed-bf13-c423048ec97a"
info["nameCaller"] = "Hien Nguyen"
info["handle"] = "0123456789"
info["type"] = 1
//... 设置更多数据
SwiftFlutterCallkitIncomingPlugin.sharedInstance?.showCallkitIncoming(flutter_callkit_incoming.Data(args: info), fromPushKit: true)
// 或者
let data = flutter_callkit_incoming.Data(id: "44d915e1-5ff4-4bed-bf13-c423048ec97a", nameCaller: "Hien Nguyen", handle: "0123456789", type: 0)
data.nameCaller = "Johnny"
data.extra = ["user": "abc@123", "platform": "ios"]
//... 设置更多数据
SwiftFlutterCallkitIncomingPlugin.sharedInstance?.showCallkitIncoming(data, fromPushKit: true)
// Objective-C
#if __has_include(<flutter_callkit_incoming/flutter_callkit_incoming-Swift.h>)
#import <flutter_callkit_incoming/flutter_callkit_incoming-Swift.h>
#else
#import "flutter_callkit_incoming-Swift.h"
#endif

Data * data = [[Data alloc]initWithId:@"44d915e1-5ff4-4bed-bf13-c423048ec97a" nameCaller:@"Hien Nguyen" handle:@"0123456789" type:1];
[data setNameCaller:@"Johnny"];
[data setExtra:@{ @"userId" : @"HelloXXXX", @"key2" : @"value2"}];
//... 设置更多数据
[SwiftFlutterCallkitIncomingPlugin.sharedInstance showCallkitIncoming:data fromPushKit:YES];
// 从原生代码发送自定义事件
SwiftFlutterCallkitIncomingPlugin.sharedInstance?.sendEventCustom("customEvent", body: ["customKey": "customValue"])
属性
| Prop | Description | Default |
|---|---|---|
id |
每个通话的UUID标识符。UUID应为每个通话唯一,并在通话结束时使用相同的UUID。建议使用uuid包。 |
Required |
nameCaller |
来电者的姓名。 | None |
appName |
应用程序名称。用于在Callkit(iOS)中显示。 | 应用程序名称 |
avatar |
用于显示的头像URL。用于Android。 | None |
handle |
电话号码/电子邮件/其他信息。 | None |
type |
0 - 音频通话,1 - 视频通话 | 0 |
duration |
来电/呼出显示时间(秒)。如果时间过长,来电将被标记为未接通。 | 30000 |
textAccept |
用于Android的“接受”文本。 | Accept |
textDecline |
用于Android的“拒绝”文本。 | Decline |
textMissedCall |
用于Android的“未接来电”文本(显示在未接来电通知中)。 | Missed Call |
textCallback |
用于Android的“回拨”文本(显示在未接来电通知中)。 | Call back |
extra |
添加到事件中的任何数据。 | {} |
headers |
用于自定义头像/背景图像的任何数据。 | {} |
android |
Android所需的数据以自定义UI。 | Below |
ios |
iOS所需的数据。 | Below |
Android
| Prop | Description | Default |
|---|---|---|
isCustomNotification |
使用自定义通知。 | false |
isShowLogo |
在全屏中显示应用图标。 | false |
isShowMissedCallNotification |
超时后显示未接来电通知。 | true |
isShowCallback |
显示未接来电通知中的回调操作。 | true |
ringtonePath |
文件名铃声。将其放入/android/app/src/main/res/raw/ringtone_default.pm3。 |
system_ringtone_default |
backgroundColor |
来电屏幕背景颜色。 | #0955fa |
backgroundUrl |
用于来电屏幕的背景图像。 | None |
actionColor |
通知中使用的按钮/文本颜色。 | #4CAF50 |
iOS
| Prop | Description | Default |
|---|---|---|
iconName |
应用图标。用于在Callkit(iOS)中显示。 | CallKitLogo |
handleType |
处理呼叫类型 generic, number, email | generic |
supportsVideo |
是否支持视频通话 | true |
maximumCallGroups |
最大通话组数 | 2 |
maximumCallsPerCallGroup |
每组最大通话数 | 1 |
audioSessionMode |
音频会话模式 | None |
audioSessionActive |
音频会话是否激活 | true |
audioSessionPreferredSampleRate |
音频会话首选采样率 | 44100.0 |
audioSessionPreferredIOBufferDuration |
音频会话首选I/O缓冲区持续时间 | 0.005 |
supportsDTMF |
是否支持DTMF | true |
supportsHolding |
是否支持保持 | true |
supportsGrouping |
是否支持分组 | true |
supportsUngrouping |
是否支持取消分组 | true |
ringtonePath |
将文件添加到Xcode根目录 /ios/Runner/Ringtone.caf 并复制到资源包中(构建阶段)。 |
Ringtone.caf |
源代码
请查看GitHub仓库:
6. Pushkit - 接收VoIP并从终止状态唤醒应用(仅限iOS)
请检查PUSHKIT.md设置Pushkit。
7. 待办事项
💡 示例
示例说明:
图片
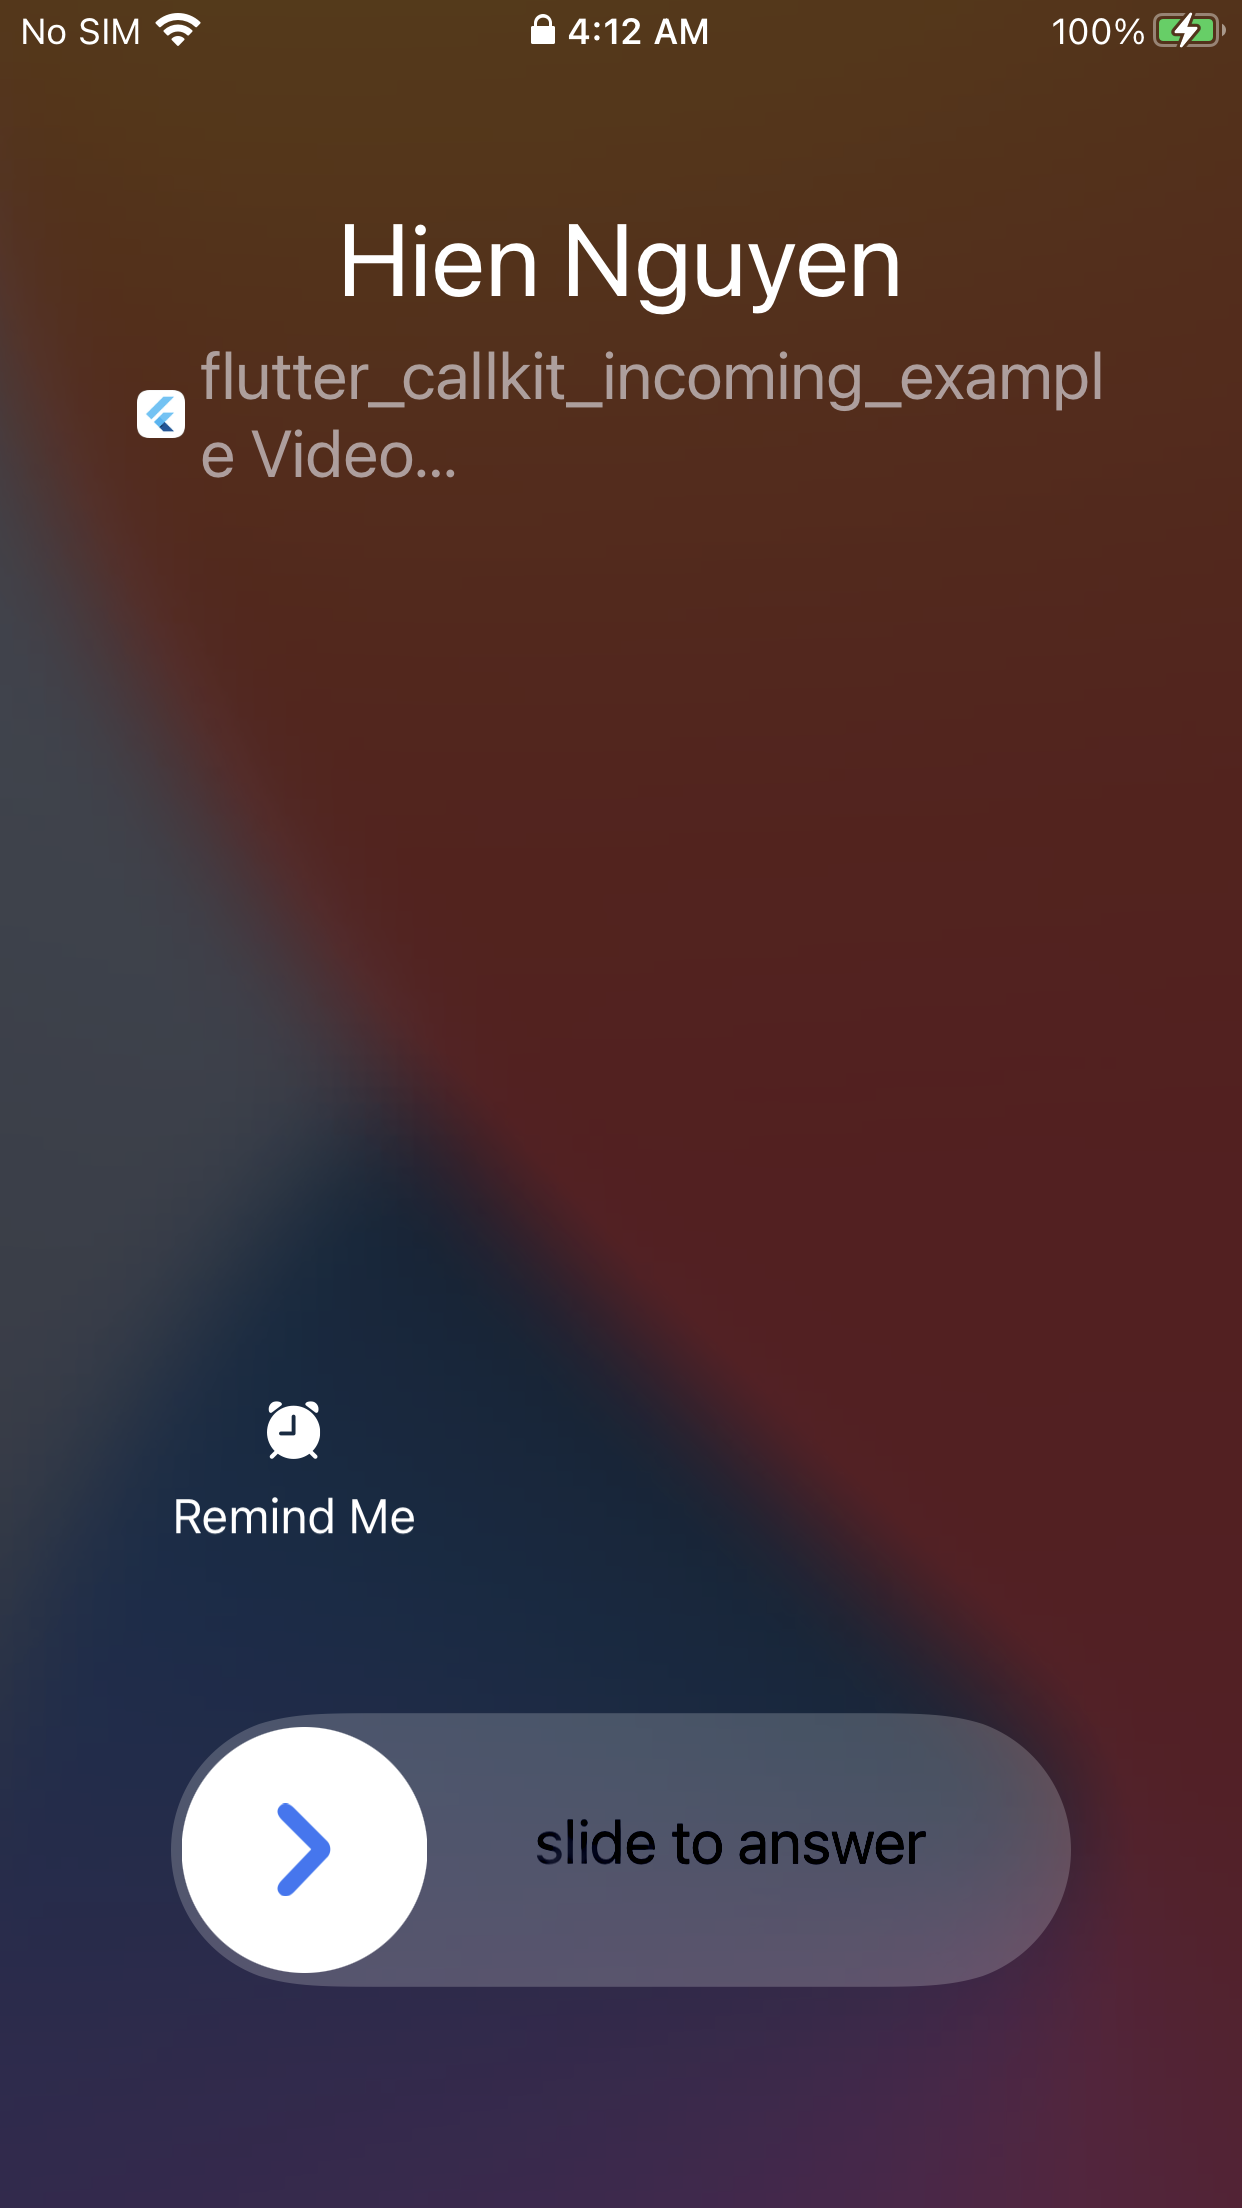
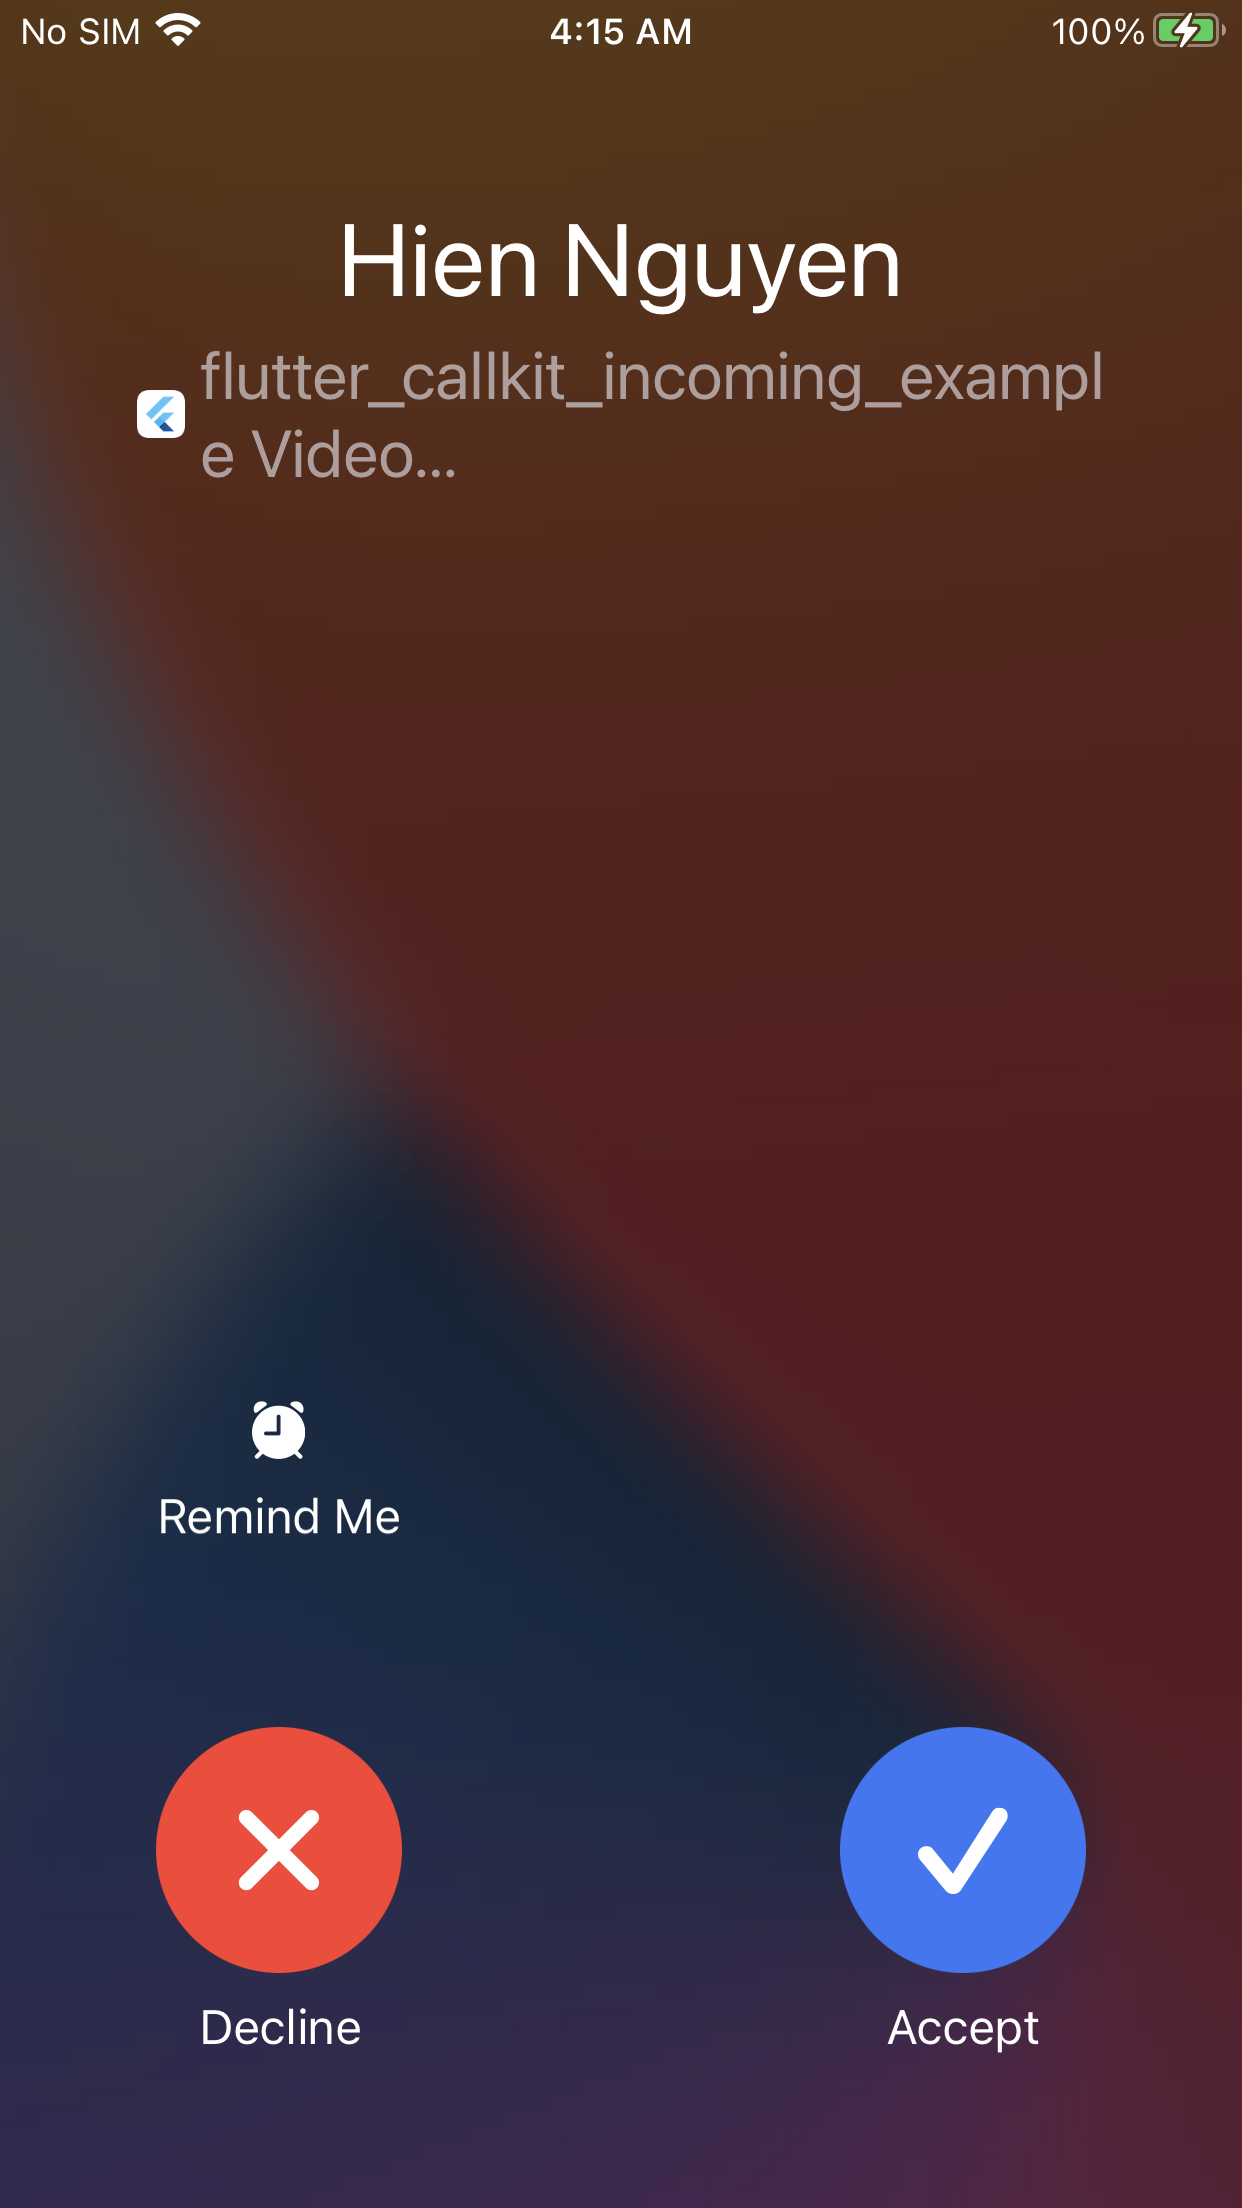
| iOS(锁屏) | iOS(全屏) | iOS(提醒) |
|---|---|---|
 |
 |
 |
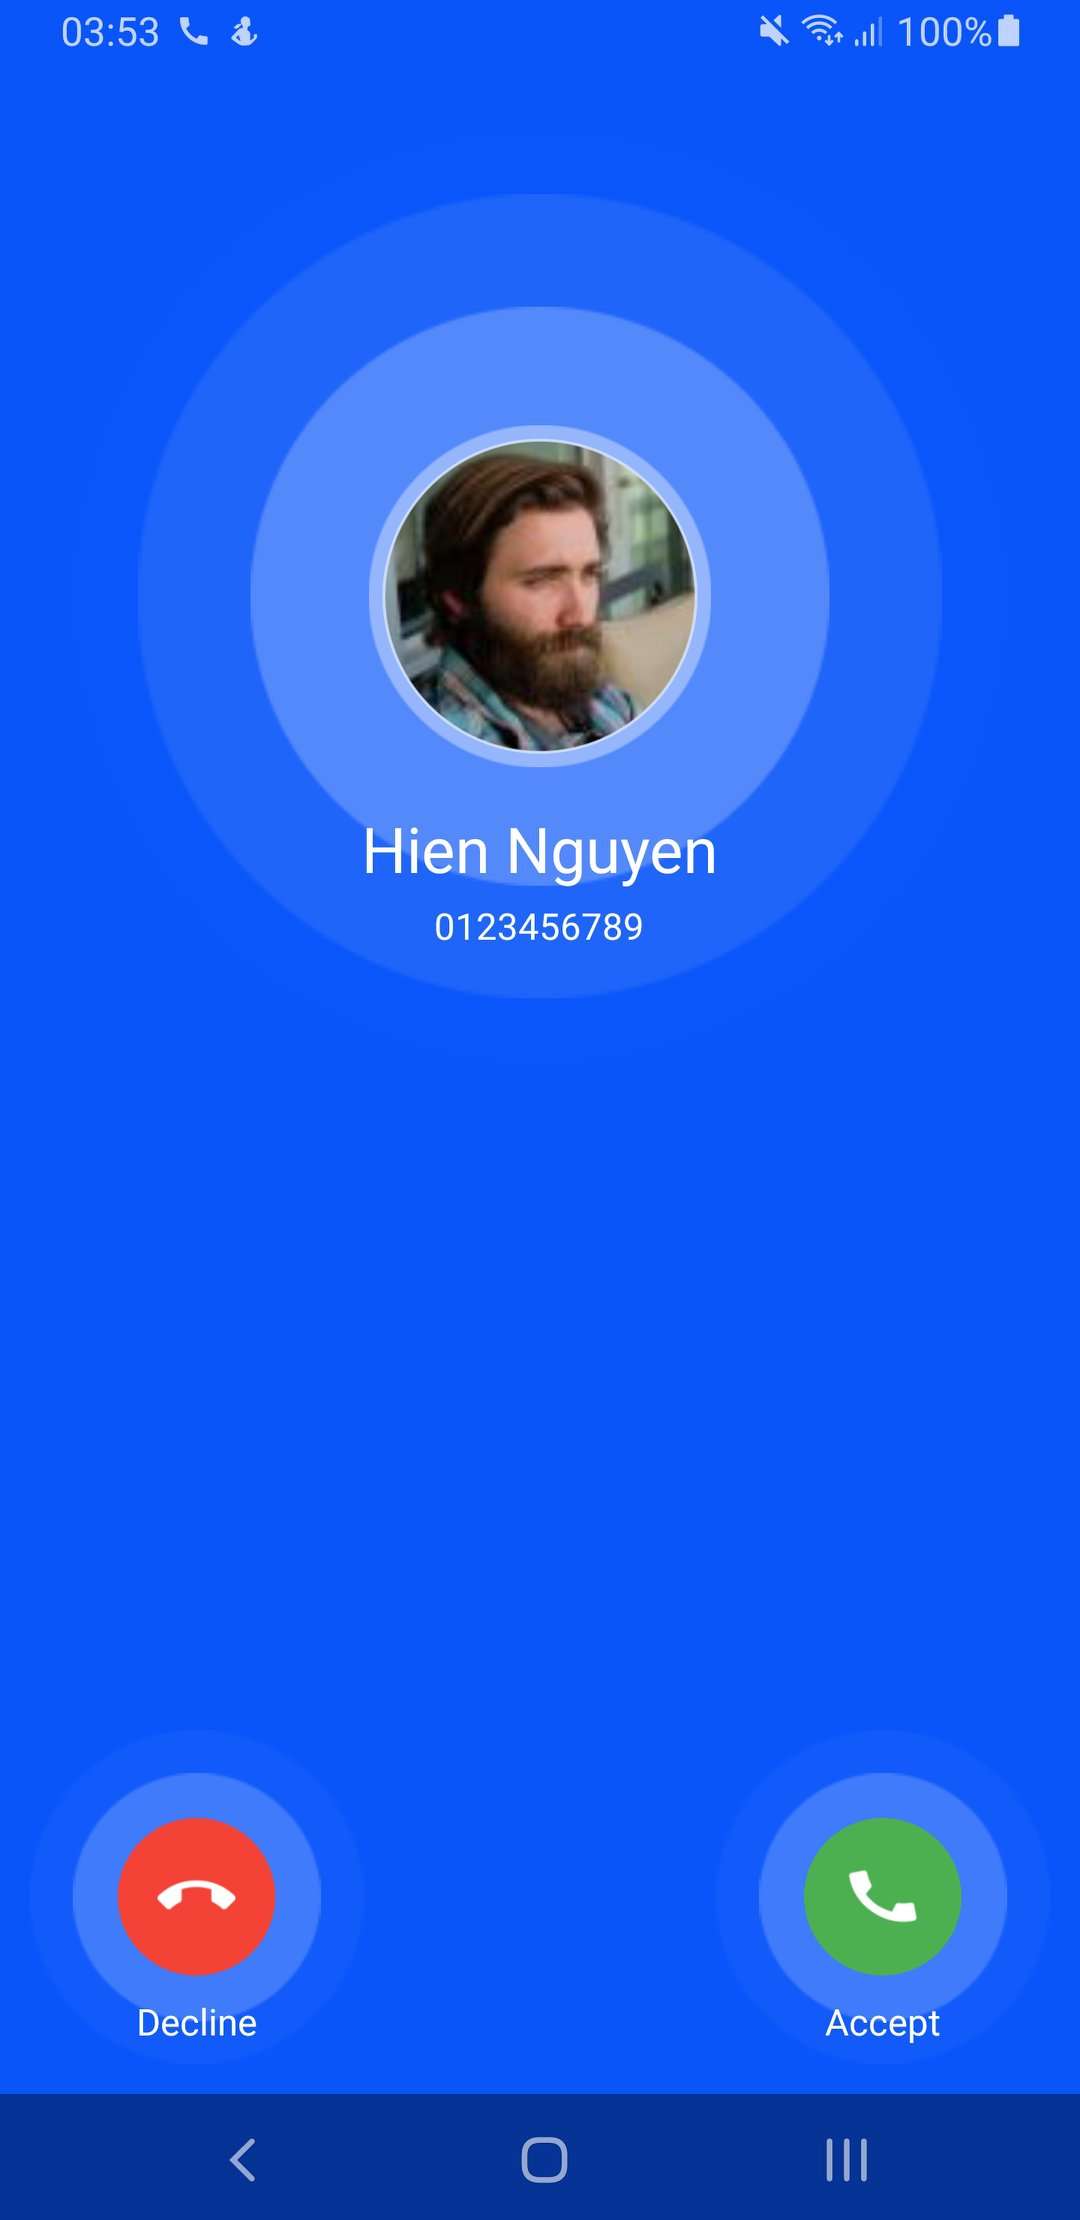
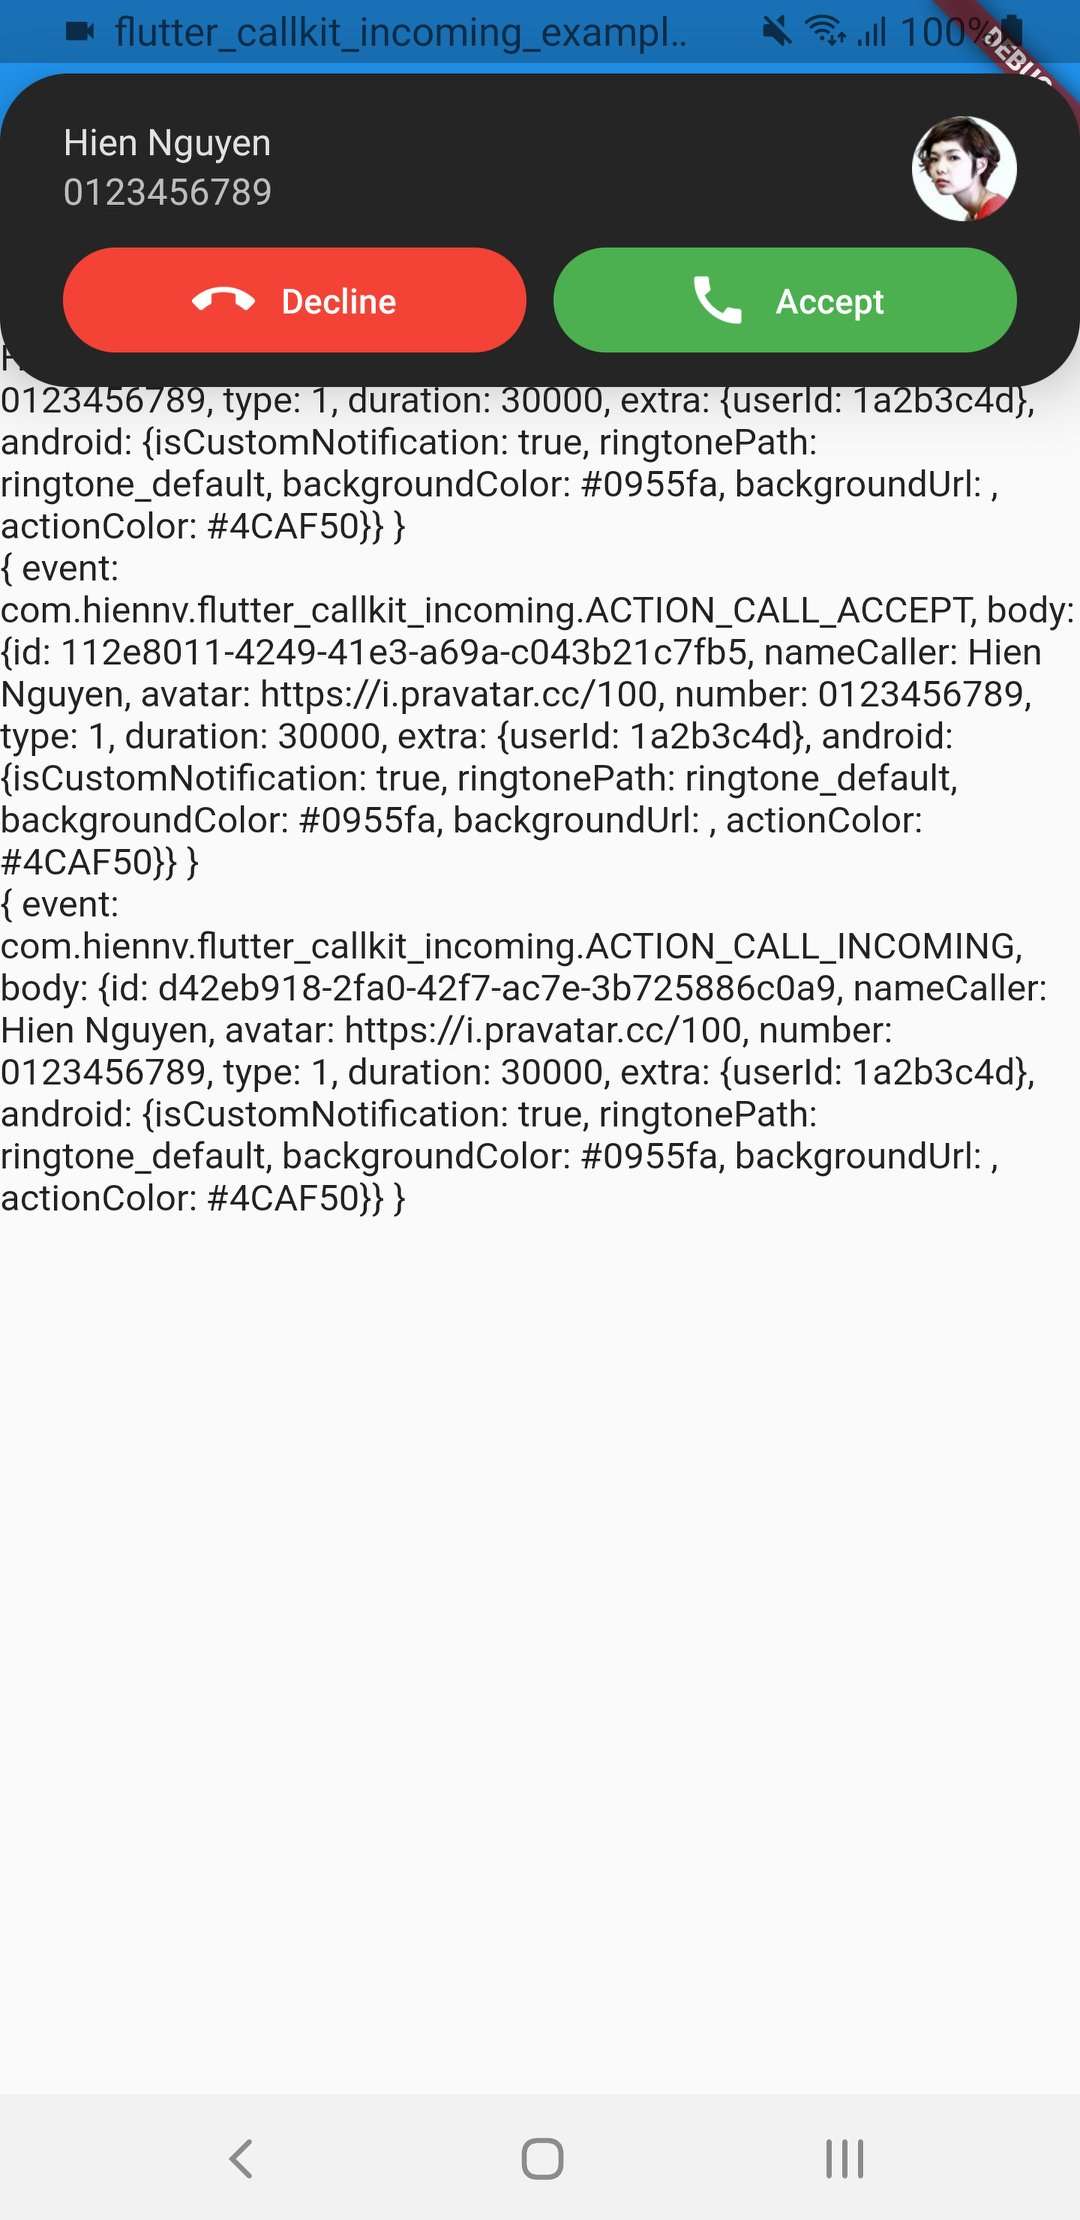
| Android(锁屏) - 音频 | Android(提醒) - 音频 | Android(锁屏) - 视频 |
 |
 |
 |
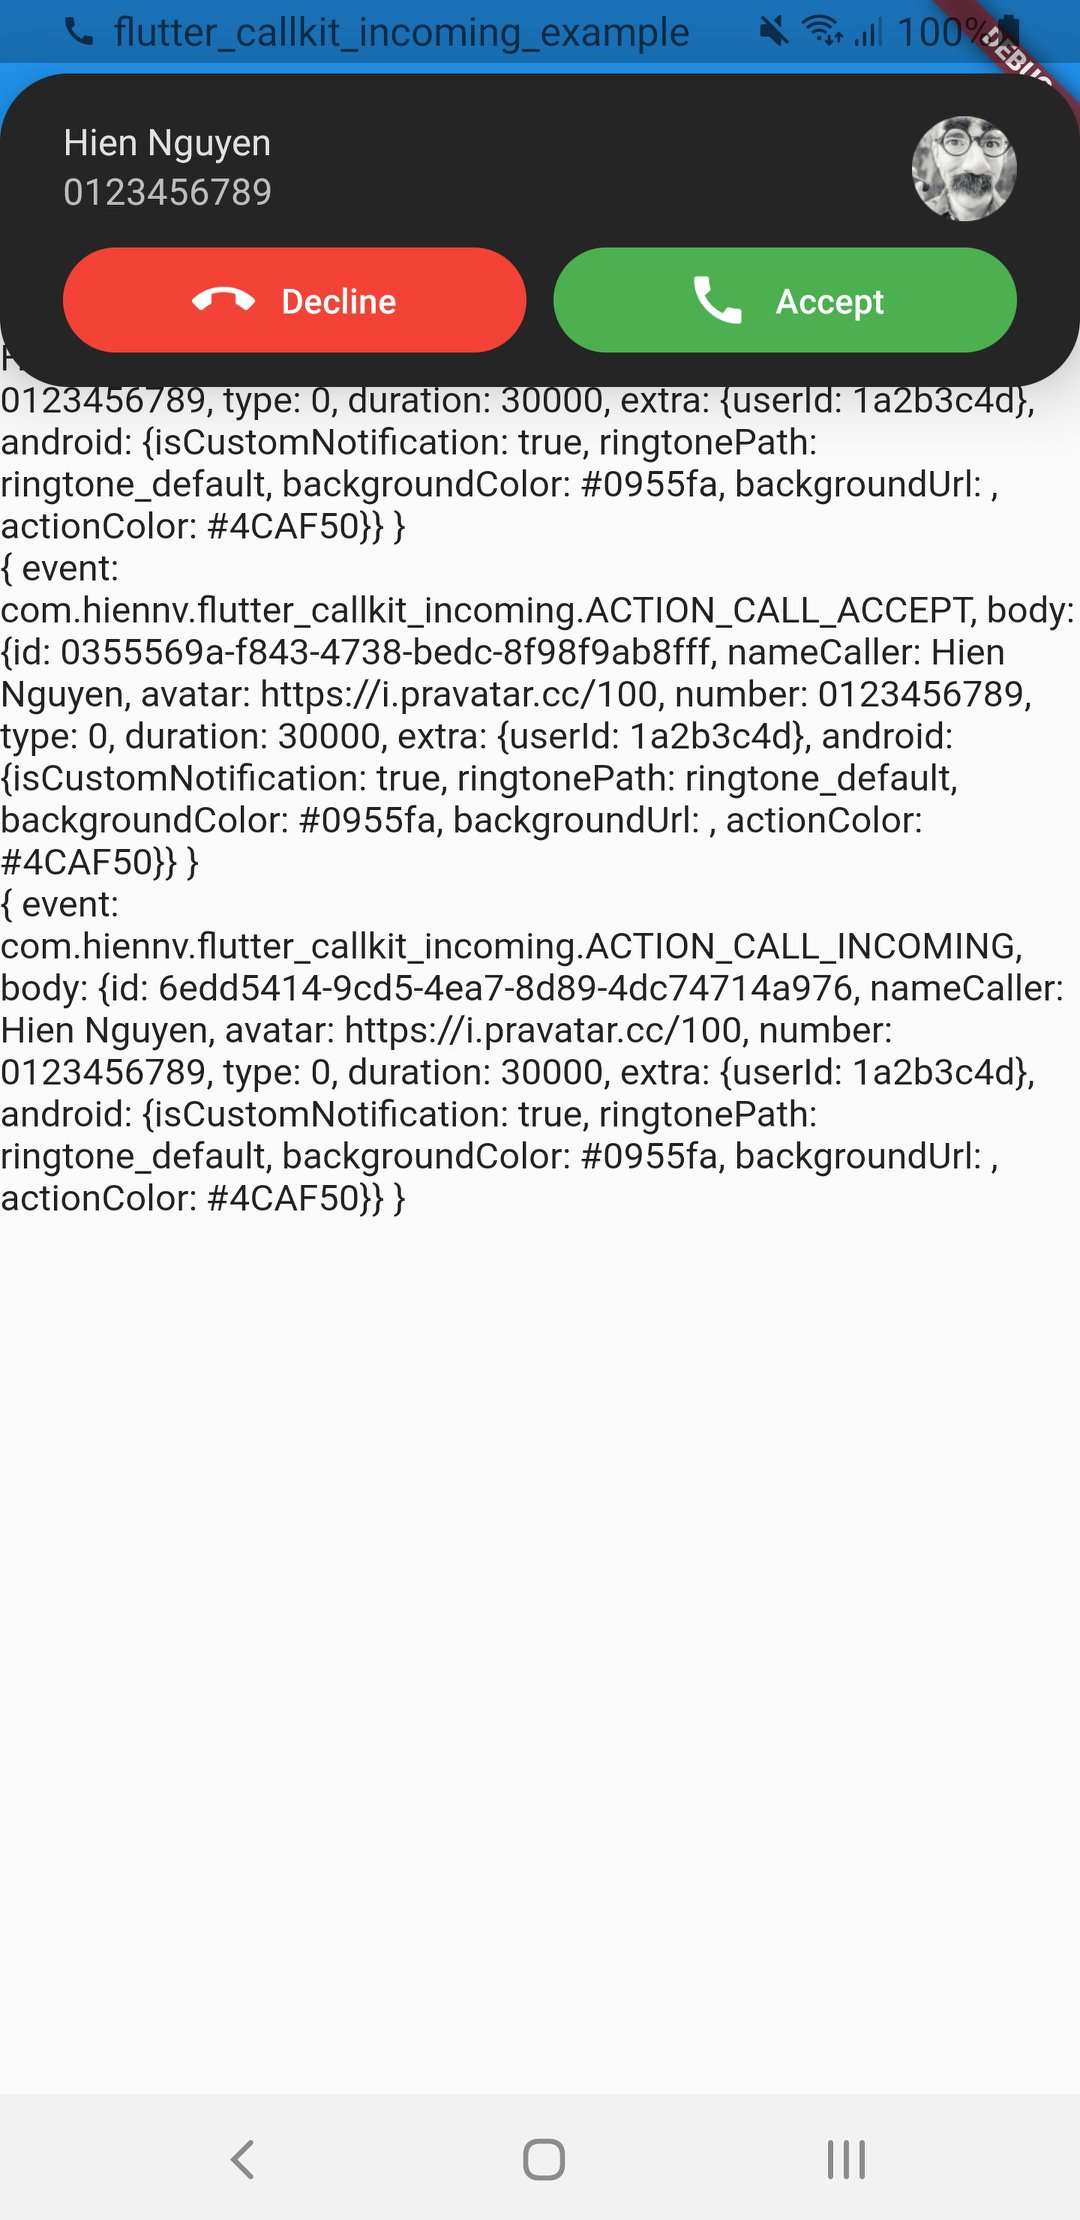
| Android(提醒) - 视频 | isCustomNotification: false | |
 |
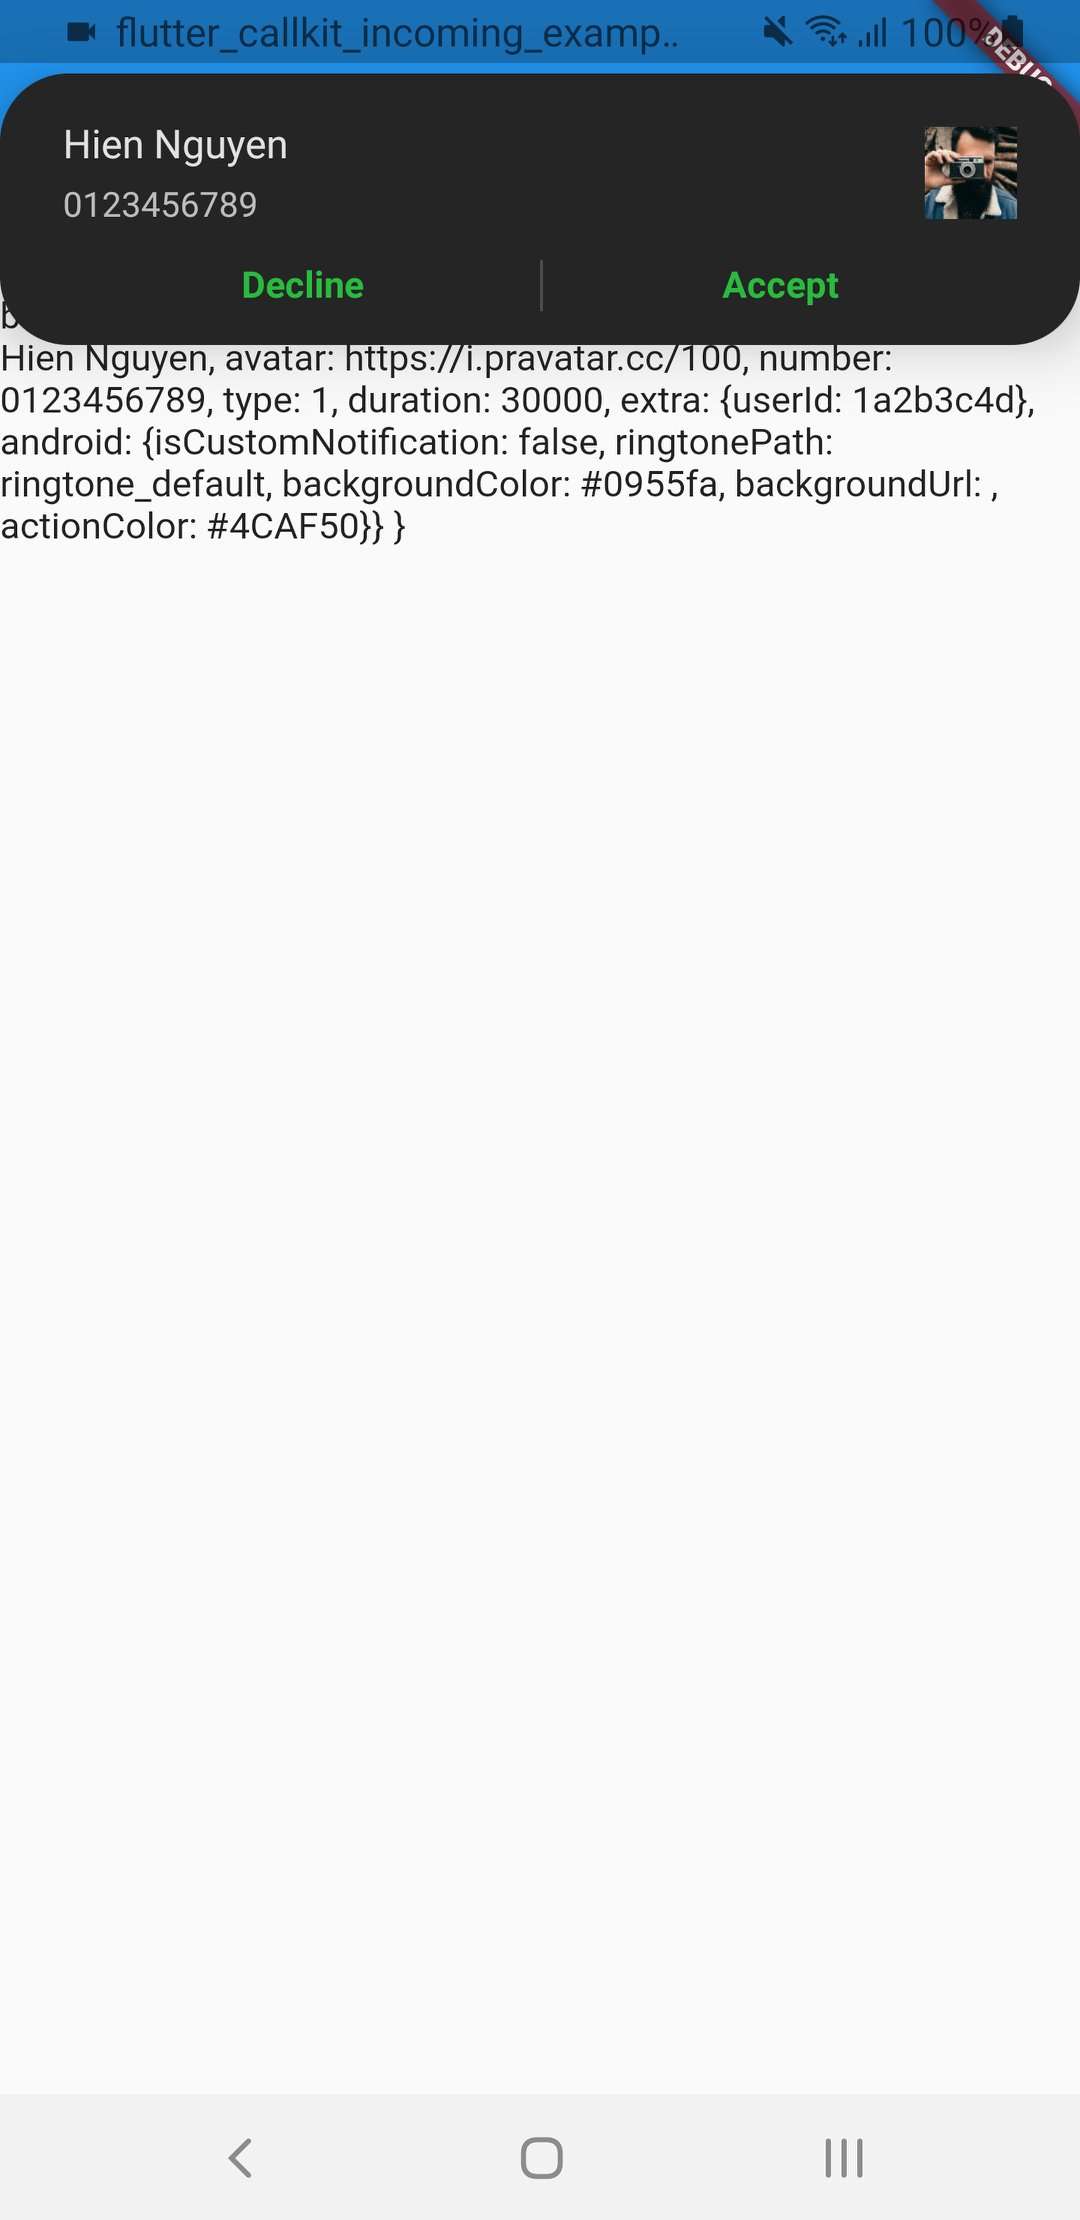 |
完整示例代码:
import 'package:firebase_core/firebase_core.dart';
import 'package:flutter/material.dart';
import 'package:flutter_callkit_incoming_example/app_router.dart';
import 'package:flutter_callkit_incoming_example/navigation_service.dart';
import 'dart:async';
import 'dart:convert';
import 'package:uuid/uuid.dart';
import 'package:firebase_messaging/firebase_messaging.dart';
import 'package:flutter_callkit_incoming/flutter_callkit_incoming.dart';

Future<void> _firebaseMessagingBackgroundHandler(RemoteMessage message) async {
  print("Handling a background message: ${message.messageId}");
  showCallkitIncoming(Uuid().v4());
}

Future<void> showCallkitIncoming(String uuid) async {
  var params = <String, dynamic>{
    'id': uuid,
    'nameCaller': 'Hien Nguyen',
    'appName': 'Callkit',
    'avatar': 'https://i.pravatar.cc/100',
    'handle': '0123456789',
    'type': 0,
    'duration': 30000,
    'textAccept': 'Accept',
    'textDecline': 'Decline',
    'textMissedCall': 'Missed call',
    'textCallback': 'Call back',
    'extra': <String, dynamic>{'userId': '1a2b3c4d'},
    'headers': <String, dynamic>{'apiKey': 'Abc@123!', 'platform': 'flutter'},
    'android': <String, dynamic>{
      'isCustomNotification': true,
      'isShowLogo': false,
      'isShowCallback': false,
      'ringtonePath': 'system_ringtone_default',
      'backgroundColor': '#0955fa',
      'background': 'https://i.pravatar.cc/500',
      'actionColor': '#4CAF50'
    },
    'ios': <String, dynamic>{
      'iconName': 'CallKitLogo',
      'handleType': '',
      'supportsVideo': true,
      'maximumCallGroups': 2,
      'maximumCallsPerCallGroup': 1,
      'audioSessionMode': 'default',
      'audioSessionActive': true,
      'audioSessionPreferredSampleRate': 44100.0,
      'audioSessionPreferredIOBufferDuration': 0.005,
      'supportsDTMF': true,
      'supportsHolding': true,
      'supportsGrouping': false,
      'supportsUngrouping': false,
      'ringtonePath': 'system_ringtone_default'
    }
  };
  await FlutterCallkitIncoming.showCallkitIncoming(params);
}

void main() {
  WidgetsFlutterBinding.ensureInitialized();
  runApp(MyApp());
}

class MyApp extends StatefulWidget {
  [@override](/user/override)
  _MyAppState createState() => _MyAppState();
}

class _MyAppState extends State<MyApp> with WidgetsBindingObserver {
  var _uuid;
  var _currentUuid;

  late final FirebaseMessaging _firebaseMessaging;

  [@override](/user/override)
  void initState() {
    super.initState();
    _uuid = Uuid();
    initFirebase();
    WidgetsBinding.instance?.addObserver(this);
    // Check call when open app from terminated
    checkAndNavigationCallingPage();
  }

  getCurrentCall() async {
    // check current call from pushkit if possible
    var calls = await FlutterCallkitIncoming.activeCalls();
    if (calls is List) {
      if (calls.isNotEmpty) {
        print('DATA: $calls');
        this._currentUuid = calls[0]['id'];
        return calls[0];
      } else {
        this._currentUuid = "";
        return null;
      }
    }
  }

  checkAndNavigationCallingPage() async {
    var currentCall = await getCurrentCall();
    if (currentCall != null) {
      NavigationService.instance
          .pushNamedIfNotCurrent(AppRoute.callingPage, args: currentCall);
    }
  }

  [@override](/user/override)
  Future<void> didChangeAppLifecycleState(AppLifecycleState state) async {
    print(state);
    if (state == AppLifecycleState.resumed) {
      // Check call when open app from background
      checkAndNavigationCallingPage();
    }
  }

  [@override](/user/override)
  void dispose() {
    WidgetsBinding.instance?.removeObserver(this);
    super.dispose();
  }

  initFirebase() async {
    await Firebase.initializeApp();
    _firebaseMessaging = FirebaseMessaging.instance;
    FirebaseMessaging.onBackgroundMessage(_firebaseMessagingBackgroundHandler);
    FirebaseMessaging.onMessage.listen((RemoteMessage message) async {
      print(
          'Message title: ${message.notification?.title}, body: ${message.notification?.body}, data: ${message.data}');
      this._currentUuid = _uuid.v4();
      showCallkitIncoming(this._currentUuid);
    });
    _firebaseMessaging.getToken().then((token) {
      print('Device Token FCM: $token');
    });
  }

  [@override](/user/override)
  Widget build(BuildContext context) {
    return MaterialApp(
      theme: ThemeData.light(),
      onGenerateRoute: AppRoute.generateRoute,
      initialRoute: AppRoute.homePage,
      navigatorKey: NavigationService.instance.navigationKey,
      navigatorObservers: <NavigatorObserver>[
        NavigationService.instance.routeObserver
      ],
    );
  }

  Future<void> getDevicePushTokenVoIP() async {
    var devicePushTokenVoIP =
        await FlutterCallkitIncoming.getDevicePushTokenVoIP();
    print(devicePushTokenVoIP);
  }
}
更多关于Flutter来电界面集成插件custom_flutter_callkit_incoming的使用的实战教程也可以访问 https://www.itying.com/category-92-b0.html

更多关于Flutter来电界面集成插件custom_flutter_callkit_incoming的使用的实战系列教程也可以访问 https://www.itying.com/category-92-b0.html
custom_flutter_callkit_incoming 是一个用于在 Flutter 应用中集成来电界面的插件。它允许你在应用中显示类似于原生 iOS 和 Android 的来电界面,并处理来电事件。以下是如何使用 custom_flutter_callkit_incoming 插件的步骤:
1. 添加依赖
首先,你需要在 pubspec.yaml 文件中添加 custom_flutter_callkit_incoming 插件的依赖:
dependencies:
  flutter:
    sdk: flutter
  custom_flutter_callkit_incoming: ^1.0.0  # 请使用最新版本
然后运行 flutter pub get 来安装依赖。
2. 初始化插件
在你的 Dart 代码中,首先需要初始化插件。通常,你可以在 main.dart 文件中进行初始化:
import 'package:custom_flutter_callkit_incoming/custom_flutter_callkit_incoming.dart';

void main() async {
  WidgetsFlutterBinding.ensureInitialized();

  // 初始化插件
  await CustomFlutterCallkitIncoming().initialize();

  runApp(MyApp());
}
3. 显示来电界面
当有来电时,你可以使用 CustomFlutterCallkitIncoming 来显示来电界面。以下是一个简单的示例:
import 'package:custom_flutter_callkit_incoming/custom_flutter_callkit_incoming.dart';

void showIncomingCall() async {
  var callKitData = CallKitParams(
    id: '12345', // 唯一标识符
    nameCaller: 'John Doe', // 来电者姓名
    appName: 'My App', // 应用名称
    avatar: 'https://example.com/avatar.png', // 来电者头像
    handle: '1234567890', // 来电号码
    type: 0, // 0: 来电, 1: 去电
    duration: 30000, // 通话时长(毫秒)
    textAccept: 'Accept', // 接听按钮文本
    textDecline: 'Decline', // 拒绝按钮文本
    textMissedCall: 'Missed Call', // 未接来电文本
    textCallback: 'Callback', // 回拨按钮文本
    extra: <String, dynamic>{'userId': '1'}, // 额外数据
    headers: <String, dynamic>{'apiKey': 'your_api_key'}, // 请求头
    android: AndroidParams(
      isCustomNotification: true,
      isShowLogo: true,
      ringtonePath: 'system_ringtone_default',
      backgroundColor: '#0955fa',
      backgroundUrl: 'https://example.com/background.png',
      actionColor: '#4CAF50',
    ),
    ios: IOSParams(
      iconName: 'CallKitLogo',
      handleType: 'generic',
      supportsVideo: true,
      maximumCallGroups: 2,
      maximumCallsPerCallGroup: 1,
      audioSessionMode: 'default',
      audioSessionActive: true,
      audioSessionPreferredSampleRate: 44100.0,
      audioSessionPreferredIOBufferDuration: 0.005,
      supportsDTMF: true,
      supportsHolding: true,
      supportsGrouping: true,
      supportsUngrouping: true,
      ringtonePath: 'system_ringtone_default',
    ),
  );

  await CustomFlutterCallkitIncoming().showCallkitIncoming(callKitData);
}
4. 处理来电事件
你可以监听来电事件,例如接听、拒绝、挂断等。以下是如何监听这些事件的示例:
CustomFlutterCallkitIncoming().onEvent.listen((CallKitEvent event) {
  switch (event.event) {
    case Event.actionCallAccept:
      // 用户接听电话
      break;
    case Event.actionCallDecline:
      // 用户拒绝电话
      break;
    case Event.actionCallEnded:
      // 电话结束
      break;
    case Event.actionCallTimeout:
      // 电话超时未接
      break;
    case Event.actionCallCallback:
      // 用户点击回拨
      break;
    case Event.actionCallToggleHold:
      // 用户切换保持状态
      break;
    case Event.actionCallToggleMute:
      // 用户切换静音状态
      break;
    case Event.actionCallToggleDmtf:
      // 用户输入DTMF
      break;
    case Event.actionCallToggleGroup:
      // 用户切换群组
      break;
    case Event.actionCallToggleAudioSession:
      // 用户切换音频会话
      break;
    default:
      break;
  }
});
5. 结束通话
当通话结束时,你可以使用以下代码来关闭来电界面:
await CustomFlutterCallkitIncoming().endCall('12345');