


HarmonyOS鸿蒙Next Codelabs挑战赛—定制消息和配置:Android版定制520简易告白消息
HarmonyOS鸿蒙Next Codelabs挑战赛—定制消息和配置:Android版定制520简易告白消息 【Codelabs挑战赛—定制消息和配置】Android版定制520简易告白消息
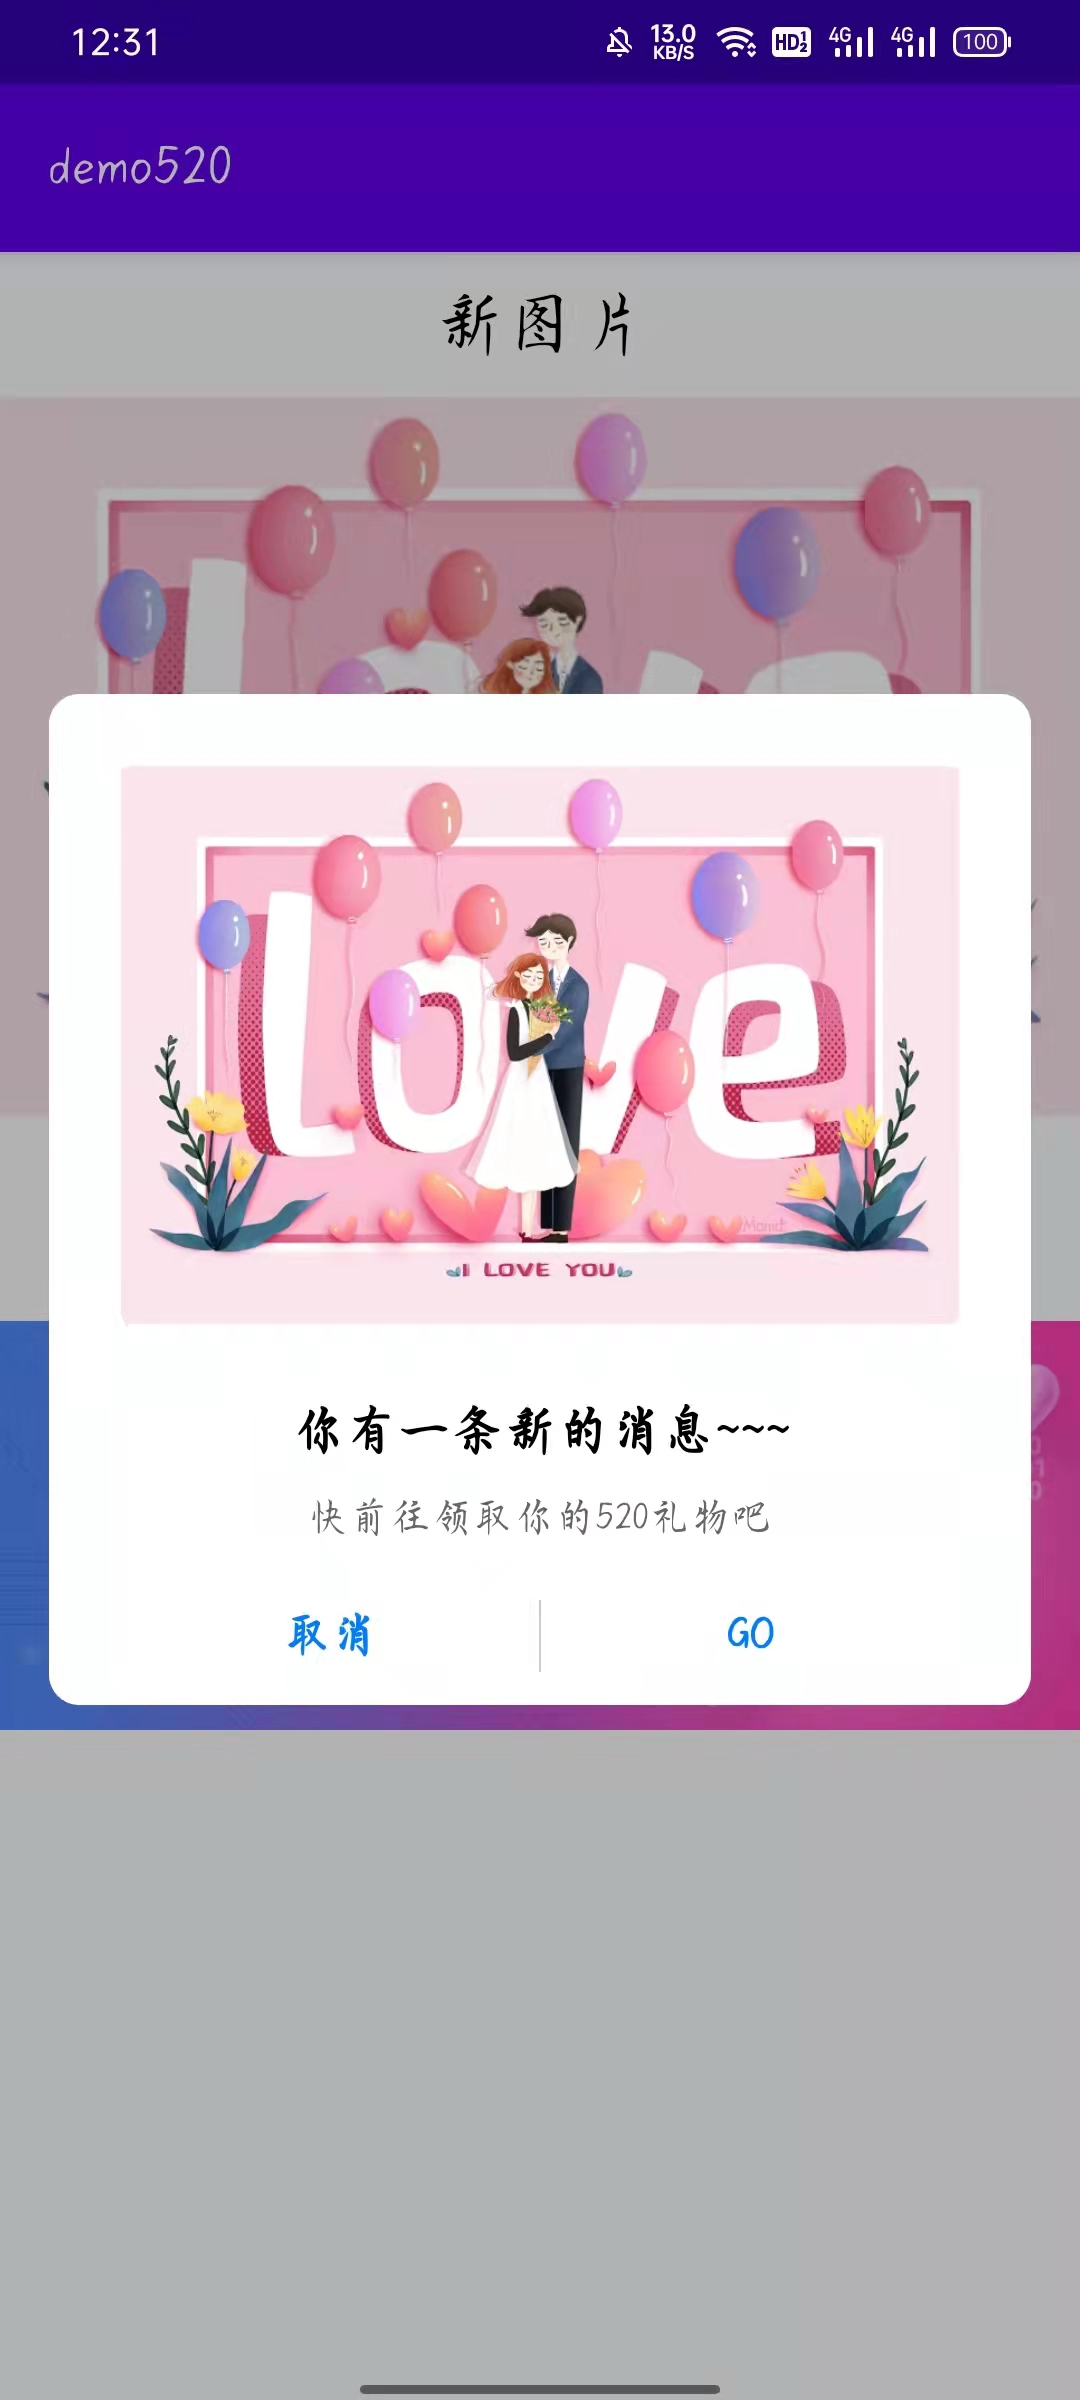
一、效果展示
二、选用技术
| 业务功能 | 技术选型 | 技术来源 |
|---|---|---|
| 营销消息定制及展示 | 应用内消息 | AppGallery Connect |
| 5.20”节日主题更新 | 远程配置 | AppGallery Connect |
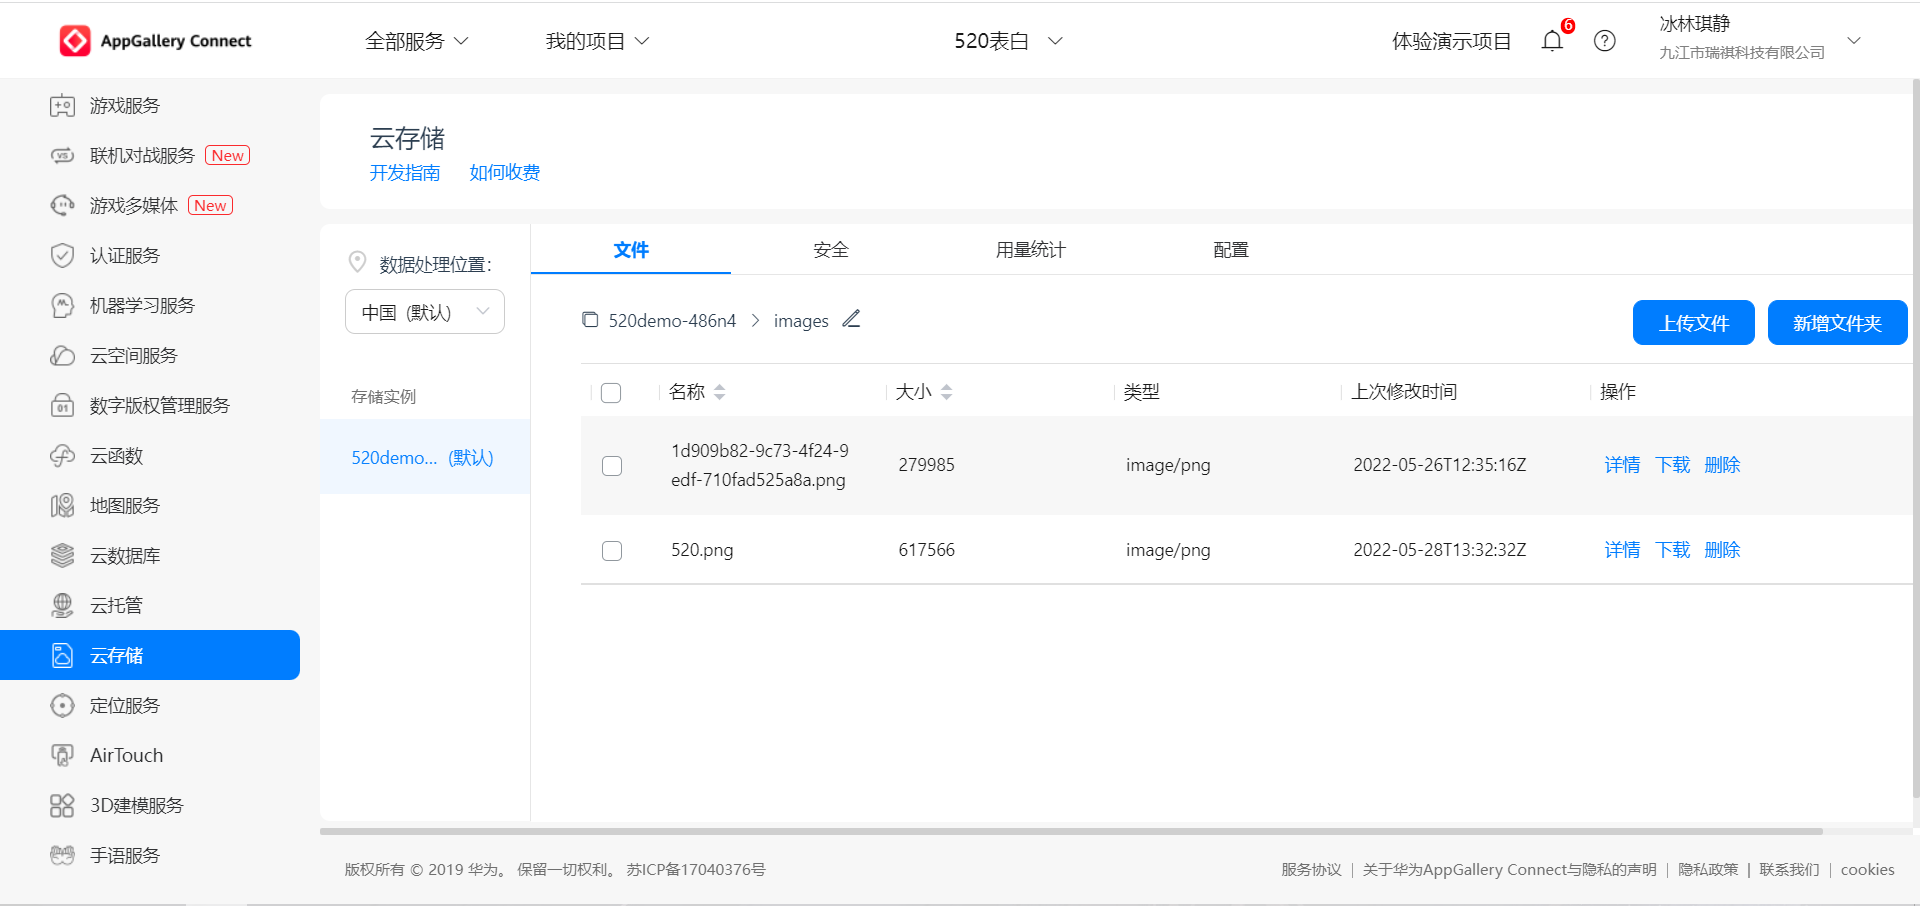
| 应用内消息图片存储 | 云存储+云托管 | AppGallery Connect |
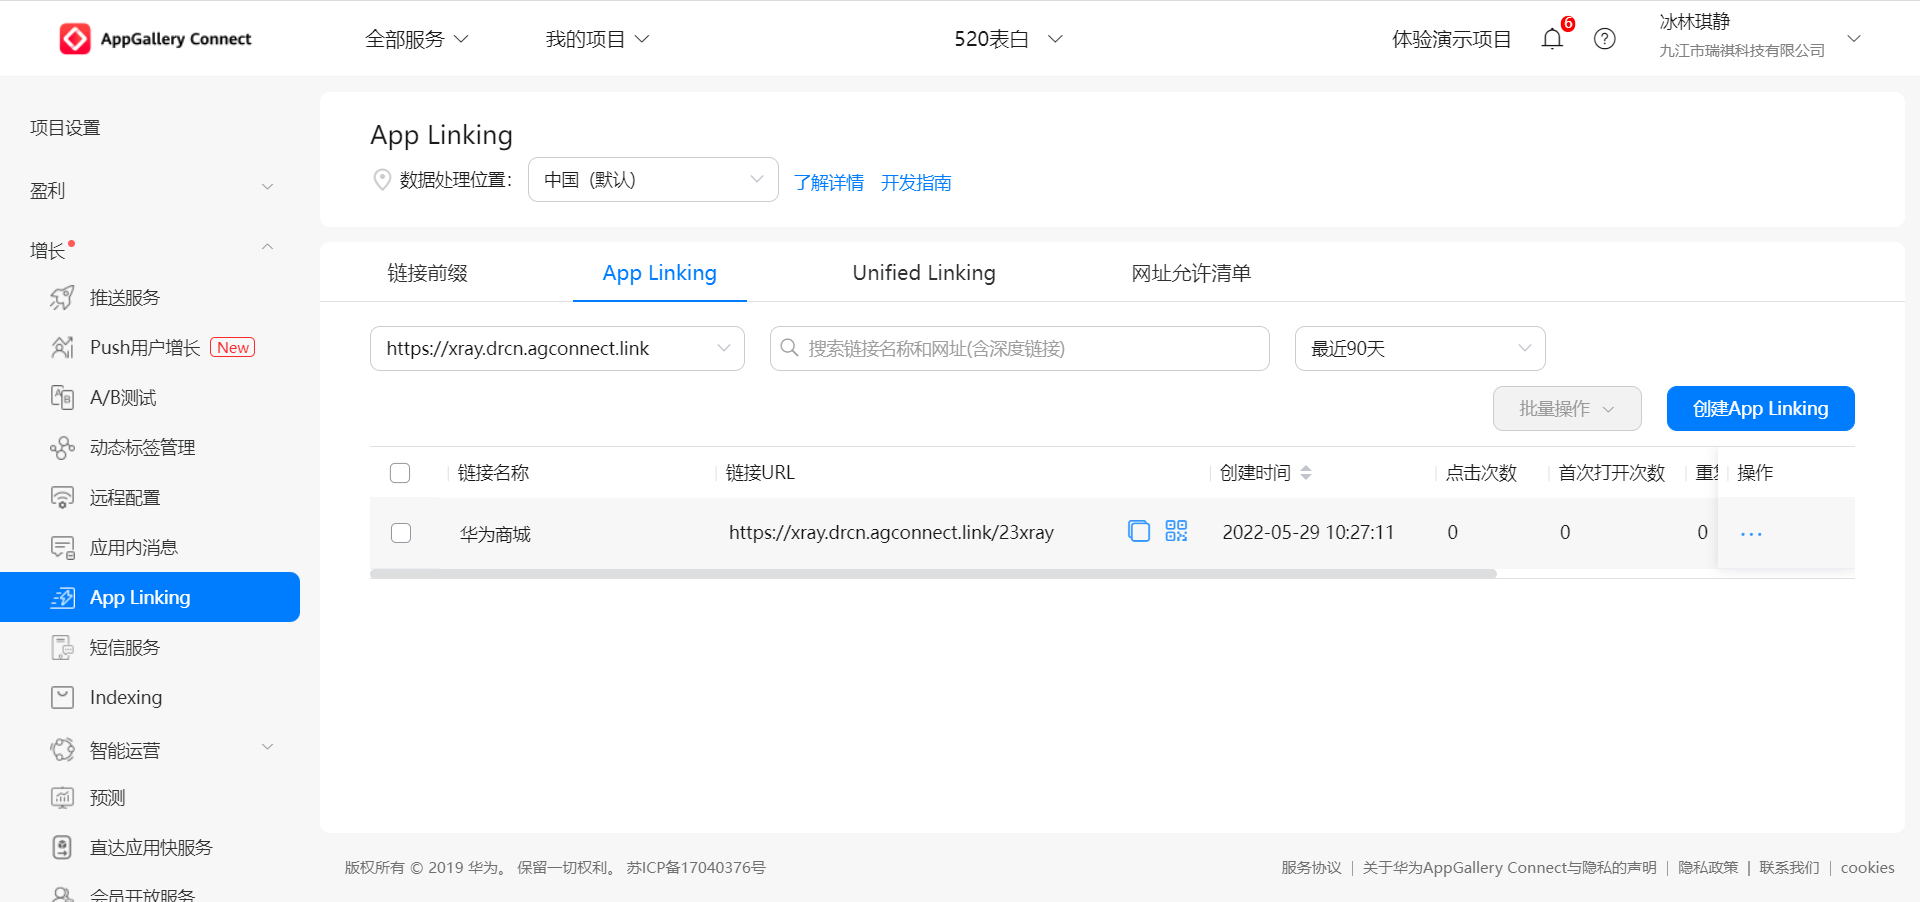
| Applinking链接跳转 | Applinking | AppGallery Connect |
三、前期准备
1 云存储+云托管配置
-
云存储
-
-
云托管
-
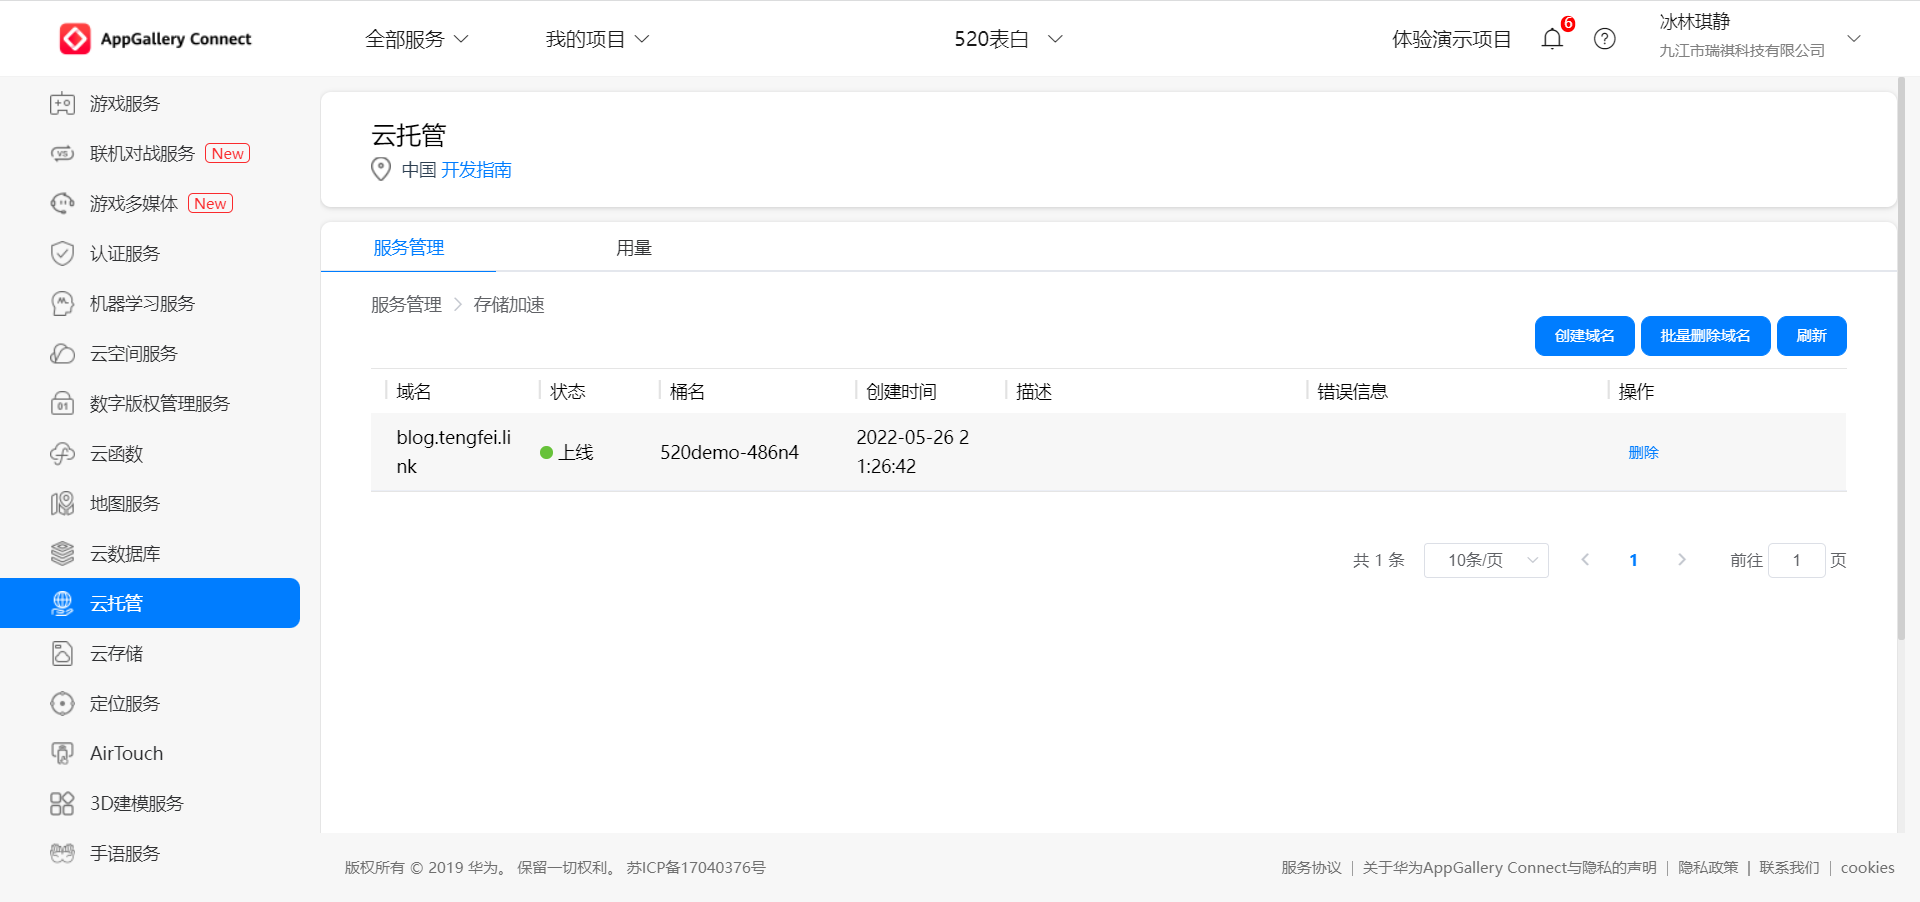
注意:远程配置需要有域名,具体可看官方文档
2. Applink配置
-
Applink
-
-
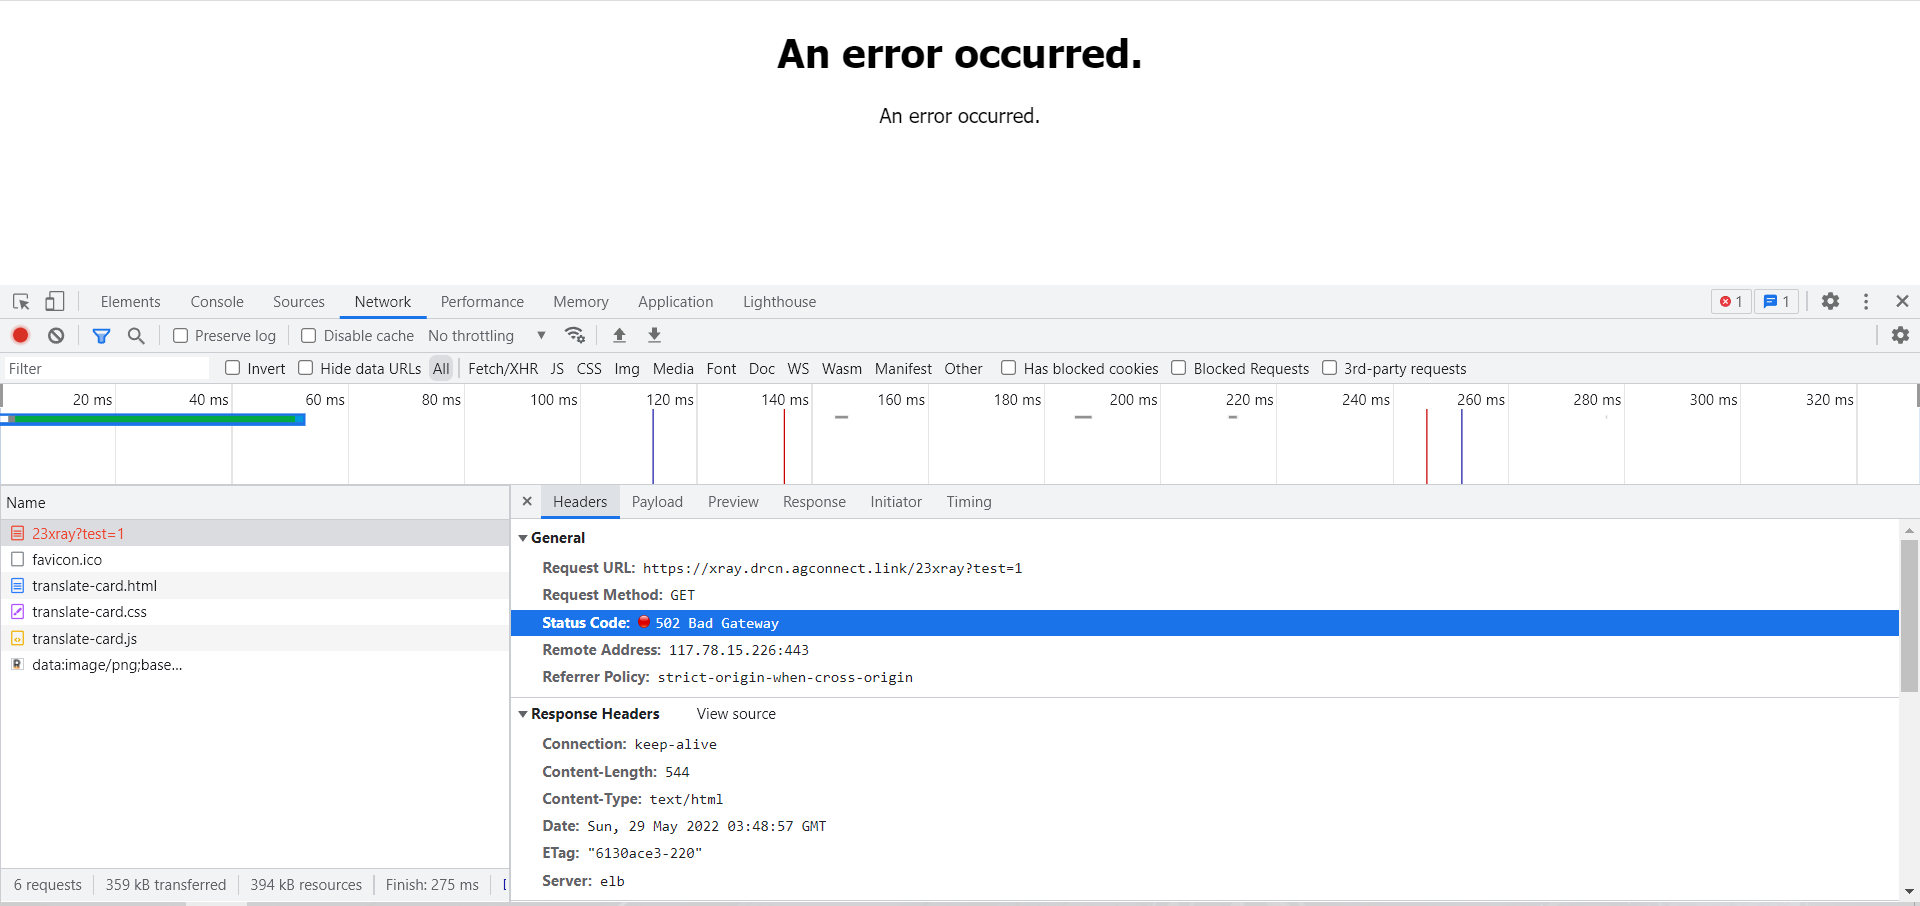
出现问题(未解决)
- 链接前缀配置完成
- Applink配置完成
- 网站允许清单配置完成
- 在调测的时候出现问题(出现502网关问题)
3. 远程配置
-
远程配置
-
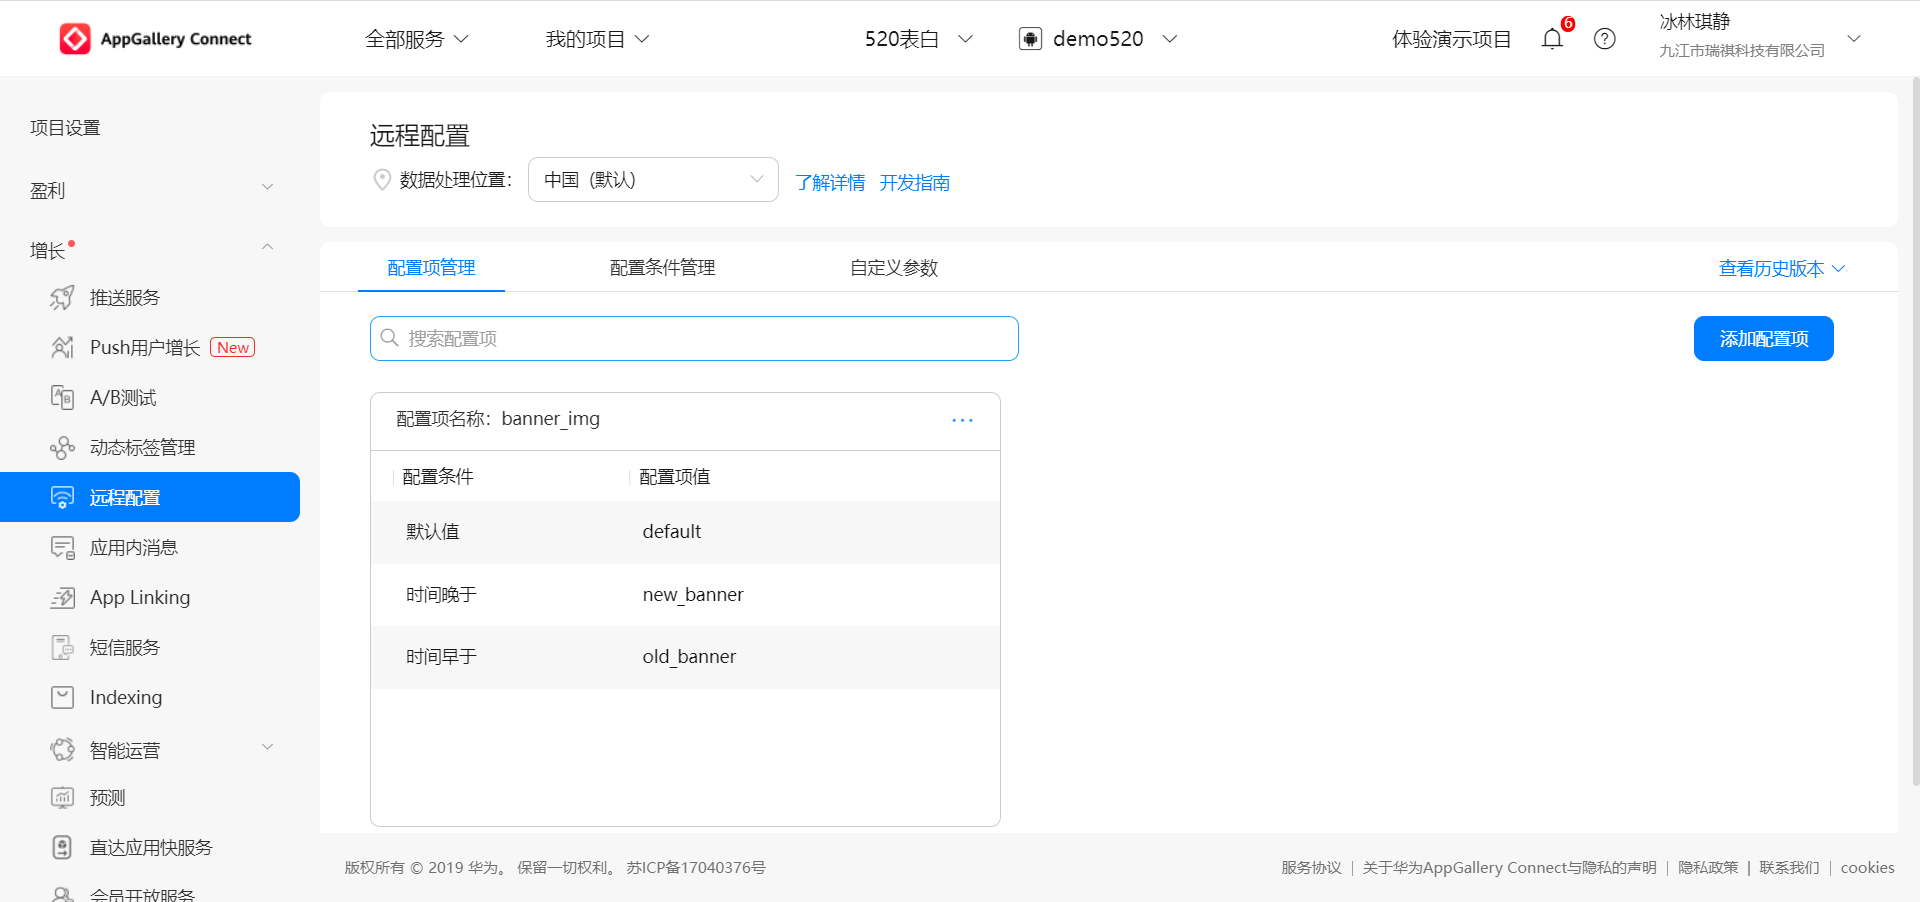
其实只要配置默认与时间晚于就行(时间晚于是指时间晚于5月20号00:00:00在UTC8:00时区下)
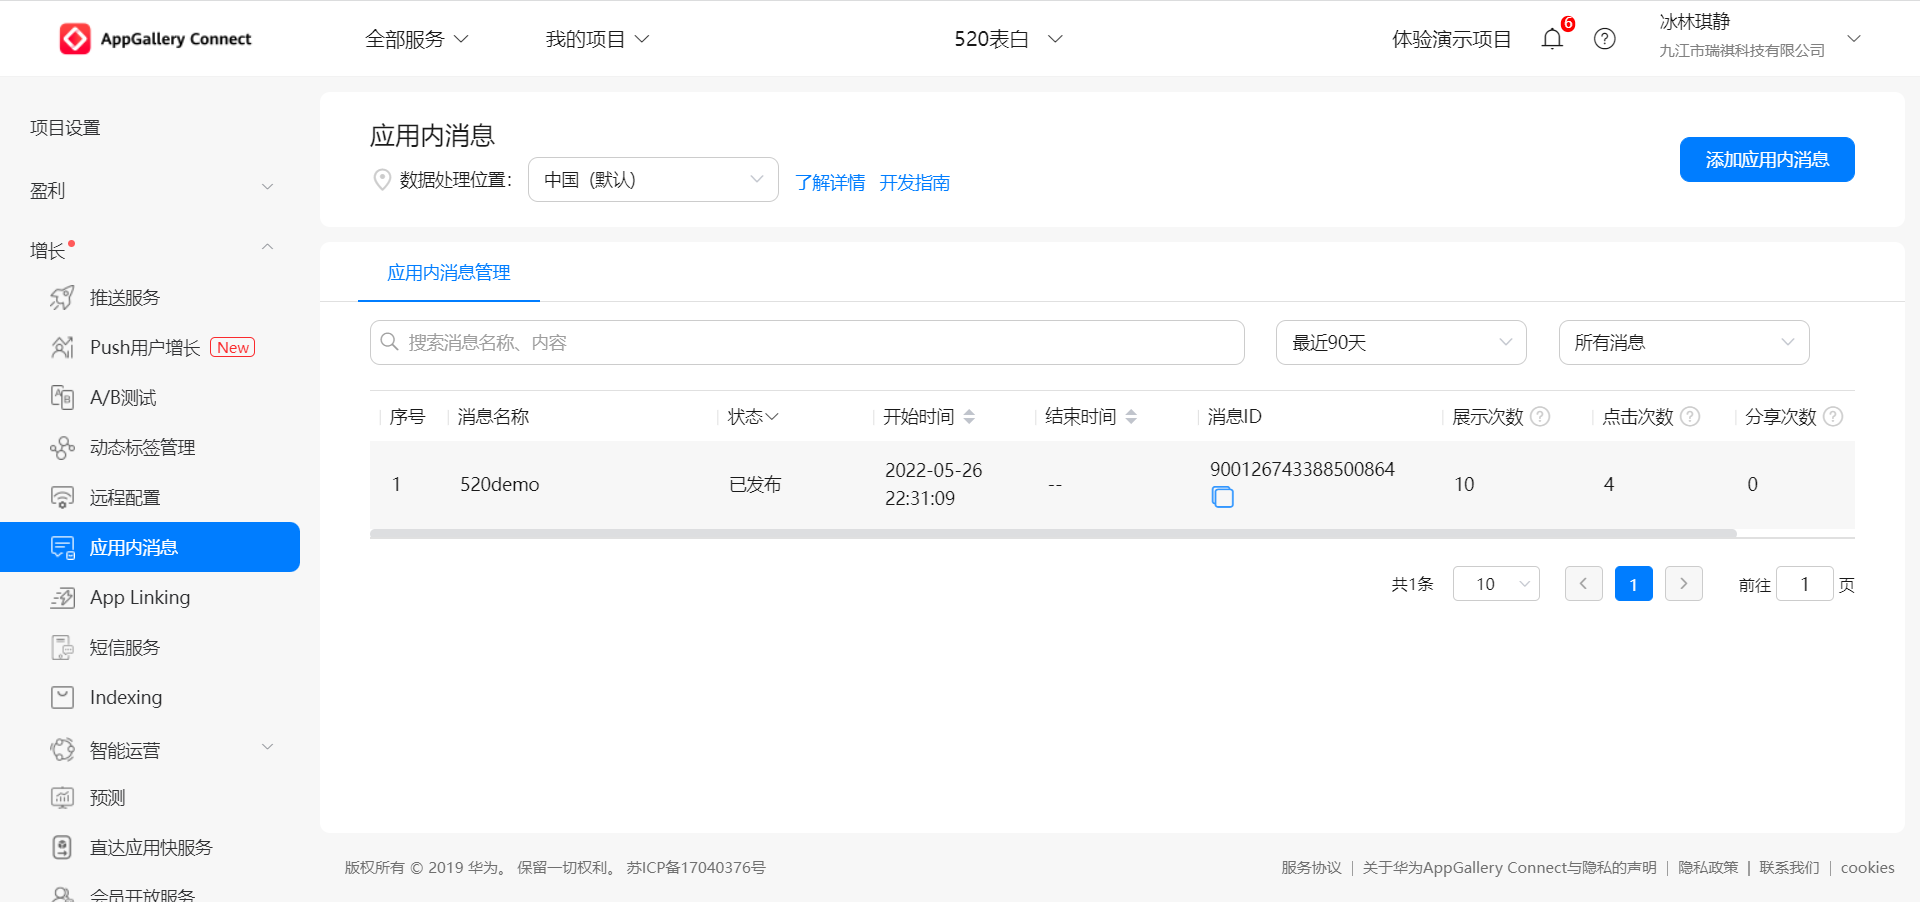
4. 应用内消息配置
-
展示
-
-
部分配置
-
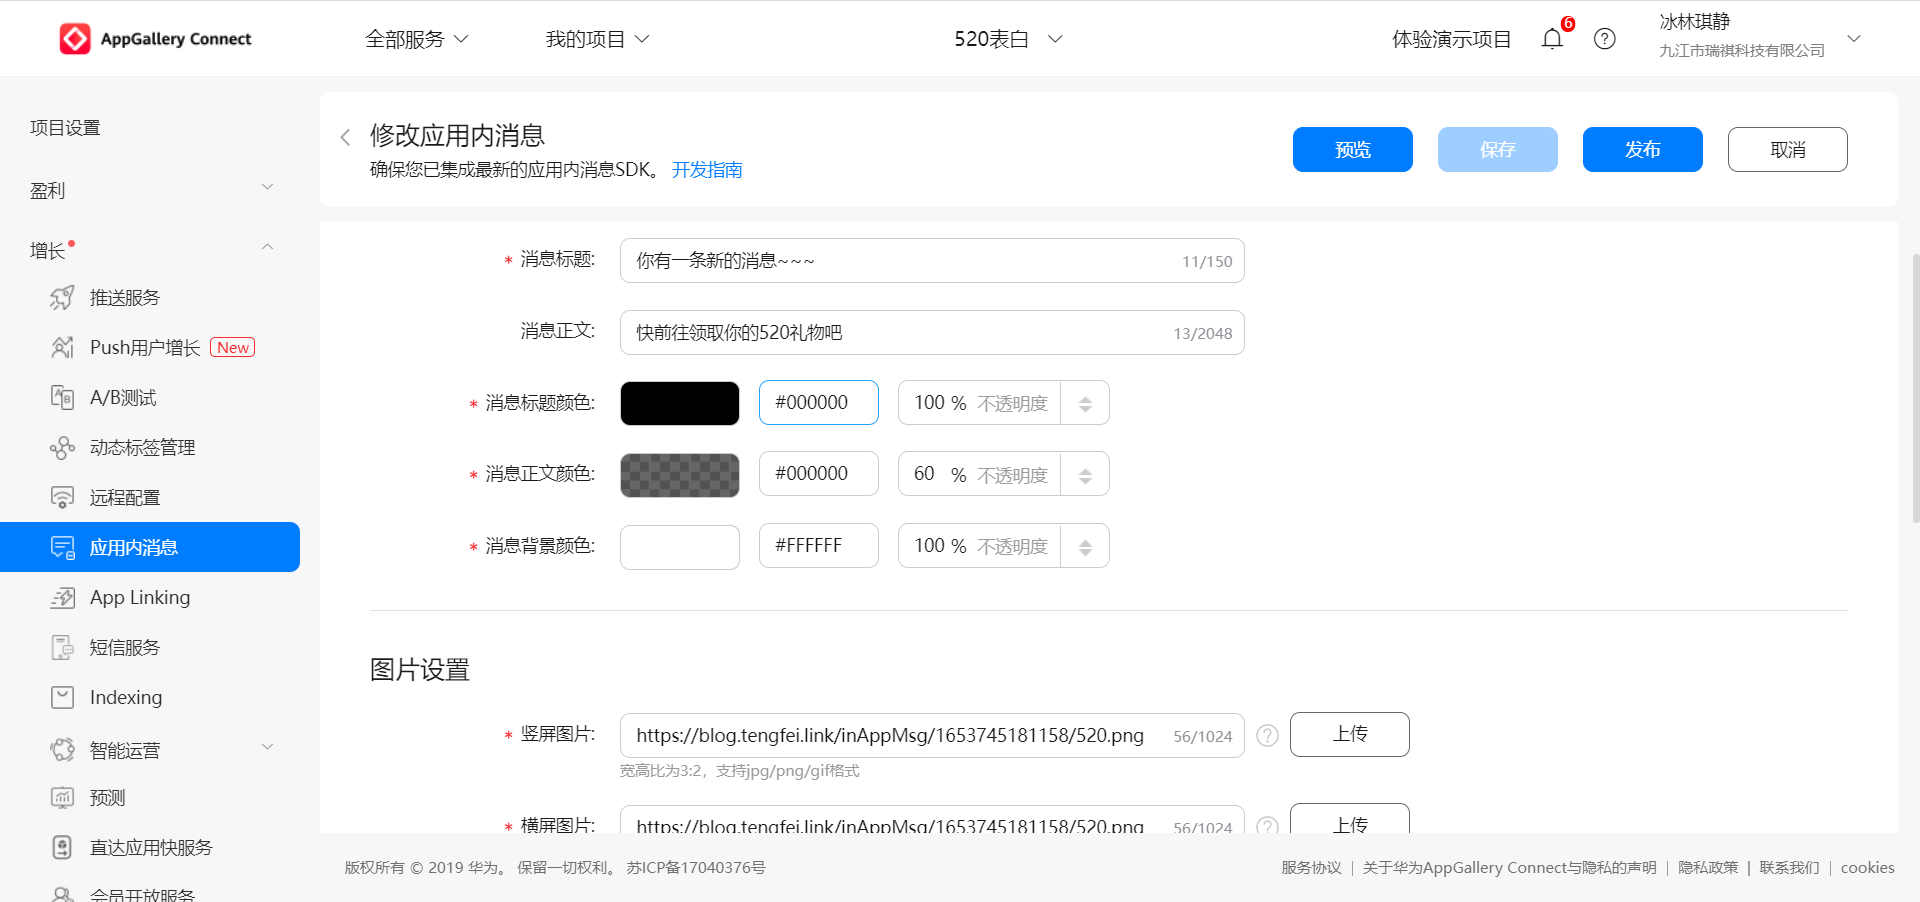
具体可参考官方文档
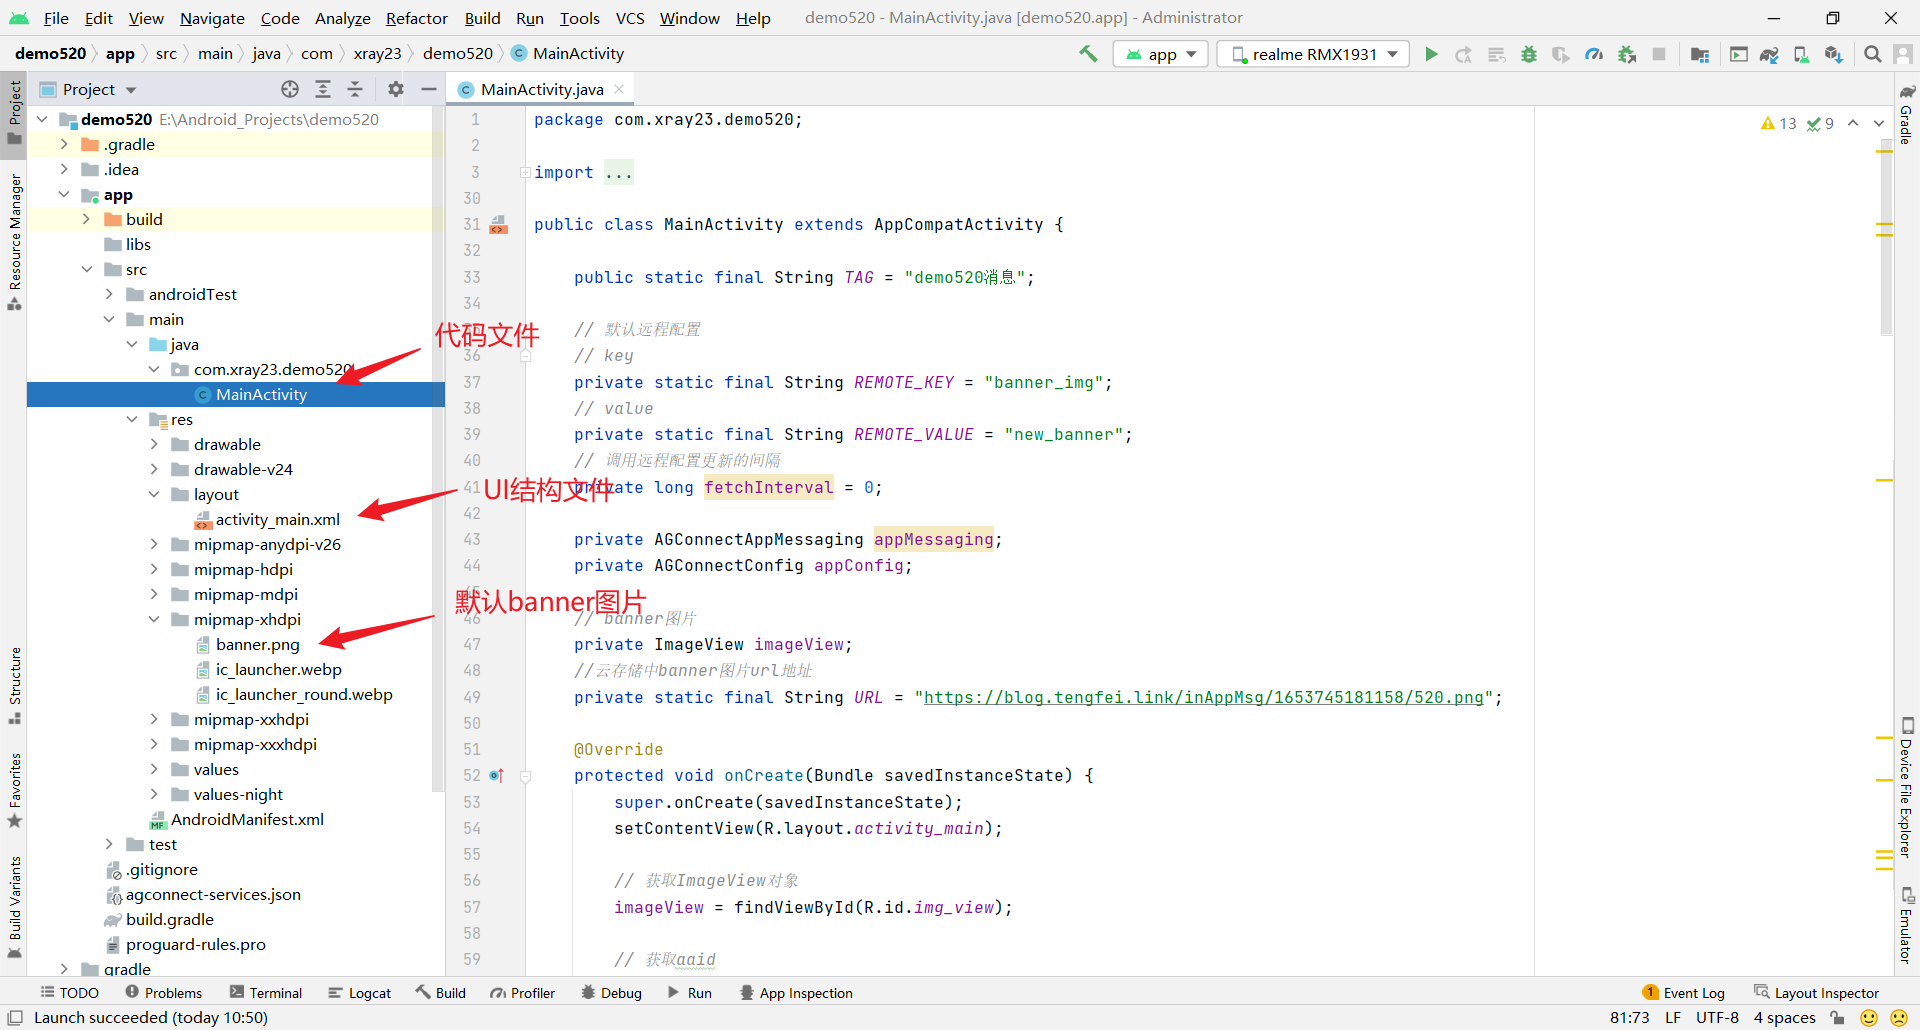
四、代码编写
1. 目录结构
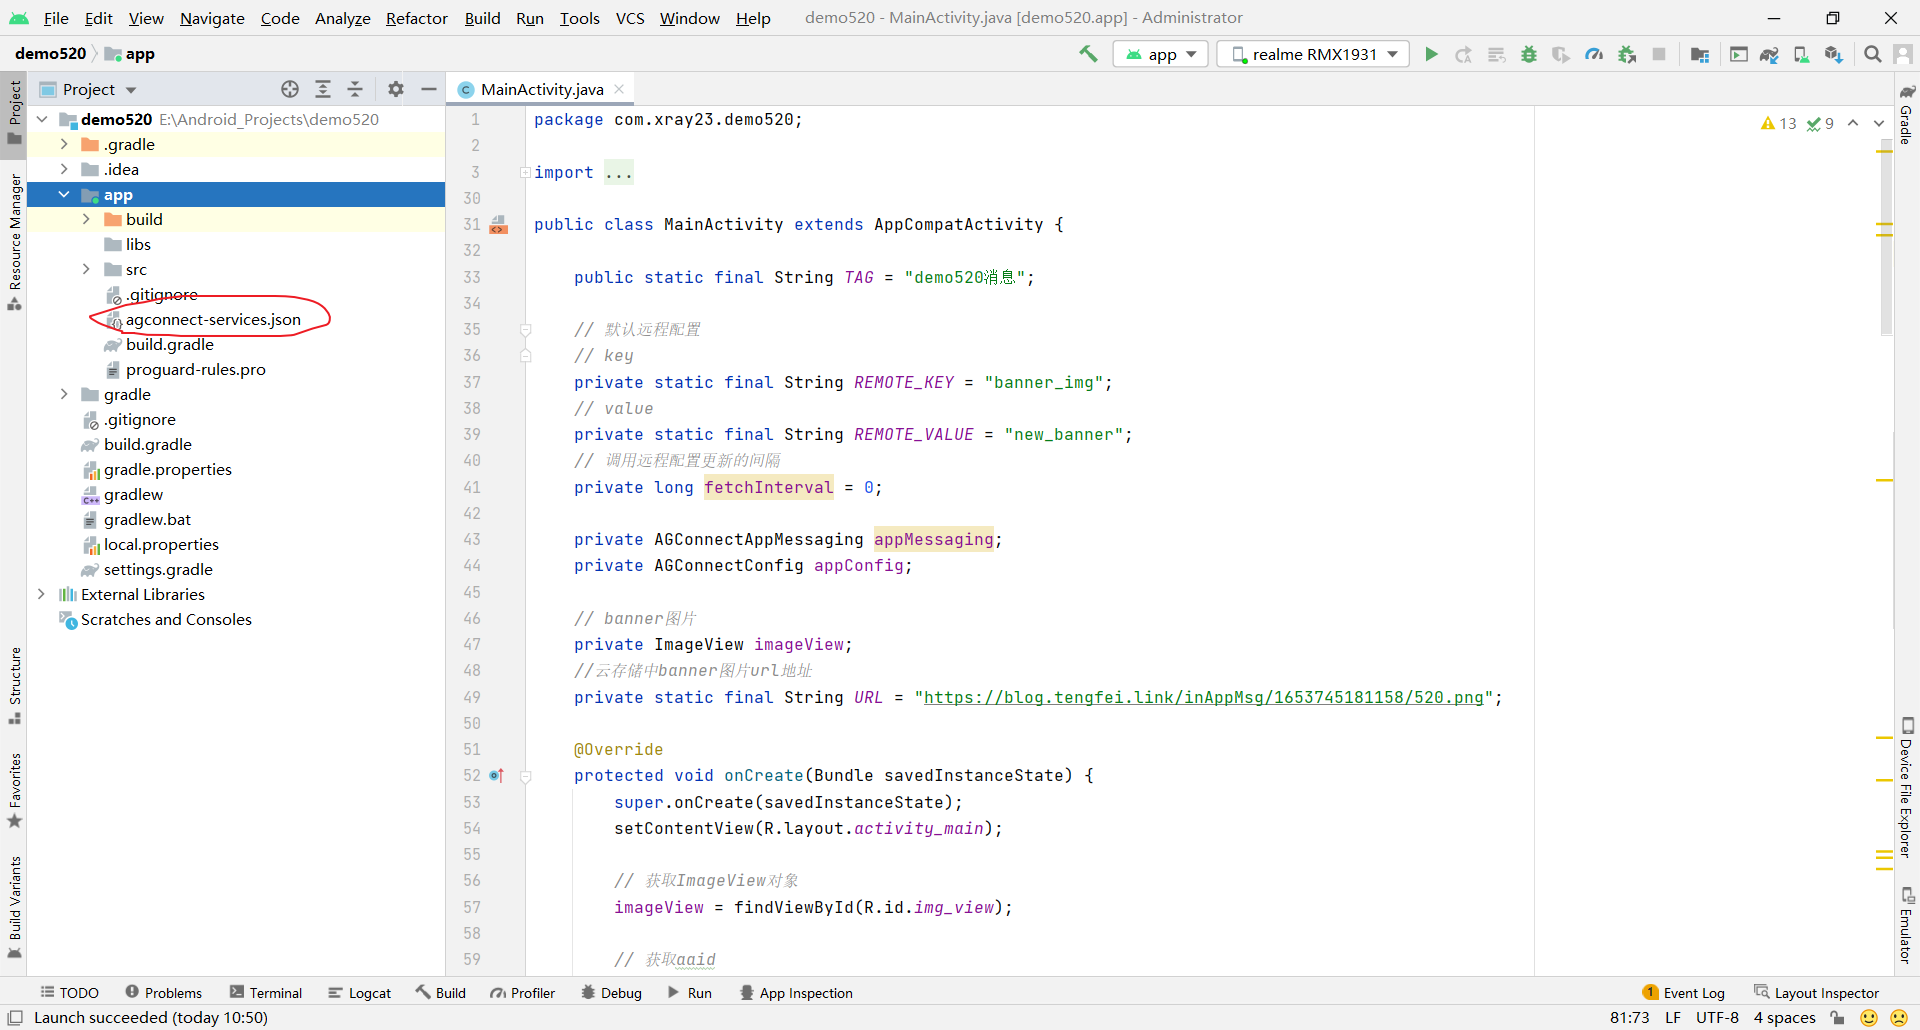
2. 配置agconnect-services.json文件
-
进入AGC平台,在你的具体项目首页,下载最新的agconnect-services.json文件
-
将下载好的文件拷贝到AndroidStudio项目的app目录下(以project的方式查看项目结构)
-
3. 配置仓库,引入依赖
- 配置仓库(配置项目级build.gradle)(具体更改参考自己项目)
// Top-level build file where you can add configuration options common to all sub-projects/modules.
buildscript {
    repositories {
        google()
        jcenter()
        //maven仓地址
        maven {url 'https://developer.huawei.com/repo/'}
    }
    dependencies {
        classpath "com.android.tools.build:gradle:4.1.0"
        //AGC插件地址
        classpath 'com.huawei.agconnect:agcp:1.6.5.300'
        // NOTE: Do not place your application dependencies here; they belong
        // in the individual module build.gradle files
    }
}

allprojects {
    repositories {
        google()
        jcenter()
        //maven仓地址
        maven {url 'https://developer.huawei.com/repo/'}
    }
}

task clean(type: Delete) {
    delete rootProject.buildDir
}
- 引入依赖(配置应用级build.gradle)(具体更改参考自己项目)
plugins {
    id 'com.android.application'
    //添加AGC的依赖
    id 'com.huawei.agconnect'
}

android {
    compileSdk 31

    defaultConfig {
        applicationId "com.xray23.demo520"
        minSdk 21
        targetSdk 31
        versionCode 1
        versionName "1.0"

        testInstrumentationRunner "androidx.test.runner.AndroidJUnitRunner"
    }

    buildTypes {
        release {
            minifyEnabled false
            proguardFiles getDefaultProguardFile('proguard-android-optimize.txt'), 'proguard-rules.pro'
        }
    }
    compileOptions {
        sourceCompatibility JavaVersion.VERSION_1_8
        targetCompatibility JavaVersion.VERSION_1_8
    }
}

dependencies {

    implementation 'androidx.appcompat:appcompat:1.2.0'
    implementation 'com.google.android.material:material:1.3.0'
    implementation 'androidx.constraintlayout:constraintlayout:2.0.4'
    testImplementation 'junit:junit:4.+'
    androidTestImplementation 'androidx.test.ext:junit:1.1.2'
    androidTestImplementation 'androidx.test.espresso:espresso-core:3.3.0'
    // glide图片加载框架
    implementation group: 'com.github.bumptech.glide', name: 'glide', version: '4.8.0'
    //agc-core的依赖
    implementation 'com.huawei.agconnect:agconnect-core:1.6.5.300'
    //应用内消息sdk
    implementation 'com.huawei.agconnect:agconnect-appmessaging:1.6.5.300'
    //远程配置sdk
    implementation 'com.huawei.agconnect:agconnect-remoteconfig:1.6.5.300'
    //华为分析SDK,查看消息展示报表需要
    implementation 'com.huawei.hms:hianalytics:6.4.1.302'
}
4. 代码编写
- activity_main.xml
<?xml version="1.0" encoding="utf-8"?>
<LinearLayout xmlns:android="http://schemas.android.com/apk/res/android"
    xmlns:tools="http://schemas.android.com/tools"
    android:layout_width="match_parent"
    android:layout_height="match_parent"
    android:orientation="vertical"
    tools:context=".MainActivity">

    <TextView
        android:layout_width="match_parent"
        android:layout_height="wrap_content"
        android:layout_marginTop="10dp"
        android:layout_marginBottom="10dp"
        android:gravity="center"
        android:text="新图片"
        android:textColor="@color/black"
        android:textSize="24dp" />

    <ImageView
        android:id="@+id/img_view"
        android:layout_width="match_parent"
        android:layout_height="wrap_content"
        android:adjustViewBounds="true"
        android:layout_marginBottom="20dp"
        android:src="@mipmap/banner" />

    <TextView
        android:layout_width="match_parent"
        android:layout_height="wrap_content"
        android:layout_marginTop="10dp"
        android:layout_marginBottom="10dp"
        android:gravity="center"
        android:text="原来图片"
        android:textColor="@color/black"
        android:textSize="24dp" />

    <ImageView
        android:layout_width="match_parent"
        android:layout_height="wrap_content"
        android:adjustViewBounds="true"
        android:src="@mipmap/banner" />

</LinearLayout>
- MainActivity.java
package com.xray23.demo520;

import androidx.appcompat.app.AppCompatActivity;

import android.content.Intent;
import android.graphics.drawable.Drawable;
import android.net.Uri;
import android.os.Bundle;
import android.util.Log;
import android.widget.ImageView;
import android.widget.Toast;

import com.bumptech.glide.Glide;
import com.huawei.agconnect.appmessaging.AGConnectAppMessaging;
import com.huawei.agconnect.appmessaging.model.Action;
import com.huawei.agconnect.appmessaging.model.AppMessage;
import com.huawei.agconnect.remoteconfig.AGConnectConfig;
import com.huawei.hmf.tasks.OnFailureListener;
import com.huawei.hmf.tasks.OnSuccessListener;
import com.huawei.hmf.tasks.Task;
import com.huawei.hms.aaid.HmsInstanceId;
import com.huawei.hms.aaid.entity.AAIDResult;

import java.io.InputStream;
import java.net.URL;

public class MainActivity extends AppCompatActivity {

    public static final String TAG = "demo520消息";

    // 默认远程配置
    // key
    private static final String REMOTE_KEY = "banner_img";
    // value
    private static final String REMOTE_VALUE = "new_banner";
    // 调用远程配置更新的间隔
    private long fetchInterval = 0;

    private AGConnectAppMessaging appMessaging;
    private AGConnectConfig appConfig;

    // banner图片
    private ImageView imageView;
    //云存储中banner图片url地址
    private static final String URL = "https://blog.tengfei.link/inAppMsg/1653745181158/520.png";

    @Override
    protected void onCreate(Bundle savedInstanceState) {
        super.onCreate(savedInstanceState);
        setContentView(R.layout.activity_main);

        // 获取ImageView对象
        imageView = findViewById(R.id.img_view);

        // 获取aaid
        getAAID();
        // 应用内消息
        configMessage();
        // 远程配置
        configRemote();

    }

    private void configRemote() {
        // 实例化
        appConfig = AGConnectConfig.getInstance();

        appConfig.fetch(fetchInterval).addOnSuccessListener(configValues -> {
            // 配置参数生效
            appConfig.apply(configValues);

            //以String方式获取参数值
            String value = appConfig.getValueAsString(REMOTE_KEY);

            if (value.equals(REMOTE_VALUE)) {
                // 使用Glide图片框架更改图片(需要在AndroidManifest.xml中加入网络访问权限)
                Glide.with(MainActivity.this).load(URL).into(imageView);
            }

        }).addOnFailureListener(e -> {
            Toast.makeText(getBaseContext(), "Fetch Fail", Toast.LENGTH_LONG).show();
        });
    }

    /**
     * 配置应用内消息
     */
    private void configMessage() {
        // 实例化
        appMessaging = AGConnectAppMessaging.getInstance();
        // 设置是否允许同步AGC服务端数据
        appMessaging.setFetchMessageEnable(true);
        // 强制请求AGC服务端消息数据
        appMessaging.setForceFetch("AppOnForeground");
        // 设置是否允许展示消息
        appMessaging.setDisplayEnable(true);
        // 消息展示监听器
        appMessaging.addOnDisplayListener(appMessage -> {
                    System.out.println("展示消息成功");
                    Toast.makeText(MainActivity.this, "展示消息成功", Toast.LENGTH_SHORT).show();
                }
        );
        // 消息点击监听器
        appMessaging.addOnClickListener((AppMessage appMessage, Action action) -> {
                    //点击后打开弹框消息设置的url
                    String urlStr = action.getActionUrl();
                    Log.i(TAG, "getActionUrl: card url" + urlStr);
                    Uri url = Uri.parse(urlStr);
                    Log.i(TAG, "onMessageClick: message clicked" + url);
                    Intent intent = new Intent(Intent.ACTION_VIEW);
                    intent.addCategory(Intent.CATEGORY_BROWSABLE);
                    intent.setData(url);
                    startActivity(intent);
                }
        );
    }

    /**
     * 获取AAID
     */
    private void getAAID() {
        Task<AAIDResult> idResult = HmsInstanceId.getInstance(getApplicationContext()).getAAID();
        idResult.addOnSuccessListener(new OnSuccessListener<AAIDResult>() {
            @Override
            public void onSuccess(AAIDResult aaidResult) {
                // 获取AAID方法成功
                String aaid = aaidResult.getId();
                Log.d(TAG, "getAAID successfully, aaid is " + aaid);
            }
        }).addOnFailureListener(new OnFailureListener() {
            @Override
            public void onFailure(Exception myException) {
                // 获取AAID失败
                Log.d(TAG, "getAAID failed, catch exception: " + myException);
            }
        });
    }

    /**
     * 加载imgUrl
     *
     * @param url
     * @return
     */
    private void loadImageFromUrl(String url) {
        new Thread(() -> {
            try {
                InputStream is = (InputStream) new URL(url).getContent();
                Drawable d = Drawable.createFromStream(is, "banner图片地址");
                imageView.setImageDrawable(d);
            } catch (Exception e) {
                System.out.println("Exc=" + e);
            }
        }).start();

    }
}
- AndroidManifest.xml
<?xml version="1.0" encoding="utf-8"?>
<manifest xmlns:android="http://schemas.android.com/apk/res/android"
    package="com.xray23.demo520">

    <uses-permission android:name="android.permission.INTERNET" /> <!-- 网络访问权限 -->

    <application
        android:allowBackup="true"
        android:icon="@mipmap/ic_launcher"
        android:label="@string/app_name"
        android:roundIcon="@mipmap/ic_launcher_round"
        android:supportsRtl="true"
        android:theme="@style/Theme.Demo520">
        <activity
            android:name=".MainActivity"
            android:exported="true">
            <intent-filter>
                <action android:name="android.intent.action.MAIN" />

                <category android:name="android.intent.category.LAUNCHER" />
            </intent-filter>
        </activity>
    </application>

</manifest>
五、展示
更多关于HarmonyOS鸿蒙Next Codelabs挑战赛—定制消息和配置:Android版定制520简易告白消息的实战教程也可以访问 https://www.itying.com/category-93-b0.html

很不错的,学习了
更多关于HarmonyOS鸿蒙Next Codelabs挑战赛—定制消息和配置:Android版定制520简易告白消息的实战系列教程也可以访问 https://www.itying.com/category-93-b0.html


棒棒哒,
基本信息
<div>
    <p>这是一些基本的说明信息。</p>
</div>
<div style="color: black; background-color: white;">
    <p>这是深色代码主题的部分,需要去除。</p>
</div>
<div>
    <p>还有一些其他的信息。</p>
    <img src="" alt="空图片链接">
</div>

姓名:张三 职位:软件工程师 简介:具有5年软件开发经验,熟悉Java、Python和C++。 技能:
- 熟练使用Spring Boot、Django
- 熟悉MySQL、MongoDB数据库
- 了解微服务架构

HarmonyOS鸿蒙Next Codelabs挑战赛中,定制消息和配置的Android版定制520简易告白消息,主要涉及HarmonyOS的分布式能力和ArkUI框架。通过HarmonyOS的分布式数据管理,可以实现跨设备的消息同步和定制。ArkUI框架提供了丰富的UI组件和布局方式,便于开发者快速构建界面。
在实现过程中,首先需要利用HarmonyOS的分布式数据管理能力,将消息内容同步到目标设备。通过DistributedDataManager类,可以实现数据的跨设备传输和同步。接着,使用ArkUI框架中的Text、Button等组件,构建消息展示界面。通过@State和@Link等装饰器,可以实现数据的动态绑定和更新。
具体实现步骤包括:1. 创建分布式数据管理实例,并注册数据监听器;2. 定义消息数据结构,并通过分布式数据管理进行同步;3. 使用ArkUI框架构建消息展示界面,绑定数据;4. 通过事件处理机制,实现消息的发送和接收。
代码示例:
import distributedData from '@ohos.data.distributedData';
import { Text, Button } from '@ohos.arkui';

@Entry
@Component
struct MessagePage {
  @State message: string = '';

  build() {
    Column() {
      Text(this.message)
      Button('发送消息')
        .onClick(() => {
          this.message = '520 告白消息';
          distributedData.setData('messageKey', this.message);
        })
    }
  }
}
通过以上步骤,可以实现HarmonyOS鸿蒙Next中的定制消息和配置功能,完成Android版定制520简易告白消息的开发。
在HarmonyOS鸿蒙Next Codelabs挑战赛中,定制520简易告白消息的Android版实现,可以通过以下步骤完成:
- 创建项目:在Android Studio中新建一个项目,选择空活动模板。
- 设计界面:在
activity_main.xml中设计一个简单的界面,包含一个EditText用于输入告白内容,一个Button用于发送消息。 - 编写逻辑:在
MainActivity.java中,为按钮设置点击事件监听器,获取EditText中的内容,并通过Toast或Snackbar显示告白消息。 - 测试运行:在模拟器或真机上运行应用,输入告白内容并点击按钮,确认消息正确显示。
通过以上步骤,即可实现一个简易的520告白消息定制应用。