


HarmonyOS鸿蒙Next中【快应用】switch组件开关的动态控制
HarmonyOS鸿蒙Next中【快应用】switch组件开关的动态控制
现象描述
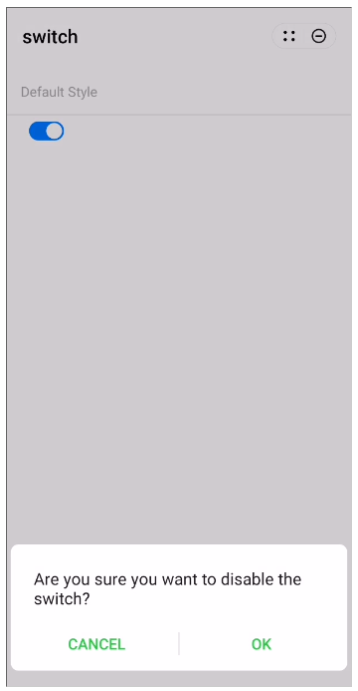
当我们在打开或关闭switch开关时,有时需要弹出对话框让用户确认是否打开或关闭,避免误操作。
例如switch开关默认处于打开状态,在用户关闭开关时,弹出对话框供用户确认。如果用户点击取消,则开关重新置于打开状态;如果用户点击确认,则开关关闭。
实现方法
switch组件的change事件可以用于响应用户打开或关闭开关的操作,通过改变switch组件的checked属性可以实现对开关的控制。
示例代码:
<template>
<div class="container">
<div class="item-container">
<text class="item-title">Default Style</text>
<stack>
<switch checked="{{checkedValue}}" id="switch" class="switch"></switch>
<div class="item-content" style="opacity: 0" "switchTouch"></div>
</stack>
</div>
</div>
</template>

<script>
import prompt from '@system.prompt';
export default {
data: {
  componentName: 'switch',
  checkedValue: true,
},
onInit() {
  this.$page.setTitleBar({
    text: 'switch'
  })
},
switchTouch: function() {
  if (this.checkedValue === false) {
    this.checkedValue = true;
  } else if (this.checkedValue === true) {
    console.log(this.checkedValue);
    var that = this
    prompt.showDialog({
      title: '',
      message: 'Are you sure you want to disable the switch?',
      buttons: [{
        text: 'OK',
        color: '#33dd44'
      }, {
        text: 'cancel',
        color: '#33dd44'
      }],
      success: function(data) {
        console.log("handling callback", data);
        if (data.index === 0) {
          that.checkedValue = false;
          console.log(that.checkedValue);
        } else {
          console.log(that.checkedValue);
        }
      },
      cancel: function() {
        console.log("cancel");
      }
    })
  }
}
}
</script>

<style>
.container {
  flex: 1;
  flex-direction: column;
}
.item-container {
  margin-top: 20px;
  margin-bottom: 30px;
  flex-direction: column;
}
.item-title {
  padding-left: 30px;
  padding-bottom: 30px;
  padding-top: 30px;
  border-bottom-width: 1px;
  border-color: #bbbbbb;
  color: #aaaaaa;
}
.item-content {
  background-color: #0000cd;
  border-bottom-width: 1px;
  border-color: #0000cd;
  margin-top: 10px;
  width: 130px;
  height: 60px;
}
</style>
实现效果:
更多关于HarmonyOS鸿蒙Next中【快应用】switch组件开关的动态控制的实战教程也可以访问 https://www.itying.com/category-93-b0.html
1 回复

更多关于HarmonyOS鸿蒙Next中【快应用】switch组件开关的动态控制的实战系列教程也可以访问 https://www.itying.com/category-93-b0.html
在HarmonyOS鸿蒙Next中,快应用的switch组件可以通过checked属性动态控制开关状态。你可以在JavaScript中通过绑定数据模型,使用this.setData方法更新checked的值,从而实现开关的动态控制。例如:
this.setData({
  isChecked: true // 或 false
});
在模板中,将checked属性绑定到isChecked:
<switch checked="{{isChecked}}" onchange="onSwitchChange"></switch>
onchange事件可用于监听开关状态变化,并在回调函数中处理逻辑。