


Flutter底部导航栏插件awesome_bottom_navigation的使用
awesome_bottom_navigation是一个用于在 Flutter 应用中实现自定义底部导航栏的插件。其灵感来源于 Dribbble 上的设计作品。
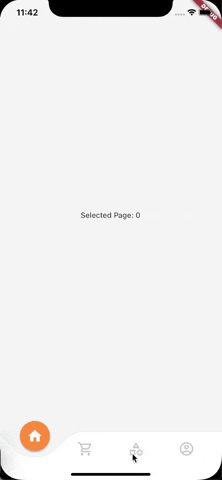
效果预览
awesome_bottom_navigation基本用法
示例代码
以下是一个完整的示例代码,展示了如何使用 awesome_bottom_navigation 插件:
import 'package:awesome_bottom_navigation/awesome_bottom_navigation.dart';
import 'package:flutter/material.dart';

void main() {
  runApp(MyApp());
}

class MyApp extends StatelessWidget {
  @override
  Widget build(BuildContext context) {
    return MaterialApp(
      title: 'Bottom Nav Demo',
      theme: ThemeData(
        primarySwatch: Colors.blue,
        visualDensity: VisualDensity.adaptivePlatformDensity,
      ),
      home: ExampleHomePage(),
    );
  }
}

class ExampleHomePage extends StatefulWidget {
  @override
  _ExampleHomePageState createState() => _ExampleHomePageState();
}

class _ExampleHomePageState extends State<ExampleHomePage> {
  int selectedIndex = 0; // 当前选中的导航项索引
  final _bgColor = Color(0xFFF6F6F6); // 页面背景颜色

  @override
  Widget build(BuildContext context) {
    return Scaffold(
      body: Container(
        color: _bgColor, // 设置页面背景颜色
        child: Center(
          child: Text("Selected Page: $selectedIndex"), // 显示当前选中的页面索引
        ),
      ),
      bottomNavigationBar: AwesomeBottomNav(
        icons: [ // 未高亮时的图标列表
          Icons.home_outlined,
          Icons.shopping_cart_outlined,
          Icons.category_outlined,
          Icons.account_circle_outlined,
        ],
        highlightedIcons: [ // 高亮时的图标列表
          Icons.home,
          Icons.shopping_cart,
          Icons.category,
          Icons.account_circle,
        ],
        onTapped: (int value) { // 点击导航项时的回调函数
          setState(() {
            selectedIndex = value; // 更新选中的索引
          });
        },
        bodyBgColor: _bgColor, // 页面背景颜色
        highlightColor: Color(0xFFFF9944), // 高亮颜色
        navFgColor: Colors.grey.withOpacity(0.5), // 导航栏前景色(图标颜色)
        navBgColor: Colors.white, // 导航栏背景颜色
      ),
    );
  }
}
代码解析
-
导入必要的库:
import 'package:awesome_bottom_navigation/awesome_bottom_navigation.dart';
import 'package:flutter/material.dart';
这里导入了
awesome_bottom_navigation和 Flutter 的核心库。 -
定义主应用:
void main() {
  runApp(MyApp());
}

class MyApp extends StatelessWidget {
  @override
  Widget build(BuildContext context) {
    return MaterialApp(
      title: 'Bottom Nav Demo',
      theme: ThemeData(
        primarySwatch: Colors.blue,
        visualDensity: VisualDensity.adaptivePlatformDensity,
      ),
      home: ExampleHomePage(),
    );
  }
}
定义了一个简单的 Flutter 应用,使用
MaterialApp作为根组件,并设置主题和主页。 -
定义主页:
class ExampleHomePage extends StatefulWidget {
  @override
  _ExampleHomePageState createState() => _ExampleHomePageState();
}
使用
StatefulWidget来管理状态。 -
状态管理:
class _ExampleHomePageState extends State<ExampleHomePage> {
  int selectedIndex = 0; // 当前选中的导航项索引
  final _bgColor = Color(0xFFF6F6F6); // 页面背景颜色

  @override
  Widget build(BuildContext context) {
    return Scaffold(
      body: Container(
        color: _bgColor, // 设置页面背景颜色
        child: Center(
          child: Text("Selected Page: $selectedIndex"), // 显示当前选中的页面索引
        ),
      ),
      bottomNavigationBar: AwesomeBottomNav(
        icons: [ // 未高亮时的图标列表
          Icons.home_outlined,
          Icons.shopping_cart_outlined,
          Icons.category_outlined,
          Icons.account_circle_outlined,
        ],
        highlightedIcons: [ // 高亮时的图标列表
          Icons.home,
          Icons.shopping_cart,
          Icons.category,
          Icons.account_circle,
        ],
        onTapped: (int value) { // 点击导航项时的回调函数
          setState(() {
            selectedIndex = value; // 更新选中的索引
          });
        },
        bodyBgColor: _bgColor, // 页面背景颜色
        highlightColor: Color(0xFFFF9944), // 高亮颜色
        navFgColor: Colors.grey.withOpacity(0.5), // 导航栏前景色(图标颜色)
        navBgColor: Colors.white, // 导航栏背景颜色
      ),
    );
  }
}
更多关于Flutter底部导航栏插件awesome_bottom_navigation的使用的实战教程也可以访问 https://www.itying.com/category-92-b0.html

更多关于Flutter底部导航栏插件awesome_bottom_navigation的使用的实战系列教程也可以访问 https://www.itying.com/category-92-b0.html
awesome_bottom_navigation 是一个用于 Flutter 的底部导航栏插件,它提供了丰富的自定义选项和动画效果,可以帮助你快速实现一个漂亮的底部导航栏。以下是如何使用 awesome_bottom_navigation 插件的步骤:
1. 添加依赖
首先,你需要在 pubspec.yaml 文件中添加 awesome_bottom_navigation 插件的依赖:
dependencies:
  flutter:
    sdk: flutter
  awesome_bottom_navigation: ^2.0.0+1  # 请检查最新版本
然后运行 flutter pub get 来安装依赖。
2. 导入包
在你的 Dart 文件中导入 awesome_bottom_navigation 包:
import 'package:awesome_bottom_navigation/awesome_bottom_navigation.dart';
3. 创建底部导航栏
接下来,你可以在你的 Scaffold 中使用 AwesomeBottomNavigation 组件来创建底部导航栏。
class MyHomePage extends StatefulWidget {
  [@override](/user/override)
  _MyHomePageState createState() => _MyHomePageState();
}

class _MyHomePageState extends State<MyHomePage> {
  int _selectedIndex = 0;

  final List<Widget> _pages = [
    Page1(),
    Page2(),
    Page3(),
  ];

  [@override](/user/override)
  Widget build(BuildContext context) {
    return Scaffold(
      body: _pages[_selectedIndex],
      bottomNavigationBar: AwesomeBottomNavigation(
        items: [
          BottomNavigationItem(
            icon: Icons.home,
            title: 'Home',
          ),
          BottomNavigationItem(
            icon: Icons.business,
            title: 'Business',
          ),
          BottomNavigationItem(
            icon: Icons.school,
            title: 'School',
          ),
        ],
        onTap: (index) {
          setState(() {
            _selectedIndex = index;
          });
        },
        selectedIndex: _selectedIndex,
      ),
    );
  }
}
4. 自定义导航栏
AwesomeBottomNavigation 提供了多种自定义选项,例如颜色、动画效果等。你可以通过以下参数进行自定义:
backgroundColor: 导航栏的背景颜色。color: 未选中项的颜色。activeColor: 选中项的颜色。iconSize: 图标的大小。titleStyle: 标题的文本样式。borderRadius: 导航栏的圆角半径。elevation: 导航栏的阴影高度。animationDuration: 动画的持续时间。
例如:
AwesomeBottomNavigation(
  items: [
    BottomNavigationItem(
      icon: Icons.home,
      title: 'Home',
    ),
    BottomNavigationItem(
      icon: Icons.business,
      title: 'Business',
    ),
    BottomNavigationItem(
      icon: Icons.school,
      title: 'School',
    ),
  ],
  onTap: (index) {
    setState(() {
      _selectedIndex = index;
    });
  },
  selectedIndex: _selectedIndex,
  backgroundColor: Colors.blue,
  color: Colors.white,
  activeColor: Colors.yellow,
  iconSize: 24.0,
  titleStyle: TextStyle(fontSize: 14.0),
  borderRadius: 20.0,
  elevation: 5.0,
  animationDuration: Duration(milliseconds: 300),
);
5. 处理页面切换
在 onTap 回调中,你可以根据选中的索引来切换页面。在上面的例子中,我们使用 _selectedIndex 来跟踪当前选中的页面,并在 setState 中更新页面。
6. 运行应用
现在你可以运行你的 Flutter 应用,查看底部导航栏的效果。
7. 其他功能
awesome_bottom_navigation 还支持其他功能,例如:
- Badge: 可以在导航项上显示徽章。
- Custom Icons: 可以使用自定义图标。
- More Items: 可以添加更多的导航项。
你可以根据需求进一步探索和定制。
示例代码
以下是一个完整的示例代码:
import 'package:flutter/material.dart';
import 'package:awesome_bottom_navigation/awesome_bottom_navigation.dart';

void main() {
  runApp(MyApp());
}

class MyApp extends StatelessWidget {
  [@override](/user/override)
  Widget build(BuildContext context) {
    return MaterialApp(
      title: 'Awesome Bottom Navigation Demo',
      theme: ThemeData(
        primarySwatch: Colors.blue,
      ),
      home: MyHomePage(),
    );
  }
}

class MyHomePage extends StatefulWidget {
  [@override](/user/override)
  _MyHomePageState createState() => _MyHomePageState();
}

class _MyHomePageState extends State<MyHomePage> {
  int _selectedIndex = 0;

  final List<Widget> _pages = [
    Center(child: Text('Home Page')),
    Center(child: Text('Business Page')),
    Center(child: Text('School Page')),
  ];

  [@override](/user/override)
  Widget build(BuildContext context) {
    return Scaffold(
      body: _pages[_selectedIndex],
      bottomNavigationBar: AwesomeBottomNavigation(
        items: [
          BottomNavigationItem(
            icon: Icons.home,
            title: 'Home',
          ),
          BottomNavigationItem(
            icon: Icons.business,
            title: 'Business',
          ),
          BottomNavigationItem(
            icon: Icons.school,
            title: 'School',
          ),
        ],
        onTap: (index) {
          setState(() {
            _selectedIndex = index;
          });
        },
        selectedIndex: _selectedIndex,
        backgroundColor: Colors.blue,
        color: Colors.white,
        activeColor: Colors.yellow,
        iconSize: 24.0,
        titleStyle: TextStyle(fontSize: 14.0),
        borderRadius: 20.0,
        elevation: 5.0,
        animationDuration: Duration(milliseconds: 300),
      ),
    );
  }
}