


HarmonyOS鸿蒙NEXT优雅的路由跳转方案 ZRouter
HarmonyOS鸿蒙NEXT优雅的路由跳转方案 ZRouter
HarmonyOS Next 优雅的路由跳转方案 ZRouter
前言
目前鸿蒙应用开发中,官方的路由跳转方案是
<del>Router 不推荐</del>Navigation 推荐
然后 HMRouter 和 ZRouter 都是基于 Navigation 做的封装。
介绍
ZRouter是一款轻量级且非侵入性的鸿蒙动态路由框架,目前在三方库上已有4,671 的下载量,也是鸿蒙生态中很流行的路由管理库。
ZRouter 已上架录入到华为鸿蒙生态伙伴组件专区
特性
ZRouter 具有以下优点:
- 简单易用
- 支持 V1 状态管理和 V2 状态管理;
- 支持 API 链式调用,让 API 更简洁直观;
- 支持 NavDestination 页面模板化
- 注解参数支持使用静态常量,可跨模块定义;
- 支持自定义与全局拦截器,可设优先级及中断逻辑,可实现页面重定向、登录验证等业务场景。
- 支持服务路由,可实现 Har/Hsp 模块间的通信;
- 支持全局及单个页面的生命周期函数管理,可使任意类都能享有与组件相同的生命周期特性,可实现页面埋点统计等业务场景;
- 支持跨多级页面参数携带返回监听;
- 支持自定义 URL 路径跳转,可在拦截器内自行解析 URL 实现业务逻辑;
- 内置多种转场动画效果(平移、旋转、渐变、缩放、高斯模糊),并支持自定义动画;
- 支持启动模式、混淆、嵌套 Navigation、Hap;
- 支持第三方 Navigation 的使用本库 API;
- 支持与您现有项目中的 Navigation 无缝融合,实现零成本向本库迁移;
- 支持 ArkUI-X 跨平台上使用;
- 未来计划:支持共享元素动画、持续优化
快速上手
1. 项目中配置router-register-plugin插件
// hvigor/hvigor-config.json5
  "dependencies": {
    "router-register-plugin":"1.3.2"
  },
2. 在模块(har、hsp、hap 都可以)的 hvigorfile.ts 文件导入 router-register-plugin 插件,如在 Entry 中进行配置
// entry/hvigorfile.ts
import { hapTasks } from "@ohos/hvigor-ohos-plugin";
import { routerRegisterPlugin, PluginConfig } from "router-register-plugin";
// 2、初始化配置
const config: PluginConfig = {
  scanDirs:["src/main/ets/pages", "src/main/ets/views"], // 扫描的目录,如果不设置,默认是扫描src/main/ets目录
  logEnabled: true, // 查看日志
  viewNodeInfo: false, // 查看节点信息
  isAutoDeleteHistoryFiles: true, // 删除无用编译产物
  lifecycleObserverAttributeName: "xxx", // 可选,设置全局的生命周期实现类在组件上的属性名,默认值是lifecycleObserver
};
export default {
  system: hapTasks /* Built-in plugin of Hvigor. It cannot be modified. */,
  plugins: [routerRegisterPlugin(config)],
};
3. 在模块中,下载安装 ZRouter
ohpm install [@hzw](/user/hzw)/zrouter
4. 在 EntryAbility 的 onCreate()方法中初始化 ZRouter
onCreate(want: Want, launchParam: AbilityConstant.LaunchParam): void {
    this.context.getApplicationContext().setColorMode(ConfigurationConstant.ColorMode.COLOR_MODE_NOT_SET);
     ZRouter.initialize((config) => {
          // config.isLoggingEnabled = BuildProfile.DEBUG
          config.isHSPModuleDependent = true
    })
  }
5. 将 page/Index.ets ,作为 ZRouter 的根容器,需要使用Navigation进行外层容器
import { Route, ZRouter } from '[@hzw](/user/hzw)/zrouter'

[@Entry](/user/Entry)
[@Component](/user/Component)
export struct Index {

  build(){
    // 获取NavPathStack实例对象
    Navigation(ZRouter.getNavStack()){
      Column({space:12}){
        Button('跳转到登录').onClick(event => {
          ZRouter.getInstance().push("Login")
        })
      }
    }
    .title('首页')
    .height('100%')
    .width('100%')
  }
}
6. 其他页面需要使用@Route 和 NavDestination 进行修饰
// entry/src/main/ets/pages/Login.ets
import { Route, ZRouter } from "[@hzw](/user/hzw)/zrouter";

[@Route](/user/Route)({ name: 'Login'})
[@Component](/user/Component)
export struct Login {

  build(){
    NavDestination(){
      Column({space:12}){
         Text("登录的页面")
          // 返回使用pop方法
      }
    }
    .title('登录')
    .width('100%')
    .height('100%')

  }
}
7. 效果

启动页的设置流程
一般 app 的启动流程都是 启动页面->主页,这里因为使用了 pages/Index.ets 作为了根容器,所以当要实现启动页流程时,其实是需要用到 3 个页面。
1. page/Index.ets 作为页面根容器
// entry/src/main/ets/pages/Index.ets
import { Route, ZRouter } from '[@hzw](/user/hzw)/zrouter'

[@Route](/user/Route)({ name: "Index" })
[@Entry](/user/Entry)
[@Component](/user/Component)
export struct Index {
  build(){
    // 获取NavPathStack实例对象
    Navigation(ZRouter.getNavStack()) {
      Column({ space: 12 }) {
        Button('跳转到登录').onClick(event => {
          ZRouter.getInstance().push("Login")
        })
      }
    }
    .title('首页')
    .height('100%')
    .width('100%')
    .onAppear(() => {
      // 跳转启动页
      ZRouter.getInstance().push("Splash")
    })
    .hideTitleBar(true)

  }
}
2. 新建一个启动页 ,完成页面展示后,跳转到真正的业务首页
// entry/src/main/ets/pages/Splash.ets
import { Route, ZRouter } from "[@hzw](/user/hzw)/zrouter";

[@Route](/user/Route)({ name: "Splash" })
[@Component](/user/Component)
export struct Splash {
  build(){
    NavDestination() {
      Column() {
        Button('Splash 启动页')
      }
      .width("100%")
      .height("100%")
      .justifyContent(FlexAlign.Center)
      .backgroundColor(Color.Yellow)
    }
    .onAppear(() => {
      // 模拟展示启动页
      setTimeout(() => {
        ZRouter.getInstance().navigation("Login")
      }, 3000)
    })
  }
}
3. 业务首页
登录页面作为,业务中的首页
// entry/src/main/ets/pages/Login.ets
import { Route, TranslateAnimationOptions, ZRouter } from "[@hzw](/user/hzw)/zrouter";

[@Route](/user/Route)({ name: 'Login' })
[@Component](/user/Component)
export struct Login {
  build(){
    NavDestination() {
      Column({ space: 12 }) {
        Text("登录的页面")
      }
    }
    .title('登录')
    .width('100%')
    .height('100%')
  }
}
4. 效果
动画转场
ZRouter 也提供了页面切换的动画效果,主要有:
- 平移
- 缩放
- 旋转
- 渐变
可以全局设置页面切换的动画,也可以单个页面设置。
全局动画
1. 在容器页面设置全局动画
import {
  OpacityAnimateOptions,
  RotateAnimateOptions,
  Route,
  ScaleAnimateOptions,
  TranslateAnimationOptions,
  ZRouter
} from '[@hzw](/user/hzw)/zrouter'

[@Entry](/user/Entry)
[@Component](/user/Component)
export struct Index {
  build(){
    // 获取NavPathStack实例对象
    Navigation(ZRouter.getNavStack()) {
      Column({ space: 12 }) {
        Button('跳转到登录').onClick(event => {
          ZRouter.getInstance().push("Login")
        })
      }
    }
    .title('首页')
    .height('100%')
    .width('100%')
    .customNavContentTransition(
      ZRouter
        .animateMgr()// 创建默认动画管理器
        .defaultAnimateBuilder()// 设置进场动画参数
        .setEnterAnimate({ duration: 500 })// 设置退场动画参数
        .setExitAnimate({ duration: 700 })// 平移
          // .addAnimateOptions(new TranslateAnimationOptions({ x: '50%', y: '50%'}))// 渐变
        .addAnimateOptions(new OpacityAnimateOptions(0.01))// 缩放
          // .addAnimateOptions(new ScaleAnimateOptions({ x: 0, y: 0}))// 旋转
          // .addAnimateOptions(new RotateAnimateOptions({ angle: 90}))// 自定义转场动画回调
        .getAnimCustomNavContentTransition())

  }
}
2. 在子页面注册和卸载动画
比如,需要跳转到登录页面,那么就在登录页面注册和卸载动画
// entry/src/main/ets/pages/Login.ets
import { Route, ZRouter } from "[@hzw](/user/hzw)/zrouter";

[@Route](/user/Route)({ name: 'Login'})
[@Component](/user/Component)
export struct Login {
  build(){
    NavDestination(){
      Column({ space: 12 }){
        Text("登录的页面")
      }
    }
    .title('登录')
    .width('100%')
    .height('100%')
    .onReady(context => {
      // 注册动画
      ZRouter.animateMgr().registerAnimParam(this, context)
    })
    .onDisAppear(() => {
      // 取消注册动画
      ZRouter.animateMgr().unregisterAnim(this)
    }) // 设置NavAnimationModifier
    .attributeModifier(ZRouter.animateMgr().modifier(this))
  }
}
3. 查看效果

单个页面动画
如果不想进行全局的页面跳转动画设置,可以给单个子页面进行设置,比如Login 页面
1. 容器页面
// entry/src/main/ets/pages/Index.ets
import {
  OpacityAnimateOptions,
  RotateAnimateOptions,
  Route,
  ScaleAnimateOptions,
  TranslateAnimationOptions,
  ZRouter
} from '[@hzw](/user/hzw)/zrouter'

[@Entry](/user/Entry)
[@Component](/user/Component)
export struct Index {
  build(){
    // 获取NavPathStack实例对象
    Navigation(ZRouter.getNavStack()) {
      Column({ space: 12 }) {
        Button('跳转到登录').onClick(event => {
          ZRouter.getInstance().push("Login")
        })
      }
    }
    .title('首页')
    .height('100%')
    .width('100%')
    // 容器页面设置
    .customNavContentTransition(
      ZRouter
        .animateMgr()
        .getAnimCustomNavContentTransition())
  }
}
2. 登录页面
// entry/src/main/ets/pages/Login.ets
import { Route, TranslateAnimationOptions, ZRouter } from "[@hzw](/user/hzw)/zrouter";

[@Route](/user/Route)({ name: 'Login'})
[@Component](/user/Component)
export struct Login {
  build(){
    NavDestination(){
      Column({ space: 12 }){
        Text("登录的页面")
      }
    }
    .title('登录')
    .width('100%')
    .height('100%')
    .onReady(context => {
      ZRouter
        .animateMgr()
        .registerAnimParam(this, context)// 设置进场动画参数(比如动画时间,播放速度等)
        .setEnterAnimate({ duration: 500, curve: Curve.LinearOutSlowIn })// 设置退场动画参数(比如动画时间,播放速度等)
        .setExitAnimate({ duration: 500, curve: Curve.LinearOutSlowIn })// 添加平移动画
        .addAnimateOptions(new TranslateAnimationOptions({ y: '100%' }))
    })
    .onDisAppear(() => {
      // 取消注册动画
      ZRouter.animateMgr().unregisterAnim(this)
    }) // 设置NavAnimationModifier
    .attributeModifier(ZRouter.animateMgr().modifier(this))

  }
}
3. 效果

生命周期
ZRouter 也提供了项目开发必备的生命周期
| 名称 | 解释 |
|---|---|
| aboutToAppear | 即将出现 |
| aboutToDisappear | 即将消失 |
| onWillAppear | 在即将出现时 |
| onAppear | 在出现时 |
| onWillShow | 在即将展示时 |
| onShown | 在已展示时 |
| onWillHide | 在即将隐藏时 |
| onHidden | 在已隐藏时 |
| onWillDisappear | 在即将消失时 |
| onDisappear | 在消失时 |
ZRouter 中提供了3 种使用生命周期的方式,差别不大,分别是字面量和class的以及直接判断
字面量
在需要使用生命周期的页面中,进行注册生命周期
// entry/src/main/ets/pages/Index.ets:1
import { ILifecycleObserver, Lifecycle, LifecycleRegistry, Route, ZRouter } from '[@hzw](/user/hzw)/zrouter'

[@Route](/user/Route)({ name: "Index" })
[@Entry](/user/Entry)
[@Component](/user/Component)
export struct Index {
  // 1 声明生命周期注册器
  @Lifecycle lifecycle: LifecycleRegistry = LifecycleRegistry.create(this);
  tag = "Index "

  aboutToAppear(): void {
    // 2、使用addObserver设置生命周期函数监听
    let that = this
    this.lifecycle.addObserver<ILifecycleObserver>({
      aboutToAppear() {
        console.log(`${that.tag}aboutToAppear`)
      },
      aboutToDisappear() {
        console.log(`${that.tag}aboutToDisappear`)
      },
      onWillAppear(r) {
        console.log(`${that.tag}onWillAppear`, r?.name, r?.navDestinationId)
      },
      onAppear(r) {
        console.log(`${that.tag}onAppear`, r?.name, r?.navDestinationId)
      },
      onWillShow(r) {
        console.log(`${that.tag}onWillShow `, r?.name, r?.navDestinationId)
      },
      onShown(r) {
        console.log(`${that.tag}onShown `, r?.name, r?.navDestinationId)
      },
      onWillHide(r) {
        console.log(`${that.tag}onWillHide `, r?.name, r?.navDestinationId)
      },
      onHidden(r) {
        console.log(`${that.tag}onHidden `, r?.name, r?.navDestinationId)
      },
      onWillDisappear(r) {
        console.log(`${that.tag}onWillDisappear `, r?.name, r?.navDestinationId)
      },
      onDisappear(r) {
        console.log(`${that.tag}onDisappear `, r?.name, r?.navDestinationId)
      }
    })
  }

  build(){
    // 获取NavPathStack实例对象
    Navigation(ZRouter.getNavStack()) {
      Column({ space: 12 }) {
        Button('跳转到登录').onClick(event => {
          ZRouter.getInstance().push("Login")
        })
      }
    }
    .title('首页')
    .height('100%')
    .width('100%')

  }
}
class 的方式
1. 用 class 的方式定义 class
// 1 定义生命周期class
@Observed
export class LifecycleModel implements ILifecycleObserver {
  private tag = "class的生命周期: ";
  loadState: string = "请求数据中...";
  counter: number = 0;

  aboutToAppear(): void {
    console.log(this.tag + "aboutToAppear");
  }

  aboutToDisappear(): void {
    console.log(this.tag + "aboutToDisappear");
  }

  onWillAppear(info: RouterInfo): void {
    console.log(this.tag + "onWillAppear");
  }

  onAppear(info: RouterInfo): void {
    console.log(this.tag + "onAppear");
    // 模拟请求数据
    setTimeout(() => {
      this.counter = 100;
    }, 3000);
  }

  onWillShow(info: RouterInfo): void {
    console.log(this.tag + "onWillShow");
  }

  onShown(info: RouterInfo): void {
    console.log(this.tag + "onShown");
  }

  onWillHide(info: RouterInfo): void {
    console.log(this.tag + "onWillHide");
  }

  onHidden(info: RouterInfo): void {
    console.log(this.tag + "onHidden");
  }

  onWillDisappear(info: RouterInfo): void {
    console.log(this.tag + "onWillDisappear");
  }

  onDisappear(info: RouterInfo): void {
    console.log(this.tag + "onDisappear");
  }
}
2. 在页面中使用
[@Route](/user/Route)({ name: "Index" })
[@Entry](/user/Entry)
[@Component](/user/Component)
export struct Index {
  // 2 使用生命周期class
  @State viewModel: LifecycleModel = new LifecycleModel()
  @Lifecycle lifecycle: LifecycleRegistry = LifecycleRegistry.create(this);

  aboutToAppear(): void {
    // 3 注册监听
    this.lifecycle.addObserver(this.viewModel)
  }

  build(){
    // 获取NavPathStack实例对象
    Navigation(ZRouter.getNavStack()) {
      Column({ space: 12 }) {
        Button('跳转到登录').onClick(event => {
          ZRouter.getInstance().push("Login")
        })
      }
    }
    .title('首页')
    .height('100%')
    .width('100%')

  }
}
直接判断
通过 this.lifecycle.addListener 直接判断。
// entry/src/main/ets/pages/Index.ets:1
import { Lifecycle, LifecycleRegistry, Route, ZRouter } from '[@hzw](/user/hzw)/zrouter'


[@Route](/user/Route)({ name: "Index" })
[@Entry](/user/Entry)
[@Component](/user/Component)
export struct Index {
  @Lifecycle lifecycle: LifecycleRegistry = LifecycleRegistry.create(this);

  aboutToAppear(): void {
    // 直接判定
    this.lifecycle.addListener(pageName => {
      // pageName 生命周期函数的名字  aboutToAppear、onPageShow等
      console.log('--2--', pageName, r?.name ?? "", r?.navDestinationId ?? "")
    })
  }

  build(){
    // 获取NavPathStack实例对象
    Navigation(ZRouter.getNavStack()) {
      Column({ space: 12 }) {
        Button('跳转到登录').onClick(event => {
          ZRouter.getInstance().push("Login")
        })
      }
    }
    .title('首页')
    .height('100%')
    .width('100%')

  }
}
拦截器
ZRouter 支持多个拦截器和全局拦截器,在拦截器中可以做页面跳转的拦截,比如跳转前拦截、数据预取、登录拦截,404 拦截、埋点、自定义 URL 路径等等。
| 拦截器 | 解释 |
|---|---|
| onNavigateBefore | 在跳转之前回调 |
| onRootWillShow | Navigation 根视图显示时回调 |
| onPageWillShow | 页面显示时回调 |
| onNavigate | 页面 push 或者 replace 跳转时回调 |
| onShowCallback | 页面显示回调 |

常规使用
1. 定义拦截器 class
// entry/src/main/ets/utils/GlobalNavigateInterceptor.ets
import {
IGlobalNavigateInterceptor,
DestinationInfo,
InterceptorInfo,
ZRouter,
RedirectType,
} from "[@hzw](/user/hzw)/zrouter";
import { promptAction } from "@kit.ArkUI";
export class GlobalNavigateInterceptor implements IGlobalNavigateInterceptor {
static count = 0;
/**
* 在跳转之前回调,可以在此回调中拦截跳转做一些自定义的逻辑,比如修改路由参数、数据预取、拦截跳转、拦截登录等场景
* @param dest
* @returns DestinationInfo#action 为NavigationAction.BLOCK 则表示拦截跳转,NEXT继续执行
* @note
* 如果通过ZRouter.getNavStack().push()方法跳转,则不会回调此方法,后续会考虑兼容
* 只有通过ZRouter.getInstance().push()方法跳转时会回调此方法
*/
onNavigateBefore: (destInfo: DestinationInfo) => Promise<DestinationInfo> = (
destInfo
) => {
console.log("IInterceptor Global onNavigateBefore -> ", destInfo.name);
return new Promise((resolve, _) => {
// 拦截页面1
if (destInfo.name === "Login") {
console.log("拦截了登录页面");
// 拦截跳转到Login页面
if (GlobalNavigateInterceptor.count === 0) {
// 自己定义的一些逻辑
destInfo.param = " 在拦截器onNavigateBefore中已替换参数 ";
destInfo.next(); // 继续跳转 默认的 ,可以不写
}
}
resolve(destInfo);
});
};
/**
* Navigation根视图显示时回调
* @param fromContext
*/
onRootWillShow: (fromContext: NavDestinationContext) => void | undefined = (
fromContext
) => {
console.log(
"IInterceptor Global onRootWillShow: ",
fromContext.pathInfo.name
);
};
/**
* 页面显示时回调,当fromContext、toContext是一样时,则在NavBar根页面中启动的
* @param fromContext
* @param toContext
*/
onPageWillShow:
| ((fromContext: NavDestinationContext, toContext: NavDestinationContext) => void)
| undefined = (from, to) => {
console.log(
"IInterceptor Global onPageWillShow: ",
from,
to.pathInfo.name,
to.pathInfo.param
);
};
/**
* 页面push 或者 replace跳转时回调
* @param context
*/
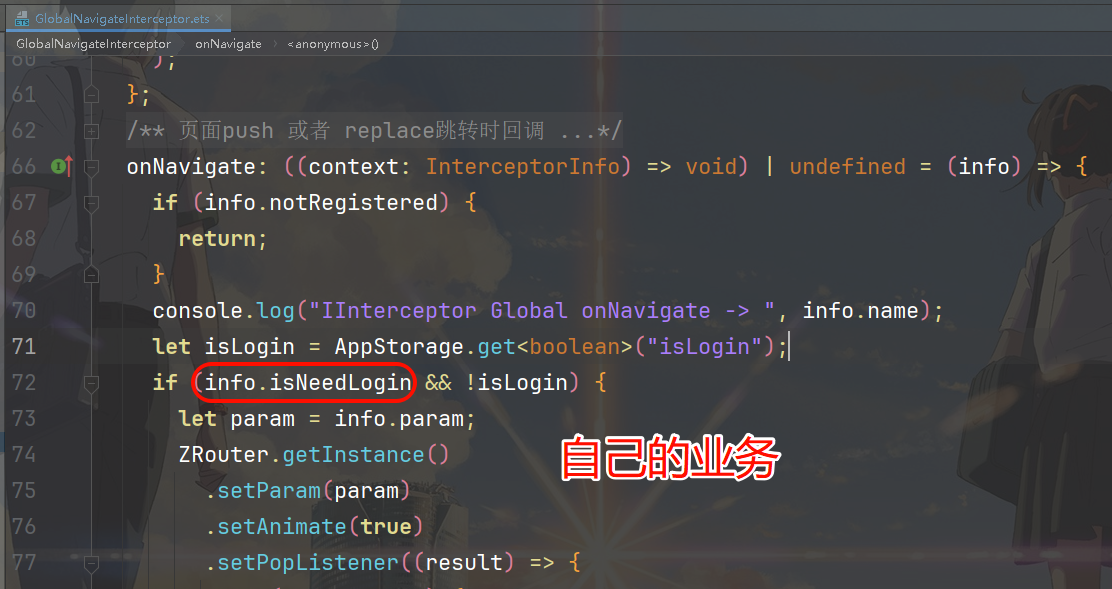
onNavigate: (context: InterceptorInfo) => void | undefined = (info) => {
if (info.notRegistered) {
return;
}
console.log("IInterceptor Global onNavigate -> ", info.name);
let isLogin = AppStorage.get<boolean>("isLogin");
if (info.isNeedLogin && !isLogin) {
let param = info.param;
ZRouter.getInstance()
.setParam(param)
.setAnimate(true)
.setPopListener(result => {
if (result.data) {
// 登录成功
promptAction.showToast({ message: `登录成功` });
return true; // 返回true 则继续跳转登录前的页面
} else {
return false;
}
})
.redirect("LoginPage", RedirectType.REPLACE);
}
};
/**
* 页面显示回调,鸿蒙sdk默认的,没有处理逻辑,如果其他的回调函数无法满足你的需求,可考虑在这里实现
* @param context
*/
onShowCallback: InterceptionShowCallback = info => {};
}
2. 注册使用
// entry/src/main/ets/pages/Index.ets:1
import { Route, ZRouter } from '[@hzw](/user/hzw)/zrouter'
import { GlobalNavigateInterceptor } from '../utils/GlobalNavigateInterceptor';


[@Route](/user/Route)({ name: "Index" })
[@Entry](/user/Entry)
[@Component](/user/Component)
export struct Index {
  aboutToAppear(): void {
    // 添加拦截器
    ZRouter.setGlobalInterceptor(new GlobalNavigateInterceptor());
  }

  build(){
    // 获取NavPathStack实例对象
    Navigation(ZRouter.getNavStack()) {
      Column({ space: 12 }) {
        Button('跳转到登录').onClick(event => {
            // 此时会触发拦截器
          ZRouter.getInstance().push("Login")
        })
      }
    }
    .title('首页')
    .height('100%')
    .width('100%')
  }
}
needLogin
普通的页面在使用装饰器 @Route 的时候,也可以传递一个属性needlogin:boolean,该属性会在拦截器中出现,我们可以结合该属性进行登录的权限校验。
1. 页面中使用
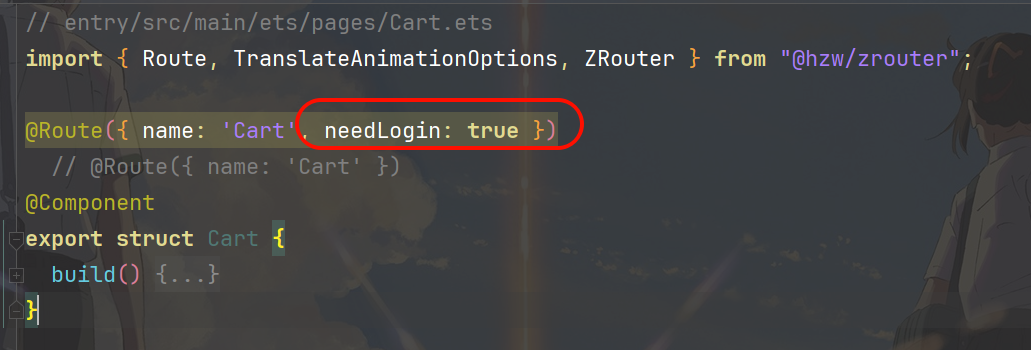
然后当跳转到这个页面时,拦截器中的就可以获取到该属性
ZRouter.getInstance().push("Cart")
2. 拦截器中处理
携带参数跳转
跳转页面的时候携带参数的写法比较简单
1. 携带参数跳转 setParam
// entry/src/main/ets/pages/Index.ets:1
import { Route, ZRouter } from '[@hzw](/user/hzw)/zrouter'


export interface IGoods {
  num: number
  name: string
}

[@Route](/user/Route)({ name: "Index" })
[@Entry](/user/Entry)
[@Component](/user/Component)
export struct Index {
  build(){
    // 获取NavPathStack实例对象
    Navigation(ZRouter.getNavStack()) {
      Column({ space: 12 }) {
        Button('跳转到登录').onClick(event => {
          // ZRouter.getInstance().push("Login")
          ZRouter.getInstance()
            .setParam({ num: 100, name: "手机" })
            .push("Login")
        })
      }
    }
    .title('首页')
    .height('100%')
    .width('100%')

  }
}
2. 获取页面参数 getParam
// entry/src/main/ets/pages/Login.ets
import { Route, TranslateAnimationOptions, ZRouter } from "[@hzw](/user/hzw)/zrouter";
import { IGoods } from "./Index";

[@Route](/user/Route)({ name: 'Login' })
[@Component](/user/Component)
export struct Login {
  build(){
    NavDestination(){
      Column({ space: 12 }){
        Text("登录的页面")
      }
    }
    .title('登录')
    .width('100%')
    .height('100%')
    .onReady(context => {
      const param = ZRouter.getInstance().getParam() as IGoods
      console.log("参数", param.num, param.name)

    })

  }
}
跨模块跳转
这里演示两个模块,一个是hap-entry,另外一个是hsp-library,演示entry跳转到 library 模块。
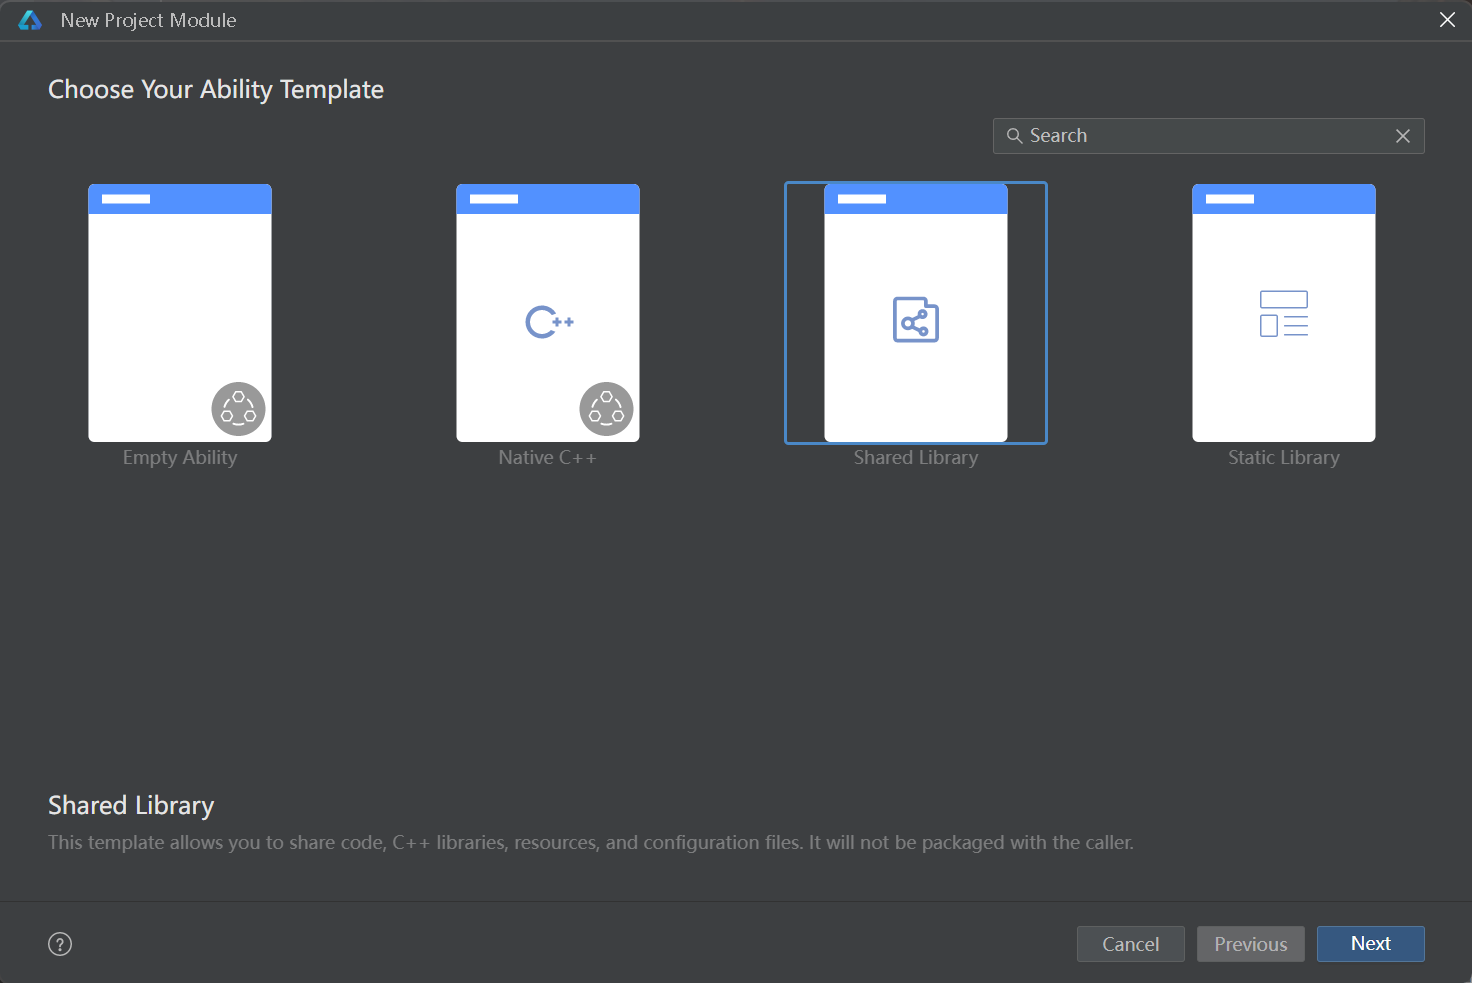
1. 项目中新建 hsp 模块-library
2. library 模块下载 ZRouter library/oh-package.json5
  "dependencies": {
    "[@hzw](/user/hzw)/zrouter": "^1.4.1",
  }
3. library模块在 hvigorfile.ts 导入 router-register-plugin
// library/hvigorfile.ts
import { hspTasks } from "@ohos/hvigor-ohos-plugin";
import { routerRegisterPlugin, PluginConfig } from "router-register-plugin";

// 2、初始化配置
const config: PluginConfig = {
  scanDirs:["src/main/ets/pages", "src/main/ets/views"], // 扫描的目录,如果不设置,默认是扫描src/main/ets目录
  logEnabled: true, // 查看日志
  viewNodeInfo: false, // 查看节点信息
  isAutoDeleteHistoryFiles: true, // 删除无用编译产物
  lifecycleObserverAttributeName: "xxx", // 可选,设置全局的生命周期实现类在组件上的属性名,默认值是lifecycleObserver
};

export default {
  system: hspTasks /* Built-in plugin of Hvigor. It cannot be modified. */,
  plugins: [
    routerRegisterPlugin(config),
  ] /* Custom plugin to extend the functionality of Hvigor. */,
};
4. library模块新建 Info 页面
// library/src/main/ets/pages/Info.ets
import { Route } from "[@hzw](/user/hzw)/zrouter"

[@Route](/user/Route)({ name: "Info" })
[@Component](/user/Component)
export struct Info {
  build(){
    NavDestination() {
      Column() {
        Button('Info')
      }
      .width("100%")
      .height("100%")
      .justifyContent(FlexAlign.Center)
    }
  }
}
5. entry 模块引入其他模块 entry/oh-package.json5
  "dependencies": {
    "[@hzw](/user/hzw)/zrouter": "^1.4.1",
    "library": "file:../library"
  },
6. 进行页面跳转
// entry/src/main/ets/pages/Index.ets:1
import { Route, ZRouter } from '[@hzw](/user/hzw)/zrouter'
import { GlobalNavigateInterceptor } from '../utils/GlobalNavigateInterceptor';

export interface I13 {
  id: number;
  name: string
}

[@Route](/user/Route)({ name: "Index" })
[@Entry](/user/Entry)
[@Component](/user/Component)
export struct Index {
  aboutToAppear(): void {
    // 添加拦截器
    ZRouter.setGlobalInterceptor(new GlobalNavigateInterceptor());
  }

  build(){
    // 获取NavPathStack实例对象
    Navigation(ZRouter.getNavStack()) {
      Column({ space: 12 }) {
        Button('跳转到登录').onClick(event => {
          ZRouter.getInstance().push("Login")
        })
        Button('跳转到购物车').onClick(event => {
          ZRouter.getInstance().push("Cart")
        })
        Button("跳转到商品详情页面")
          .onClick(() => {
            ZRouter.getInstance().setParam({
              id: 1,
              name: "商品1"
            })
              .push("Goods")
          })

        Button('跳转到信息详情页面').onClick(event => {
          ZRouter.getInstance().push("Info")
        })
      }
    }
    .
更多关于HarmonyOS鸿蒙NEXT优雅的路由跳转方案 ZRouter的实战教程也可以访问 https://www.itying.com/category-93-b0.html

在HarmonyOS鸿蒙NEXT中,ZRouter是基于ArkTS实现的路由框架,专为单页应用设计。它提供声明式路由配置,支持动态路由、拦截器和参数传递。ZRouter通过@Route装饰器标注页面路径,使用ZRouter.push("pages/HomePage")方法跳转。路由信息存储在ZRouterConfig中,可通过ZRouter.getParams()获取传递参数。该方案简化了页面间通信,无需依赖第三方库,性能优于传统导航方式。
更多关于HarmonyOS鸿蒙NEXT优雅的路由跳转方案 ZRouter的实战系列教程也可以访问 https://www.itying.com/category-93-b0.html

ZRouter确实是一个优秀的HarmonyOS Next路由解决方案,它基于官方推荐的Navigation进行了深度封装,提供了更便捷的开发体验。从技术实现角度来看,它有几个值得关注的亮点:
-
架构设计上采用了插件化思想,通过router-register-plugin实现编译时路由注册,避免了运行时反射带来的性能损耗。
-
动画系统设计精良,支持多种预置动画效果的同时,通过NavAnimationMgr提供了灵活的扩展机制,开发者可以自定义复杂动画效果。
-
拦截器链的实现采用了责任链模式,支持优先级设置和中断控制,这种设计非常适合实现AOP编程范式。
-
跨模块通信通过HSP动态加载机制实现,结合服务路由的设计,解决了模块化解耦的关键问题。
-
生命周期管理采用了观察者模式,将系统生命周期事件转化为更细粒度的回调,方便业务逻辑组织。
在实际项目中使用时,建议注意:
-
对于复杂路由场景,合理规划stack管理
-
动画效果要考虑性能影响
-
拦截器逻辑要保持简洁高效
总体来说,ZRouter的架构设计和功能实现都达到了较高水平,是当前HarmonyOS生态中路由方案的最佳选择之一。