


HarmonyOS 鸿蒙Next学习记录part1
HarmonyOS 鸿蒙Next学习记录part1
记录关于最近遇到的一些问题和解决方案
入手学习的最初设计目标是实现设备网络状态的读取与展示,如图:

(虽然掌握一些ArkUI基础知识,但有实践起来点不知天高地厚了,初始目标设这么高还怎么搞,蒜鸟蒜鸟~),接下来那就开始吧。要实现网络状态的读取,那肯定得先将设备连接到网络吧,B站视频太长太杂懒得看,官方文档字都认识合着就看不懂了,问AI是个好办法,可是要问什么我也不知道,酸鸟放弃鸟…几天后…老老实实写吧:
// 首先创建网络连接对象
this.netConnection = connection.createNetConnection();
// 然后注册网络状态监听
this.netConnection.register((error: BusinessError) => {
  if (error) {
    // 注册失败处理
    hilog.error(0x0000, 'mxxx', '监听注册失败:%{public}s', error.message);  // 管他能不能解决,先打印看看
    this.cleanup(); // 清理网络监听资源(错都错了,放了吧)
    reject('监听初始化失败');
  } else {
    console.log('监听已启动');
  }
});
到此,如果运气好就会有好消息(result)返回,那还等什么,赶紧on起来吧:
// 监听网络可用事件
this.netConnection.on('netAvailable', (data: connection.NetHandle) => {
  if (this.resolveCallback) {
    // 根据netId判断是否是默认网络
    const result = data.netId == 0 ? '网络已连接' : '网络已连接(非默认网络)';
    console.log(result);
    // 返回网络状态
    this.resolveCallback(result);
    // 清空回调引用,确保只返回一次结果
    this.resolveCallback = null;
    // 清理监听资源
    this.cleanup();
  }
});
// 监听网络丢失事件
this.netConnection.on('netLost', (data: connection.NetHandle) => {
  if (this.resolveCallback) {
    const result = "网络丢失";
    console.log(result + JSON.stringify(data.netId));
    this.resolveCallback(result);
    this.resolveCallback = null;
    this.cleanup();
  }
});
// 监听网络不可用事件
this.netConnection.on('netUnavailable', () => {
  if (this.resolveCallback) {
    const result = "网络已断开";
    console.log(result);
    this.resolveCallback(result);
    this.resolveCallback = null;
    this.cleanup();
  }
});
非常好(我真是有开发天赋,请叫我大拿),结果已经出来了:

至于对不对那就看缘分了…然后网络连接是有了,接下来就该判断类型:
connection.getDefaultNet() // 用于获取当前默认网络连接信息的方法
connection.getNetCapabilities() // 用于获取当前网络连接能力的方法

await connection.getDefaultNet().then(async (data: connection.NetHandle) => {
  if (data.netId === 0) {
    result = "网络错误";
    console.info(result);
    return;
  }

await connection.getNetCapabilities(data).then((data: connection.NetCapabilities) => {
  let bearerTypes: Set<number> = new Set(data.bearerTypes);
  let bearerTypesNum = Array.from(bearerTypes.values());
  for (let item of bearerTypesNum) {
    if (item == 0) {
      result = "蜂窝网络";
      console.log(JSON.stringify("BEARER_CELLULAR") + result);
    } else if (item === 1) {
      result = "Wi-Fi网络";
      console.log(JSON.stringify("BEARER_WIFI") + result);
    } else if (item === 2) {
      result = "蓝牙网络";
      console.log(JSON.stringify("BEARER_BLUETOOTH") + result);
    } else if (item === 3) {
      result = "以太网网络";
      console.log(JSON.stringify("BEARER_ETHERNET") + result);
    } else if (item === 4) {
      result = "VPN网络";
      console.log(JSON.stringify("BEARER_VPN") + result);
    } else {
      return;
    }
  }
})
这块感觉还行,也不难嘛(事后诸葛亮)…

对了,这还涉及一个非常重要的点–“异步网络操作async" (我还没想好该怎么写,后面再说吧)。
最后获取当前网速,听说是要实战中通过API获取,反正我不会接API,那就随机来一个数反正不是零就行
private lastBytesReceived: number = 0;
private lastBytesSent: number = 0;
private lastCheckTime: number = 0;

/**
 * 计算当前网络速度
 */
private calculateSpeed(): void {
  if (!this.netConnection) {
    return;
  }

  // 实际项目中应替换为获取真实网络统计数据的API
  // 以下是模拟实现逻辑
  const now = Date.now();
  const timeDiff = (now - this.lastCheckTime) / 1000;

  if (timeDiff > 0) {
    // 模拟数据变化 - 实际项目中使用真实API获取
    const currentReceived = this.lastBytesReceived + Math.random() * 1024 * 100;
    const currentSent = this.lastBytesSent + Math.random() * 1024 * 50;

    const downloadSpeed = (currentReceived - this.lastBytesReceived) / timeDiff;
    const uploadSpeed = (currentSent - this.lastBytesSent) / timeDiff;

    this.lastBytesReceived = currentReceived;
    this.lastBytesSent = currentSent;
    this.lastCheckTime = now;

    // 格式化并发送更新(无非就是换换单位,反正没人看,罢了懒得写,少占用官方资源)
    this.emitSpeedUpdate(
      this.formatSpeed(uploadSpeed),
      this.formatSpeed(downloadSpeed)
    );
  }
}
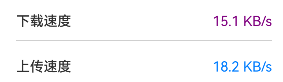
就当我实现了最初的梦想:
更多关于HarmonyOS 鸿蒙Next学习记录part1的实战教程也可以访问 https://www.itying.com/category-93-b0.html

HarmonyOS Next是华为新一代操作系统,采用微内核分布式架构,不支持Android应用。开发者需使用ArkTS语言进行应用开发,IDE工具为DevEco Studio 4.0以上版本。系统提供全新的API 10接口,强调一次开发多端部署能力。关键特性包括元服务、原子化服务和全新权限管理机制。应用打包格式为.app,调试需使用真机或官方模拟器。开发文档可在华为开发者联盟官网获取最新版本。
更多关于HarmonyOS 鸿蒙Next学习记录part1的实战系列教程也可以访问 https://www.itying.com/category-93-b0.html

从你的学习记录来看,你已经很好地掌握了HarmonyOS网络状态监测的核心功能实现。以下是几点技术要点补充:
-
网络连接监听部分你使用了
connection.createNetConnection()创建连接对象,并通过register()方法注册监听,这是正确的做法。建议在实际应用中增加try-catch块处理可能的异常。 -
网络类型判断部分,你正确使用了
getDefaultNet()和getNetCapabilities()方法,并通过bearerTypes判断网络类型。注意BearerType枚举值:- 0: CELLULAR
- 1: WIFI
- 2: BLUETOOTH
- 3: ETHERNET
-
异步处理方面,你提到了
async/await的使用。在HarmonyOS网络API中,大部分操作都是异步的,使用Promise或async/await是正确的选择。 -
网速计算部分你采用了模拟实现,实际项目中可以使用
@ohos.net.statistics模块获取真实网络统计数据。
建议下一步可以:
- 完善错误处理机制
- 考虑网络状态变化的实时更新
- 增加网络质量检测功能
你的实现已经展示了HarmonyOS网络能力的基本用法,继续深入可以探索更多高级网络功能。