


HarmonyOS 鸿蒙Next VPN适配相关问题
HarmonyOS 鸿蒙Next VPN适配相关问题
VPN适配鸿蒙Next系统遇到2个问题,求大佬们支持 !
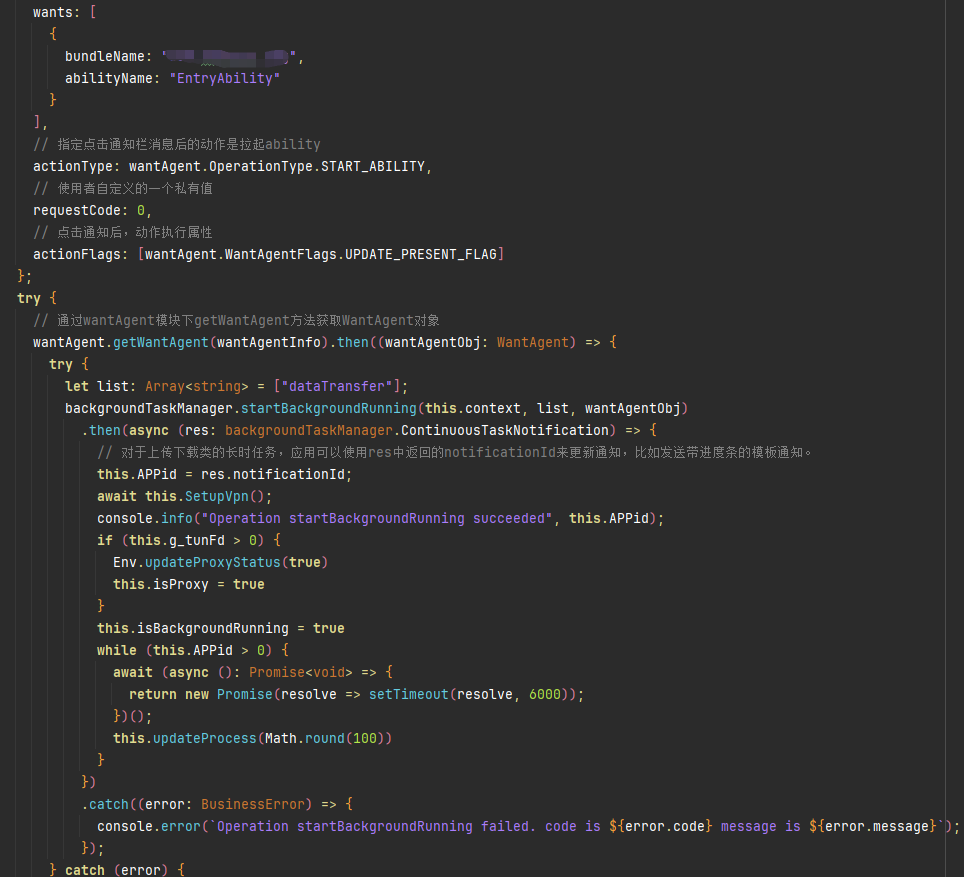
- 申请后台长时任务,10分支后自动退出。期间一直有进行数据的传输,且按照官方提供的文档,更新任务进度。会产生两个长时任务,主长时任务会退出 导致程序被挂起,更新进度的长时任务不会退出。代码如下:
申请长时任务:
更新长时任务进度
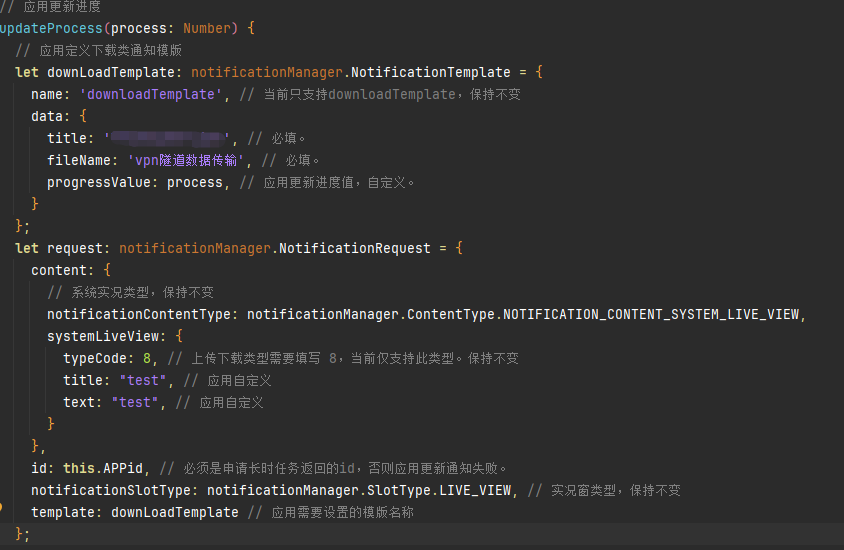 由于是VPN长时任务,不存在进度条的概率,故使用生成随机数来代理数据传输进度。
- 创建的VPN,存在丢包情况,HTTP协议正常,HTTPS在进行加密套件VPN传输时,会存在丢包。导致client与server之间TLS协商加密套件等失败,无法建连。如果VPN创建成功后,第一次与服务发起HTTPS连接。不会存在问题。但是第一次通过VPN传输HTTP请求,再发起HTTPS请求必出现丢包的情况。考虑是否存在缓存或者其他机制。从而导致该问题
更多关于HarmonyOS 鸿蒙Next VPN适配相关问题的实战教程也可以访问 https://www.itying.com/category-93-b0.html

开始申请长时任务和每隔一分钟调用一次 this.updateProcess() 来更新通知,要一起处理,请参考以下代码:
function callback(info: backgroundTaskManager.ContinuousTaskCancelInfo) {
  // 长时任务id
  console.info('OnContinuousTaskCancel callback id ' + info.id);
  // 长时任务取消原因
  console.info('OnContinuousTaskCancel callback reason ' + info.reason);
}

// 获取应用文件路径
let context = this.getContext(this) as common.UIAbilityContext;
let cacheDir = context.cacheDir;

@Entry
@Component
struct Index {
  ids: number = 0
  @State message: string = 'ContinuousTask';
  // 通过getUIContext().getHostContext()方法,来获取page所在的UIAbility上下文
  private context: Context | undefined = this.getUIContext().getHostContext();

  OnContinuousTaskCancel() {
    try {
      backgroundTaskManager.on("continuousTaskCancel", callback);
      console.info(`Succeeded in operationing OnContinuousTaskCancel.`);
    } catch (error) {
      console.error(`Operation OnContinuousTaskCancel failed. code is ${(error as BusinessError).code} message is ${(error as BusinessError).message}`);
    }
  }

  OffContinuousTaskCancel() {
    try {
      // callback参数不传,则取消所有已注册的回调
      backgroundTaskManager.off("continuousTaskCancel", callback);
      console.info(`Succeeded in operationing OffContinuousTaskCancel.`);
    } catch (error) {
      console.error(`Operation OffContinuousTaskCancel failed. code is ${(error as BusinessError).code} message is ${(error as BusinessError).message}`);
    }
  }

  startContinuousTask() {
    let wantAgentInfo: wantAgent.WantAgentInfo = {
      // 点击通知后,将要执行的动作列表
      // 添加需要被拉起应用的bundleName和abilityName
      wants: [
        {
          bundleName: "com.example.backgrouddemo",
          abilityName: "EntryAbility"
        }
      ],
      // 指定点击通知栏消息后的动作是拉起ability
      actionType: wantAgent.OperationType.START_ABILITY,
      // 使用者自定义的一个私有值
      requestCode: 0,
      // 点击通知后,动作执行属性
      actionFlags: [wantAgent.WantAgentFlags.UPDATE_PRESENT_FLAG],
      // 车钥匙长时任务子类型。只有申请bluetoothInteraction类型的长时任务,车钥匙子类型才能生效。
      // 确保extraInfo参数中的Key值为backgroundTaskManager.BackgroundModeType.SUB_MODE,否则子类型不生效。
      // extraInfo: { [backgroundTaskManager.BackgroundModeType.SUB_MODE] : backgroundTaskManager.BackgroundSubMode.CAR_KEY }
    };

    try {
      // 通过wantAgent模块下getWantAgent方法获取WantAgent对象
      wantAgent.getWantAgent(wantAgentInfo).then((wantAgentObj: WantAgent) => {
        try {
          let list: Array<string> = ["dataTransfer"];
          // let list: Array<string> = ["bluetoothInteraction"]; 长时任务类型包含bluetoothInteraction,CAR_KEY子类型合法
          backgroundTaskManager.startBackgroundRunning(this.context, list, wantAgentObj)
            .then((res: backgroundTaskManager.ContinuousTaskNotification) => {
              console.info("Operation startBackgroundRunning succeeded");
              // 此处执行具体的长时任务逻辑,如录音,录制等。
              promptAction.showToast({ message: '后台任务,开启成功' })
              create_server();
              tpc_client();
              this.ids = res.notificationId;
            })
            .catch((error: BusinessError) => {
              console.error(`Failed to Operation startBackgroundRunning. code is ${error.code} message is ${error.message}`);
            });
        } catch (error) {
          console.error(`Failed to Operation startBackgroundRunning. code is ${(error as BusinessError).code} message is ${(error as BusinessError).message}`);
        }
      });
    } catch (error) {
      console.error(`Failed to Operation getWantAgent. code is ${(error as BusinessError).code} message is ${(error as BusinessError).message}`);
    }
  }

  // 应用更新进度
  updateProcess(process: Number) {
    // 应用定义下载类通知模版
    let downLoadTemplate: notificationManager.NotificationTemplate = {
      name: 'downloadTemplate', // 当前只支持downloadTemplate,保持不变
      data: {
        title: 'socket通信中', // 必填
        fileName: 'senTemplate', // 必填
        progressValue: process, // 应用更新进度值,自定义
      }
    };
    let request: notificationManager.NotificationRequest = {
      content: {
        // 系统实况类型,保持不变
        notificationContentType: notificationManager.ContentType.NOTIFICATION_CONTENT_SYSTEM_LIVE_VIEW,
        systemLiveView: {
          typeCode: 8, // 上传下载类型需要填写 8,当前仅支持此类型。保持不变
          title: "test", // 应用自定义
          text: "test", // 应用自定义
        }
      },
      id: this.ids, // 必须是申请长时任务返回的id,否则应用更新通知失败
      notificationSlotType: notificationManager.SlotType.LIVE_VIEW, // 实况窗类型,保持不变
      template: downLoadTemplate // 应用需要设置的模版名称
    };

    try {
      notificationManager.publish(request).then(() => {
        console.info("publish success, id= " + this.id);
      }).catch((err: BusinessError) => {
        console.error(`publish fail: ${JSON.stringify(err)}`);
      });
    } catch (err) {
      console.error(`publish fail: ${JSON.stringify(err)}`);
    }
  }

  stopContinuousTask() {
    backgroundTaskManager.stopBackgroundRunning(this.context).then(() => {
      console.info(`Succeeded in operationing stopBackgroundRunning.`);
    }).catch((err: BusinessError) => {
      console.error(`Failed to operation stopBackgroundRunning. Code is ${err.code}, message is ${err.message}`);
    });
  }

  build() {
    Row() {
      Column() {
        Button() {
          Text('申请长时任务').fontSize(25).fontWeight(FontWeight.Bold)
        }
        .type(ButtonType.Capsule)
        .margin({ top: 10 })
        .backgroundColor('#0D9FFB')
        .width(250)
        .height(40)
        .onClick(() => {
          this.startContinuousTask();
          let process = 0
          setInterval(() => {
            process += 1
            this.updateProcess(process)
          }, 1000 * 60)
        })
      }
      .width('100%')
    }
    .height('100%')
  }
}
更多关于HarmonyOS 鸿蒙Next VPN适配相关问题的实战系列教程也可以访问 https://www.itying.com/category-93-b0.html

问题1: 后台长时任务申请上有数量限制:一个UIAbility(FA模型则为ServiceAbility)同一时刻仅支持申请一个长时任务,即在一个长时任务结束后才可能继续申请。如果一个应用同时需要申请多个长时任务,需要创建多个UIAbility。
主长时任务和更新进度的长时任务,需要两个UIAbility。或者监测主长时任务,要及时重新申请。
问题2: VPN丢包不稳定,需要注意对VPN隧道的保护。可以考虑使用系统提供的VPN增强功能。
参考giteeVPN连接,
具体代码如下:
(1)MyVpnExtAbility.ts
导入相关模块:
import { Want } from '@ohos.app.ability.Want';
import { VpnExtensionAbility } from '@ohos.app.ability.VpnExtensionAbility';
import vpn_client from 'libvpn_client.so';
import { VpnConnectionExt } from '@ohos.net.vpnExtension';
import { hilog } from '@ohos.hilog';
import common from '@ohos.app.ability.common';
定义TAG和全局变量:
const TAG: string = "[MyVpnExtAbility]";
let g_tunFd = -1;
let g_tunnelFd = -1;
MyVpnExtAbility类主体:
export default class MyVpnExtAbility extends VpnExtensionAbility {
  private VpnConnection: VpnConnectionExt
  private vpnServerIp: string = '192.168.85.185';
  private tunIp: string = '10.0.0.8';
  private blockedAppName: string = 'com.example.testvpn';

  onCreate(want: Want) {
    console.info(TAG, `xdw onCreate, want: ${want.abilityName}`);
    // this.context.stopVpnExtensionAbility(want);
    this.VpnConnection = vpnExt.createVpnConnection(this.context);
    console.info("wmw createVpnConnection success")
    this.CreateTunnel();
    this.Protect();
    console.info("xdw step4");
  }

  onRequest(want: Want, startId: number) {
    console.info(TAG, `xdw onRequest, want: ${want.abilityName}`);
  }

  onConnect(want: Want) {
    console.info(TAG, `xdw onConnect, want: ${want.abilityName}`);
    // 返回ServiceExtImpl对象,客户端获取后便可以与ServiceExtensionAbility进行通信
    let abilityName: string = want.parameters.abilityName.toString();
    let bundleName: string = want.parameters.bundleName.toString();
    return null;
  }

  onDisconnect(want: Want) {
    console.info(TAG, `xdw onDisconnect, want: ${want.abilityName}`);
  }

  onDestroy() {
    console.info(TAG, `xdw onDestroy`);
    this.Destroy();
  }

  Destroy() {
    hilog.info(0x0000, 'developTag', '%{public}s', 'vpn Destroy');
    vpn_client.stopVpn(g_tunnelFd);
    this.VpnConnection.destroy().then(() => {
      hilog.info(0x0000, 'developTag', '%{public}s', 'vpn Destroy Success');
    }).catch((err: Error) => {
      hilog.error(0x0000, 'developTag', 'vpn Destroy Failed: %{public}s', JSON.stringify(err) ?? '');
    })
  }

  CreateTunnel() {
    console.info("xdw step1")
    g_tunnelFd = vpn_client.tcpConnect(this.vpnServerIp, 8888);
  }

  Protect() {
    console.info("xdw step2")
    hilog.info(0x0000, 'developTag', '%{public}s', 'vpn Protect');
    this.VpnConnection.protect(g_tunnelFd).then(() => {
      hilog.info(0x0000, 'developTag', '%{public}s', 'vpn Protect Success');
      this.SetupVpn();
    }).catch((err: Error) => {
      hilog.error(0x0000, 'developTag', 'vpn Protect Failed %{public}s', JSON.stringify(err) ?? '');
    })
  }

  SetupVpn() {
    console.info("xdw step3")
    hilog.info(0x0000, 'developTag', '%{public}s', 'vpn SetupVpn');

    class Address {
      address: string;
      family: number;

      constructor(address: string, family: number) {
        this.address = address;
        this.family = family;
      }
    }

    class AddressWithPrefix {...}

    class Config {...}

    let config = new Config(this.tunIp, this.blockedAppName);

    try {
      this.VpnConnection.create(config, (error, data) => {
        g_tunFd = data;
        hilog.error(0x0000, 'developTag', 'tunfd: %{public}s', JSON.stringify(data) ?? '');
        vpn_client.startVpn(g_tunFd, g_tunnelFd);
      })
    } catch (error) {
      hilog.error(0x0000, 'developTag', 'vpn setUp fail: %{public}s', JSON.stringify(error) ?? '');
    }
  }
}
(2)Index.ets
import common from '@ohos.app.ability.common'
import { Want } from '@ohos.app.ability.Want';
import vpnext from '@ohos.net.vpnExtension';

let context = getContext(this) as common.VpnExtensionContext;
let want: Want = {
  deviceId: "",
  bundleName: "com.example.testvpn",
  abilityName: "MyVpnExtAbility",
};

@Entry
@Component
struct Index {
  @State message: string = 'Hello World'

  build() {
    Row() {
      Column() {
        Text(this.message)
          .fontSize(50)
          .fontWeight(FontWeight.Bold).onClick(() => {
            console.info("xdw btn click")
          })
        Button('Start Extension').onClick(() => {
          console.info("xdw btn start")
          vpnext.startVpnExtensionAbility(want)
        }).width('70%').fontSize(45).margin(16)

        Button('Stop Extension').onClick(() => {
          console.info("xdw btn end")
          vpnext.stopVpnExtensionAbility(want)
        }).width('70%').fontSize(45).margin(16)
      }.width('100%')
    }.height('100%')
  }
}
(3)build-profile.json5
{
  "apiType": 'stageMode',
  "buildOption": {
    "externalNativeOptions": {
      "path": "./src/main/cpp/CMakeLists.txt",
      "arguments": "",
      "cppFlags": "",
      "abiFilters": ["arm64-v8a", "x86_64"]
    }
  },
  "targets": [
    {
      "name": "default",
      "runtimeOS": "HarmonyOS"
    },
    {
      "name": "ohosTest",
    }
  ]
}

这个不熟悉但是既然看到了还是写一下自己看法,不一定对:
问题1:后台长时任务异常退出可能是主长时任务未正确绑定到VPN服务进程,导致系统误判任务空闲,随机数生成方式不符合持续性任务要求,导致系统判定任务非活跃
// 声明VPN专用任务类型
const VPN_TASK_PARAMS = {
  taskName: 'vpnService',
  taskType: backgroundTaskManager.TaskType.VPN_PROTECTION // 明确任务类型
};

// 启动任务时绑定进程ID
startContinuousTask() {
  backgroundTaskManager.startBackgroundRunning(this.context, VPN_TASK_PARAMS)
    .then(() => {
      hilog.info(0x0000, 'VPN', 'Long-term task started successfully');
      // 保持心跳机制
      setInterval(() => {
        backgroundTaskManager.updateProgress({
          progress: 100,  // 固定进度值
          description: 'VPN tunnel protection'
        });
      }, 30000);  // 30秒更新一次
    })
    .catch((err: BusinessError) => {
      hilog.error(0x0000, 'VPN', `Failed to start task: ${err.code}, ${err.message}`);
    });
}

function startContinuousTask() {
  throw new Error('Function not implemented.');
}
问题2:HTTPS协议丢包VPN未正确处理TLS会话票据导致复用失败
// VPN隧道配置优化
const VPN_CONFIG = {
  mtu: 1400,  // 适配鸿蒙网络栈
  cipherSuites: [
    'TLS_SM4_CCM_SM3',    // 国密算法优先
    'TLS_AES_256_GCM_SHA384',
    'TLS_CHACHA20_POLY1305_SHA256'
  ],
  sessionCache: {
    enable: true,
    timeout: 300  // 单位:秒
  }
};

// 建立隧道时强制清除旧缓存
function setupTunnel() {
  vpnConnection.clearSessionCache();
  const tunnel = vpnConnection.create({
    ...VPN_CONFIG,
    dns: ['8.8.8.8', '1.1.1.1']  // 显式设置DNS
  });
}

鸿蒙Next的VPN适配主要涉及系统级网络管理接口的使用。开发者需调用@ohos.net.vpn扩展模块提供的API,包括createVpnSession()、establish()等方法实现VPN通道建立。系统提供了TUN/TAP虚拟网卡支持,可通过VpnConnectionConfig配置IP地址、路由等参数。数据加密需使用鸿蒙的加密框架,支持主流VPN协议如IKEv2/IPsec。注意鸿蒙的进程保活机制与Android不同,需使用系统托管的后台任务管理。权限需声明ohos.permission.GET_NETWORK_INFO和ohos.permission.INTERNET。

关于HarmonyOS Next VPN适配问题:
- 长时任务自动退出问题:
- 建议检查任务类型是否使用continuousTask(持续任务)
- 确保在任务管理器中正确注册了后台任务类型
- 注意鸿蒙的后台任务管理策略较严格,持续数据传输建议使用ServiceAbility
- 可尝试在任务即将超时时重新申请任务
- HTTPS丢包问题:
- 可能是TLS握手阶段的包过滤问题
- 检查VPN实现中TLS记录的完整性校验
- 确保VPN隧道对TLS 1.2/1.3的完整支持
- 建议抓包分析具体在哪一阶段出现丢包
对于具体实现细节,建议参考鸿蒙官方文档中关于VPN和网络安全的专门章节。