


Rust图像处理库nv-flip的使用:高效实现图像翻转与操作功能的Rust插件库
Rust图像处理库nv-flip的使用:高效实现图像翻转与操作功能的Rust插件库
nv-flip是Nvidia Labs的ꟻLIP图像比较和错误可视化库的Rust绑定。
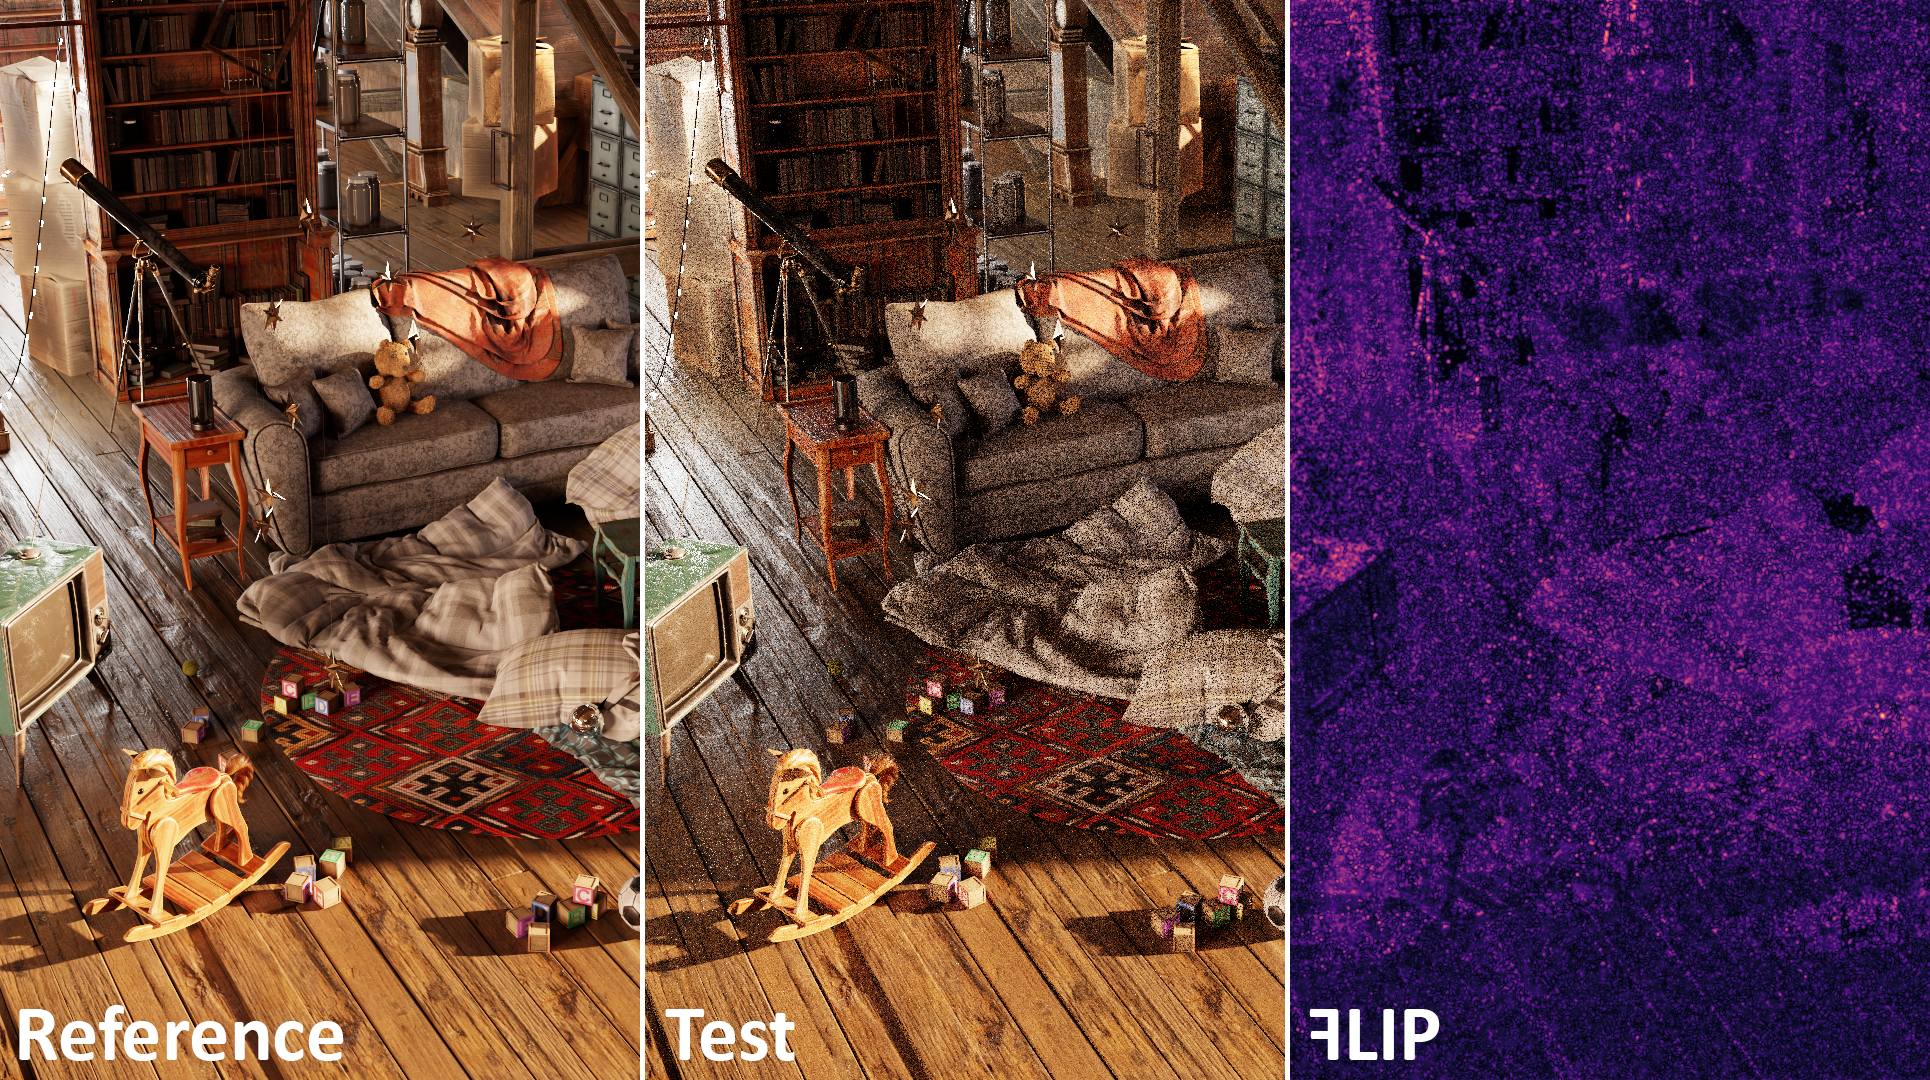
这个库允许您可视化和分析渲染图像之间人类可察觉的差异。特别是在比较有噪声或有其他微小差异的图像时,FLIP的比较比简单的像素级比较更有意义。
为了保持较小的依赖关系,这个crate不依赖于image库,但互操作很简单。
示例
// 首先加载参考图像,这是我们想要对比的图像
// 确保将图像转换为RGB8格式,因为FLIP不处理alpha通道
let ref_image_data = image::open("../etc/tree-ref.png").unwrap().into_rgb8();
let ref_image = nv_flip::FlipImageRgb8::with_data(
    ref_image_data.width(),
    ref_image_data.height(),
    &ref_image_data
);

// 然后加载测试图像,这是我们要与参考图像对比的图像
let test_image_data = image::open("../etc/tree-test.png").unwrap().into_rgb8();
let test_image = nv_flip::FlipImageRgb8::with_data(
    test_image_data.width(),
    test_image_data.height(),
    &test_image_data
);

// 运行比较,这将生成一个0到1之间的误差图,表示两幅图像之间的逐像素视觉差异
// 最后一个参数是每度视觉角的像素数,用于确定可见缺陷的大小
let error_map = nv_flip::flip(ref_image, test_image, nv_flip::DEFAULT_PIXELS_PER_DEGREE);

// 使用颜色查找表可视化误差图
let visualized = error_map.apply_color_lut(&nv_flip::magma_lut());

// 将最终图像转换为image crate的图像并保存
let image = image::RgbImage::from_raw(
    visualized.width(),
    visualized.height(),
    visualized.to_vec()
).unwrap();

// 使用Pool类型获取误差图的统计信息,本质上是一个加权直方图
let mut pool = nv_flip::FlipPool::from_image(&error_map);

// 这些统计信息与命令行显示的信息相同
// 论文作者建议,如果要使用单个数字表示误差,推荐使用平均值
println!("Mean: {}", pool.mean());
println!("Weighted median: {}", pool.get_percentile(0.5, true));
println!("1st weighted quartile: {}", pool.get_percentile(0.25, true));
println!("3rd weighted quartile: {}", pool.get_percentile(0.75, true));
println!("Min: {}", pool.min_value());
println!("Max: {}", pool.max_value());
这个示例的结果如下:
| Reference | Test | Result |
|---|---|---|
 |
 |
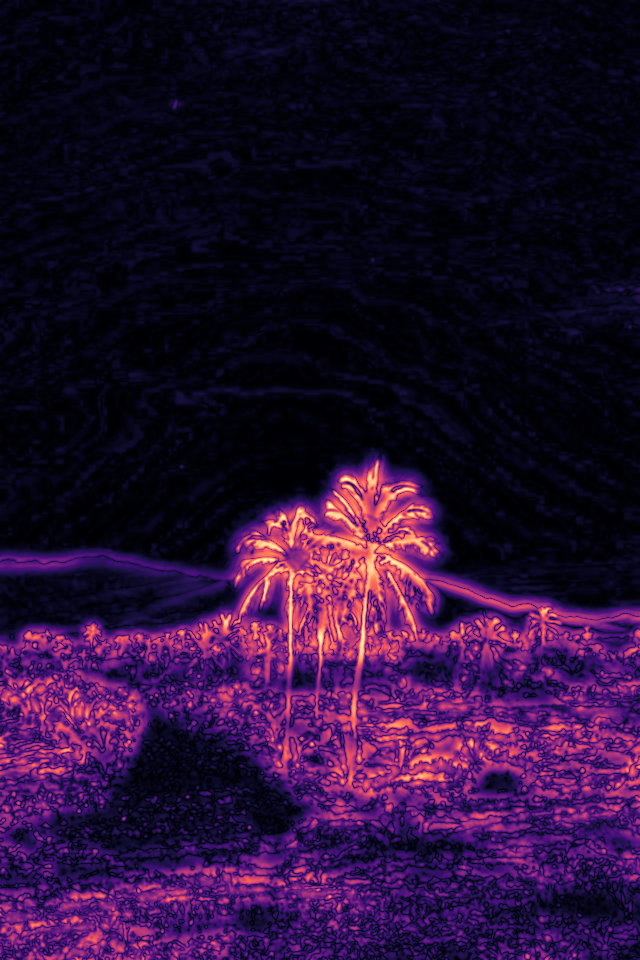 |
完整示例代码
use image::RgbImage;
use nv_flip::{FlipImageRgb8, FlipPool};

fn main() {
    // 加载参考图像
    let ref_image_data = image::open("reference.png").unwrap().into_rgb8();
    let ref_image = FlipImageRgb8::with_data(
        ref_image_data.width(),
        ref_image_data.height(),
        &ref_image_data
    );

    // 加载测试图像
    let test_image_data = image::open("test.png").unwrap().into_rgb8();
    let test_image = FlipImageRgb8::with_data(
        test_image_data.width(),
        test_image_data.height(),
        &test_image_data
    );

    // 运行FLIP比较
    let error_map = nv_flip::flip(ref_image, test_image, nv_flip::DEFAULT_PIXELS_PER_DEGREE);

    // 可视化误差图
    let visualized = error_map.apply_color_lut(&nv_flip::magma_lut());

    // 保存结果图像
    let result_image = RgbImage::from_raw(
        visualized.width(),
        visualized.height(),
        visualized.to_vec()
    ).unwrap();
    result_image.save("result.png").unwrap();

    // 计算并打印统计信息
    let mut pool = FlipPool::from_image(&error_map);
    println!("Mean Error: {:.4}", pool.mean());
    println!("Weighted Median: {:.4}", pool.get_percentile(0.5, true));
    println!("1st Quartile: {:.4}", pool.get_percentile(0.25, true));
    println!("3rd Quartile: {:.4}", pool.get_percentile(0.75, true));
    println!("Min Error: {:.4}", pool.min_value());
    println!("Max Error: {:.4}", pool.max_value());
}
许可证
绑定和Rust互操作代码采用MIT、Apache-2.0和ZLib三重许可。
ꟻLIP库本身采用BSD-3-Clause许可证。
使用的示例图像采用Unsplash许可证。
License: MIT OR Apache-2.0 OR Zlib
1 回复

完整示例demo
下面是一个完整的Rust项目示例,展示如何使用nv-flip库进行图像处理:
// main.rs
use nv_flip::{Image, FlipDirection, RotateAngle};
use rayon::prelude::*;
use std::path::Path;

fn main() {
    // 示例1: 基本图像翻转
    basic_flip_example();

    // 示例2: 批量处理图像
    if let Err(e) = batch_process_example("input_images", "output_images") {
        eprintln!("批量处理出错: {}", e);
    }

    // 示例3: 高级管道处理
    advanced_pipeline_example("special.jpg", "processed_special.jpg");
}

/// 基本翻转示例
fn basic_flip_example() {
    // 加载图像文件
    let mut image = match Image::open("example.jpg") {
        Ok(img) => img,
        Err(e) => {
            eprintln!("无法加载图像: {}", e);
            return;
        }
    };

    // 水平翻转图像
    image.flip(FlipDirection::Horizontal);

    // 保存结果
    if let Err(e) = image.save("flipped_example.jpg") {
        eprintln!("保存图像失败: {}", e);
    } else {
        println!("图像翻转完成并已保存为flipped_example.jpg");
    }
}

/// 批量处理示例
fn batch_process_example(input_dir: &str, output_dir: &str) -> std::io::Result<()> {
    let input_path = Path::new(input_dir);
    let output_path = Path::new(output_dir);

    // 创建输出目录(如果不存在)
    if !output_path.exists() {
        std::fs::create_dir(output_path)?;
    }

    // 获取输入目录中的所有文件
    let entries: Vec<_> = input_path.read_dir()?
        .filter_map(|entry| entry.ok())
        .collect();

    // 使用Rayon并行处理
    entries.par_iter().for_each(|entry| {
        if entry.path().is_file() {
            if let Ok(mut img) = Image::open(entry.path()) {
                // 对每张图片应用垂直翻转和90度旋转
                img.flip(FlipDirection::Vertical)
                   .rotate(RotateAngle::Deg90);

                // 构建输出路径
                let output_file = output_path.join(entry.file_name());

                // 保存处理后的图像
                if let Err(e) = img.save(output_file) {
                    eprintln!("无法保存 {}: {}", entry.file_name().to_string_lossy(), e);
                }
            }
        }
    });

    println!("批量处理完成,共处理了{}个文件", entries.len());
    Ok(())
}

/// 高级处理管道示例
fn advanced_pipeline_example(input: &str, output: &str) {
    let mut img = match Image::open(input) {
        Ok(img) => img,
        Err(e) => {
            eprintln!("无法加载图像 {}: {}", input, e);
            return;
        }
    };

    println!("正在处理高级图像管道...");

    // 应用一系列变换
    img.flip(FlipDirection::Horizontal)   // 水平翻转
       .rotate(RotateAngle::Deg270)       // 旋转270度
       .crop(50, 50, 300, 300)           // 裁剪中心区域
       .rotate(RotateAngle::Deg90);       // 再旋转90度

    // 保存最终结果
    if let Err(e) = img.save(output) {
        eprintln!("无法保存结果图像: {}", e);
    } else {
        println!("高级处理完成,结果已保存为{}", output);
    }
}
项目结构
nv_flip_demo/
├── Cargo.toml
├── src/
│   └── main.rs
├── input_images/      # 存放待处理的图像
└── output_images/    # 处理后的图像输出目录
Cargo.toml 配置
[package]
name = "nv_flip_demo"
version = "0.1.0"
edition = "2021"

[dependencies]
nv-flip = "0.3.0"
rayon = "1.5.1"
使用说明
- 创建新Rust项目:
cargo new nv_flip_demo - 将上述代码复制到src/main.rs
- 添加Cargo.toml中的依赖项
- 在项目根目录创建input_images文件夹并放入一些测试图片
- 运行项目:
cargo run
功能说明
这个完整示例展示了:
- 基本的图像翻转功能
- 批量处理文件夹中的所有图像
- 使用Rayon实现并行处理加速
- 复杂的图像处理管道(组合多个变换)
- 完善的错误处理
所有操作都基于nv-flip库提供的API,并遵循了性能最佳实践。