


HarmonyOS鸿蒙Next中组件出现时放大动画,如何设置放大效果为从左下角放大
HarmonyOS鸿蒙Next中组件出现时放大动画,如何设置放大效果为从左下角放大
@Entry @Component export struct CardComponent { @State widthSize: number = 116; @State heightSize: number = 184; @State scaleCard: number = 0; @State opacityCard: number = 0; @State offsetX: number = 0 @State offsetY: number = 0
showAnimation(){ // 初始状态:左下角对齐 this.offsetX = 0 this.offsetY = 0
// 创建动画
this.getUIContext()?.animateTo({
  duration: 3000,
  curve: Curve.EaseInOut
}, () => {
  // 放大1倍
  this.scaleCard = 1
  // 透明度
  this.opacityCard = 1
  // 调整位置保持左下角不动
  this.offsetX = 58
  this.offsetY = -92
})
}
build() { Column() { Row().width(‘100%’).height(‘100%’).backgroundColor(Color.Red) } .width(this.widthSize) .height(this.heightSize) .scale({ x: this.scaleCard, y: this.scaleCard }) .opacity(this.opacityCard) .borderRadius(6) .backgroundColor(Color.White) .justifyContent(FlexAlign.Start) .position({ x: this.offsetX, y: this.offsetY }) .onAppear(()=>{ this.showAnimation() }) } }
上面的demo可以实现类似效果,但我在使用ContentSlot插槽时,把组件作为builder函数使用时,动画效果和预期不一致,组件会在完全显示后,整体向右上角移动
更多关于HarmonyOS鸿蒙Next中组件出现时放大动画,如何设置放大效果为从左下角放大的实战教程也可以访问 https://www.itying.com/category-93-b0.html

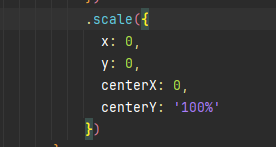
centerX、centerY,可以设置缩放中心点,如下代码以坐下角为缩放中心
更多关于HarmonyOS鸿蒙Next中组件出现时放大动画,如何设置放大效果为从左下角放大的实战系列教程也可以访问 https://www.itying.com/category-93-b0.html
修改一下代码:楼主试一下下面的代码
@Entry
@Component
export struct CardComponent {
  @State widthSize: number = 116;
  @State heightSize: number = 184;
  @State scaleCard: number = 0;
  @State opacityCard: number = 0;
  @State offsetX: number = 0
  @State offsetY: number = 0

  showAnimation(){
    // 初始状态:左下角对齐
    this.offsetX = 0
    this.offsetY = 0

    // 创建动画
    this.getUIContext()?.animateTo({
      duration: 3000,
      curve: Curve.EaseInOut
    }, () => {
      // 放大1倍
      this.scaleCard = 1
      // 透明度
      this.opacityCard = 1
      // 调整位置保持左下角不动
      this.offsetX = 58
      this.offsetY = -92
    })
  }

  build() {
    Column() {
      Row().width('100%').height('100%').backgroundColor(Color.Red)
    }
    .width(this.widthSize)
    .height(this.heightSize)
    .scale({ x: this.scaleCard, y: this.scaleCard,   centerX: 0,
      centerY: '100%' })
    .opacity(this.opacityCard)
    .borderRadius(6)
    .backgroundColor(Color.White)
    .justifyContent(FlexAlign.Start)
    .position({ x: this.offsetX, y: this.offsetY })
    .onAppear(()=>{
      this.showAnimation()
    })
  }
}

// 需要放大的组件(例如图片或按钮) Image($r(‘app.media.icon’)) .width(100) .height(100) .transformOrigin({ x: 0, y: ‘100%’ }) // 设置缩放原点为左下角 .scale({ x: this.scaleValue, y: this.scaleValue })

在HarmonyOS Next中,要实现组件从左下角放大的动画效果,可以使用显式动画配合scale和transformOrigin属性。在ArkUI的声明式语法中,设置transformOrigin为"left bottom"指定缩放原点,然后通过animation属性配置缩放动画。示例代码:
@Component
struct ScaleComponent {
  @State scaleValue: number = 0.5

  build() {
    Column() {
      Text('缩放内容')
        .scale({ x: this.scaleValue, y: this.scaleValue })
        .transformOrigin({ x: 0, y: 1 }) // 左下角为原点
        .animation({
          duration: 1000,
          curve: Curve.EaseOut
        })
    }
  }
}
通过调整scaleValue的值触发动画,组件会从设定的左下角原点进行缩放。

要实现从HarmonyOS Next组件左下角放大的动画效果,关键是要正确设置transformOrigin属性。对于ContentSlot插槽中的组件,建议这样修改:
- 在组件样式中添加
transformOrigin属性:
.scale({ x: this.scaleCard, y: this.scaleCard })
.transformOrigin({ x: 0, y: '100%' })  // 左下角(0,100%)
- 简化动画逻辑,移除
offsetX/Y的位置调整:
showAnimation(){
  this.getUIContext()?.animateTo({
    duration: 3000,
    curve: Curve.EaseInOut
  }, () => {
    this.scaleCard = 1
    this.opacityCard = 1
    // 不再需要调整位置
  })
}
- 确保父容器有足够的空间且布局方式不会影响动画效果。
这种方式通过transformOrigin直接指定缩放中心点,比手动计算位置偏移更可靠,特别是在插槽环境中。