


HarmonyOS鸿蒙Next中Navigation组件怎么设置顶部动态模糊效果
HarmonyOS鸿蒙Next中Navigation组件怎么设置顶部动态模糊效果
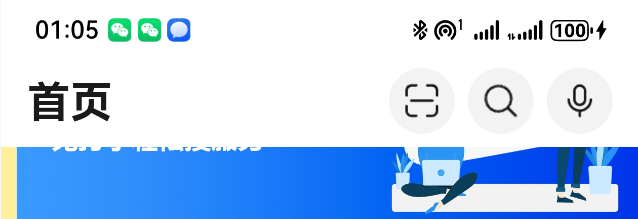
希望底部元素经过头部的时候,会有背景模糊的效果
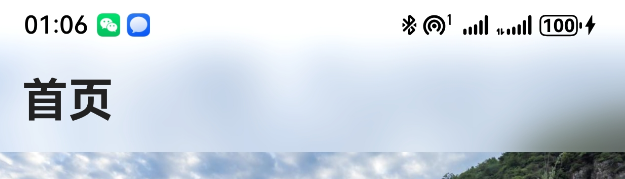
如第二张图片所示,第二张图片我是自己封装的一个头部组件,但是没法使用Navigation的menus
更多关于HarmonyOS鸿蒙Next中Navigation组件怎么设置顶部动态模糊效果的实战教程也可以访问 https://www.itying.com/category-93-b0.html

参考这个看看呢。
const COLOR1: string = "#80004AAF";
const COLOR2: string = "#802787D9";
const BLUR_STYLE_1: BlurStyle = BlurStyle.BACKGROUND_THIN;
const BLUR_STYLE_2: BlurStyle = BlurStyle.BACKGROUND_THICK;
const BLUR_STYLE_OPTION_1: BackgroundBlurStyleOptions = {
  colorMode: ThemeColorMode.DARK,
  adaptiveColor: AdaptiveColor.DEFAULT,
  blurOptions: { grayscale: [20, 20] },
  scale: 1
};
const BLUR_STYLE_OPTION_2: BackgroundBlurStyleOptions = {
  colorMode: ThemeColorMode.LIGHT,
  adaptiveColor: AdaptiveColor.AVERAGE,
  blurOptions: { grayscale: [20, 20] },
  scale: 1
};
const EFFECT_OPTION_1: BackgroundEffectOptions = {
  radius: 20,
  saturation: 10,
  brightness: 0,
  color: '#66FFFFFF',
  adaptiveColor: AdaptiveColor.DEFAULT,
  blurOptions: { grayscale: [0, 0] },
};
const EFFECT_OPTION_2: BackgroundEffectOptions = {
  radius: 60,
  saturation: 40,
  brightness: 1,
  color: '#661A1A1A',
  adaptiveColor: AdaptiveColor.AVERAGE,
  blurOptions: { grayscale: [20, 20] },
};

@Component
struct BackComponent {
  build() {
    Row() {
      Column() {
      }
      .height('100%')
      .backgroundColor("#3D9DB4")
      .layoutWeight(9)

      Column() {
      }
      .height('100%')
      .backgroundColor("#17A98D")
      .layoutWeight(9)

      Column() {
      }
      .height('100%')
      .backgroundColor("#FFC000")
      .layoutWeight(9)
    }
    .height('100%')
    .width('100%')
  }
}

@Component
struct ColorAndBlur {
  @State useColor1: boolean = true;
  @State useBlur1: boolean = true;
  @State useEffect1: boolean = true;

  build() {
    NavDestination() {
      Stack({ alignContent: Alignment.Center }) {
        BackComponent()
          .width('100%')
          .height('100%')
        Column() {
          Stack({ alignContent: Alignment.Center }) {
            Button("switch color")
              .onClick(() => {
                this.useColor1 = !this.useColor1;
              })
          }
          .width('100%')
          .layoutWeight(1)

          Stack({ alignContent: Alignment.Center }) {
            Button("switch blur")
              .onClick(() => {
                this.useBlur1 = !this.useBlur1;
              })
          }
          .width('100%')
          .layoutWeight(1)

          Stack({ alignContent: Alignment.Center }) {
            Button("switch effect")
              .onClick(() => {
                this.useEffect1 = !this.useEffect1;
              })
          }
          .width('100%')
          .layoutWeight(1)
        }
        .width('100%')
        .height('100%')
      }.width('100%')
      .height('100%')
    }
    .width('100%')
    .height('100%')
    // 开发者可以设置标题栏的背景颜色和背景模糊效果
    .title("Destination Title", {
      backgroundColor: this.useColor1 ? COLOR1 : COLOR2,
      backgroundBlurStyle: this.useBlur1 ? BLUR_STYLE_1 : BLUR_STYLE_2,
      barStyle: BarStyle.STACK,
      backgroundEffect: this.useEffect1 ? EFFECT_OPTION_1 : EFFECT_OPTION_2,
    })
    // 开发者可以设置菜单的背景颜色和背景模糊效果
    .menus([
      { value: "A" },
      { value: "B" },
      { value: "C" },
      { value: "D" },
    ], {
      moreButtonOptions: {
        backgroundEffect: this.useEffect1 ? EFFECT_OPTION_1 : EFFECT_OPTION_2,
      }
    })
    // 开发者可以设置工具栏的背景颜色和背景模糊效果
    .toolbarConfiguration([
      { value: "A" },
      { value: "B" },
      { value: "C" },
      { value: "D" },
      { value: "E" },
      { value: "F" }
    ], {
      backgroundEffect: this.useEffect1 ? EFFECT_OPTION_1 : EFFECT_OPTION_2,
      // 开发者可以设置工具栏的菜单的背景颜色和背景模糊效果
      moreButtonOptions: {
        backgroundEffect: this.useEffect1 ? EFFECT_OPTION_1 : EFFECT_OPTION_2,
      }
    })
  }
}

@Entry
@Component
struct Index {
  @Provide('navPathStack') navPathStack: NavPathStack = new NavPathStack();
  @State useColor1: boolean = true;
  @State useBlur1: boolean = true;
  @State useBlurOption1: boolean = true;

  @Builder
  PageBuilder(name: string, param?: Object) {
    if (name === 'NavigationMenu') {
      ColorAndBlur();
    }
  }

  build() {
    Navigation(this.navPathStack) {
      Stack({ alignContent: Alignment.Center }) {
        BackComponent()
          .width('100%')
          .height('100%')
        Column() {
          Stack({ alignContent: Alignment.Center }) {
            Button("switch color")
              .onClick(() => {
                this.useColor1 = !this.useColor1;
              })
          }
          .width('100%')
          .layoutWeight(1)

          Stack({ alignContent: Alignment.Center }) {
            Button("switch blur")
              .onClick(() => {
                this.useBlur1 = !this.useBlur1;
              })
          }
          .width('100%')
          .layoutWeight(1)

          Stack({ alignContent: Alignment.Center }) {
            Button("switch blurOption")
              .onClick(() => {
                this.useBlurOption1 = !this.useBlurOption1;
              })
          }
          .width('100%')
          .layoutWeight(1)

          Stack({ alignContent: Alignment.Center }) {
            Button("push page")
              .onClick(() => {
                this.navPathStack.pushPathByName('NavigationMenu', null);
              })
          }
          .width('100%')
          .layoutWeight(1)
        }
        .width('100%')
        .height('80%')
      }.width('100%')
      .height('100%')
    }
    .width('100%')
    .height('100%')
    .navDestination(this.PageBuilder)
    // 开发者可以设置标题栏的背景颜色和背景模糊效果
    .title("NavTitle", {
      backgroundColor: this.useColor1 ? COLOR1 : COLOR2,
      backgroundBlurStyle: this.useBlur1 ? BLUR_STYLE_1 : BLUR_STYLE_2,
      barStyle: BarStyle.STACK,
      backgroundBlurStyleOptions: this.useBlurOption1 ? BLUR_STYLE_OPTION_1 : BLUR_STYLE_OPTION_2,
    })
    // 开发者可以设置菜单的背景颜色和背景模糊效果
    .menus([
      { value: "A" },
      { value: "B" },
      { value: "C" },
      { value: "D" },
    ], {
      moreButtonOptions: {
        backgroundBlurStyle: this.useBlur1 ? BLUR_STYLE_1 : BLUR_STYLE_2,
        backgroundBlurStyleOptions: this.useBlurOption1 ? BLUR_STYLE_OPTION_1 : BLUR_STYLE_OPTION_2,
      }
    })
    // 开发者可以设置工具栏的背景颜色和背景模糊效果
    .toolbarConfiguration([
      { value: "A" },
      { value: "B" },
      { value: "C" },
      { value: "D" },
      { value: "E" },
      { value: "F" }
    ], {
      backgroundColor: this.useColor1 ? COLOR1 : COLOR2,
      backgroundBlurStyle: this.useBlur1 ? BLUR_STYLE_1 : BLUR_STYLE_2,
      // 开发者可以设置工具栏的菜单的背景颜色和背景模糊效果
      moreButtonOptions: {
        backgroundBlurStyle: this.useBlur1 ? BLUR_STYLE_1 : BLUR_STYLE_2,
        backgroundBlurStyleOptions: this.useBlurOption1 ? BLUR_STYLE_OPTION_1 : BLUR_STYLE_OPTION_2,
      }
    })
  }
}
更多关于HarmonyOS鸿蒙Next中Navigation组件怎么设置顶部动态模糊效果的实战系列教程也可以访问 https://www.itying.com/category-93-b0.html


楼主可以通过hdsNavigation组件结合滚动事件监听,动态调整标题栏模糊样式:
import { HdsNavigation, ScrollEffectType } from '@kit.UIDesignKit';

@Component

struct NavigationDemo {

  @State scrollOffset: number = 0; // 滚动偏移量

  build() {

    HdsNavigation()

      .titleBar({

        style: {

          scrollEffect: ScrollEffectType.DYNAMIC_BLUR, // 启用动态模糊

          blurStyle: {

            beforeScroll: BlurEffectStyle.THIN, // 滚动前模糊样式

            afterScroll: BlurEffectStyle.THICK  // 滚动后模糊样式

          }

        }

      })

      .onContentScroll((offset: number) => {

        this.scrollOffset = offset; // 监听滚动位置变化

      })

  }

}
通过scrollThreshold参数设置触发模糊样式变化的临界值:
style: {

  scrollThreshold: 50, // 滚动超过50vp触发样式切换

  // ...其他配置

}

可以使用 HdsNavigation 进行实现
对组件背景进行均匀的模糊处理,模糊强度一致,边界清晰,用于强调控件与内容的层级分隔。滑动内容进入/离开标题栏区域过程中,模糊背板和分割线透明渐变出现/消失。此方式适用于非沉浸式场景。
import { HdsNavigation, HdsNavigationAttribute, ScrollEffectType } from '@kit.UIDesignKit';
import { LengthMetrics } from '@kit.ArkUI';

@Entry
@Component
struct Index {
  build() {
    HdsNavigation() { // 创建HdsNavigation组件
      // HdsNavigation组件内容区
    }.titleBar({
      style: { // 设置导航组件标题栏样式
        // 标题栏动态模糊样式,包括是否使能滚动动态模糊,动态模糊类型,动态模糊生效的滚动距离等
        scrollEffectOpts: {
          enableScrollEffect: true,
          scrollEffectType: ScrollEffectType.COMMON_BLUR,
          blurEffectiveStartOffset: LengthMetrics.vp(0),
          blurEffectiveEndOffset: LengthMetrics.vp(20)
        },
        originalStyle: { // 内容区滚动前初始样式设置
          backgroundStyle: { // 标题栏背板样式设置
            backgroundColor: $r('sys.color.ohos_id_color_background'),
          },
          contentStyle: { // 标题栏内容区样式设置,包括标题区域,菜单区域,返回按钮区域
            titleStyle: {
              mainTitleColor: $r('sys.color.font_primary'),
              subTitleColor: $r('sys.color.font_secondary')
            },
            menuStyle: {
              backgroundColor: $r('sys.color.comp_background_tertiary'),
              iconColor: $r('sys.color.icon_primary')
            },
            backIconStyle: {
              backgroundColor: $r('sys.color.comp_background_tertiary'),
              iconColor: $r('sys.color.icon_primary')
            }
          }
        },
        scrollEffectStyle: { // 内容区滚动超过blurEffectiveEndOffset后样式设置
          backgroundStyle: {
            backgroundColor: $r('sys.color.ohos_id_color_background_transparent'),
          },
          contentStyle: {
            titleStyle: {
              mainTitleColor: $r('sys.color.font_primary'),
              subTitleColor: $r('sys.color.font_secondary')
            },
            menuStyle: {
              backgroundColor: $r('sys.color.comp_background_tertiary'),
              iconColor: $r('sys.color.icon_primary')
            },
            backIconStyle: {
              backgroundColor: $r('sys.color.comp_background_tertiary'),
              iconColor: $r('sys.color.icon_primary')
            }
          }
        }
      },
      content: { // 标题栏内容设置
        title: { mainTitle: 'Main', subTitle: 'Sub' },
      }
    })
  }
}
参考地址
https://developer.huawei.com/consumer/cn/doc/harmonyos-guides/ui-design-navigation-dynamic-blur
在HarmonyOS鸿蒙Next中,通过Navigation组件的titleBarStyle属性设置顶部动态模糊效果。使用BlurStyle枚举值,例如BlurStyle.Thin、BlurStyle.Regular或BlurStyle.Thick,调整模糊程度。代码示例:
Navigation()
  .titleBarStyle(
    titleBarStyle: {
      blurStyle: BlurStyle.Regular
    }
  )
此方法仅适用于鸿蒙系统,不涉及Java或C语言。

在HarmonyOS Next中,可以通过自定义Navigation组件的样式来实现顶部动态模糊效果。建议使用BlurEffect组件结合Scroll事件监听,根据滚动位置动态调整模糊度。具体步骤:
- 在Navigation组件外层包裹一个容器,并设置其背景为半透明或模糊效果。
- 使用Scroll组件监听滚动位置,通过状态变量控制模糊效果的强度。
- 利用BlurEffect组件,根据滚动偏移量动态调整模糊半径(blurRadius)。
示例代码片段:
import { BlurEffect, Navigation, Scroll } from '@harmony/next';

@Entry
@Component
struct CustomNav {
  @State blurRadius: number = 0;

  build() {
    Column() {
      // 自定义Navigation头部,应用模糊效果
      BlurEffect({ blurRadius: this.blurRadius }) {
        Navigation() {
          // Navigation内容
        }
      }

      // 滚动内容区域
      Scroll() {
        // 内容元素
      }
      .onScroll((offset) => {
        // 根据滚动偏移量计算模糊度
        this.blurRadius = Math.min(offset / 10, 20); // 调整计算逻辑
      })
    }
  }
}
注意:需根据实际布局调整滚动监听和模糊度的映射关系,确保效果平滑。若需兼容Navigation的menus功能,建议通过自定义组件封装而非直接修改原生Navigation。