


HarmonyOS鸿蒙Next中应用摄像头区域和底部导航条区域的黑边该怎么消除
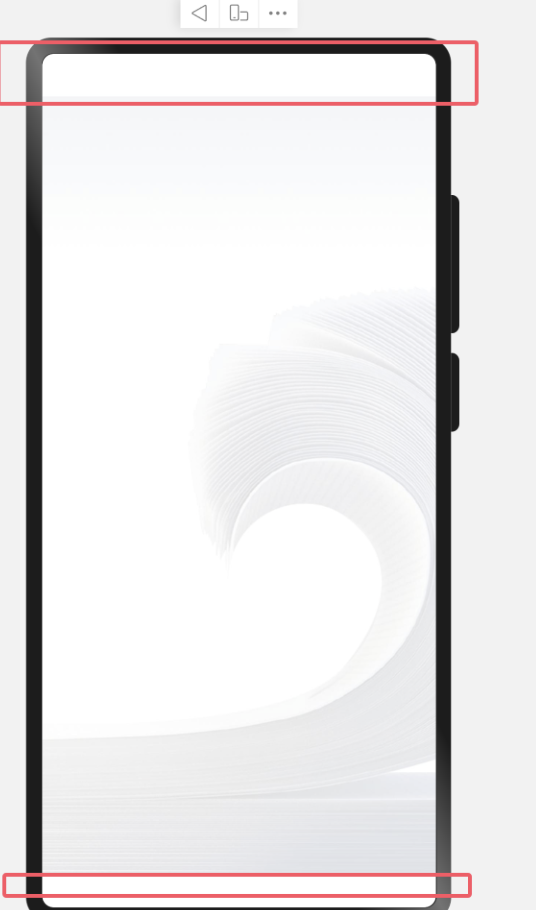
HarmonyOS鸿蒙Next中应用摄像头区域和底部导航条区域的黑边该怎么消除 【问题描述】:应用摄像头区域和底部导航条区域的黑边该怎么消除
【问题现象】:应用摄像头区域和底部导航条区域的黑边该怎么消除
【版本信息】:开发工具版本:deveco 6.0.0 手机系统版本:HarmonyOs 5.0.3(15) Api语言版本:5.0.1(13)

【尝试解决方案】:
更多关于HarmonyOS鸿蒙Next中应用摄像头区域和底部导航条区域的黑边该怎么消除的实战教程也可以访问 https://www.itying.com/category-93-b0.html

【背景知识】
典型应用全屏窗口UI元素包括状态栏、应用界面和底部导航条。通过调整状态栏、应用界面和导航条的显示效果来减少状态栏导航条等系统界面的突兀感,这种设计方式被称为开发应用沉浸式效果。主要思路有两种:
- 使用全屏布局,使页面元素延伸到状态栏和导航条。此方法下又可以选择是否隐藏状态栏和导航条。
- 设置状态栏和导航条的显示效果,使其颜色风格与应用页面保持一致。
【解决方案】
根据设计要素要求,可以通过如下四种方式实现应用沉浸式效果,您可以优先参考方案五:
- 方案一:全屏显示,不隐藏避让区:调整布局系统为全屏布局,界面元素延伸到状态栏和导航条区域实现沉浸式效果。通过接口查询状态栏和导航条区域进行可交互元素避让处理,并设置状态栏或导航条的颜色等属性与界面元素匹配。
- 方案二:全屏显示,隐藏避让区:通过对应接口设置全屏布局即可(隐藏避让区场景适用于游戏、电影等应用场景,可以通过从底部上滑唤出导航条)。
注意:全屏显示设置针对的是窗口,如果希望实现单页面的全屏显示,可以在对应页面中添加如下代码:
@Entry
@Component
struct Index {
  onPageShow(): void {
    window.getLastWindow(getContext(this), (err, win) => {
      win.setWindowLayoutFullScreen(true)
    })
  }

  onPageHide(): void {
    window.getLastWindow(getContext(this), (err, win) => {
      win.setWindowLayoutFullScreen(false)
    })
  }

  build() {
  // ...
  }
}
不设置全屏显示下的方案:
- 方案三:通过setWindowBackgroundColor设置窗口背景色风格与应用界面一致: EntryAbility中的onWindowStageCreate方法示例代码:
export default class EntryAbility extends UIAbility {
  onWindowStageCreate(windowStage: window.WindowStage): void {
    console.info('Ability onWindowStageCreate');

    windowStage.loadContent('pages/Index', (err) => {
      if (err.code) {
        console.error(`Failed to load the content. Cause: ${err}`);
        return;
      }

      // 设置全窗颜色和应用元素颜色一致
      windowStage.getMainWindowSync().setWindowBackgroundColor('#317AF7');
      console.info('Succeeded in loading the content.');
    });
  }
}
-
方案四:通过expandSafeArea属性扩展安全区域属性进行调整:示例参考扩展安全区域属性原理。
-
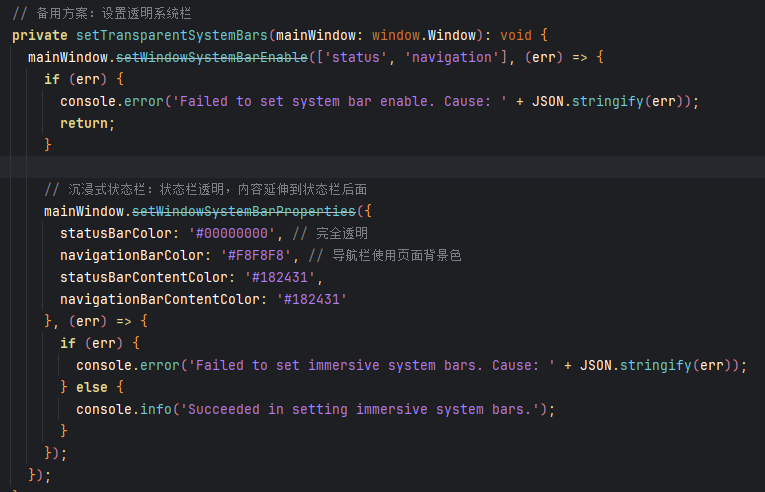
方案五:通过setWindowSystemBarProperties设置避让区域背景颜色与字体颜色统一风格: 以改变状态栏背景颜色和字体颜色为例,在方案三代码中添加如下代码:
import { window } from '@kit.ArkUI';
import { BusinessError } from '@kit.BasicServicesKit';
@Entry
@Component
struct Index {
  aboutToAppear(): void {
    let windowClass: window.Window | undefined = undefined;
    window.getLastWindow(getContext(), (err, data) => {
      windowClass = data
      let SystemBarProperties: window.SystemBarProperties = {
        statusBarColor: '#00000000',
        navigationBarColor:'#F8F8F8',
        statusBarContentColor: '#182431',
        navigationBarContentColor:'#182431'
      };
      try {
        let promise = windowClass.setWindowSystemBarProperties(SystemBarProperties);
        promise.then(() => {
          console.info('Succeeded in setting the system bar properties.');
        }).catch((err:BusinessError) => {
          console.error(`Failed to set the system bar properties. Cause code: ${err.code}, message: ${err.message}`);
        });
      } catch (exception) {
        console.error(`Failed to set the system bar properties. Cause code: ${exception.code}, message: ${exception.message}`);
      }
    })
  }

  build() {
    // ...
  }
}
更多关于HarmonyOS鸿蒙Next中应用摄像头区域和底部导航条区域的黑边该怎么消除的实战系列教程也可以访问 https://www.itying.com/category-93-b0.html

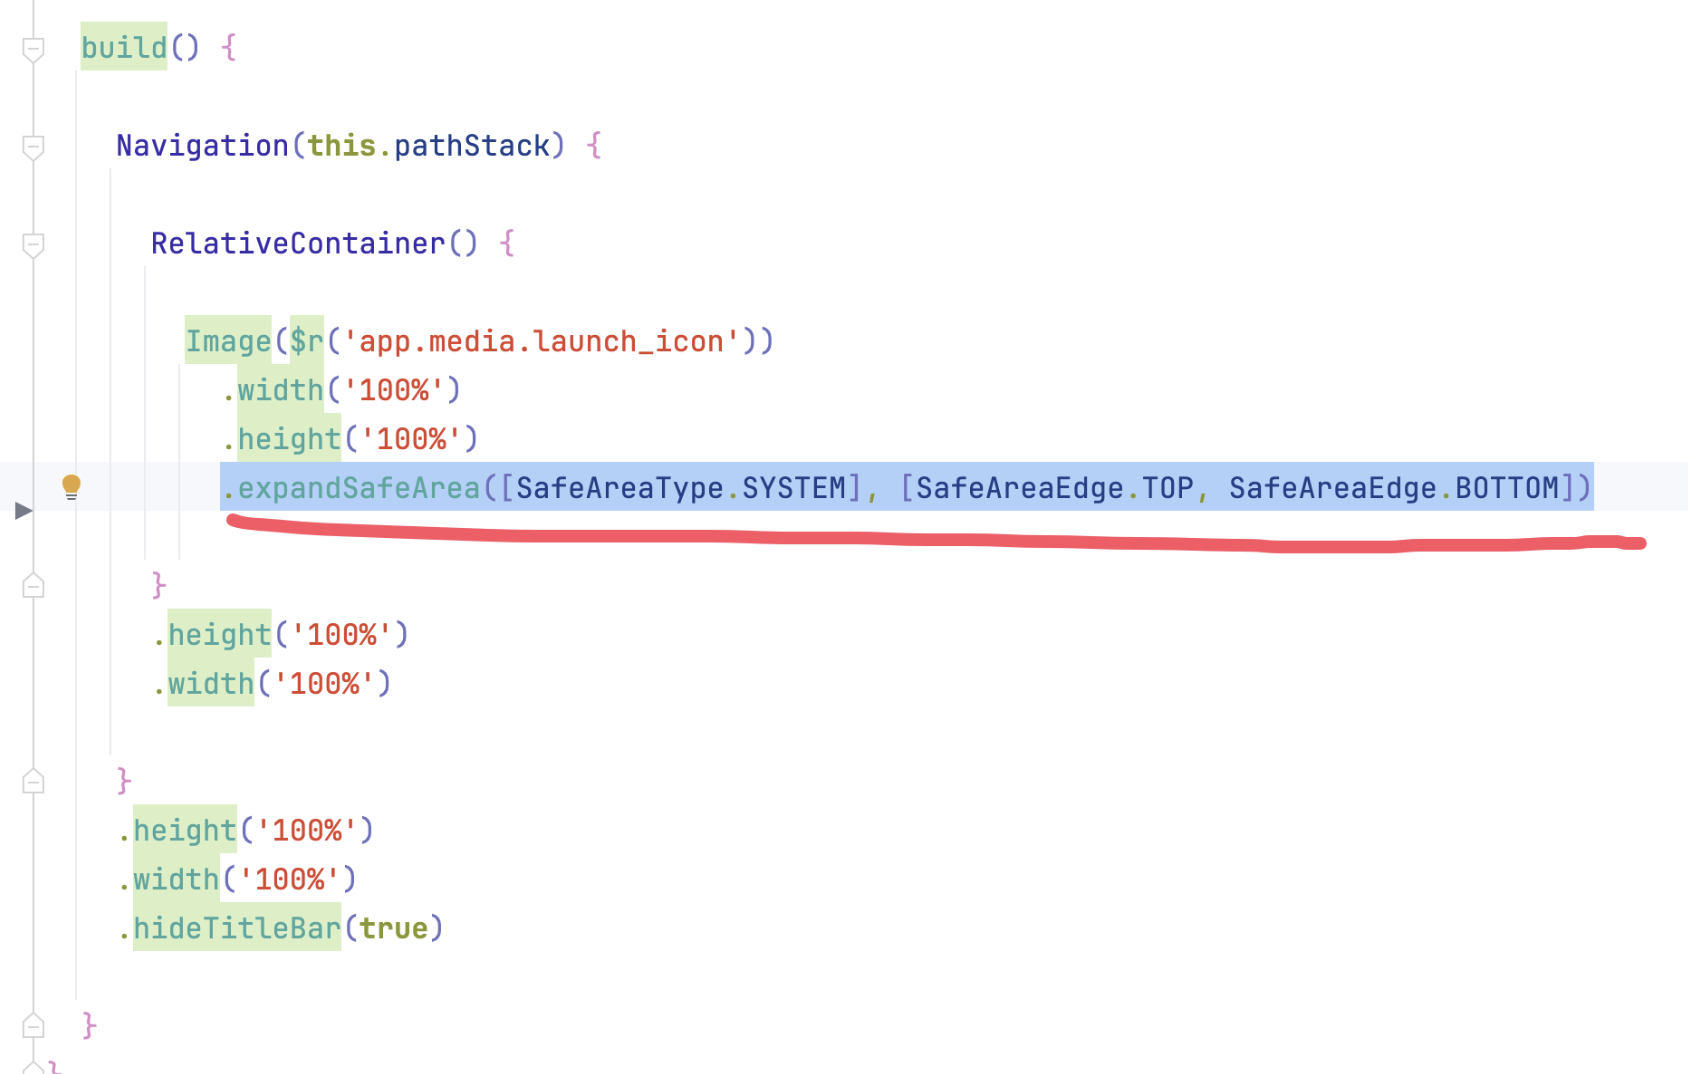
最简单的方案就是修改安全区:
Image($r('app.media.launch_icon'))
.width('100%')
.height('100%')
.expandSafeArea([SafeAreaType.SYSTEM], [SafeAreaEdge.TOP, SafeAreaEdge.BOTTOM])

在HarmonyOS Next中,应用摄像头区域和底部导航条区域的黑边问题可通过适配系统安全区域解决。使用系统提供的安全区域API,如@ohos.display模块中的getDefaultDisplaySync().cutout获取刘海屏信息,结合@ohos.window模块的getTopWindow().setWindowLayoutFullScreen设置全屏模式。通过safeArea组件或margin属性避开摄像头和导航条区域,确保内容不被遮挡。具体参数需根据设备屏幕规格动态调整。

在HarmonyOS Next中,应用摄像头区域和底部导航条区域的黑边通常是由于未正确适配系统安全区域导致的。可以通过以下方式解决:
-
使用安全区域API:在UI布局中通过
safeArea组件或getSafeAreaInsets()方法获取系统预留的安全区域边界,并相应调整内容布局。 -
配置窗口属性:在
module.json5中设置"maxWindowRatio": 1和"minWindowRatio": 1,确保应用可以全屏显示。 -
检查主题设置:确认未启用
isTransparentTitle等可能导致布局异常的属性,或通过setWindowSystemBarEnable调整系统栏显示。 -
适配沉浸式布局:使用
fitContent和avoidKeyboard等属性,确保内容自动避开摄像头和导航条区域。
建议检查当前使用的API版本是否支持上述方法,并参考官方文档更新相关配置。