


HarmonyOS鸿蒙Next中栅格布局中的断点获取
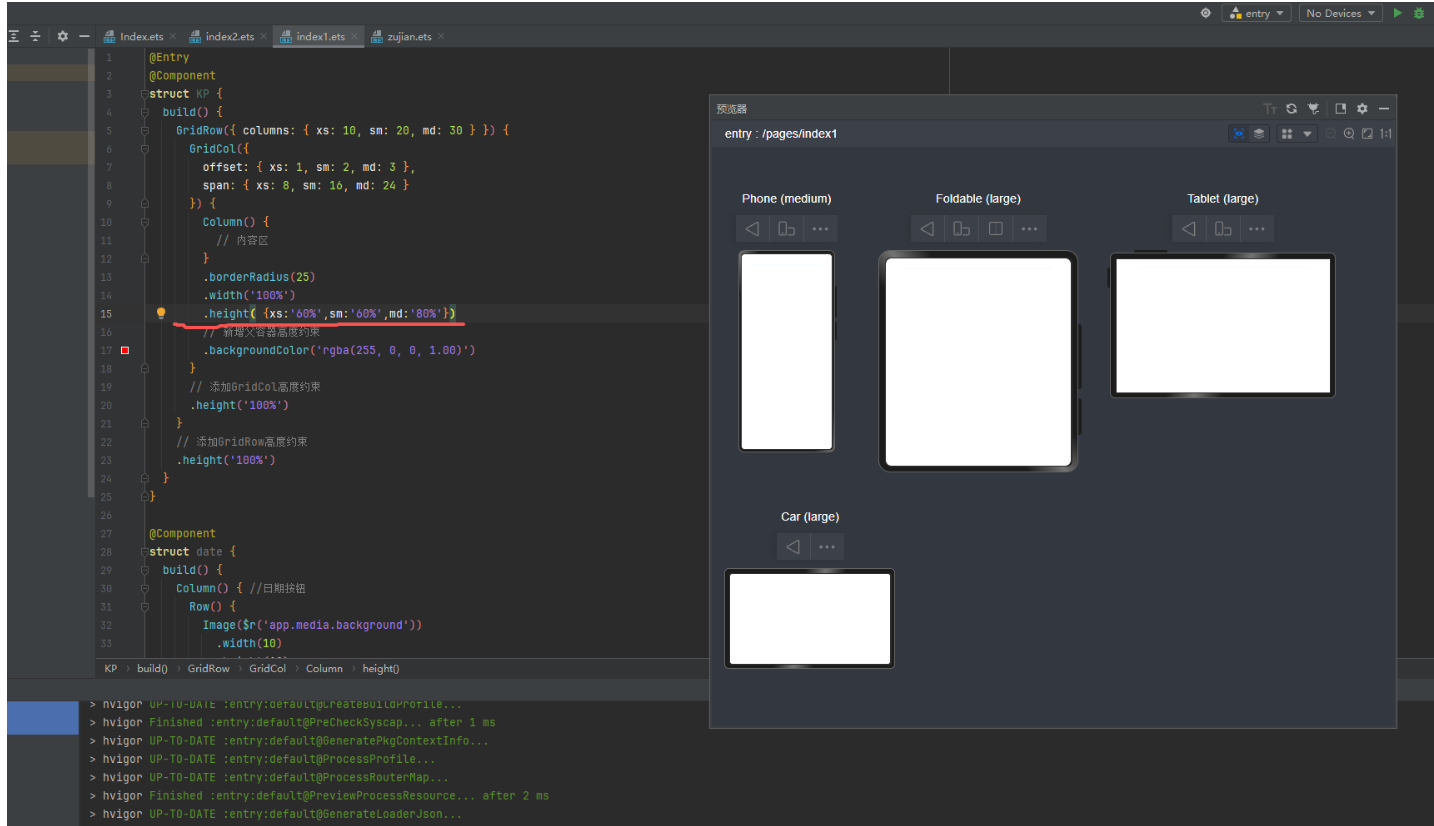
HarmonyOS鸿蒙Next中栅格布局中的断点获取 我想改成栅格布局,但是不知道为什么高度不能跟着断点变化
更多关于HarmonyOS鸿蒙Next中栅格布局中的断点获取的实战教程也可以访问 https://www.itying.com/category-93-b0.html

栅格布局,高度跟着断点变化可参考
1.在EntryAbility文件中的onWindowStageCreate生命周期回调中通过on(‘windowStatusChange’)和on(‘windowSizeChange’)事件来监听窗口布局的变化,并将窗口尺寸的长度单位由px换算为vp后,保存当前窗口的大小。
// EntryAbility.ets
export default class EntryAbility extends UIAbility {
  private windowObj?: window.Window;
  private curBp: string = '';

  onCreate(want: Want, launchParam: AbilityConstant.LaunchParam): void {
    this.context.getApplicationContext().setColorMode(ConfigurationConstant.ColorMode.COLOR_MODE_NOT_SET);

    // 1、获取Preference实例
    hilog.info(DOMAIN, 'testTag', '%{public}s', 'Ability onCreate');
  }

  // 根据当前窗口尺寸更新断点
  private updateBreakpoint(windowWidth: number) :void{
    // 将长度的单位由px换算为vp
    let windowWidthVp = windowWidth / display.getDefaultDisplaySync().densityPixels;
    let newBp: string = '';
    if (windowWidthVp < 320) {
      newBp = 'xs';
    } else if (windowWidthVp < 600) {
      newBp = 'sm';
    } else if (windowWidthVp < 840) {
      newBp = 'md';
    } else {
      newBp = 'lg';
    }
    if (this.curBp !== newBp) {
      this.curBp = newBp;
      // 使用状态变量记录当前断点值
      AppStorage.setOrCreate('currentBreakpoint', this.curBp);
    }
  }

  onWindowStageCreate(windowStage: window.WindowStage): void {
    // Main window is created, set main page for this ability
    hilog.info(DOMAIN, 'testTag', '%{public}s', 'Ability onWindowStageCreate');
    windowStage.getMainWindow().then((windowObj) => {
      this.windowObj = windowObj;
      // 获取应用启动时的窗口尺寸
      this.updateBreakpoint(windowObj.getWindowProperties().windowRect.width);
      // 注册回调函数,监听窗口尺寸变化
      windowObj.on('windowSizeChange', (windowSize)=>{
        this.updateBreakpoint(windowSize.width);
      })
    });

    windowStage.loadContent('pages/Index', (err) => {
      if (err.code) {
        hilog.error(DOMAIN, 'testTag', 'Failed to load the content. Cause: %{public}s', JSON.stringify(err));
        return;
      }
      hilog.info(DOMAIN, 'testTag', 'Succeeded in loading the content.');
    });
  }
}
2.在页面获取当前窗口的尺寸BreakPoint,并根据BreakPoint结合栅格布局来对页面中的组件进行适配
@Entry
@Component
struct GridRowSample3 {
  @StorageProp('currentBreakpoint') currentBreakpoint: string = 'sm';

  build() {
    // 配置不同断点下columns和gutter的取值
    GridRow({columns: {sm: 4, md: 8, lg: 12},
      gutter: {x: {sm: 8, md: 16, lg: 24}, y: {sm: 8, md: 16, lg: 24}}}) {
      ForEach([1,2], ()=>{
        GridCol({span: {sm: 2, md: 4, lg: 6}}) {
          Column() {
            Image($r('app.media.example'))
              .width('100%')
              .height(this.currentBreakpoint =='sm' ? '10%': this.currentBreakpoint == 'md' ? "15%": '20%')
              .layoutWeight(1)
            Text('金顶学府').margin({top: 16, bottom: 8}).padding({left: 8, right: 8})
            Text('地点: 武汉/武昌').fontSize(12).margin({bottom: 8}).fontColor('#333').padding({left: 8})
            Flex({justifyContent: FlexAlign.Start, alignItems: ItemAlign.Center}) {
              ForEach(this.elements, (item: ElementType) => {
                Text(item.text).backgroundColor(item.color)
                  .padding(2)
                  .margin({right: 12})
                  .fontSize(12)
              })
            }.padding({left: 8})
            Text('24599/元m²起').fontSize(24).margin({top: 12}).fontColor(Color.Red).padding({left: 8})
          }
          .alignItems(HorizontalAlign.Start)
          .justifyContent(FlexAlign.Start)
          .border({radius: this.currentBreakpoint == 'sm' ? '4%' : '8%'})
          .height(this.currentBreakpoint == 'sm' ? '30%' : '50%')
          .width('100%')
          .backgroundColor(Color.White)
        }
      })
    }
    .height('100%')
    .width('100%')
  }

}
完整代码如下:
interface ElementType {
  index: number
  text: string
  color: ResourceColor
}

@Entry
@Component
struct GridRowSample3 {
  @StorageProp('currentBreakpoint') currentBreakpoint: string = 'sm';
  private controller: TextInputController = new TextInputController();
    private elements: ElementType[] = [
    {index: 1, text: '在售', color: $r('sys.color.ohos_id_color_palette_aux1')},
    {index: 2, text: '住宅', color: $r('sys.color.ohos_id_color_palette_aux2')},
    {index: 3, text: '江景', color: $r('sys.color.ohos_id_color_palette_aux3')},
    {index: 4, text: '品质楼盘', color: $r('sys.color.ohos_id_color_palette_aux4')},
    {index: 5, text: '地铁沿线', color: $r('sys.color.ohos_id_color_palette_aux5')},
  ];


  build() {
    Column() {
      TextInput({ text: '', placeholder: 'input your word...', controller: this.controller })
        .placeholderColor(Color.Grey)
        .placeholderFont({ size: 14, weight: 400 })
        .caretColor(Color.Blue)
        .width('95%')
        .height(40)
        .margin(20)
        .fontSize(14)
        .fontColor(Color.Black)
        .inputFilter('[a-z]', (e) => {
          console.log(JSON.stringify(e));
        })
      // 配置不同断点下columns和gutter的取值
      GridRow({columns: {sm: 4, md: 8, lg: 12},
        gutter: {x: {sm: 8, md: 16, lg: 24}, y: {sm: 8, md: 16, lg: 24}}}) {
        ForEach([1,2], ()=>{
          GridCol({span: {sm: 2, md: 4, lg: 6}}) {
            Column() {
              Image($r('app.media.example'))
                .width('100%')
                .height(this.currentBreakpoint =='sm' ? '10%': this.currentBreakpoint == 'md' ? "15%": '20%')
                .layoutWeight(1)
              Text('金顶学府').margin({top: 16, bottom: 8}).padding({left: 8, right: 8})
              Text('地点: 武汉/武昌').fontSize(12).margin({bottom: 8}).fontColor('#333').padding({left: 8})
              Flex({justifyContent: FlexAlign.Start, alignItems: ItemAlign.Center}) {
                ForEach(this.elements, (item: ElementType) => {
                  Text(item.text).backgroundColor(item.color)
                    .padding(2)
                    .margin({right: 12})
                    .fontSize(12)
                })
              }.padding({left: 8})
              Text('24599/元m²起').fontSize(24).margin({top: 12}).fontColor(Color.Red).padding({left: 8})
            }
            .alignItems(HorizontalAlign.Start)
            .justifyContent(FlexAlign.Start)
            .border({radius: this.currentBreakpoint == 'sm' ? '4%' : '8%'})
            .height(this.currentBreakpoint == 'sm' ? '30%' : '50%')
            .width('100%')
            .backgroundColor(Color.White)
          }
        })
      }
      .height('100%')
      .width('100%')
    }.padding({left: 12, right: 12})
      .backgroundColor('#eee')
      .height('100%')
      .width('100%')
  }
}
【背景知识】
断点:将窗口宽度划分为不同的范围(即断点),监听窗口尺寸变化,当断点改变时同步调整页面布局。
栅格布局:栅格组件将其所在的区域划分为有规律的多列,通过调整不同断点下的栅格组件的参数以及其子组件占据的列数等,实现不同的布局效果。
更多关于HarmonyOS鸿蒙Next中栅格布局中的断点获取的实战系列教程也可以访问 https://www.itying.com/category-93-b0.html

Column属于普通容器组件,需要获取断点值设置
@Entry @Component struct GridColHeightExample { @State currentBreakpoint: string = ‘xs’; // 当前断点状态 @State colHeight: number = 50; // 默认高度 build() { GridRow({ breakpoints: { value: [“320vp”, “600vp”, “840vp”] }, reference: BreakpointsReference.WindowSize }) { GridCol({ span: { xs: 6, sm: 4, md: 3 } }) { // 根据断点设置不同高度 Row() .width(“100%”) .height(this.currentBreakpoint === ‘xs’ ? ‘50vp’ : this.currentBreakpoint === ‘sm’ ? ‘80vp’ : ‘120vp’) .backgroundColor(Color.Blue) } } .onBreakpointChange((breakpoint) => { this.currentBreakpoint = breakpoint; // 更新当前断点 }) } }
//在 EntryAbility 中添加监听 在 EntryAbility 中添加监听
// MainAbility.ts import { window, display } from ‘@kit.ArkUI’ import { UIAbility } from ‘@kit.AbilityKit’ export default class MainAbility extends UIAbility { private curBp: string = ‘’ //… // 根据当前窗口尺寸更新断点 private updateBreakpoint(windowWidth: number) :void{ try { // 核心代码1: 将长度的单位由px换算为vp,(px除以像素密度得到vp) let windowWidthVp = windowWidth / display.getDefaultDisplaySync().densityPixels let newBp: string = ‘’ // 核心代码2: 基于窗口宽度vp值,判断当前设备属于哪个断点范围 if (windowWidthVp < 320) { newBp = ‘xs’ } else if (windowWidthVp < 600) { newBp = ‘sm’ } else if (windowWidthVp < 840) { newBp = ‘md’ } else { newBp = ‘lg’ } if (this.curBp !== newBp) { this.curBp = newBp // 核心代码3: 使用状态变量记录当前断点值 AppStorage.setOrCreate(‘currentBreakpoint’, this.curBp) } } catch(err) { console.log(“getDisplayByIdSync failed err” + err.code) } } onWindowStageCreate(windowStage: window.WindowStage) :void{ windowStage.getMainWindow().then((windowObj) => { // 获取应用启动时的窗口尺寸 this.updateBreakpoint(windowObj.getWindowProperties().windowRect.width) // 注册回调函数,监听窗口尺寸变化 windowObj.on(‘windowSizeChange’, (windowSize)=>{ this.updateBreakpoint(windowSize.width) }) }); // … } //… }
页面中使用断点信息
@Entry @Component struct Index { @StorageProp(‘currentBreakpoint’) curBp: string = ‘sm’ build() { Flex({justifyContent: FlexAlign.Center, alignItems: ItemAlign.Center}) { Text(this.curBp).fontSize(50).fontWeight(FontWeight.Medium) } .width(‘100%’) .height(‘100%’) } }

在HarmonyOS Next中,栅格布局断点通过GridContainer的breakpoints属性定义,使用GridBreakpoints类设置响应式断点值。可通过GridContainer的currentBreakpoint属性获取当前断点类型,返回值为Breakpoints枚举(如xs、sm、md、lg)。使用onBreakpointChange事件监听断点变化,实时获取当前断点信息。断点数据基于窗口宽度自动匹配,无需手动计算。

在HarmonyOS Next中,栅格布局的高度默认不会随断点自动调整,因为栅格系统主要基于列宽和间距的响应式变化。若需实现高度自适应,建议通过以下方式:
-
使用栅格容器属性
检查是否在.grid-container中正确设置了grid-template-rows,可尝试设置为auto或minmax()函数动态调整行高:.grid-container { grid-template-rows: repeat(auto-fit, minmax(100px, auto)); } -
结合媒体查询控制高度
通过断点监听(如sm|md|lg)在对应媒体查询中手动调整高度:[@media](/user/media) (min-width: 768px) { /* md断点 */ .grid-item { height: 120px; } } -
检查内容流布局
确认栅格子项内容是否撑开高度,若内容高度固定,需显式设置百分比或视口单位(如vh)实现响应。 -
使用Flexbox辅助
若栅格布局限制较多,可改用Flex容器并设置flex-wrap: wrap,通过flex-basis和媒体查询控制项的高度与排列。
注意:栅格系统默认聚焦宽度适配,高度需依赖内容或显式配置。建议通过DevEco Studio的实时预览功能验证不同断点下的表现。