


HarmonyOS鸿蒙Next中遮罩中开一个孔能点击下层组件怎么实现?
HarmonyOS鸿蒙Next中遮罩中开一个孔能点击下层组件怎么实现? 之前可能描述不够清楚,修改了一下。
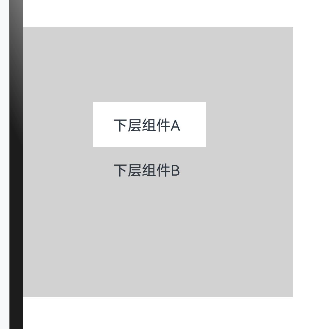
下面测试代码,灰色遮罩遮住一部分下层组件,屏蔽下层点击,镂空区域需要允许点击下层。
最好是通用的,因为遮罩和下层的东西(其他人的模块)是改不了先后顺序和组件内容的
@Entry
@Component
struct Canvas02 {
  build() {
    Column() {
      Text('下层组件A').position({ x: 100, y: 100 }).onClick(() => console.log('下层组件A'))
      Text('下层组件B').position({ x: 100, y: 150 }).onClick(() => console.log('下层组件B'))
      Column().backgroundColor('#39373737').size({ width: 300, height: 300 }).onClick(() => console.log('遮罩组件'))
    }
  }
}
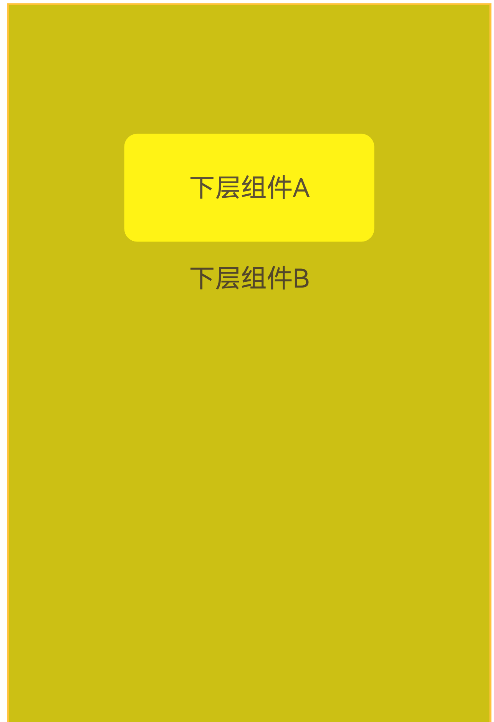
下图右边是镂空目标效果(改为圆角矩形),
点击下层组件B,要输出遮罩组件日志,
点击下层组件A,要输下层组件A日志
更多关于HarmonyOS鸿蒙Next中遮罩中开一个孔能点击下层组件怎么实现?的实战教程也可以访问 https://www.itying.com/category-93-b0.html


使用 HitTestMode.Transparent 让 Canvas 的事件传递到底层。
@Entry
@Component
struct Index {
  @State offsetY: number = 100
  private contextSettings: RenderingContextSettings = new RenderingContextSettings(true);
  private ctx: CanvasRenderingContext2D = new CanvasRenderingContext2D(this.contextSettings);
  private rect: Rectangle = {}

  build() {
    Stack() {
      Text('下层组件B')
        .fontSize(20)
        .fontColor('#333')
        .offset({ y: 200 })

      Text('下层组件A')
        .fontSize(20)
        .fontColor('#333')
        .padding({
          left: 50,
          right: 50,
          top: 30,
          bottom: 30
        })
        .offset({ y: this.offsetY })
        .onAreaChange((oldValue: Area, newValue: Area) => {
          const x = newValue.position.x
          const y = newValue.position.y
          const width = newValue.width
          const height = newValue.height
          this.rect = {
            x,
            y,
            width,
            height
          }
          this.draw()
        })
        .onClick(() => {
          this.offsetY += 10
          this.draw()
          console.log('下层组件-点击了 this.offsetY = ' + this.offsetY)
        })


      Canvas(this.ctx)
        .width('100%')
        .height('100%')
        .backgroundColor(Color.Transparent)
        .hitTestBehavior(HitTestMode.Transparent)
        .onReady(() => {

        })
    }
    .align(Alignment.Top)
    .width('100%')
    .height('100%')
    .backgroundColor('#ff0')
  }

  draw() {
    const x = this.rect.x as number
    const y = this.rect.y as number + this.offsetY
    const width = this.rect.width as number
    const height = this.rect.height as number
    const radius = 10

    this.ctx.reset()

    // 遮罩层
    this.ctx.fillStyle = '#40000000';
    this.ctx.beginPath();
    this.ctx.moveTo(0, 0);
    this.ctx.lineTo(0, this.ctx.height);
    this.ctx.lineTo(this.ctx.width, this.ctx.height);
    this.ctx.lineTo(this.ctx.width, 0);
    this.ctx.lineTo(0, 0);

    // 圆角矩形  API20 可用 roundRect
    this.ctx.arc(x + radius, y + radius, radius, Math.PI, Math.PI * 3 / 2);
    this.ctx.lineTo(width - radius + x, y);
    this.ctx.arc(width - radius + x, radius + y, radius, Math.PI * 3 / 2, Math.PI * 2);
    this.ctx.lineTo(width + x, height + y - radius);
    this.ctx.arc(width - radius + x, height - radius + y, radius, 0, Math.PI / 2);
    this.ctx.lineTo(radius + x, height + y);
    this.ctx.arc(radius + x, height - radius + y, radius, Math.PI / 2, Math.PI);
    this.ctx.lineTo(x, y + radius);
    this.ctx.fill();
    this.ctx.closePath();
  }
}


把Colunm与Text创建顺序调整一下就行,后创建的组件会覆盖先创建的组件。
Column().backgroundColor('#39373737').size({ width: 300, height: 300 })
        Text('下层组件').position({ x: 100, y: 100 }).onClick(() => console.log('点击下层'))
          .width(100).height(100).backgroundColor("#fff")
如果不想改顺序在Text组件后面加上zIndex(vaule:number)也是可以解决的,当元素重叠时,具有较高z-index值的元素将显示在具有较低z-index值的元素之上
        Text('下层组件').position({ x: 100, y: 100 }).onClick(() => console.log('点击下层'))
          .width(100).height(100).backgroundColor("#fff").zIndex(999)
        Column().backgroundColor('#39373737').size({ width: 300, height: 300 })
通常遇到组件重叠()、层级控制可以用stack,这样你就不需要Position来定位到Column上面了
Stack() {
         Column()
          .backgroundColor('#39373737')
          .size({ width: 300, height: 300 })
        Text('上层组件')
          .width(100)
          .height(100)
          .backgroundColor("#fff")
      }
参考链接:Stack-行列与堆叠-ArkTS组件-ArkUI(方舟UI框架)-应用框架 - 华为HarmonyOS开发者


@Entry
@Component
struct Canvas02 {
  build() {
    Stack({ alignContent: Alignment.TopStart }) {
      // 底层遮罩组件
      Column()
        .backgroundColor('#39373737')
        .size({ width: 300, height: 300 })
        .onClick(() => console.log('遮罩组件'))
        .hitTestBehavior(HitTestMode.Transparent) // 允许事件穿透
      // 上层交互组件
      Column() {
        Text('下层组件A')
          .position({ x: 100, y: 100 })
          .onClick(() => console.log('下层组件A'))

        Text('下层组件B')
          .position({ x: 100, y: 150 })
          .hitTestBehavior(HitTestMode.None) // 禁用事件拦截
      }
    }
  }
}
使用.hitTestBehavior(HitTestMode.Transparent)允许穿透,.hitTestBehavior(HitTestMode.None)禁止穿透

您好使用触摸测试可以实现,望采纳!
@Entry
@Component
struct Index {
  build() {
    Stack() {
      // 下层内容组件
      Column() {
        Text('底层内容区域').fontSize(20)
      }
      .width('100%')
      .height('100%')
      .backgroundColor(Color.White)
      .onClick(() => {
        this.getUIContext().getPromptAction().showToast({ message: '底层内容被点击' })
      })

      // 镂空遮罩层
      Column() {
        // 镂空区域(透明部分)
        Column()
          .width(200)
          .aspectRatio(1)
          .borderRadius('50%')
          .backgroundColor(Color.White)
          .position({ left: 20, top: 30 })
          .hitTestBehavior(HitTestMode.Transparent) // 关键:允许点击穿透
          .onClick(() => {
            this.getUIContext().getPromptAction().showToast({ message: '透明部分' })
          })
      }
      .width('100%')
      .height('100%')
      .backgroundColor('#80000000')

    }
    .width('100%')
    .height('100%')
  }
}


在HarmonyOS Next中,可通过@State和@Builder结合Stack组件实现遮罩开孔点击。使用Stack布局上层遮罩与下层内容,通过if条件控制遮罩层显示,在遮罩层使用Rect或Circle设置透明区域,并绑定onClick事件穿透至下层组件。示例代码片段:
@State isMaskVisible: boolean = true

build() {
  Stack() {
    // 下层组件
    Button('点击我')
      .onClick(() => {
        // 处理点击
      })

    // 遮罩层
    if (this.isMaskVisible) {
      Rect()
        .fill('#CC000000')
        .clip(new Circle({ radius: 50 }))
        .onClick(() => {
          this.isMaskVisible = false
        })
    }
  }
}
通过clip设置开孔形状,控制遮罩层显隐实现点击穿透。