


HarmonyOS 鸿蒙Next中如何在应用的沙箱目录下创建指定名称的子目录
HarmonyOS 鸿蒙Next中如何在应用的沙箱目录下创建指定名称的子目录 如何在应用的沙箱目录下创建指定名称的子目录
并在这个子目录下创建或者读取删除(一个或者多个)指定名称的子文件
4 回复

【实现思路】
- 获取沙箱路径。
- 创建一个名为 my_data 的子目录。
- 在该子目录下创建并写入文件。
- 读取该文件的内容。
- 删除该文件。
【核心步骤说明】
- 导入模块: 使用 import { fileIo as fs } from ‘@kit.CoreFileKit’;。
- 获取路径: 使用 getContext(this).filesDir 获取应用沙箱内部存储路径。
- 创建目录: 使用 fs.mkdirSync(或者异步 mkdir)。通常先用 fs.accessSync 判断是否存在。
- 文件读写: 使用 fs.openSync 打开/创建文件,fs.writeSync 写入,fs.readSync 读取。
- 删除: 使用 fs.unlinkSync 删除文件。
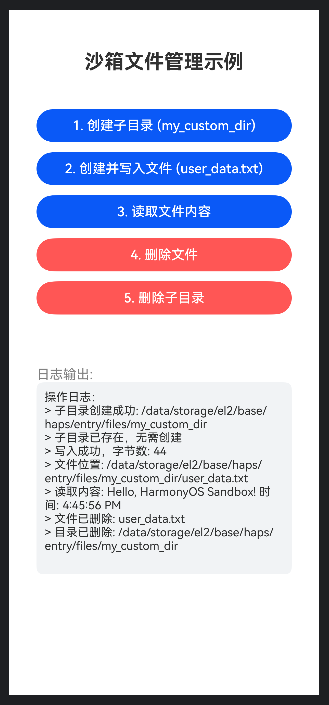
【实现效果】
【完整代码】:
import { fileIo as fs } from '[@kit](/user/kit).CoreFileKit';
import { common } from '[@kit](/user/kit).AbilityKit';
import { util } from '[@kit](/user/kit).ArkTS';

@Entry
@Component
struct SandboxFileManager {
  // 用于显示操作日志
  @State logs: string = "操作日志:\n";
  // 上下文,用于获取 filesDir
  private context = getContext(this) as common.UIAbilityContext;
  // 定义子目录名称
  private subDirName: string = "my_custom_dir";
  // 定义文件名
  private fileName: string = "user_data.txt";

  /**
   * 辅助函数:添加日志
   */
  addLog(msg: string) {
    this.logs += `> ${msg}\n`;
    console.info(`SandboxDemo: ${msg}`);
  }

  /**
   * 1. 获取完整的文件夹路径
   */
  getDirPath(): string {
    // filesDir 是应用沙箱内的 files 目录
    return `${this.context.filesDir}/${this.subDirName}`;
  }

  /**
   * 2. 获取完整的文件路径
   */
  getFilePath(): string {
    return `${this.getDirPath()}/${this.fileName}`;
  }

  /**
   * 操作:创建子目录
   */
  createSubDirectory() {
    const dirPath = this.getDirPath();
    try {
      // 检查目录是否存在
      const exists = fs.accessSync(dirPath);
      if (!exists) {
        // 创建目录
        fs.mkdirSync(dirPath);
        this.addLog(`子目录创建成功: ${dirPath}`);
      } else {
        this.addLog(`子目录已存在,无需创建`);
      }
    } catch (e) {
      this.addLog(`创建目录失败: ${e.message}`);
    }
  }

  /**
   * 操作:在子目录下创建并写入文件
   */
  createAndWriteFile() {
    // 确保目录存在
    this.createSubDirectory();

    const filePath = this.getFilePath();
    let file: fs.File | undefined;
    try {
      // 打开文件,如果不存在则创建 (CREATE),如果是读写模式 (READ_WRITE)
      // TRUNC 表示如果文件存在则清空内容
      file = fs.openSync(filePath, fs.OpenMode.READ_WRITE | fs.OpenMode.CREATE | fs.OpenMode.TRUNC);

      const content = "Hello, HarmonyOS Sandbox! 时间: " + new Date().toLocaleTimeString();

      // 写入数据
      const writeLen = fs.writeSync(file.fd, content);
      this.addLog(`写入成功,字节数: ${writeLen}`);
      this.addLog(`文件位置: ${filePath}`);
    } catch (e) {
      this.addLog(`写入文件失败: ${e.message}`);
    } finally {
      // 务必关闭文件流
      if (file) {
        fs.closeSync(file);
      }
    }
  }

  /**
   * 操作:读取指定文件
   */
  readFile() {
    const filePath = this.getFilePath();
    let file: fs.File | undefined;
    try {
      // 检查文件是否存在
      if (!fs.accessSync(filePath)) {
        this.addLog("文件不存在,无法读取");
        return;
      }

      // 以只读模式打开
      file = fs.openSync(filePath, fs.OpenMode.READ_ONLY);

      // 获取文件大小用于创建缓冲区
      const stat = fs.statSync(filePath);
      const buf = new ArrayBuffer(stat.size);

      // 读取内容到缓冲区
      fs.readSync(file.fd, buf);

      // 将 ArrayBuffer 转换为字符串
      const textDecoder = util.TextDecoder.create("utf-8", { ignoreBOM: true });
      const content = textDecoder.decodeWithStream(new Uint8Array(buf));

      this.addLog(`读取内容: ${content}`);
    } catch (e) {
      this.addLog(`读取失败: ${e.message}`);
    } finally {
      if (file) {
        fs.closeSync(file);
      }
    }
  }

  /**
   * 操作:删除指定文件
   */
  deleteFile() {
    const filePath = this.getFilePath();
    try {
      if (fs.accessSync(filePath)) {
        fs.unlinkSync(filePath);
        this.addLog(`文件已删除: ${this.fileName}`);
      } else {
        this.addLog("文件不存在,无需删除");
      }
    } catch (e) {
      this.addLog(`删除失败: ${e.message}`);
    }
  }

  /**
   * 操作:删除整个子目录(及其内容)
   * 注意:rmdir 只能删除空目录,如果目录内有文件,需要先删除文件或使用递归逻辑
   * 这里演示简单的 rmdir
   */
  deleteDirectory() {
    const dirPath = this.getDirPath();
    try {
      if (fs.accessSync(dirPath)) {
        // 先尝试删除里面的文件(为了演示简单流程,这里假设只有一个文件)
        try {
          fs.unlinkSync(this.getFilePath());
        } catch (ignore) {
        }

        fs.rmdirSync(dirPath);
        this.addLog(`目录已删除: ${dirPath}`);
      } else {
        this.addLog("目录不存在");
      }
    } catch (e) {
      this.addLog(`删除目录失败 (目录可能非空): ${e.message}`);
    }
  }

  build() {
    Column() {
      Text("沙箱文件管理示例")
        .fontSize(24)
        .fontWeight(FontWeight.Bold)
        .margin({ bottom: 20 })

      Scroll() {
        Column({ space: 12 }) {
          Button("1. 创建子目录 (my_custom_dir)")
            .width('90%')
            .onClick(() => this.createSubDirectory())

          Button("2. 创建并写入文件 (user_data.txt)")
            .width('90%')
            .onClick(() => this.createAndWriteFile())

          Button("3. 读取文件内容")
            .width('90%')
            .onClick(() => this.readFile())

          Button("4. 删除文件")
            .width('90%')
            .backgroundColor('#FF5555')
            .onClick(() => this.deleteFile())

          Button("5. 删除子目录")
            .width('90%')
            .backgroundColor('#FF5555')
            .onClick(() => this.deleteDirectory())
        }
      }
      .height('40%')

      Divider().margin({ top: 20, bottom: 20 })

      Text("日志输出:")
        .width('90%')
        .textAlign(TextAlign.Start)
        .fontColor(Color.Gray)

      Scroll() {
        Text(this.logs)
          .fontSize(14)
          .width('90%')
          .padding(10)
          .backgroundColor('#F1F3F5')
          .borderRadius(8)
      }
      .layoutWeight(1)
      .align(Alignment.TopStart)
    }
    .width('100%')
    .height('100%')
    .padding(16)
  }
}
【核心代码解读】
- 路径拼接: 鸿蒙的沙箱路径不需要我们手动去拼写 /data/app/el2/… 这样复杂的绝对路径,而是直接使用 Context 提供的变量。
- this.context.filesDir:指向应用的内部存储 files 目录。
- 我们通过 ${this.context.filesDir}/目录名/文件名 的方式组合路径。
- 创建目录 (fs.mkdirSync):
- 在创建之前,使用 fs.accessSync(path) 检查目录是否已经存在,避免重复创建报错。
- 文件打开模式 (fs.OpenMode):
- READ_WRITE: 读写权限。
- CREATE: 如果文件不存在则创建。
- TRUNC: 如果文件存在,打开时清空内容(覆盖写入时常用)。如果想追加内容,可以使用 fs.OpenMode.APPEND。
- 二进制转换:
- fs.writeSync 和 fs.readSync 都是基于 buffer (ArrayBuffer) 操作的。
- 为了显示文字,使用了 util.TextDecoder 将读取到的二进制数据转换回 UTF-8 字符串。
更多关于HarmonyOS 鸿蒙Next中如何在应用的沙箱目录下创建指定名称的子目录的实战系列教程也可以访问 https://www.itying.com/category-93-b0.html

import { fileIo } from '@kit.CoreFileKit';

@Entry
@Component
struct Index {
  @State message: string = '创建子目录';

  build() {
    Column() {
      Text(this.message)
        .fontSize($r('app.float.page_text_font_size'))
        .fontWeight(FontWeight.Bold)
        .onClick(() => {
          this.create("app")
        })
      Text('删除子目录')
        .fontSize($r('app.float.page_text_font_size'))
        .fontWeight(FontWeight.Bold)
        .onClick(() => {
          this.delete("app")
        })
    }
    .height('100%')
    .width('100%')
  }
  /**
   * 传入目录名字进行创建
   * @param name
   */
  create(name: string) {
    const context = getContext(this)
    const baseDir = context.filesDir; // 获取沙箱files目录
    let subDirPath = baseDir + "/" + name
    // 检查并创建目录
    if (!fileIo.accessSync(subDirPath)) {
      fileIo.mkdirSync(subDirPath, true); // true表示递归创建
    }
  }
  /**
   * 传入目录名字进行删除
   * @param name
   */
  delete(name: string) {
    const context = getContext(this)
    const baseDir = context.filesDir; // 获取沙箱files目录
    let filePath = baseDir + "/" + name
    this.deleteDir(filePath)
  }

  deleteDir(dirPath: string) {
    const files = fileIo.listFileSync(dirPath); // 列出目录内容
    files.forEach(file => {
      const fullPath = `${dirPath}/${file}`;
      if (fileIo.statSync(fullPath).isDirectory()) {
        this.deleteDir(fullPath); // 递归删除子目录
      } else {
        fileIo.unlinkSync(fullPath); // 删除文件
      }
    });
    fileIo.rmdirSync(dirPath); // 删除空目录
  }
}
你试试看满足吗?我亲自试过的。

在HarmonyOS Next中,使用@ohos.file.fs模块的mkdir方法在应用沙箱目录下创建子目录。首先通过context.filesDir获取应用文件沙箱路径,然后拼接目标子目录名称,最后调用fs.mkdir创建目录。注意确保路径正确并处理可能出现的异常。

在HarmonyOS Next中,应用沙箱目录的访问主要通过Context对象和fs文件系统模块实现。以下是具体步骤:
1. 获取应用沙箱目录路径
首先,通过UIAbility的Context获取应用沙箱目录:
// 在UIAbility或AbilityStage中
let context = this.context; // 或通过其他方式获取Context
let filesDir = context.filesDir; // 应用沙箱文件目录
2. 创建指定名称的子目录
使用fs模块在沙箱目录下创建子目录:
import fs from '@ohos.file.fs';

let subDirName = 'mySubDir';
let subDirPath = filesDir + '/' + subDirName;

try {
  // 检查目录是否存在
  if (!fs.accessSync(subDirPath)) {
    // 创建目录,recursive为true可创建多级目录
    fs.mkdirSync(subDirPath, true);
    console.log('目录创建成功:' + subDirPath);
  } else {
    console.log('目录已存在:' + subDirPath);
  }
} catch (error) {
  console.error('目录操作失败:' + JSON.stringify(error));
}
3. 在子目录中操作文件
创建文件:
let fileName = 'myFile.txt';
let filePath = subDirPath + '/' + fileName;

try {
  let file = fs.openSync(filePath, fs.OpenMode.CREATE | fs.OpenMode.READ_WRITE);
  fs.closeSync(file);
  console.log('文件创建成功:' + filePath);
} catch (error) {
  console.error('文件创建失败:' + JSON.stringify(error));
}
写入文件:
let content = 'Hello HarmonyOS Next';
try {
  fs.writeSync(fs.openSync(filePath, fs.OpenMode.WRITE_ONLY), content);
  console.log('文件写入成功');
} catch (error) {
  console.error('文件写入失败:' + JSON.stringify(error));
}
读取文件:
try {
  let file = fs.openSync(filePath, fs.OpenMode.READ_ONLY);
  let buffer = new ArrayBuffer(1024);
  let bytesRead = fs.readSync(file, buffer);
  let content = String.fromCharCode.apply(null, new Uint8Array(buffer.slice(0, bytesRead)));
  fs.closeSync(file);
  console.log('文件内容:' + content);
} catch (error) {
  console.error('文件读取失败:' + JSON.stringify(error));
}
删除文件:
try {
  fs.unlinkSync(filePath);
  console.log('文件删除成功');
} catch (error) {
  console.error('文件删除失败:' + JSON.stringify(error));
}
删除子目录(需为空目录):
try {
  fs.rmdirSync(subDirPath);
  console.log('目录删除成功');
} catch (error) {
  console.error('目录删除失败:' + JSON.stringify(error));
}
4. 批量操作多个文件
可结合循环和数组实现批量操作:
let fileNames = ['file1.txt', 'file2.txt', 'file3.txt'];

// 批量创建
fileNames.forEach((name) => {
  let path = subDirPath + '/' + name;
  fs.openSync(path, fs.OpenMode.CREATE | fs.OpenMode.READ_WRITE);
});
关键注意事项:
- 确保在
module.json5中声明必要的文件操作权限(沙箱目录内通常不需要额外权限)。 - 使用
fs.accessSync()检查路径存在性,避免重复创建。 - 操作完成后及时调用
fs.closeSync()释放资源。 - 删除目录前需确保目录为空,否则会操作失败。
以上代码基于HarmonyOS Next的API 10+版本,实际开发时请根据SDK版本调整API调用方式。