


HarmonyOS 鸿蒙Next中使用 Date 实现高精度毫秒级秒表
HarmonyOS 鸿蒙Next中使用 Date 实现高精度毫秒级秒表 如何使用 Date 实现高精度毫秒级秒表应用?以此来实现跑步计时?
3 回复

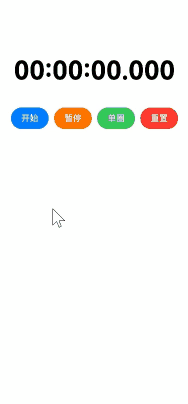
实现效果
使用场景
跑步、游泳计圈、定时闹钟等
实现思路
第一步:创建一个HighPrecisionStopwatch管理方法类,维护一个 elapsedTime,定时器每次触发时,elapsedTime += 10。
第二步:通过lapTimes一个数组来 管理日期记录以此来实现圈数数据的记录。
完整实现代码
import { hilog } from '@kit.PerformanceAnalysisKit';

export class HighPrecisionStopwatch {
  private startTime: number = 0;
  private elapsedTime: number = 0;
  private isRunning: boolean = false;
  private lapTimes: number[] = [];

  // 开始计时
  start(): void {
    if (!this.isRunning) {
      this.startTime = Date.now() - this.elapsedTime;
      this.isRunning = true;
      hilog.info(0x0000, 'Stopwatch', '秒表开始计时');
    }
  }

  // 暂停计时
  pause(): void {
    if (this.isRunning) {
      this.elapsedTime = Date.now() - this.startTime;
      this.isRunning = false;
      hilog.info(0x0000, 'Stopwatch', `秒表暂停,当前时间: ${this.getFormattedTime()}`);
    }
  }

  // 记录单圈时间
  lap(): string {
    if (this.isRunning) {
      const currentTime = Date.now();
      const lapTime = currentTime - this.startTime;
      this.lapTimes.push(lapTime);

      const formattedLap = this.formatMilliseconds(lapTime);
      hilog.info(0x0000, 'Stopwatch', `单圈时间: ${formattedLap}`);
      return formattedLap;
    }
    return '00:00:00.000';
  }

  // 重置秒表
  reset(): void {
    this.startTime = 0;
    this.elapsedTime = 0;
    this.isRunning = false;
    this.lapTimes = [];
    hilog.info(0x0000, 'Stopwatch', '秒表已重置');
  }

  // 获取当前时间(毫秒)
  getCurrentTime(): number {
    if (this.isRunning) {
      return Date.now() - this.startTime;
    }
    return this.elapsedTime;
  }

  // 格式化时间显示
  getFormattedTime(): string {
    const time = this.getCurrentTime();
    return this.formatMilliseconds(time);
  }

  // 毫秒格式化
  private formatMilliseconds(ms: number): string {
    const hours = Math.floor(ms / 3600000);
    const minutes = Math.floor((ms % 3600000) / 60000);
    const seconds = Math.floor((ms % 60000) / 1000);
    const milliseconds = Math.floor(ms % 1000);

    return `${hours.toString().padStart(2, '0')}:${
    minutes.toString().padStart(2, '0')}:${
    seconds.toString().padStart(2, '0')}.${
    milliseconds.toString().padStart(3, '0')}`;
  }

  // 获取所有单圈时间
  getAllLaps(): string[] {
    return this.lapTimes.map((lap, index) =>
    `单圈 ${index + 1}: ${this.formatMilliseconds(lap)}`
    );
  }
}
import { HighPrecisionStopwatch } from './HighPrecisionStopwatch';

@Entry
@Component
struct StopwatchPage {
  private stopwatch: HighPrecisionStopwatch = new HighPrecisionStopwatch();
  @State currentTime: string = '00:00:00.000';
  @State laps: string[] = [];
  private timerId: number = 0;

  aboutToAppear(): void {
    this.startTimer();
  }

  aboutToDisappear(): void {
    this.stopTimer();
  }

  // 定时更新UI
  startTimer(): void {
    this.timerId = setInterval(() => {
      if (this.stopwatch) {
        this.currentTime = this.stopwatch.getFormattedTime();
      }
    }, 10);
  }

  stopTimer(): void {
    if (this.timerId) {
      clearInterval(this.timerId);
    }
  }

  build() {
    Column({ space: 0 }) {
      // 时间显示
      Text(this.currentTime)
        .fontSize(48)
        .fontWeight(FontWeight.Bold)
        .fontColor(Color.Black)
        .margin({ top: 50 })

      // 控制按钮
      Row({ space: 10 }) {
        Button('开始')
          .backgroundColor('#007DFF')
          .onClick(() => {
            this.stopwatch.start();
          })
          .width(70)
          .height(40)

        Button('暂停')
          .backgroundColor('#FF7500')
          .onClick(() => {
            this.stopwatch.pause();
          })
          .width(70)
          .height(40)

        Button('单圈')
          .backgroundColor('#34C759')
          .onClick(() => {
            this.stopwatch.lap()
            this.laps = this.stopwatch.getAllLaps();
          })
          .width(70)
          .height(40)

        Button('重置')
          .backgroundColor('#FF3B30')
          .onClick(() => {
            this.stopwatch.reset();
            this.laps = [];
            this.currentTime = '00:00:00.000';
          })
          .width(70)
          .height(40)
      }
      .margin({ top: 40 })

      // 单圈时间列表
      List() {
        ForEach(this.laps, (item: string) => {
          ListItem() {
            Text(item)
              .fontColor(Color.Red)
              .fontSize(16)
              .padding(10)
          }
        })
      }
      .layoutWeight(1)
      .width('100%')
      .margin({ top: 20 })
    }
    .width('100%')
    .height('100%')
    .padding(20)
  }
}
更多关于HarmonyOS 鸿蒙Next中使用 Date 实现高精度毫秒级秒表的实战系列教程也可以访问 https://www.itying.com/category-93-b0.html

在HarmonyOS Next中,使用Date实现高精度毫秒级秒表,可通过Date.now()获取当前时间戳。记录开始时间戳,结束时再次获取并计算差值,得到精确到毫秒的耗时。示例代码:
let startTime = Date.now();
// 执行操作...
let endTime = Date.now();
let elapsed = endTime - startTime; // 毫秒级耗时
注意:Date.now()基于系统时间,精度受系统限制。

在HarmonyOS Next中,使用Date类实现毫秒级秒表的核心是精确获取并计算时间差。虽然Date本身精度可达毫秒,但直接连续调用可能受系统调度影响。以下是关键实现方案:
- 核心计时逻辑:
// 记录起始时间戳
let startTime = new Date().getTime();

// 获取当前耗时
function getElapsedTime() {
    let currentTime = new Date().getTime();
    return currentTime - startTime; // 毫秒数
}
- 格式化显示(将毫秒转为分:秒.毫秒格式):
function formatTime(ms) {
    let minutes = Math.floor(ms / 60000);
    let seconds = Math.floor((ms % 60000) / 1000);
    let milliseconds = ms % 1000;

    return `${minutes.toString().padStart(2, '0')}:${seconds.toString().padStart(2, '0')}.${milliseconds.toString().padStart(3, '0')}`;
}
- 实现跑步计时功能:
- 使用
setInterval或requestAnimationFrame进行界面刷新 - 暂停功能:记录暂停时的累计时间,恢复时重新设置起始时间基准
- 圈数记录:将每次
getElapsedTime()的结果存入数组
- 注意事项:
Date的精度足够跑步计时使用(误差约±10ms)- 避免在每次渲染时创建新的
Date对象,应复用时间戳 - 考虑使用
performance.now()获取更高精度的时间戳(如果可用)
此方案能满足跑步计时的基础需求,实际开发中可结合ArkUI组件实现界面交互。