


HarmonyOS鸿蒙Next中自定义表情包键盘
HarmonyOS鸿蒙Next中自定义表情包键盘 如何自定义一个表情包键盘:
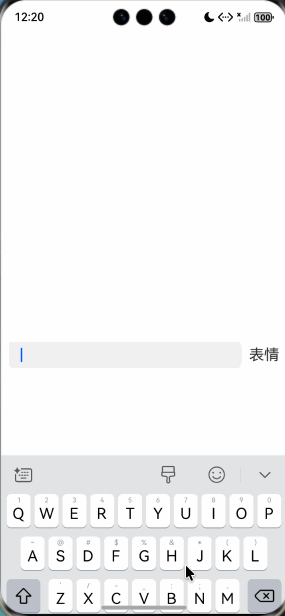
1、点击输入框先拉起系统软键盘,然后点击指定按钮将系统软键盘替换成自己的表情包键盘
2、当前处在表情包键是可向输入框输入表情,此事再次点击输入框会把表情包键盘替换成系统键盘

对于表情面板,不建议使用 customkeyboard 来自定义表情键盘。直接做一个在底部显示的Grid即可。
简单实现思路:
1、监听键盘高度,将表情面板的高度设置和键盘高度一致。
2、监听键盘弹起和隐藏,在键盘弹起时隐藏表情面板,键盘隐藏时显示表情面板。
/**
 * @fileName : EmotionView.ets
 * @author : @cxy
 * @date : 2025/12/19
 * @description : 表情面板示例
 */
import { EmotionComponent } from "./EmotionComponent"
import { Emotion } from "./EmotionImage"
import { window } from "@kit.ArkUI"
import { KeyboardAvoidMode } from '@kit.ArkUI';

enum ShowType {
  None = 0,
  Text = 1,
  Emotion = 2
}

@Component
export struct EmotionView {
  @State enableSend: boolean = false
  @State showType: ShowType = ShowType.None
  @State keybordHeight: number = 314
  @State bottomSafeHeight: number = 34 //TODO:监听avoidAreaChange获取
  private controller: RichEditorController = new RichEditorController()

  aboutToAppear(): void {
    const context = this.getUIContext().getHostContext()
    if (context) {
      this.getUIContext().setKeyboardAvoidMode(KeyboardAvoidMode.NONE)

      window.getLastWindow(context).then((win) => {
        win.setWindowLayoutFullScreen(true)
        win.on('keyboardHeightChange', this.keyboardHeightChange)
      })
    }
  }

  aboutToDisappear(): void {
    const context = this.getUIContext().getHostContext()
    if (context) {
      window.getLastWindow(context).then((win) => {
        win.off('keyboardHeightChange', this.keyboardHeightChange)
      })
    }
  }

  build() {
    Column() {
      Row({ space: 10 }) {
        RichEditor({
          controller: this.controller
        })
          .id('richEditorId')
          .backgroundColor('#f0f0f0')
          .borderRadius(6)
          .onEditingChange((isEditing) => {
            if (isEditing) {
              this.showType = ShowType.Text
            } else {
              if (this.showType === ShowType.Text) {
                this.showType = ShowType.None
              }
            }
          })
          .onDidChange((rangeBefore: TextRange, rangeAfter: TextRange) => {
            this.enableSend = this.controller.getSpans().length > 0
          })
          .layoutWeight(1)

        Text(this.showType === ShowType.Emotion ? '文本' : '表情')
          .fontSize(20)
          .onClick(() => {
            if (this.showType === ShowType.Emotion) {
              this.showType = ShowType.Text
              focusControl.requestFocus('richEditorId');
            } else {
              this.controller.stopEditing()
              this.showType = ShowType.Emotion
            }
          })
      }
      .alignItems(VerticalAlign.Center)
      .padding(10)

      EmotionComponent({
        emotionHeight: this.keybordHeight,
        enableSend: this.enableSend,
        onSelectEmoji: (e: string) => {
          this.controller.addTextSpan(e)
        },
        onDeleteEmoji: () => {
          // TODO: 删除
          // this.controller.deleteSpans()
        },
        onSendEmotion: (e?: Emotion) => {
          console.dir(e)
        }
      })
        .visibility(this.showType === ShowType.Emotion ? Visibility.Visible : Visibility.None)
    }
    .width('100%')
    .height('100%')
    .alignItems(HorizontalAlign.Center)
    .justifyContent(FlexAlign.End)
    .padding({
      bottom: this.getBottomHeight()
    })

  }

  getBottomHeight(): number {
    if (this.showType === ShowType.Text) {
      return this.keybordHeight
    }
    if (this.showType === ShowType.Emotion) {
      return 0
    }
    return this.bottomSafeHeight //底部安全区域高度,
  }

  private keyboardHeightChange = (data: number) => {
    if (data > 0) {
      this.keybordHeight = this.getUIContext().px2vp(data)
    }
  }
}
更多关于HarmonyOS鸿蒙Next中自定义表情包键盘的实战系列教程也可以访问 https://www.itying.com/category-93-b0.html

针对你的第二条问题的解决方法:
增加一个软键盘监听事件。当软键盘是以获取焦点等其他方式弹出,则可在监听方法回调里面调用你的”将系统软键盘替换成表情包键盘“的方法。
window.getLastWindow(getContext(this)).then(currentWindow => {
      currentWindow.on('keyboardHeightChange', (height: number) => {
        if (height > 0) {
          console.log("软键盘弹出");
        } else {
          console.log("软键盘收起");
        }
      });
    });

【背景知识】
- [@Builder装饰器](https://developer.huawei.com/consumer/cn/doc/harmonyos-guides/arkts-builder):ArkUI提供了一种轻量的UI元素复用机制@Builder,其内部UI结构固定,仅与使用方进行数据传递,开发者可以将重复使用的UI元素抽象成一个方法,在build方法里调用。
- customKeyboard属性:该属性可用于设置自定义键盘。其第一个参数CustomBuilder用于自定义UI描述,必须结合@Builder使用。
【解决方案】
开发者您好,自定义键盘的布局以自定义组件的方式呈现,根据具体业务场景由您自行实现。实现自定义表情包键盘,示例可参考官网文档:自定义键盘布局实现。
实现自定义表情包键盘与系统键盘通过点击指定按钮切换,可通过需绑定键盘的组件,添加customkeyboard属性,通过设置属性的参数值来实现切换,如参数值为true,组件绑定自定义键盘;参数值为false,切换系统键盘。示例可参考官网文档:自定义键盘和系统键盘的切换。

HarmonyOS Next中自定义表情包键盘可通过ArkUI的TextInput组件配合自定义面板实现。使用@State装饰器管理表情数据,通过Grid或List组件展示表情包。点击事件触发insertText方法将表情插入输入框。需注意Next版本API变化,建议查阅最新ArkTS API文档获取具体实现方式。
在HarmonyOS Next中实现自定义表情包键盘,核心在于管理TextInput的焦点和键盘控制器。以下是关键步骤和代码思路:
-
状态管理:使用
[@State](/user/State)装饰器控制当前键盘类型(系统键盘或表情键盘)。[@State](/user/State) keyboardType: 'system' | 'emoji' = 'system' -
焦点控制:通过
focusControl获取输入框焦点状态,触发键盘切换。[@Provide](/user/Provide)('focusControl') focusControl: FocusControl = new FocusControl() // 输入框获得焦点时 .onFocus(() => { if (this.keyboardType === 'emoji') { this.keyboardType = 'system' } }) -
键盘切换:点击按钮时切换键盘类型,并通过
focusControl重新聚焦输入框。// 切换至表情键盘 switchToEmojiKeyboard() { this.keyboardType = 'emoji' this.focusControl.requestFocus('inputField') } -
自定义键盘布局:使用
Column/Row等容器组件构建表情网格,通过Grid组件实现表情排列。Grid() { ForEach(emojiList, (emoji) => { GridItem() { Text(emoji) .onClick(() => this.insertEmoji(emoji)) } }) } -
表情插入:通过
TextInputController操作输入框内容。const controller = new TextInputController() insertEmoji(emoji: string) { controller.insertText(emoji) } -
条件渲染:根据
keyboardType决定渲染系统键盘或自定义键盘。if (this.keyboardType === 'emoji') { // 渲染表情键盘 CustomEmojiKeyboard() }
注意事项:
- 需在
TextInput中设置enableKeyboardAvoidance(false)防止系统自动调整布局 - 自定义键盘高度需与系统键盘保持一致以获得最佳体验
- 使用
SoftKeyboardController监听系统键盘状态变化
这种实现方式完全基于ArkUI声明式范式,通过状态驱动UI更新,符合HarmonyOS Next的设计理念。