


HarmonyOS鸿蒙Next中emoji表情图怎么做可以显示在输入框中?
HarmonyOS鸿蒙Next中emoji表情图怎么做可以显示在输入框中?
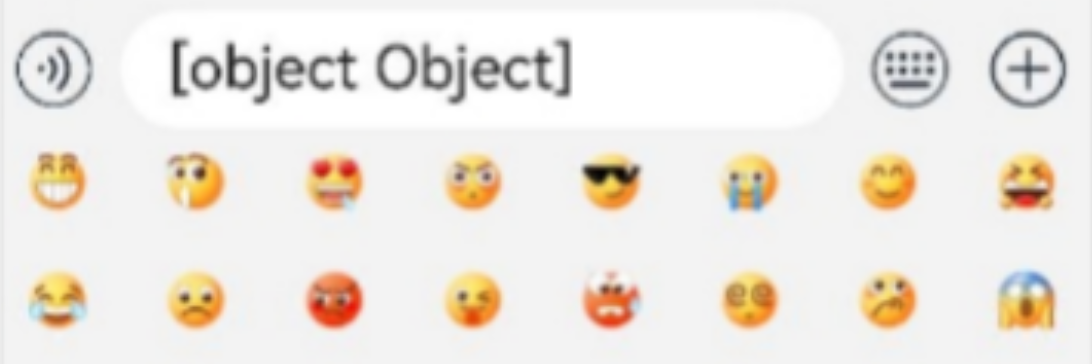
当选中表情图片的时候,显示的是[object Object],怎么转换才能显示图片呢?emoji表情是个png格式的图片
更多关于HarmonyOS鸿蒙Next中emoji表情图怎么做可以显示在输入框中?的实战教程也可以访问 https://www.itying.com/category-93-b0.html

【背景知识】
- TextInput:单行文本输入框组件。
- TextArea:多行文本输入的文本框。
- RichEditor:支持图文混排和文本交互式编辑的组件。
【解决方案】
如果输入框的点击事件被TextArea或TextInput组件消费,判断应用使用TextArea或TextInput,TextArea和TextInput不支持自定义富文本输入,无法显示表情包。
参考以下代码,使用RichEditor组件实现显示表情包图片的功能:
@Entry
@Component
struct RichEditorExample {
  controller: RichEditorController = new RichEditorController();
  private imgs: (string | number | Resource)[] = [$r('app.media.image1'), $r('app.media.image2'), $r('app.media.image3'), 1, 2, 3, 4, 5, 6, String.fromCodePoint(0x1F600)];
  @Builder
  CustomKeyboardBuilder() {
    Column() {
      Grid() {
        ForEach(this.imgs, (item: string | number | Resource) => {
          GridItem() {
            if (typeof item === 'number' || typeof item === 'string') {
              Button(item + '')
                .width(110).onClick(() => {
                this.controller.addTextSpan(item + '', {
                  offset: this.controller.getCaretOffset(),
                  style:
                  {
                    fontColor: Color.Orange,
                    fontSize: 30
                  }
                })
                this.controller.setCaretOffset(this.controller.getCaretOffset() + item.toString().length)
              })
            } else {
              Image(item)
                .width(110).onClick(() => {
                this.controller.addImageSpan(item, {
                  imageStyle:
                  {
                    size: ['110px', '110px']
                  }
                })
              })
            }
          }
        })
      }.maxCount(3).columnsGap(10).rowsGap(10).padding(5)
    }.backgroundColor(Color.Gray)
  }
  build() {
    Column() {
      RichEditor({ controller: this.controller }) // 绑定自定义键盘
        .customKeyboard(this.CustomKeyboardBuilder())
        .margin(10)
        .border({ width: 1 })
        .height(200)
        .borderWidth(1)
        .borderColor(Color.Red)
        .width('100%')
    }
  }
}
更多关于HarmonyOS鸿蒙Next中emoji表情图怎么做可以显示在输入框中?的实战系列教程也可以访问 https://www.itying.com/category-93-b0.html
要在输入框中显示emoji表情图片,不能使用标准的 TextInput 或 TextArea 组件,因为它们仅用于处理纯文本。您需要使用支持图文混排的组件。
核心解决方案:使用 RichEditor 组件
RichEditor 是鸿蒙系统提供的富文本编辑器组件,它允许在编辑内容中插入图片、设置样式等,完美支持图文混排,下面是实现步骤:
-
在布局中创建
RichEditor组件: 将您原本的TextInput或TextArea替换为RichEditor。// 示例代码 import { richEditor } from '@kit.ArkUI'; @Entry @Component struct MyComponent { build() { Column() { // 使用 RichEditor 替代 TextInput/TextArea RichEditor() .height(200) .width('100%') .onReady(() => { // 编辑器准备就绪后的回调 }) } } } -
获取 RichEditor 的控制器: 为了调用插入图片的接口,您需要获取其控制器。
import { richEditor } from '@kit.ArkUI'; @Entry @Component struct MyComponent { // 1. 创建控制器 controller: richEditor.RichEditorController = new richEditor.RichEditorController(); build() { Column() { // 2. 将控制器绑定到组件 RichEditor({ controller: this.controller }) .height(200) .width('100%') } } } -
插入 Emoji 表情图片: 使用控制器的
addImageSpan方法在光标位置插入图片。您的 emoji 表情是 PNG 格式,可以作为ResourceStr(资源路径)传入。// 假设这是您点击某个表情按钮后触发的方法 insertEmoji(emojiRes: string) { try { // 调用 addImageSpan 接口插入图片 // 第一个参数是图片资源路径,例如 $r('app.media.emoji_smile') // 第二个参数是可选配置(如宽高等) let index = this.controller.addImageSpan(emojiRes, { size: { width: 24, height: 24 } // 设置表情图片的显示大小 }); console.info(`Succeeded in inserting emoji at index: ${index}`); } catch (err) { console.error(`Failed to insert emoji. Code: ${err.code}, message: ${err.message}`); } }
总结与关键点
| 特性 | TextInput / TextArea | RichEditor |
|---|---|---|
| 内容类型 | 仅纯文本 | 图文混排(文本、图片、链接等) |
| 插入图片 | 不支持 | 支持(使用 addImageSpan API) |
| 适用场景 | 用户名、密码、普通评论等纯文本输入 | 富文本评论、博客编辑、聊天应用(发图片表情) |
因此,您的正确做法是:
- 将 UI 布局中的输入组件替换为
RichEditor。 - 获取
RichEditorController。 - 在需要插入表情的事件(如按钮点击)中,调用
controller.addImageSpan(emojiResource)方法。
这样,emoji 表情图片就能正确地显示在您的“输入框”(即富文本编辑器)中了。

在HarmonyOS Next中,要在输入框显示emoji表情图,需使用TextInput组件并设置fontFamily为系统emoji字体。例如:
TextInput()
  .fontFamily('HarmonyOS Sans Emoji')
确保系统支持该字体。也可通过Unicode字符直接插入emoji。
在HarmonyOS Next中,要在输入框(如TextInput)中显示自定义的emoji图片,核心思路是使用ImageSpan来替换文本中的特定占位符。直接设置[object Object]这类对象到文本是无法渲染为图片的。
以下是实现步骤和示例代码:
1. 核心思路
- 将emoji视为一种特殊的“文本”,用一个唯一的占位符(如
[emoji:smile])或Unicode字符表示。 - 在文本中插入占位符,然后通过
ImageSpan将占位符替换为对应的图片资源。
2. 关键API:ImageSpan
ImageSpan是Text组件中用于在文本流中嵌入图片的核心类。你需要将ImageSpan添加到Text的Span数组中。
3. 示例代码
假设你有一个TextInput(或Text)组件,并且已经获取到了用户选择的emoji图片资源(例如Resource类型)。
import { TextInput, ImageSpan, Resource, Span } from '@kit.ArkUI';

// 假设这是你的输入框组件
@Entry
@Component
struct EmojiInputExample {
  private inputText: string = ''; // 绑定的文本内容
  private emojiRes: Resource = $r('app.media.emoji_smile'); // 你的emoji图片资源

  build() {
    Column() {
      // 显示带emoji的文本(预览用)
      Text() {
        Span(this.inputText) // 基础文本
          .fontSize(20)
        // 创建ImageSpan并添加到Span数组
        ImageSpan(this.emojiRes)
          .width(30) // 设置图片宽度
          .height(30) // 设置图片高度
          .verticalAlign(ImageSpanAlignment.CENTER) // 垂直对齐方式
      }
      .fontSize(20)
      .border({ width: 1, color: Color.Gray })

      // 输入框
      TextInput({ text: this.inputText })
        .onChange((value: string) => {
          this.inputText = value;
        })
        .width('100%')
        .height(40)
        .fontSize(20)
        .border({ width: 1, color: Color.Blue })
    }
    .padding(20)
    .width('100%')
  }
}
4. 处理动态插入
如果需要在用户点击emoji时动态插入到输入框光标位置:
- 使用
TextInputController获取当前光标位置。 - 将占位符(如
[:smile:])插入到文本中。 - 在显示时(如另一个
Text组件中),解析文本中的占位符,并用ImageSpan替换。
5. 注意事项
TextInput本身不支持直接显示ImageSpan:TextInput目前仅支持纯文本输入和显示。若需显示图文混合内容,通常方案是:- 用一个
Text组件(支持ImageSpan)来模拟显示。 TextInput仅用于输入,其文本内容同步解析到Text组件中渲染。
- 用一个
- 占位符设计:建议使用易于解析的唯一标识格式,如
[:emoji_name:]。 - 性能:如果频繁插入或文本很长,注意
Span数组的更新效率。
替代方案:富文本编辑器
如果需要复杂的图文混排编辑功能,建议考虑使用RichEditor组件(如果HarmonyOS Next版本提供),它原生支持插入图片等富媒体内容。
总结:直接设置图片对象到文本字符串会导致[object Object],必须通过ImageSpan机制将图片资源转换为文本流内的可渲染元素。