


HarmonyOS 鸿蒙Next网络编程系列63-仓颉版web组件与应用互操作示例
HarmonyOS 鸿蒙Next网络编程系列63-仓颉版web组件与应用互操作示例
1. APP内嵌网页与应用互操作概述
在APP应用开发中,通过内嵌网页的形式可以很方便的适配多种系统平台,提高开发效率,而且,网页具有即时加载的特点,减少了更新APP版本的次数和要求。更重要的是,可以通过应用和网页的互操作来提升用户的使用体验,也就是可以在网页中调用APP中的方法,或者在APP中执行网页中的脚本,鸿蒙通过仓颉WebviewController类中的registerJavaScriptProxy接口提供了注册应用侧函数到web组件中的方法;如果要在应用侧执行网页中的脚本使用的是runJavaScript接口。
在本系列的第24篇文章《鸿蒙网络编程系列24-Web组件与应用互操作示例》中介绍了如何在API12环境下使用ArkTS语言执行网页与应用的互操作;本篇文章将在API 17环境下,使用仓颉语言实现类似的功能。
2. APP内嵌网页与应用互操作示例演示
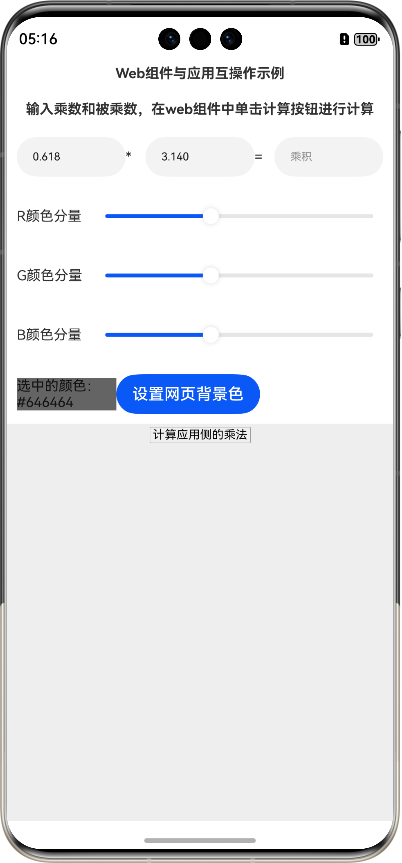
本示例运行后的界面如图所示:
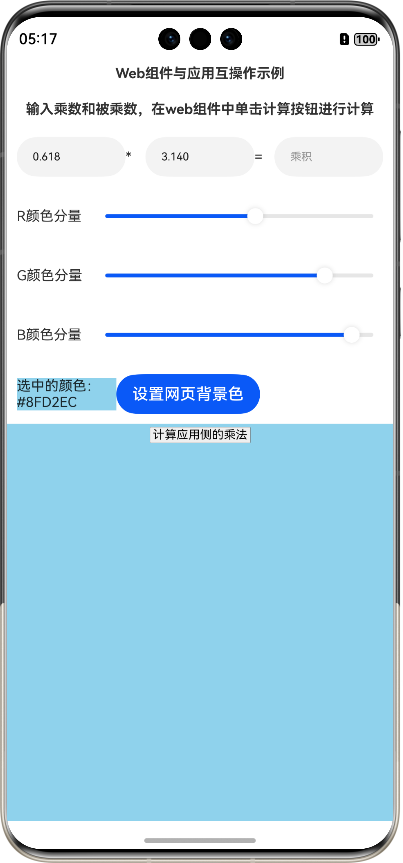
拖动RGB颜色分量,可以选择合适的颜色,然后单击“设置网页背景色”按钮,即可在应用侧调用网页中的脚本函数设置网页背景色,如图所示:
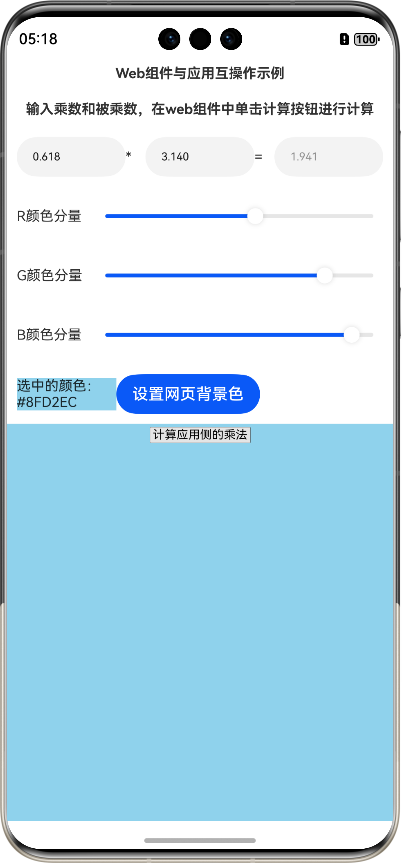
也可以输入乘数和被乘数,然后单击网页中的“计算应用侧的乘法”按钮,在网页中调用应用侧的函数,如图所示:
3. APP内嵌网页与应用互操作示例编写
下面详细介绍创建该示例的步骤(确保DevEco Studio已安装仓颉插件)。
步骤1:创建[Cangjie]Empty Ability项目。
步骤2:在module.json5配置文件加上对权限的声明:
"requestPermissions": [
      {
        "name": "ohos.permission.INTERNET"
      }
    ]
这里添加了访问互联网的权限。
步骤3:在build-profile.json5配置文件加上仓颉编译架构:
"cangjieOptions": {
      "path": "./src/main/cangjie/cjpm.toml",
      "abiFilters": ["arm64-v8a", "x86_64"]
    }
步骤4:在main_ability.cj文件里添加如下的代码:
package ohos_app_cangjie_entry

internal import ohos.base.AppLog
internal import ohos.ability.AbilityStage
internal import ohos.ability.LaunchReason
internal import cj_res_entry.app
import ohos.ability.*

//Ability全局上下文
var globalAbilityContext: Option<AbilityContext> = Option<AbilityContext>.None
class MainAbility <: Ability {
    public init() {
        super()
        registerSelf()
    }

    public override func onCreate(want: Want, launchParam: LaunchParam): Unit {
        AppLog.info("MainAbility OnCreated.${want.abilityName}")
        globalAbilityContext = Option<AbilityContext>.Some(this.context)
        match (launchParam.launchReason) {
            case LaunchReason.START_ABILITY => AppLog.info("START_ABILITY")
            case _ => ()
        }
    }

    public override func onWindowStageCreate(windowStage: WindowStage): Unit {
        AppLog.info("MainAbility onWindowStageCreate.")
        windowStage.loadContent("EntryView")
    }
}
步骤5:在index.cj文件里添加如下的代码:
package ohos_app_cangjie_entry

internal import ohos.base.*
internal import ohos.component.*
import ohos.state_manage.*
import ohos.state_macro_manage.*
import ohos.webview.*
import std.convert.*
import std.format.*

//注册到web组件中的应用侧对象
@Observed
class ComputeObj {
    public var multiplier: Float64 = 0.618
    public var multiplicand: Float64 = 3.14
    @Publish
    public var product: String = "乘积"

    //获取乘数
    public func getMultiplier() {
        return this.multiplier;
    }

    //获取被乘数
    public func getMultiplicand() {
        return this.multiplicand;
    }

    //设置乘积
    public func setProduct(newProduct: String) {
        this.product = newProduct
    }
}

//调用js函数的回调
let callback: AsyncCallback<String> = {
    errorCode: Option<AsyncError>, data: Option<String> => match (errorCode) {
        case Some(e) => AppLog.error("回调出错:错误码为 ${e.code}")
        case _ => match (data) {
            case Some(value) => AppLog.info("回调: 成功获取数据:${value}")
            case _ => AppLog.error("回调出错: 数据为空")
        }
    }
}

@Entry
@Component
class EntryView {
    @State
    var title: String = "Web组件与应用互操作示例"
    @State
    var computeObj: ComputeObj = ComputeObj()
    let jsName: String = "multipObj"
    @State
    var rColor: UInt8 = 100
    @State
    var gColor: UInt8 = 100
    @State
    var bColor: UInt8 = 100
    @State
    var backColor: String = "#646464"

    //是否已注册仓颉函数
    var isCJfuncReg: Bool = false

    let scroller: Scroller = Scroller()
    let webController: WebviewController = WebviewController()

    func build() {
        Row {
            Column {
                Text(title)
                    .fontSize(14)
                    .fontWeight(FontWeight.Bold)
                    .width(100.percent)
                    .textAlign(TextAlign.Center)
                    .padding(10)

                Text("输入乘数和被乘数,在web组件中单击计算按钮进行计算")
                    .fontSize(14)
                    .fontWeight(FontWeight.Bold)
                    .width(100.percent)
                    .textAlign(TextAlign.Center)
                    .padding(10)

                Flex(FlexParams(justifyContent: FlexAlign.Start, alignItems: ItemAlign.Center)) {
                    TextInput(text: this.computeObj.multiplier.format(".3"))
                        .onChange({
                            value => this.computeObj.multiplier = Float64.parse(value)
                        })
                        .width(100)
                        .fontSize(11)
                        .flexGrow(1)

                    Text("*").fontSize(14).width(20)
                    TextInput(text: this.computeObj.multiplicand.format(".3"))
                        .onChange({
                            value => this.computeObj.multiplicand = Float64.parse(value)
                        })
                        .width(100)
                        .fontSize(11)
                        .flexGrow(1)
                    Text("=").fontSize(14).width(20)

                    TextInput(text: this.computeObj.product).width(100).fontSize(11).flexGrow(1).enabled(false)
                }.width(100.percent).padding(10)

                Flex(FlexParams(justifyContent: FlexAlign.Start, alignItems: ItemAlign.Center)) {
                    Text("R颜色分量").fontSize(14).width(100)

                    Slider(value: Float64(this.rColor), min: 0.0, max: 255.0).onChange(
                        {
                            value: Float64, mode: SliderChangeMode =>
                            this.rColor = UInt8(value)
                            this.computeBackcolor()
                        }
                    )
                }.width(100.percent).padding(10)

                Flex(FlexParams(justifyContent: FlexAlign.Start, alignItems: ItemAlign.Center)) {
                    Text("G颜色分量").fontSize(14).width(100)

                    Slider(value: Float64(this.gColor), min: 0.0, max: 255.0).onChange(
                        {
                            value: Float64, mode: SliderChangeMode =>
                            this.gColor = UInt8(value)
                            this.computeBackcolor()
                        }
                    )
                }.width(100.percent).padding(10)

                Flex(FlexParams(justifyContent: FlexAlign.Start, alignItems: ItemAlign.Center)) {
                    Text("B颜色分量").fontSize(14).width(100)

                    Slider(value: Float64(this.bColor), min: 0.0, max: 255.0).onChange(
                        {
                            value: Float64, mode: SliderChangeMode =>
                            this.bColor = UInt8(value)
                            this.computeBackcolor()
                        }
                    )
                }.width(100.percent).padding(10)

                Flex(FlexParams(justifyContent: FlexAlign.Start, alignItems: ItemAlign.Center)) {
                    Text("选中的颜色:" + this.backColor)
                        .fontSize(14)
                        .width(100)
                        .backgroundColor(Color(this.rColor, this.gColor, this.bColor))

                    Button("设置网页背景色").onClick(
                        {
                            => this.webController.runJavaScript("setbackcolor('" + this.backColor + "')", callback)
                        })
                }.width(100.percent).padding(10)
                Scroll(scroller) {
                    Web(src: @rawfile("demo.html"), controller: webController)
                        .domStorageAccess(true)
                        .fileAccess(true)
                        .padding(10)
                        .width(100.percent)
                        .backgroundColor(0xeeeeee)
                        .onAppear({
                            => if (!this.isCJfuncReg) {
                                isCJfuncReg = true
                                regCjMethods()
                                webController.refresh()
                            }
                        })
                }
                    .align(Alignment.Top)
                    .backgroundColor(0xeeeeee)
                    .height(300)
                    .flexGrow(1)
                    .scrollable(ScrollDirection.Vertical)
                    .scrollBar(BarState.On)
                    .scrollBarWidth(20)
            }.width(100.percent).height(100.percent)
        }.height(100.percent)
    }

    //注册仓颉函数
    func regCjMethods() {
        let getMultiplier = {
            p: String => return computeObj.getMultiplier().toString()
        }

        let getMultiplicand = {
            p: String => return computeObj.getMultiplicand().toString()
        }

        let setProduct = {
            p: String =>
            computeObj.setProduct(p)
            return ""
        }
        let funcsList = Array<(String) -> String>([getMultiplier, getMultiplicand, setProduct])

        let methodList = Array<String>(["getMultiplier", "getMultiplicand", "setProduct"])

        webController.registerJavaScriptProxy(funcsList, jsName, methodList)
    }
    //计算背景色
    func computeBackcolor() {
        this.backColor = "#" + this.rColor.format(".2X") + this.gColor.format(".2X") + this.bColor.format(".2X")
    }
}
步骤6:添加资源文件demo.html,路径为src/main/resources/rawfile/demo.html,内容如下:
<!-- index.html -->
<!DOCTYPE html>
<html>
<meta charset="utf-8">

<body>
<div style="text-align: center;">
    <button style="font-size: 30px;" type="button" onclick="compute()">计算应用侧的乘法</button>
</div>
<div id="info">

</div>
</body>
<script type="text/javascript">
    function compute() {
      let multiplier = multipObj.getMultiplier("");
      let multiplicand = multipObj.getMultiplicand("");
      let product = Number(multiplier) * Number(multiplicand)
      multipObj.setProduct(product.toFixed(3));
    }

    function setbackcolor(color) {
      document.body.style.backgroundColor = color;
    }
</script>

</html>
步骤7:编译运行,可以使用模拟器或者真机。
步骤8:按照本文第2部分“APP内嵌网页与应用互操作示例演示”操作即可。
4. 代码分析
要成功运行本示例,需要保证应用和网页中相关函数的一致性,第一个是在应用中调用脚本的函数设置背景色,在脚本中该函数叫setbackcolor,那么,在应用中调用该函数的代码如下:
   Button("设置网页背景色").onClick(
                        {
                            => this.webController.runJavaScript("setbackcolor('" + this.backColor + "')", callback)
                        })
只有保证两个函数名称及签名一致才能调用成功;
第二个是在网页中调用应用侧的函数,相关注册函数到web组件的代码如下:
    func regCjMethods() {
        let getMultiplier = {
            p: String => return computeObj.getMultiplier().toString()
        }

        let getMultiplicand = {
            p: String => return computeObj.getMultiplicand().toString()
        }

        let setProduct = {
            p: String =>
            computeObj.setProduct(p)
            return ""
        }
        let funcsList = Array<(String) -> String>([getMultiplier, getMultiplicand, setProduct])

        let methodList = Array<String>(["getMultiplier", "getMultiplicand", "setProduct"])

        webController.registerJavaScriptProxy(funcsList, jsName, methodList)
    }
可以看到,仓颉中的三个函数分别叫做getMultiplier、getMultiplicand和setProduct,然后放入到数组funcsList中,这三个函数注册到web组件中的函数名称也分别叫做getMultiplier、getMultiplicand和setProduct,然后放入到数组methodList中,需要说明的是,funcsList和methodList中对应的函数名称可以不一样,但是,在methodList中的名称必须和demoh.html脚本中调用的函数名称一致。
(本文作者原创,除非明确授权禁止转载)
本文源码地址:
https://gitee.com/zl3624/harmonyos_network_samples/tree/master/code/web/WebAppInteropDemo4Cj
更多关于HarmonyOS 鸿蒙Next网络编程系列63-仓颉版web组件与应用互操作示例的实战教程也可以访问 https://www.itying.com/category-93-b0.html

鸿蒙Next仓颉版Web组件支持应用与网页双向通信。应用可通过WebController调用网页内JavaScript函数,并注入对象供网页调用。网页可通过window.harmonyos访问注入对象,实现调用应用侧方法。示例包括应用调用网页函数、网页调用应用函数及事件监听。
更多关于HarmonyOS 鸿蒙Next网络编程系列63-仓颉版web组件与应用互操作示例的实战系列教程也可以访问 https://www.itying.com/category-93-b0.html
