


HarmonyOS 鸿蒙Next中如何实现倒计时按钮?
HarmonyOS 鸿蒙Next中如何实现倒计时按钮? 比如发送验证码的倒计时按钮。
3 回复

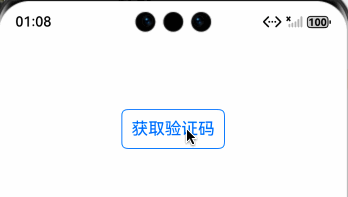
预览效果:
实现步骤:
1、使用 setInterval 定时器实现一个倒计时控制器:
/**
 * @fileName : CountDownController.ets
 * @author : @cxy
 * @date : 2025/12/23
 * @description : 倒计时控制器
 */


export class CountDownController {
  private countdownTime: number = 60;
  // 定时器ID
  private countdownInterval: number = -1;
  // 结束回调函数
  private onCountdownFinish: () => void;
  // 倒计时tick的回调函数
  private onCountdownTick: (remainingTime: number) => void;

  constructor(onCountdownFinish: () => void, onCountdownTick?: (remainingTime: number) => void) {
    this.onCountdownFinish = onCountdownFinish;
    this.onCountdownTick = onCountdownTick || (() => {
    });
    this.countdownInterval = -1;
  }

  start(countdownTime: number): void {
    this.stop()
    this.countdownTime = countdownTime

    this.countdownInterval = setInterval(() => {
      this.countdownTime--;
      this.onCountdownTick(Math.max(this.countdownTime, 0));
      if (this.countdownTime <= 0) {
        this.stop();
        this.onCountdownFinish();
      }
    }, 1000);
  }

  stop(): void {
    if (this.countdownInterval > -1) {
      clearInterval(this.countdownInterval);
      this.countdownInterval = -1;
    }
  }
}
2、自定义倒计时按钮组件:
/**
 * @fileName : CountDownButton.ets
 * @author : @cxy
 * @date : 2025/12/23
 * @description : 倒计时按钮
 */


import { CountDownController } from './CountDownController'

@Component
export struct CountDownButton {
  @Prop countDownTime: number = 60 //默认60秒
  @State remainingTime: number = this.countDownTime
  @Link @Watch("onStartTimer") startTimer: boolean;
  @Prop fontSize: number = 18
  private countDownController = new CountDownController(() => {
    this.startTimer = false
  }, (time) => {
    this.remainingTime = time
  })

  onStartTimer() {
    if (this.startTimer) {
      this.remainingTime = this.countDownTime
      this.countDownController.start(this.countDownTime)
    } else {
      this.countDownController.stop()
    }
  }

  build() {
    Button() {
      Text(this.startTimer ? `重新获取(${this.remainingTime}s)` : '获取验证码')
        .fontSize(this.fontSize)
        .fontColor(this.startTimer ? '#444444' : '#0066ff')
    }
    .enabled(!this.startTimer)
    .backgroundColor(Color.Transparent)
    .padding(10)
    .borderRadius(6)
    .borderWidth(1)
    .borderColor(this.startTimer ? '#444444' : '#0066ff')
  }
}
3、使用倒计时按钮示例:
/**
 * @fileName : CountDownDemo.ets
 * @author : @cxy
 * @date : 2025/12/22
 * @description : 文件描述
 */
import { CountDownButton } from "./CountDownButton"

@Component
export struct CountDownDemo {
  @State startTimer: boolean = false

  build() {
    Stack() {
      CountDownButton({
        startTimer: $startTimer,
        countDownTime: 5
      })
        .onClick(() => {
          // TODO: 调用发送验证码接口,成功后开启倒计时
          this.startTimer = true
        })
    }
    .width('100%')
    .height(200)
  }
}
完整的demo
更多关于HarmonyOS 鸿蒙Next中如何实现倒计时按钮?的实战系列教程也可以访问 https://www.itying.com/category-93-b0.html

在HarmonyOS Next中,实现倒计时按钮主要使用Button组件和Timer类。
- 创建
Button组件,设置初始文本。 - 使用
Timer类创建定时器,通过setInterval方法每秒更新按钮文本。 - 在倒计时结束时,调用
clearInterval停止定时器,并更新按钮状态。 示例代码使用ArkTS编写,通过状态变量控制倒计时秒数。

在HarmonyOS Next中,实现一个发送验证码的倒计时按钮,核心是结合状态管理、定时器和UI更新。以下是基于ArkTS的典型实现方案:
1. 核心思路
- 状态驱动UI:使用
@State装饰器管理按钮的可用状态、显示的文本以及剩余的秒数。 - 定时任务:使用
setInterval或setTimeout(通过timer模块)来每秒更新倒计时。 - 按钮交互:点击按钮后,触发倒计时逻辑,并禁用按钮以防止重复点击。
2. 代码示例
import { timer } from '@kit.ArkTimer';

@Entry
@Component
struct CountdownButtonExample {
  // 控制按钮是否可点击
  @State isEnabled: boolean = true;
  // 按钮上显示的文本
  @State buttonText: string = '获取验证码';
  // 倒计时总时长(秒)
  private readonly totalCount: number = 60;
  // 当前剩余秒数
  @State countdown: number = this.totalCount;
  // 定时器ID,用于清除
  private timerId: number | null = null;

  // 按钮点击事件处理函数
  handleClick() {
    if (!this.isEnabled) {
      return; // 如果已在倒计时中,则忽略点击
    }

    // 1. 立即更新状态:禁用按钮,并显示初始倒计时文本
    this.isEnabled = false;
    this.countdown = this.totalCount;
    this.buttonText = `${this.countdown}秒后重新获取`;

    // 2. 模拟发送验证码的网络请求(此处省略实际请求)
    console.log('模拟:发送验证码请求...');
    // yourApi.sendVerificationCode().then(...).catch(...);

    // 3. 启动定时器,每秒更新一次
    this.timerId = timer.setInterval(() => {
      this.countdown--;
      this.buttonText = `${this.countdown}秒后重新获取`;

      // 倒计时结束
      if (this.countdown <= 0) {
        this.clearTimer(); // 清除定时器
        this.isEnabled = true; // 重新启用按钮
        this.buttonText = '获取验证码'; // 恢复初始文本
      }
    }, 1000); // 间隔1000毫秒(1秒)
  }

  // 清理定时器的方法
  private clearTimer() {
    if (this.timerId !== null) {
      timer.clearInterval(this.timerId);
      this.timerId = null;
    }
  }

  // 组件销毁时清理定时器,防止内存泄漏
  aboutToDisappear() {
    this.clearTimer();
  }

  build() {
    Column() {
      Button(this.buttonText)
        .enabled(this.isEnabled) // 绑定启用/禁用状态
        .onClick(() => this.handleClick()) // 绑定点击事件
        .margin(20)
        .width('80%')
        .height(50)
        .fontColor(this.isEnabled ? Color.White : Color.Gray) // 根据状态改变文字颜色
        .backgroundColor(this.isEnabled ? Color.Blue : Color.LightGray) // 根据状态改变背景色
    }
    .width('100%')
    .height('100%')
    .justifyContent(FlexAlign.Center)
  }
}
3. 关键点说明
-
状态管理 (
@State):isEnabled: 控制按钮的enabled属性,直接决定按钮是否可点击。buttonText: 动态显示按钮文本,在“获取验证码”和“X秒后重新获取”之间切换。countdown: 存储当前剩余的秒数,是计算显示文本的依据。
-
定时器 (
@kit.ArkTimer):- 使用
timer.setInterval启动一个周期性任务。 - 务必在倒计时结束或组件销毁时,通过
timer.clearInterval清理定时器,这是避免内存泄漏和错误的关键步骤。
- 使用
-
用户体验优化:
- 点击后立即禁用按钮并更新文本,提供即时反馈。
- 通过改变字体颜色和背景色,直观地提示按钮的可用状态。
- 在
aboutToDisappear生命周期中清理定时器,确保组件销毁时资源被正确释放。
4. 扩展考虑
- 网络请求集成:将实际的发送验证码API调用放入
handleClick函数中。通常需要在请求发送成功后再启动倒计时,失败则应恢复按钮状态。 - 持久化倒计时:如果需要应用退到后台后倒计时依然继续,可以考虑使用后台任务或本地存储记录倒计时的开始时间点,并在应用再次激活时计算剩余时间。
- 自定义样式:可以通过
Button的样式方法(如.fontSize,.borderRadius等)或封装自定义组件来实现更复杂的视觉效果。
这个方案提供了倒计时按钮的核心逻辑,结构清晰,易于集成到实际项目中。