


HarmonyOS鸿蒙Next中画布渲染文本水平垂直居中显示问题
HarmonyOS鸿蒙Next中画布渲染文本水平垂直居中显示问题 【问题描述】:在画布上渲染一段文本,设置成水平垂直居中对齐,发现没有实现想要的效果,经过排查发现是textBaseline的问题,将“middle”设置成“top”即可实现所需要的效果,但是按照正常理解,不应该是middle才对嘛?
【问题现象】:
猜测文本跳出了文本框,如图
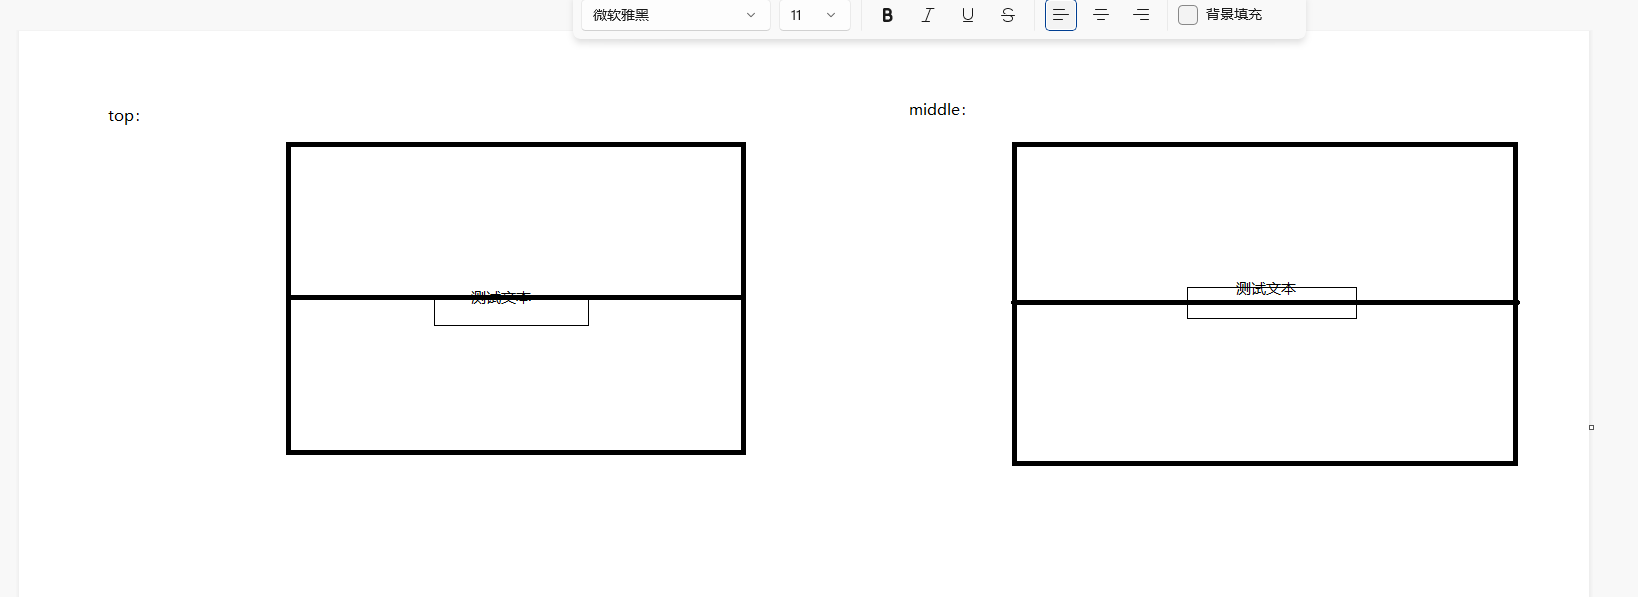
这是什么原因?
【版本信息】: 开发工具版本:5.1.1 手机系统版本:5.1.0 Api语言版本:16
【复现代码】:
@ComponentV2
export struct StepHorCompose {
private settings: RenderingContextSettings = new RenderingContextSettings(true);
private context: CanvasRenderingContext2D = new CanvasRenderingContext2D(this.settings);
build() {
Canvas(this.context)
.width('100%')
.height('200vp')
.onReady(() => {
// const centerX = this.context.width / 2
// const centerY = this.context.height / 2
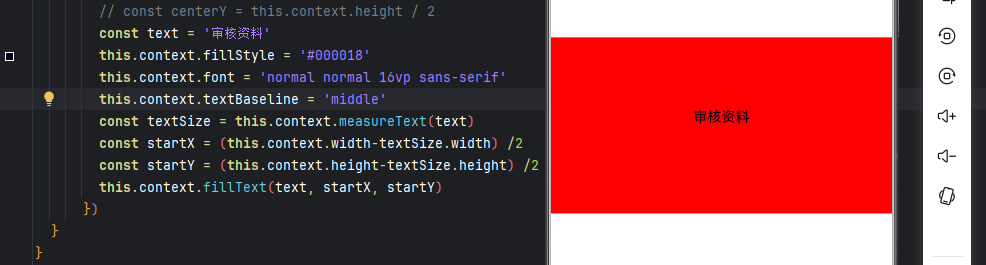
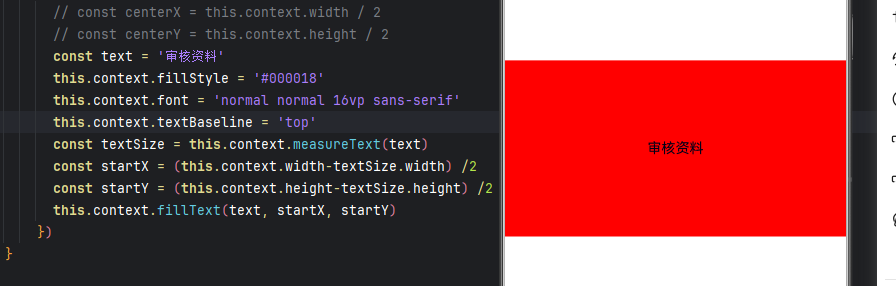
const text = '审核资料'
this.context.fillStyle = '#000018'
this.context.font = 'normal normal 16vp sans-serif'
this.context.textBaseline = 'middle'
const textSize = this.context.measureText(text)
const startX = (this.context.width-textSize.width) /2
const startY = (this.context.height-textSize.height) /2
this.context.fillText(text, startX, startY)
})
}
}
@Entry
@Component
struct Index {
build() {
Column(){
StepHorCompose()
.width('100%')
.height('200vp')
.backgroundColor('red')
}
.width('100%')
.height('100%')
.justifyContent(FlexAlign.Center)
.alignItems(HorizontalAlign.Center)
}
}
【尝试解决方案】:无
更多关于HarmonyOS鸿蒙Next中画布渲染文本水平垂直居中显示问题的实战教程也可以访问 https://www.itying.com/category-93-b0.html

该文本基线本就是以已居中文本的顶部为准设置的,设置成top达到居中效果是没问题的
更多关于HarmonyOS鸿蒙Next中画布渲染文本水平垂直居中显示问题的实战系列教程也可以访问 https://www.itying.com/category-93-b0.html
在HarmonyOS Next中,使用CanvasRenderingContext2D的fillText方法渲染文本时,要实现水平垂直居中,关键在于正确设置文本对齐基准点与绘制坐标。
水平居中:设置textAlign为'center'。
垂直居中:设置textBaseline为'middle'。
绘制坐标:将文本绘制在画布的中心点坐标(canvasWidth / 2, canvasHeight / 2)。
示例核心代码:
ctx.textAlign = 'center';
ctx.textBaseline = 'middle';
ctx.fillText('文本内容', canvasWidth / 2, canvasHeight / 2);
通过以上设置,文本的水平和垂直中心点将对齐到指定的绘制坐标。
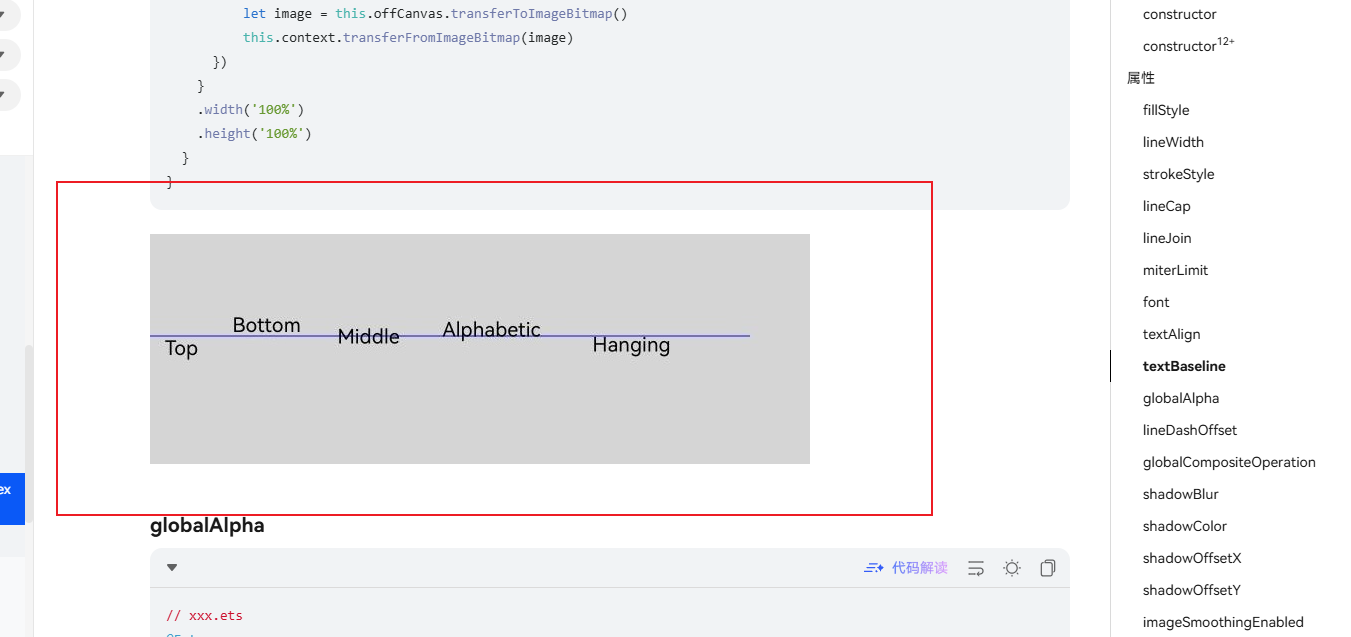
在HarmonyOS Next的Canvas 2D渲染中,textBaseline属性决定了文本基线的对齐方式。你遇到的问题核心在于对measureText()返回的TextMetrics对象中height属性的理解有误。
CanvasRenderingContext2D.measureText()返回的TextMetrics对象在HarmonyOS Next中,其height属性并不代表文本的实际渲染高度,而是根据字体度量计算出的一个理论值,它包含了字体的上升(ascent)和下降(descent)部分,通常比视觉上的文本高度要大。
当你设置textBaseline = 'middle'时,文本的垂直居中基线是字体的中间线。此时,fillText()的y坐标参数指定的是这条中间线的位置。你的计算方式(context.height - textSize.height) / 2试图将整个textSize.height区域居中,但由于textSize.height远大于视觉文本高度,导致计算出的startY偏小,最终使文本的中间线被定位在画布偏上的位置,视觉上文本就“跳出”了红色框的上方。
将textBaseline改为'top'后,fillText()的y坐标参数指定的是文本上基线(即字体上升部分的顶端)的位置。此时,你虽然使用了同样的startY计算公式,但'top'基线对齐方式使得文本的上边缘对齐到该坐标,视觉效果上反而实现了居中。
要实现真正的垂直居中,建议采用以下方法之一:
-
使用
'middle'基线并手动调整:继续使用textBaseline = 'middle',但垂直位置不要基于textSize.height计算。一个更准确的方法是使用字体的度量信息(如actualBoundingBoxAscent和actualBoundingBoxDescent,如果API支持)来计算视觉高度,或者通过实验确定一个偏移量。this.context.textBaseline = 'middle'; // 假设通过测量或已知,文本视觉高度约为 font-size 的某个比例,例如0.8倍 const visualTextHeight = 16 * 0.8; // 16vp是字体大小 const startY = this.context.height / 2; // 直接使用画布中点 this.context.fillText(text, startX, startY);实际上,更精确的做法是,如果
TextMetrics提供了actualBoundingBoxAscent和actualBoundingBoxDescent,则:const metrics = this.context.measureText(text); const visualHeight = metrics.actualBoundingBoxAscent + metrics.actualBoundingBoxDescent; const startY = (this.context.height - visualHeight) / 2 + metrics.actualBoundingBoxAscent; this.context.textBaseline = 'top'; // 或 'alphabetic' 等,再调整startY -
使用
'top'基线并修正计算:如你发现,使用'top'基线时,startY应基于文本的视觉高度来计算。但注意measureText().height可能仍不准确。一个常见的实践是,对于单行文本,其视觉高度大致接近font-size的值(例如16vp)。因此,可以近似地:this.context.textBaseline = 'top'; const startY = (this.context.height - 16) / 2; // 假设字体大小为16vp
总结:问题的根源是TextMetrics.height并非视觉渲染高度,导致垂直居中计算偏差。textBaseline属性改变了文本对齐的参考线,'top'基线让你无意中避开了对textSize.height的错误依赖,从而获得了看似居中的效果。对于精确的垂直居中,需要基于字体的实际视觉度量进行计算,而非直接使用measureText().height。