


HarmonyOS鸿蒙Next Swiper组件,如何实现同时设置preMargin、nextMargin、displayCount居中效果?
HarmonyOS鸿蒙Next Swiper组件,如何实现同时设置preMargin、nextMargin、displayCount居中效果? (API12+)

要让 displayCount 个子组件居中显示,需要满足以下条件:
- prevMargin === nextMargin (左右边距相等)
- 子组件宽度 = (Swiper宽度 - 2*边距 - (displayCount-1)*间距) / displayCount
示例代码:
@Entry
@Component
struct SwiperCenterExample {
  private swiperController: SwiperController = new SwiperController()
  private itemWidth: string = ''
  private prevMarginValue: string = '60vp'
  private nextMarginValue: string = '60vp'
  private displayCountValue: number = 3
  private itemSpaceValue: number = 12

  aboutToAppear(): void {
    let screenWidth: number = 360
    let prevMargin: number = 60
    let nextMargin: number = 60
    let displayCount: number = 3
    let itemSpace: number = 12

    let totalMargin: number = prevMargin + nextMargin
    let totalSpacing: number = (displayCount - 1) * itemSpace
    let availableWidth: number = screenWidth - totalMargin - totalSpacing
    let singleItemWidth: number = availableWidth / displayCount

    this.itemWidth = singleItemWidth.toString() + 'vp'
  }

  build() {
    Column() {
      Swiper(this.swiperController) {
        ForEach([0, 1, 2, 3, 4, 5, 6, 7], (index: number) => {
          Column() {
            Text(`${index + 1}`)
              .fontSize(24)
              .fontColor(Color.White)
              .fontWeight(FontWeight.Bold)
          }
          .width(this.itemWidth)
          .height(180)
          .backgroundColor(this.getColor(index))
          .borderRadius(8)
          .justifyContent(FlexAlign.Center)
        })
      }
      .width('100%')
      .height(200)
      .prevMargin(this.prevMarginValue)
      .nextMargin(this.nextMarginValue)
      .displayCount(this.displayCountValue)
      .itemSpace(this.itemSpaceValue)
      .loop(true)
      .indicator(true)
      .indicator(new DotIndicator()
        .itemWidth(8)
        .itemHeight(8)
        .selectedItemWidth(12)
        .selectedItemHeight(12)
        .color(0xCCCCCC)
        .selectedColor(0x317AF7)
        .bottom(10)
      )
    }
    .width('100%')
    .height('100%')
    .padding(20)
  }

  getColor(index: number): number {
    let colors: number[] = [0x317AF7, 0xED6F2D, 0x4ECBFC, 0x8BC34A, 0x9C27B0, 0xFF9800, 0x00BCD4, 0xE91E63]
    return colors[index % colors.length]
  }
}
注意事项!
- 边距与 displayCount 配合 :左右边距相等时,displayCount 个子组件会自动居中
- 子组件宽度自适应 :配合百分比宽度可以更灵活地实现居中
- 非 loop 模式 :API12+ 支持通过第二个参数控制首尾页的边距显示
更多用法请见:官方指南_Swiper
更多关于HarmonyOS鸿蒙Next Swiper组件,如何实现同时设置preMargin、nextMargin、displayCount居中效果?的实战系列教程也可以访问 https://www.itying.com/category-93-b0.html

尊敬的开发者您好,根据您的要求可以参考以下示例代码(preMargin、nextMargin、displayCount):
Swiper() {
Image($r('app.media.foreground'))
Image($r('app.media.background'))
Image($r('app.media.layered_image'))
}
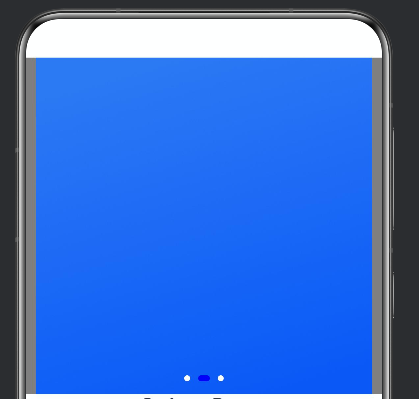
.prevMargin(10) // 1
.nextMargin(10) // 2
.displayCount(1) // 3
.width('100%')
.backgroundColor(Color.Gray)
.autoPlay(true)
.interval(1000)
.loop(true)
.indicator(
Indicator.dot()
.color(Color.White)
.selectedColor(Color.Blue)
)
运行效果如下:

详细的解释可以看下这篇文章 https://blog.csdn.net/qq_33681891/article/details/160383112
如有帮助给个采纳谢谢 , 先看核心代码,看注释:
Swiper(this.controller) {
ForEach(this.items, (item: string) => {
Text(item)
.width('100%') // 或者根据 displayCount 计算宽度
})
}
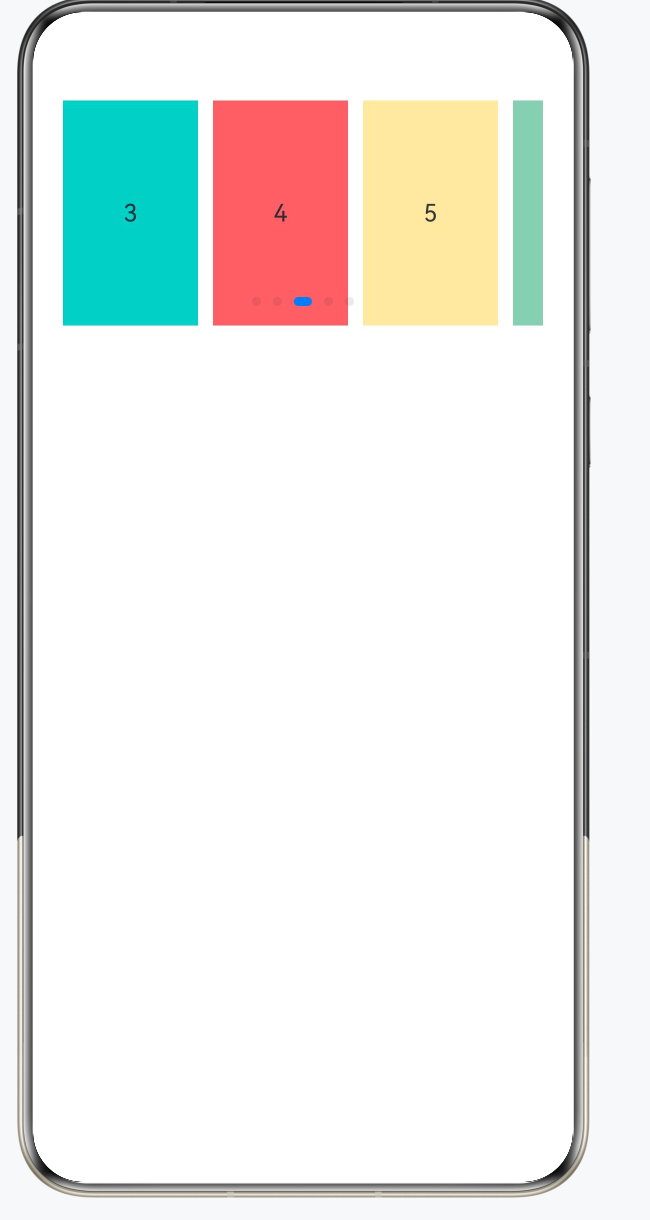
.displayCount(3) // 同时显示3个
.prevMargin(20) // 当前页左边距
.nextMargin(20) // 当前页右边距
.itemSpace(10) // item 之间的间距
相关注意点 :
| 注意点 | 说明 |
|---|---|
width 设置 |
当 displayCount > 1 时,建议手动设置 item 宽度 |
| 居中关键 | 外层 Row/Column 用 justifyContent(FlexAlign.Center) |
| prevMargin/nextMargin | 单位是 vp,不是百分比 |
效果如图
完整代码:
@Entry
@Component
struct SwiperDemo {
    private controller: SwiperController = new SwiperController()
    private items: string[] = ['1', '2', '3', '4', '5']

    build() {
        Column({ space: 20 }) {
            Swiper(this.controller) {
                ForEach(this.items, (item: string) => {
                    Text(item)
                        .width('100%')
                        .height(150)
                        .backgroundColor(this.getRandomColor())
                        .textAlign(TextAlign.Center)
                })
            }
            // 关键配置
            .displayCount(3) // 同时显示3个
            .prevMargin(20) // 左侧边距
            .nextMargin(20) // 右侧边距
            .itemSpace(10) // item间距
            .loop(true)
        }
        .padding(20)
    }

    getRandomColor(): string {
        const colors = ['#FF6B6B', '#4ECDC4', '#45B7D1', '#96CEB4', '#FFEAA7']
        return colors[Math.floor(Math.random() * colors.length)]
    }
}

代码如下,可以试一下,看看是不是你想要的效果
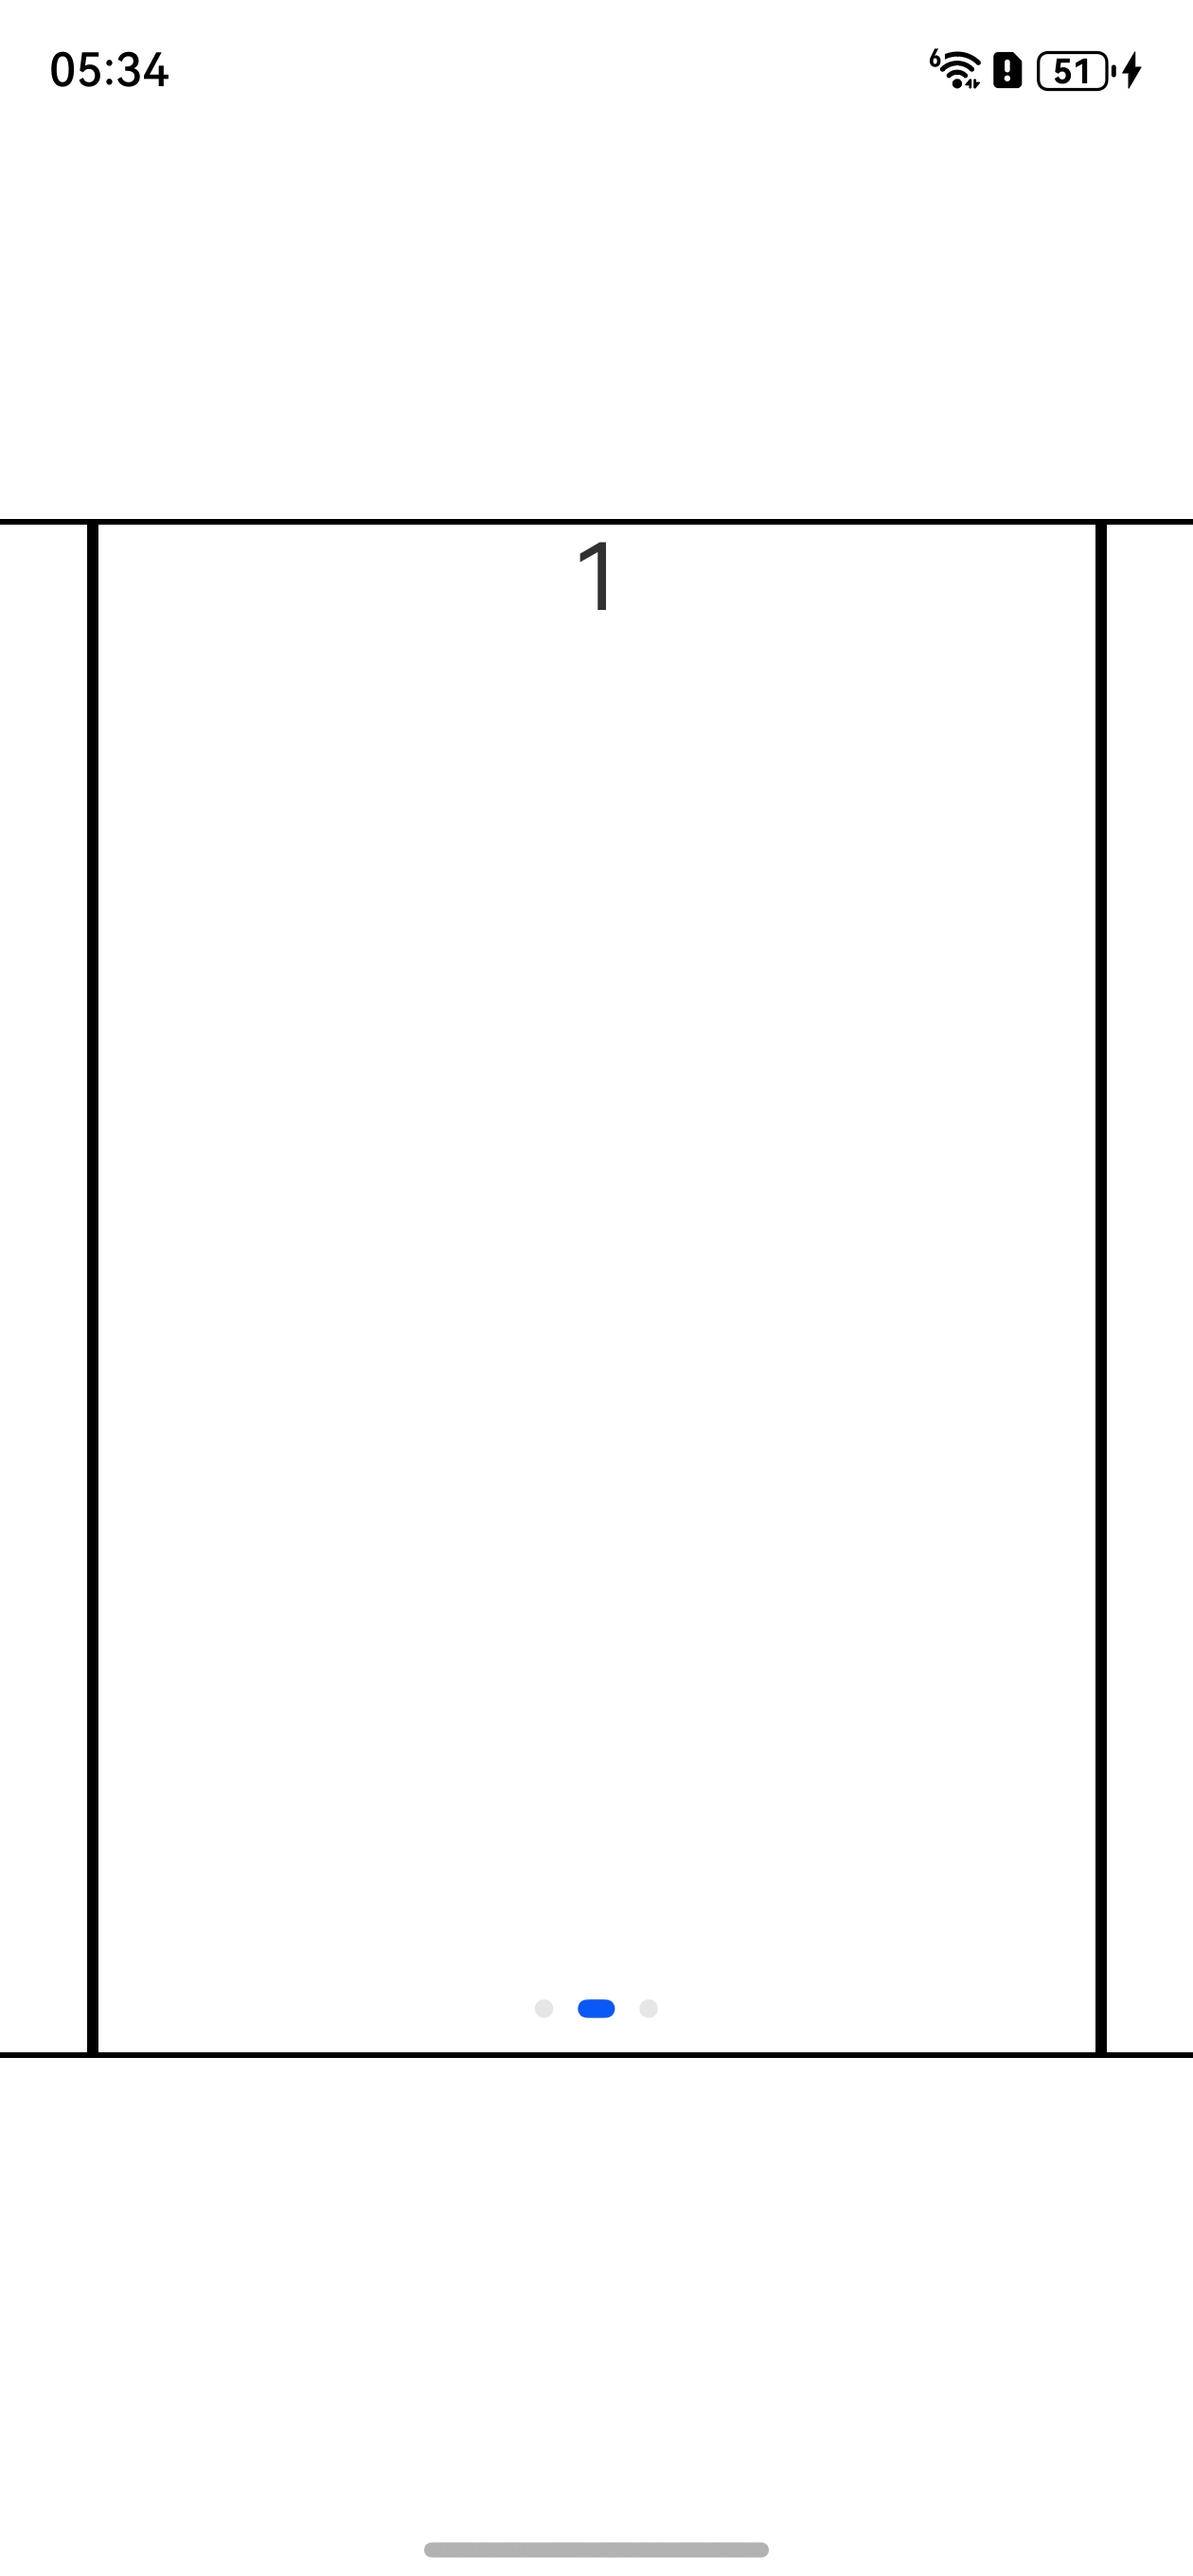
@Entry
@Component
struct Index {
  build() {
    Column() {
      Swiper() {
        ForEach(['0', '1', '2'], (item: string) => {
          Column() {
            Text(item).fontSize(30)
          }.width('100%').height('100%').border({ width: 2 })
        })
      }
      .width('100%')
      .height(500)
      .prevMargin(30)
      .nextMargin(30)
      .displayCount(1)
    }.width('100%').height('100%').justifyContent(FlexAlign.Center)
  }
}

在Swiper组件中,同时设置preMargin、nextMargin和displayCount实现居中效果:将displayCount设为奇数(如3),并令preMargin与nextMargin值相等(如'10%'或具体px),同时确保Swiper宽度自适应,当前项即可居中。循环模式loop建议开启,配合itemSpace: 0避免间隙干扰。
在 HarmonyOS Next API12+ 中,Swiper 组件可同时设置 displayCount、prevMargin 和 nextMargin 实现居中轮播效果。
displayCount设为一个奇数(如 3)prevMargin和nextMargin给一个合适的值(百分比或 vp)- 开启
loop,关闭默认指示器
这样当前项会占据中央位置,前后各露出一部分子项,视觉上自然居中。示例代码:
Swiper() {
  ForEach(data, (item: string) => {
    Column() {
      Text(item)
        .fontSize(20)
        .fontColor(Color.White)
    }
    .width('100%')
    .height(200)
    .backgroundColor('#007DFF')
    .borderRadius(12)
  })
}
.displayCount(3)
.prevMargin('12vp')
.nextMargin('12vp')
.loop(true)
.indicator(false)