


HarmonyOS 鸿蒙Next中如何实现渐变毛玻璃(模糊)效果?
HarmonyOS 鸿蒙Next中如何实现渐变毛玻璃(模糊)效果?
背景
在 ArkUI 中,使用 backgroundBlurStyle 和 foregroundBlurStyle 分别可以为组件背景、前景添加毛玻璃效果,示例代码如下:
@Entry
@Component
struct BackgroundBlurStyleDemo {
  build() {
    Column() {
      Row() {
        Text("Thin Material")
      }
      .width('50%')
      .height('50%')
      .backgroundBlurStyle(
        BlurStyle.Thin,
        {
          colorMode: ThemeColorMode.LIGHT,
          adaptiveColor: AdaptiveColor.DEFAULT,
          scale: 1.0
        })
      .position({ x: '15%', y: '30%' })
    }
    .height('100%')
    .width('100%')
    .backgroundImageSize(ImageSize.Cover)
  }
}
这里的 .backgroundBlurStyle() 为这个 Row() 组件添加了一层预设为 BlurStyle.Thin 的模糊效果,看上去就好像文字 Text("Thin Material") 有一层毛玻璃的衬底。
举一反三,可以使用 .backgroundBlurStyle() 和 .foregroundBlurStyle() 在任何想要的位置制作模糊效果。
问题
然而,这两种方法默认的作用效果都是一层均匀的模糊效果,怎么样才能做出从完全清晰到完全模糊的渐变效果?
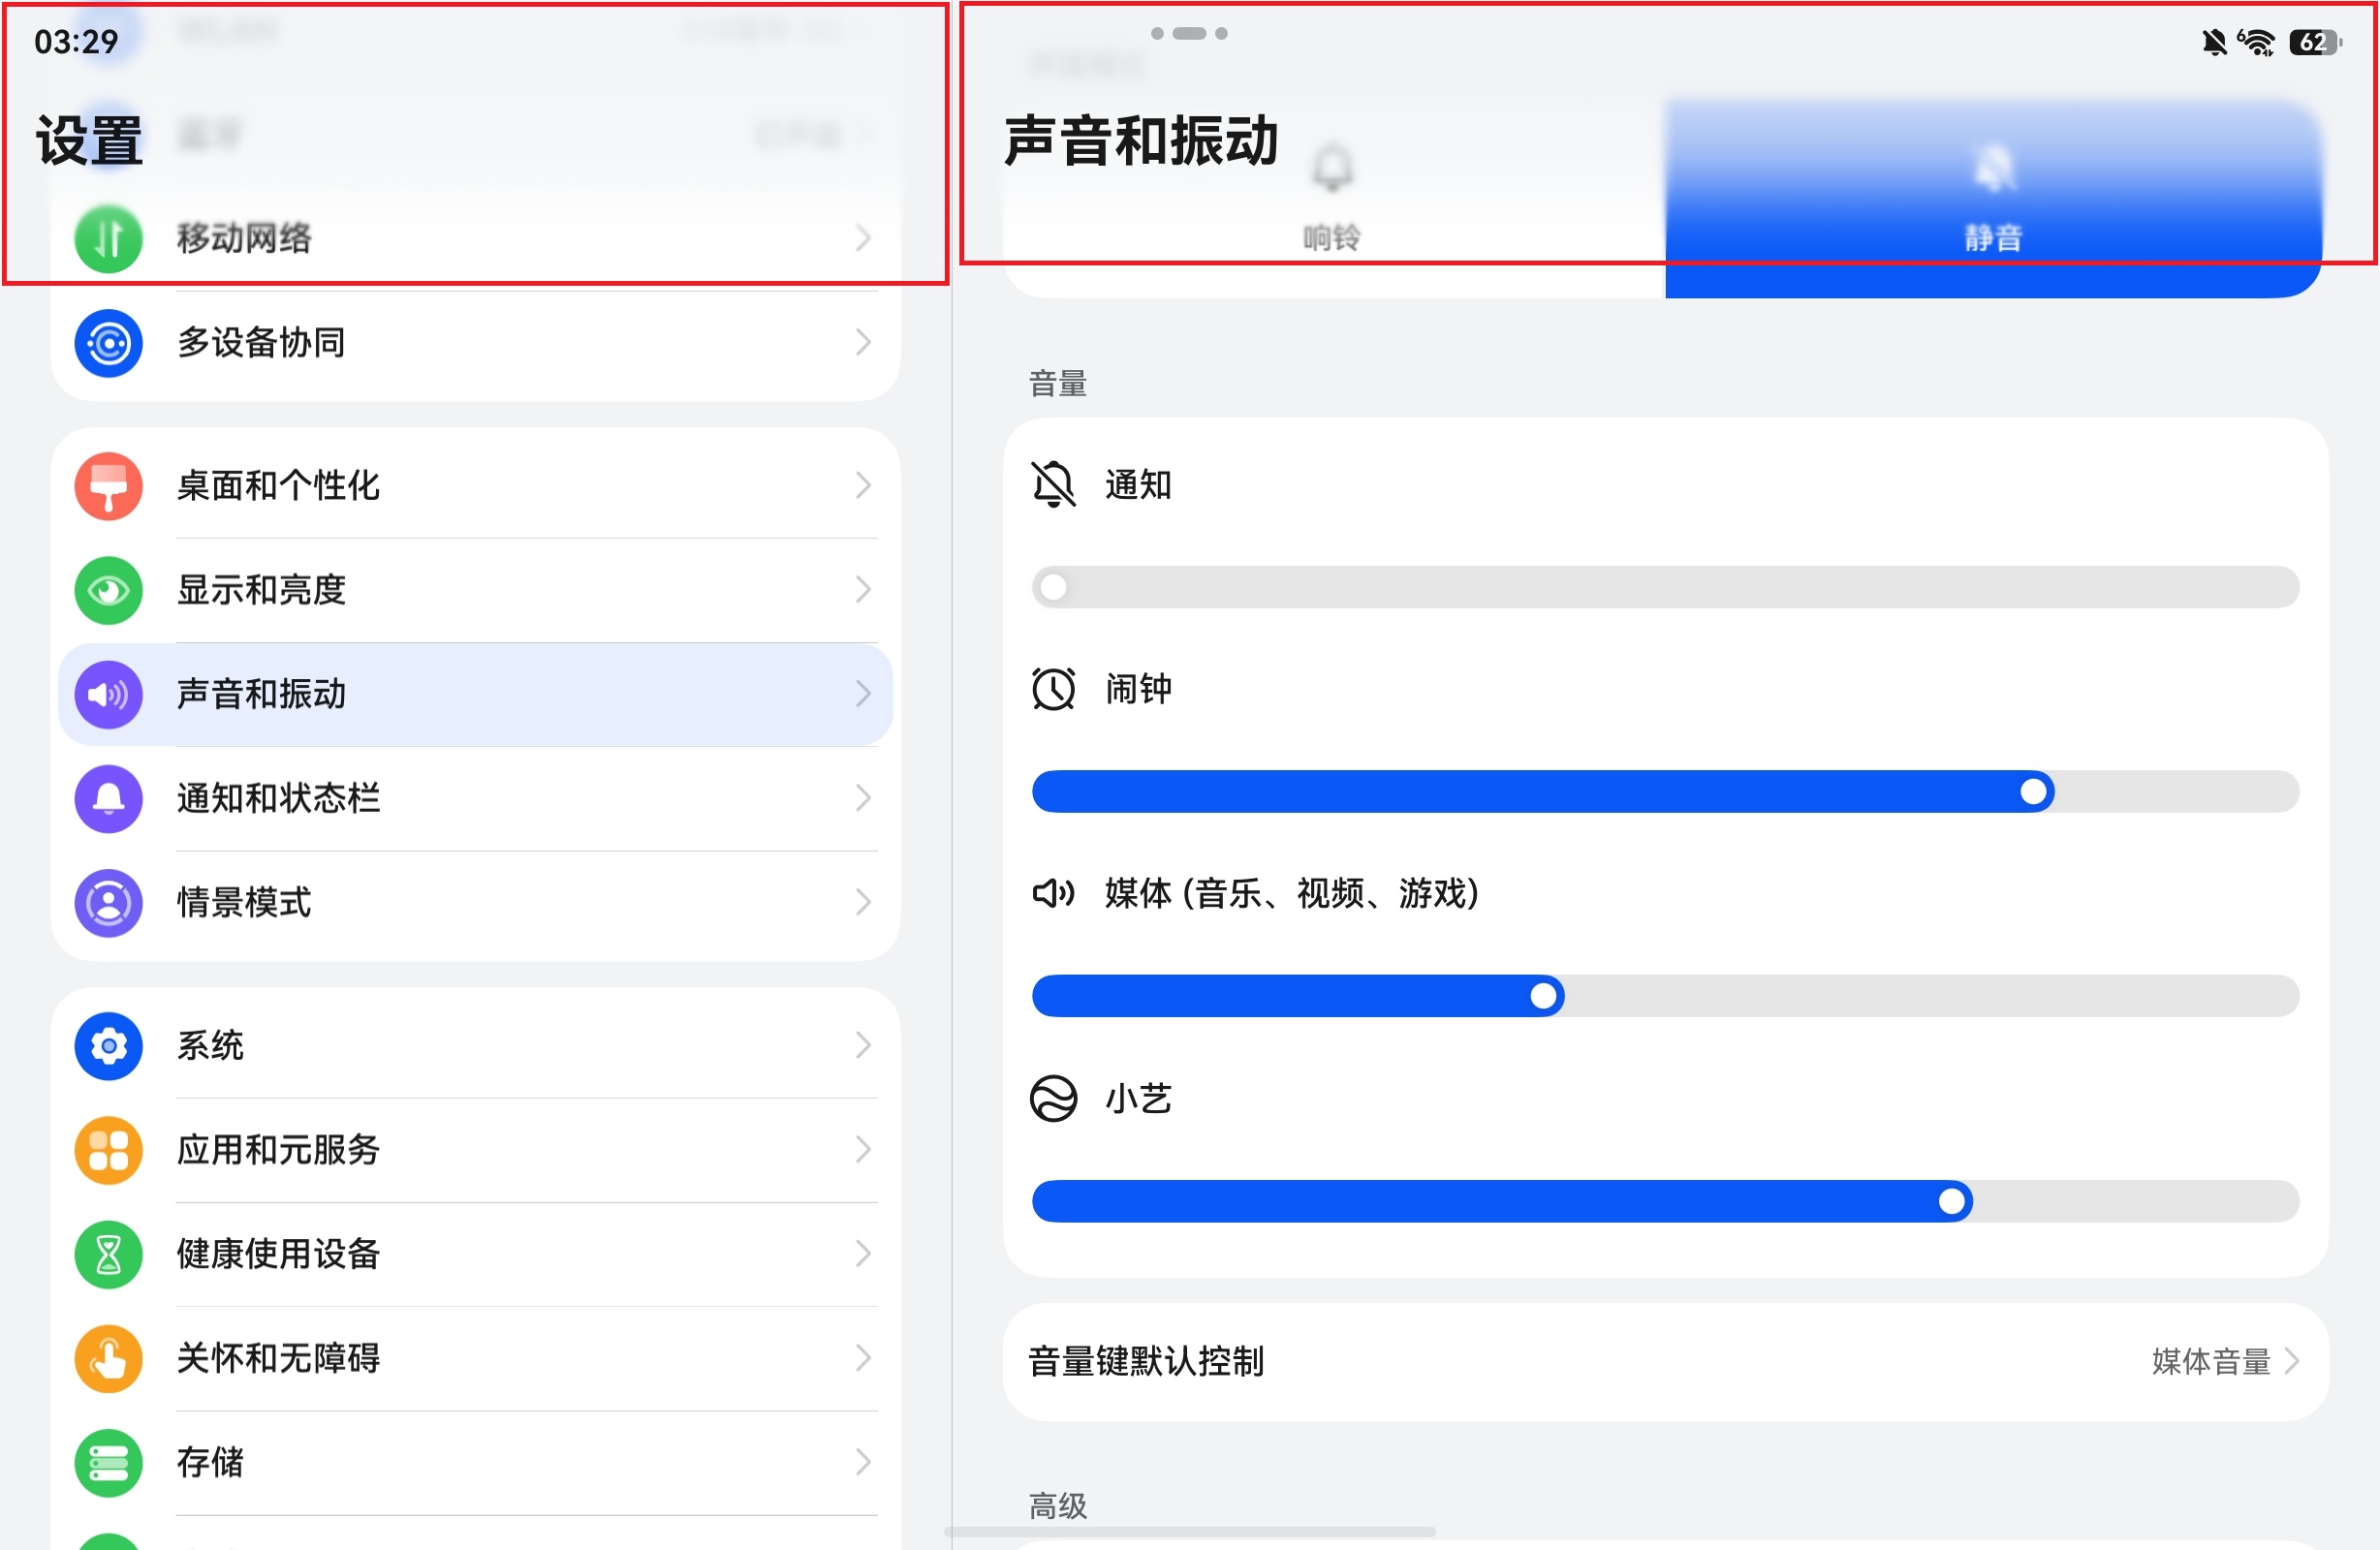
在 Harmony OS 系统应用的多处,都可以发现使用了该效果,并且做成了我想要在我应用内实现的渐变效果(红框处):
尝试过的方法
我先前尝试过使用 .opacity(),但是使用了 .backgroundBlurStyle() 和 .foregroundBlurStyle() 的组件,无法再使用 .opacity() 等方法调节其透明度,并且也无从下手向它传入一套线性渐变的值:
@Entry
@Component
struct BackgroundBlurStyleDemo {
  build() {
    Column() {
      Row() {
        Text("Thin Material")
      }
      .width('50%')
      .height('50%')
      .backgroundBlurStyle(
        BlurStyle.Thin,
        {
          colorMode: ThemeColorMode.LIGHT,
          adaptiveColor: AdaptiveColor.DEFAULT,
          scale: 1.0
        })
      .opacity(0.8)     // 此处的 opacity 无法与 backgroundBlurStyle 同时生效
      .position({ x: '15%', y: '30%' })
    }
    .height('100%')
    .width('100%')
    .backgroundImageSize(ImageSize.Cover)
  }
}
后来又尝试退而求其次,使用支持与 .opacity() 共存的 .blur(),在需要渐变透明的地方堆叠很多层不同可见程度的模糊层,来做到粗糙的伪渐变效果。然而这样做不但看起来不太自然(有稍明显的硬边缘),而且代码实现上也不优雅,并且完全不是我想要的高级毛玻璃效果:
@Component
export struct BottomBlurGradientMask {
  @Prop maskHeight: number = 80;

  build() {
    Stack({ alignContent: Alignment.Bottom }) {
      Stack({ alignContent: Alignment.Bottom }) {
        ForEach(
          [
            0, 1, 2, 3, 4, 5, 6, 7, 8, 9,
            10, 11, 12, 13, 14, 15, 16, 17, 18, 19,
            20, 21, 22, 23, 24, 25, 26, 27, 28, 29
          ],
          (index: number) => {
            Column()
              .width("100%")
              .height(Math.round(this.maskHeight * (index + 1) / 30))
              .opacity(index * 0.05)
              .blur(index * index * 0.005)
              .backgroundColor(Color.Transparent)
          },
          (index: number) => index.toString()
        )

        Column()
          .width("100%")
          .height("100%")
          .linearGradient({
            direction: GradientDirection.Top,
            colors: [
              ['rgba(0, 0, 0, 0.6)', 0.0],
              ['rgba(0, 0, 0, 0.0)', 0.6]
            ]
          })
      }
      .width("100%")
      .height(this.maskHeight)
    }
    .width("100%")
    .height("100%")
    .hitTestBehavior(HitTestMode.Transparent)
  }
}
所以,最终的问题就归结在:如何为 .backgroundBlurStyle() 和 .foregroundBlurStyle() 增加对其模糊程度关于组件位置坐标的线性渐变效果?
更多关于HarmonyOS 鸿蒙Next中如何实现渐变毛玻璃(模糊)效果?的实战教程也可以访问 https://www.itying.com/category-93-b0.html

开发者您好,可通过linearGradientBlur为组件添加内容线性渐变模糊效果,参考示例2,根据开发者demo修改如下:
// BackgroundBlurStyleDemo.ets
@Entry
@Component
struct BackgroundBlurStyleDemo {
  build() {
    Column() {
      Row() {
        Text('Thin Material');
      }
      .width('50%')
      .height('50%');
    }
    .height('100%')
    .width('100%')
    .linearGradientBlur(10,
      {
        fractionStops: [[0, 0], [0, 0.33], [1, 0.66], [1, 1]],
        direction: GradientDirection.Bottom
      }) // 添加linearGradientBlur属性
    .backgroundImage($r('app.media.xx')) // 自行添加图片背景
    .backgroundImageSize(ImageSize.Cover);
  }
}
更多关于HarmonyOS 鸿蒙Next中如何实现渐变毛玻璃(模糊)效果?的实战系列教程也可以访问 https://www.itying.com/category-93-b0.html

backgroundBlurStyle/foregroundBlurStyle 本身不支持渐变模糊,也无法与 opacity 同层生效;正确做法是用 backdropBlur + 渐变透明度蒙版 + 混合模式 实现系统级同款渐变毛玻璃
@Entry
@Component
struct GradientBlurDemo {
  build() {
    Stack() {
      // 1. 底层内容(你的列表/图片/页面)
      Scroll() {
        Column() {
          ForEach(Array.from({ length: 20 }), (_, index) => {
            Text(`设置项 ${index + 1}`)
              .width('100%')
              .height(50)
              .margin({ top: 10 })
              .backgroundColor(Color.White)
              .borderRadius(8)
              .textAlign(TextAlign.Center)
          })
        }
        .width('100%')
        .padding(10)
      }

      // 2. 渐变模糊遮罩层(核心)
      Stack()
        .width('100%')
        .height('100%')
        // 背景模糊(毛玻璃本体)
        .backdropBlur(15)
        .backgroundColor(Color.White.opacity(0.1))
        // 渐变透明度蒙版:顶部清晰 → 底部模糊
        .linearGradient({
          direction: GradientDirection.Bottom,
          colors: [
            [Color.Transparent, 0.0],   // 顶部完全清晰(不模糊)
            [Color.White, 0.6]          // 底部完全模糊
          ]
        })
        // 混合模式:用渐变透明度"擦除"模糊层
        .blendMode(BlendMode.DST_IN, BlendApplyType.OFFSCREEN)
        // 不拦截点击
        .hitTestBehavior(HitTestMode.Transparent)
    }
    .width('100%')
    .height('100%')
    .backgroundColor(0xF2F2F2)
  }
}

找HarmonyOS工作还需要会Flutter的哦,有需要Flutter教程的可以学学大地老师的教程,很不错,B站免费学的哦:https://www.bilibili.com/video/BV1S4411E7LY/?p=17

实测具有属性 .backdropBlur() 和 .linearGradient() 的组件在具有 .blendMode() 属性时并不能正常按预期显示。
在您给出的示例代码中,如果同时存在 .backdropBlur(15) 和 .blendMode(BlendMode.DST_IN, BlendApplyType.OFFSCREEN),那么在实际渲染的 UI 中看起来它们都会失效,并且 .linearGradient() 也不起作用。

在HarmonyOS Next中,使用ArkTS实现渐变毛玻璃效果:在组件上应用blur({ radius: 10 })实现模糊,配合LinearGradient设置渐变背景。例如:
Column() {
  // 内容
}
.backgroundImage('...')
.backgroundImageSize(ImageSize.Cover)
.blur({ radius: 20 })
.linearGradient({ direction: GradientDirection.Bottom, colors: [['rgba(255,255,255,0)', 0], ['rgba(255,255,255,0.8)', 1]] })
通过blur和linearGradient组合即可。

在backgroundBlurStyle/foregroundBlurStyle本身不支持渐变系数的情况下,可通过混合模式 + 渐变遮罩实现视觉上的渐变模糊效果。核心思路:在模糊层下方放置一个从透明到不透明的渐变蒙版,并给模糊层设置blendMode(BlendMode.SRC_IN),使其只显示在蒙版不透明区域,从而产生模糊从无到有的渐变过渡。
Stack() {
  // 渐变遮罩:顶部不透明,底部完全透明(可根据需要调整方向)
  Column()
    .width('100%')
    .height(200)
    .linearGradient({
      direction: GradientDirection.Bottom,
      colors: [['rgba(255,255,255,1)', 0.0], ['rgba(255,255,255,0)', 1.0]]
    })
  // 模糊层,仅显示在遮罩不透明处
  Column()
    .width('100%')
    .height(200)
    .backgroundBlurStyle(BlurStyle.Thin, {
      colorMode: ThemeColorMode.LIGHT,
      adaptiveColor: AdaptiveColor.DEFAULT,
      scale: 1.0
    })
    .blendMode(BlendMode.SRC_IN)
}
- 原理:使用
BlendMode.SRC_IN,模糊层作为源,其输出只保留与下层蒙版不透明区域相交的部分,蒙版透明度渐变使得模糊层的可见度也渐变。 - 适用场景:屏幕底部、顶部或任何需要从清晰过渡到模糊毛玻璃的区域,代码简洁,无需多层堆叠。