


HarmonyOS 鸿蒙Next中怎样在输入法APP的窗口实现沉浸式效果呢
HarmonyOS 鸿蒙Next中怎样在输入法APP的窗口实现沉浸式效果呢 我现在是用一个KeyboardMainPage承载并切换多个透明背景的键盘布局,请问这种方式正确吗?
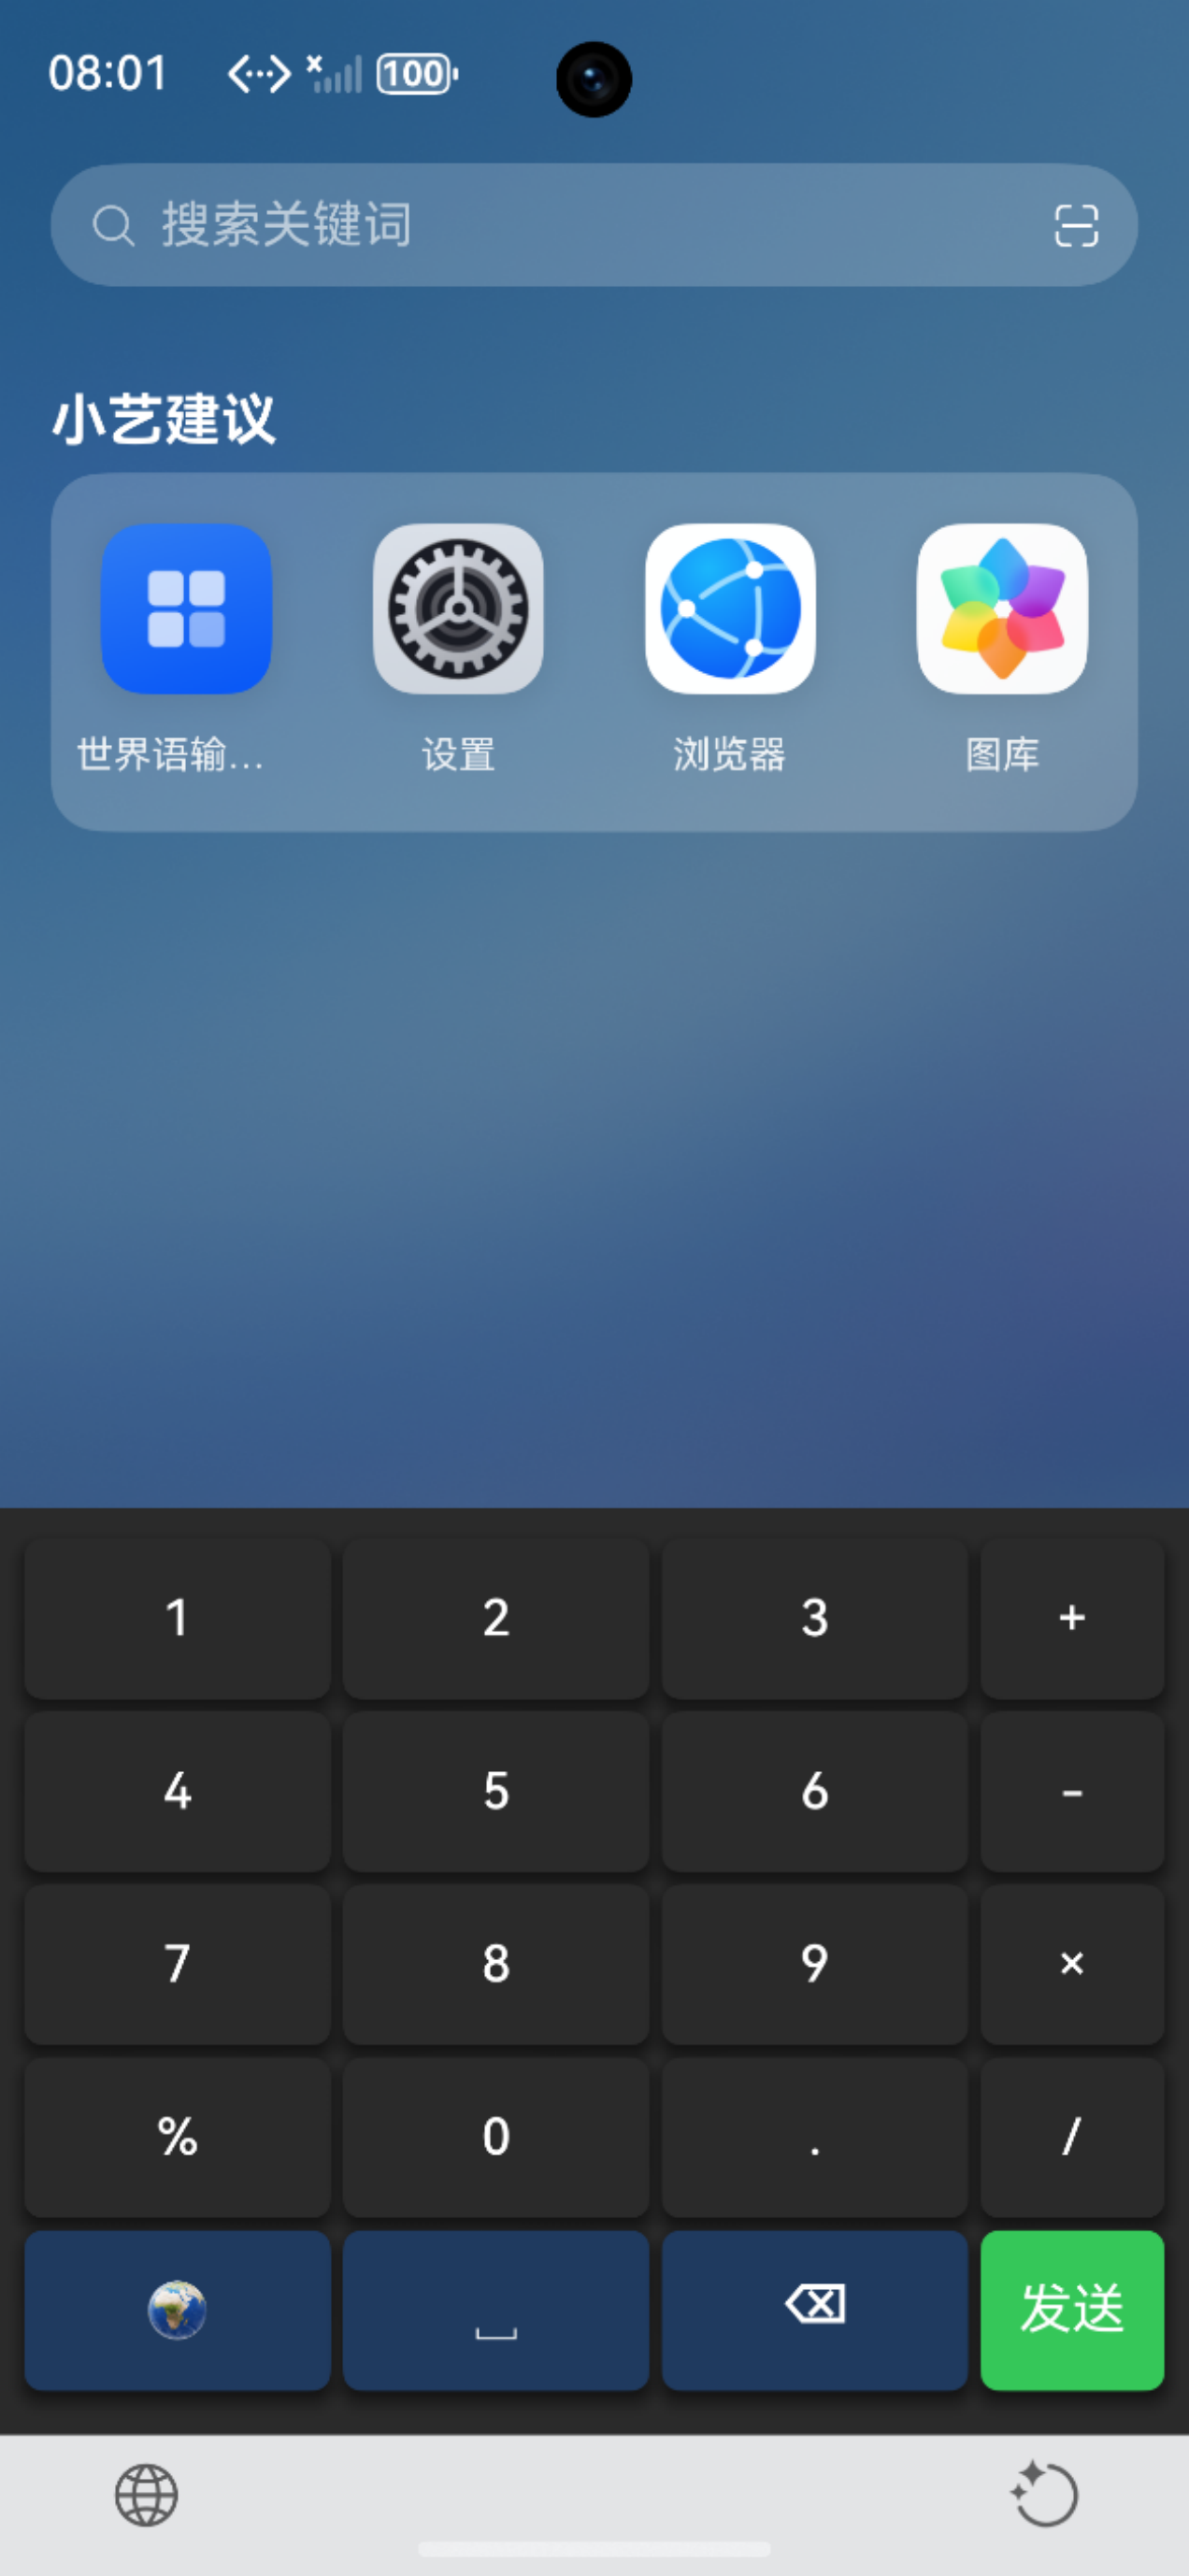
图一是在KeyboardMainPage设置主题背景色,无法将背景色延伸到底部安全区。
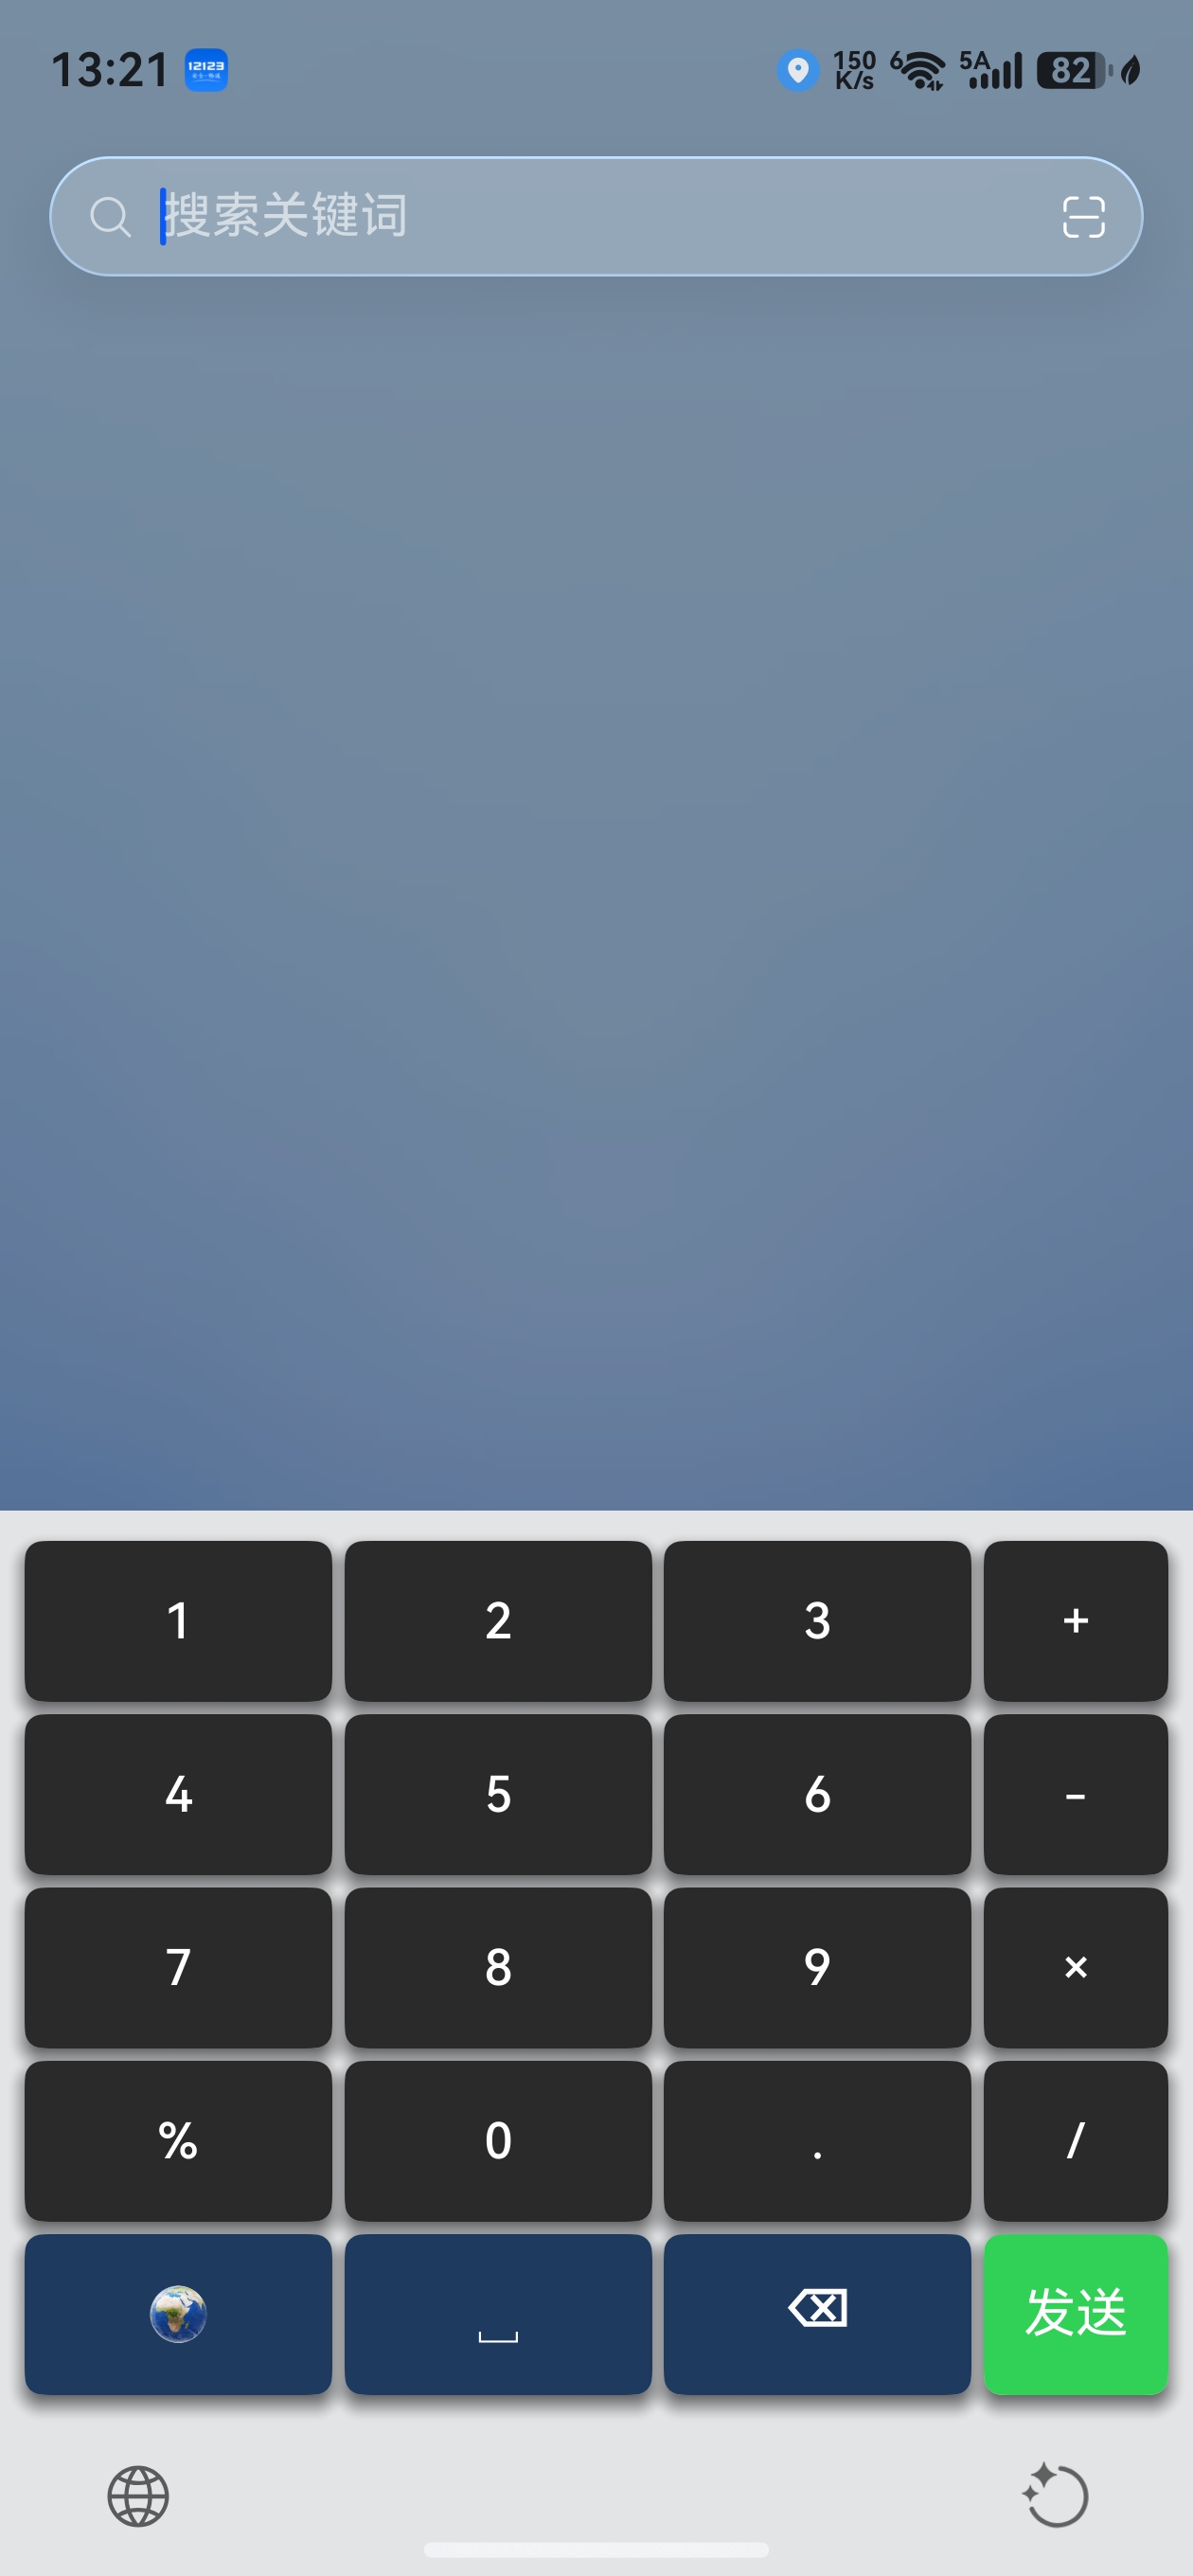
图二是把KeyboardMainPage也设为透明背景,窗口是默认颜色。
我想把键盘的主题背景色延伸到底部安全区,应该怎样做呢,试了很多方法都没有效果,应该把所有键盘布局设置为透明背景再给窗口设置色彩吗,但是键盘的窗口颜色应该怎样设置呢?应该在KeyboardController或InputMethodService里边调整吗
更多关于HarmonyOS 鸿蒙Next中怎样在输入法APP的窗口实现沉浸式效果呢的实战教程也可以访问 https://www.itying.com/category-93-b0.html

开发者你好,可以使用keyboardAppearance设置输入框拉起的键盘样式,需要输入法适配后生效。具体参考输入法应用沉浸模式。
更多关于HarmonyOS 鸿蒙Next中怎样在输入法APP的窗口实现沉浸式效果呢的实战系列教程也可以访问 https://www.itying.com/category-93-b0.html

尊敬的开发者您好,setImmersiveMode方法可以设置输入法应用的沉浸模式,支持浅色沉浸模式(LIGHT_IMMERSIVE)或深色沉浸模式(DARK_IMMERSIVE),详见文档:https://developer.huawei.com/consumer/cn/doc/harmonyos-references/js-apis-inputmethodengine#setimmersivemode15
正确实现步骤(按顺序来)
步骤 1:在 InputMethodService 中,给输入法窗口开启沉浸式并设置背景色
在你的输入法服务类中,重写 onCreateInputMethodWindow,这是最关键的一步:
ts
import InputMethodService from '@kit.IMEKit';
import window from '@kit.WindowKit';

export default class MyInputMethodService extends InputMethodService {
  // 输入法窗口控制器
  private keyboardWindowController: window.WindowController | null = null;

  // 输入法窗口创建完成回调
  override async onCreateInputMethodWindow(windowController: window.WindowController): Promise<void> {
    this.keyboardWindowController = windowController;

    // 1. 开启输入法窗口的沉浸式模式(关键!)
    await this.keyboardWindowController.setWindowLayoutFullScreen(true);
    await this.keyboardWindowController.setImmersiveMode(true);

    // 2. 设置窗口背景色(直接在窗口层设置,才能覆盖到底部安全区)
    // 你可以在这里设置主题色,比如深色/浅色模式切换
    await this.keyboardWindowController.setWindowBackgroundColor('#1E293B'); // 示例:深色背景

    // 3. 窗口背景不随系统默认色变化,强制生效
    await this.keyboardWindowController.setWindowBackgroundTransparent(false);
  }
}
步骤 2:KeyboardMainPage 必须设置为透明 + 扩展安全区
你的主页面 KeyboardMainPage 必须这样写,绝对不能设置 backgroundColor:
ts
@Entry
@Component
struct KeyboardMainPage {
  build() {
    // 整个页面根节点设为透明背景
    Column() {
      // 这里放你的键盘布局(所有子布局也必须是透明背景)
      this.buildKeyboardContent()
    }
    .width('100%')
    .height('100%')
    .backgroundColor(Color.Transparent) // 必须透明,不遮挡窗口背景
    // 扩展安全区,让内容延伸到底部
    .expandSafeArea([SafeAreaType.SYSTEM], [SafeAreaEdge.BOTTOM])
  }

  @Builder
  buildKeyboardContent() {
    // 你的键盘布局,所有容器都不要设置背景色,或者设为透明
    Row() {
      // ... 按键布局
    }
    .width('100%')
    .height('280vp')
    .backgroundColor(Color.Transparent) // 布局也必须透明
  }
}
步骤 3:所有子键盘布局,全部设置为透明背景
你现在的 “切换多个透明布局” 的思路是对的,只需要确保:
- 每个切换的布局根节点,都设置
.backgroundColor(Color.Transparent) - 不要在布局里设置背景色,全部由窗口层控制
- 键盘按键、面板的背景色,只设置在按键组件上,不要设置在父容器上
三、为什么你之前的两种尝试都失败了?
-
图一:在
KeyboardMainPage设置背景色- 页面的背景色会被输入法窗口的安全区裁切,底部导航栏区域属于系统窗口,页面无法直接绘制。
- 页面级的背景色只能渲染到键盘区域,无法穿透到底部安全区。
-
图二:页面全透明,窗口默认颜色
- 输入法窗口默认背景是透明的,所以你看到的是系统默认的灰色。
- 你没有在
InputMethodService里设置windowBackgroundColor,所以窗口层没有颜色。
四、进阶:动态切换主题色(深浅色 / 自定义主题)
如果需要动态切换键盘背景色,可以在服务里封装一个方法,在页面中调用:
ts
// 在 InputMethodService 中
async setKeyboardThemeColor(color: string) {
  if (this.keyboardWindowController) {
    await this.keyboardWindowController.setWindowBackgroundColor(color);
  }
}

// 在 KeyboardMainPage 中调用
this.getUIContext().getServiceProvider().getService(MyInputMethodService)?.setKeyboardThemeColor('#0F172A');
五、官方文档参考

在鸿蒙Next中,输入法APP实现沉浸式效果需通过窗口属性设置。使用windowStage.getMainWindow()获取主窗口,调用setWindowLayoutInFullScreen(true)启用全屏布局,再通过setSystemBarProperties()设置状态栏和导航栏为透明或隐藏。同时需在module.json5中配置ohos.permission.SYSTEM_FLOAT_WINDOW权限。确保输入法窗口层级正确,避免与系统UI重叠。

在 HarmonyOS Next 输入法开发中,让键盘背景色延伸到底部安全区实现沉浸式效果,本质是让输入法窗口全屏并正确处理安全区域。你使用透明背景的 KeyboardMainPage 思路正确,但需要配合窗口属性和页面安全区扩展。
实现步骤:
-
在
InputMethodExtensionAbility的onWindowStageCreate中设置窗口全屏且系统栏透明。
这会让整个键盘窗口内容延伸到导航栏区域。// InputMethodExtensionAbility.ts onWindowStageCreate(windowStage: window.WindowStage): void { windowStage.loadContent('pages/KeyboardMainPage', (err, data) => { if (err.code) return; let mainWindow = windowStage.getMainWindowSync(); // 开启全屏,使窗口布局延伸到安全区 mainWindow.setWindowLayoutFullScreen(true); // 设置状态栏、导航栏透明 mainWindow.setWindowSystemBarProperties({ statusBarColor: '#00000000', navigationBarColor: '#00000000', statusBarContentColor: '#000000', // 根据背景色调整图标颜色 navigationBarContentColor: '#000000' }); }); } -
在
KeyboardMainPage的根布局中扩展安全区,并填充主题背景色。
透明背景的键盘子布局可以继续保留,页面本身(或一个背景容器)负责颜色覆盖。// KeyboardMainPage.ets [@Entry](/user/Entry) [@Component](/user/Component) struct KeyboardMainPage { build() { Column() { // 你的键盘布局区域,保持透明 // ... } .width('100%') .height('100%') .backgroundColor('#FF5500') // 你的主题色,现在会铺满全屏 .expandSafeArea([SafeAreaType.SYSTEM], [SafeAreaEdge.BOTTOM]) // 关键:向底部导航栏安全区扩展 } }
说明:
setWindowLayoutFullScreen(true)让窗口内容忽略系统栏的避让,直接绘制到屏幕底部。expandSafeArea使页面组件可以延伸到导航栏所在的区域,配合背景色即可实现主题色铺满效果。- 输入法窗口的创建和属性设置必须在
InputMethodExtensionAbility的生命周期中进行,KeyboardController或InputMethodService无法直接调整窗口级属性。
按照以上方式,你的键盘主题色就会完整覆盖到底部安全区,无需再纠结窗口颜色设置。