


HarmonyOS 鸿蒙Next想要在App内直接进行经典蓝牙连接配对的流程?
HarmonyOS 鸿蒙Next想要在App内直接进行经典蓝牙连接配对的流程? 目标是自动直接进行经典蓝牙配对,不想通过设置选择点击配对连接。想实现这个目标,是否要先通过BLE扫描到目标设备以后,通过deviceId来进行经典蓝牙的配对连接?

BLE 扫描到的 deviceId 不能简单当成经典蓝牙配对的入口,两套链路不是一回事。BLE 更适合发现、广播和 GATT 通信;经典蓝牙配对/连接通常要走对应的 Classic Bluetooth 能力和系统配对流程。
如果目标是“完全不经过系统设置页,App 内自动完成配对”,要先确认当前公开 API 是否允许三方应用主动发起经典蓝牙配对。很多系统会把配对确认交给系统弹窗处理,应用只能发起连接或引导用户确认,不能静默配对。
建议先明确设备支持的 profile/SPP/协议,再按经典蓝牙接口发现和连接;BLE 可以作为辅助发现手段,但不要依赖 BLE 的 id 直接完成经典配对。
更多关于HarmonyOS 鸿蒙Next想要在App内直接进行经典蓝牙连接配对的流程?的实战系列教程也可以访问 https://www.itying.com/category-93-b0.html

第一个问题: 是否需要先通过 BLE 扫描到设备,再用 deviceId 做经典蓝牙配对?
答案是: 不需要!BLE 和 Classic Bluetooth 是两套独立的协议和扫描方式
| 对比项 | BLE 扫描 | 经典蓝牙扫描 |
|---|---|---|
| 扫描 API | ble.startScan() |
bluetooth.startBluetoothSearching() |
| 扫描结果 | BLEAdvertiseDevice |
设备名称 + 地址 |
| 配对方式 | 不涉及配对,直接连接 GATT | 需要配对(PIN/配对码) |
| 用途 | 读取传感器、广播数据 | 音频、串口、文件传输 |
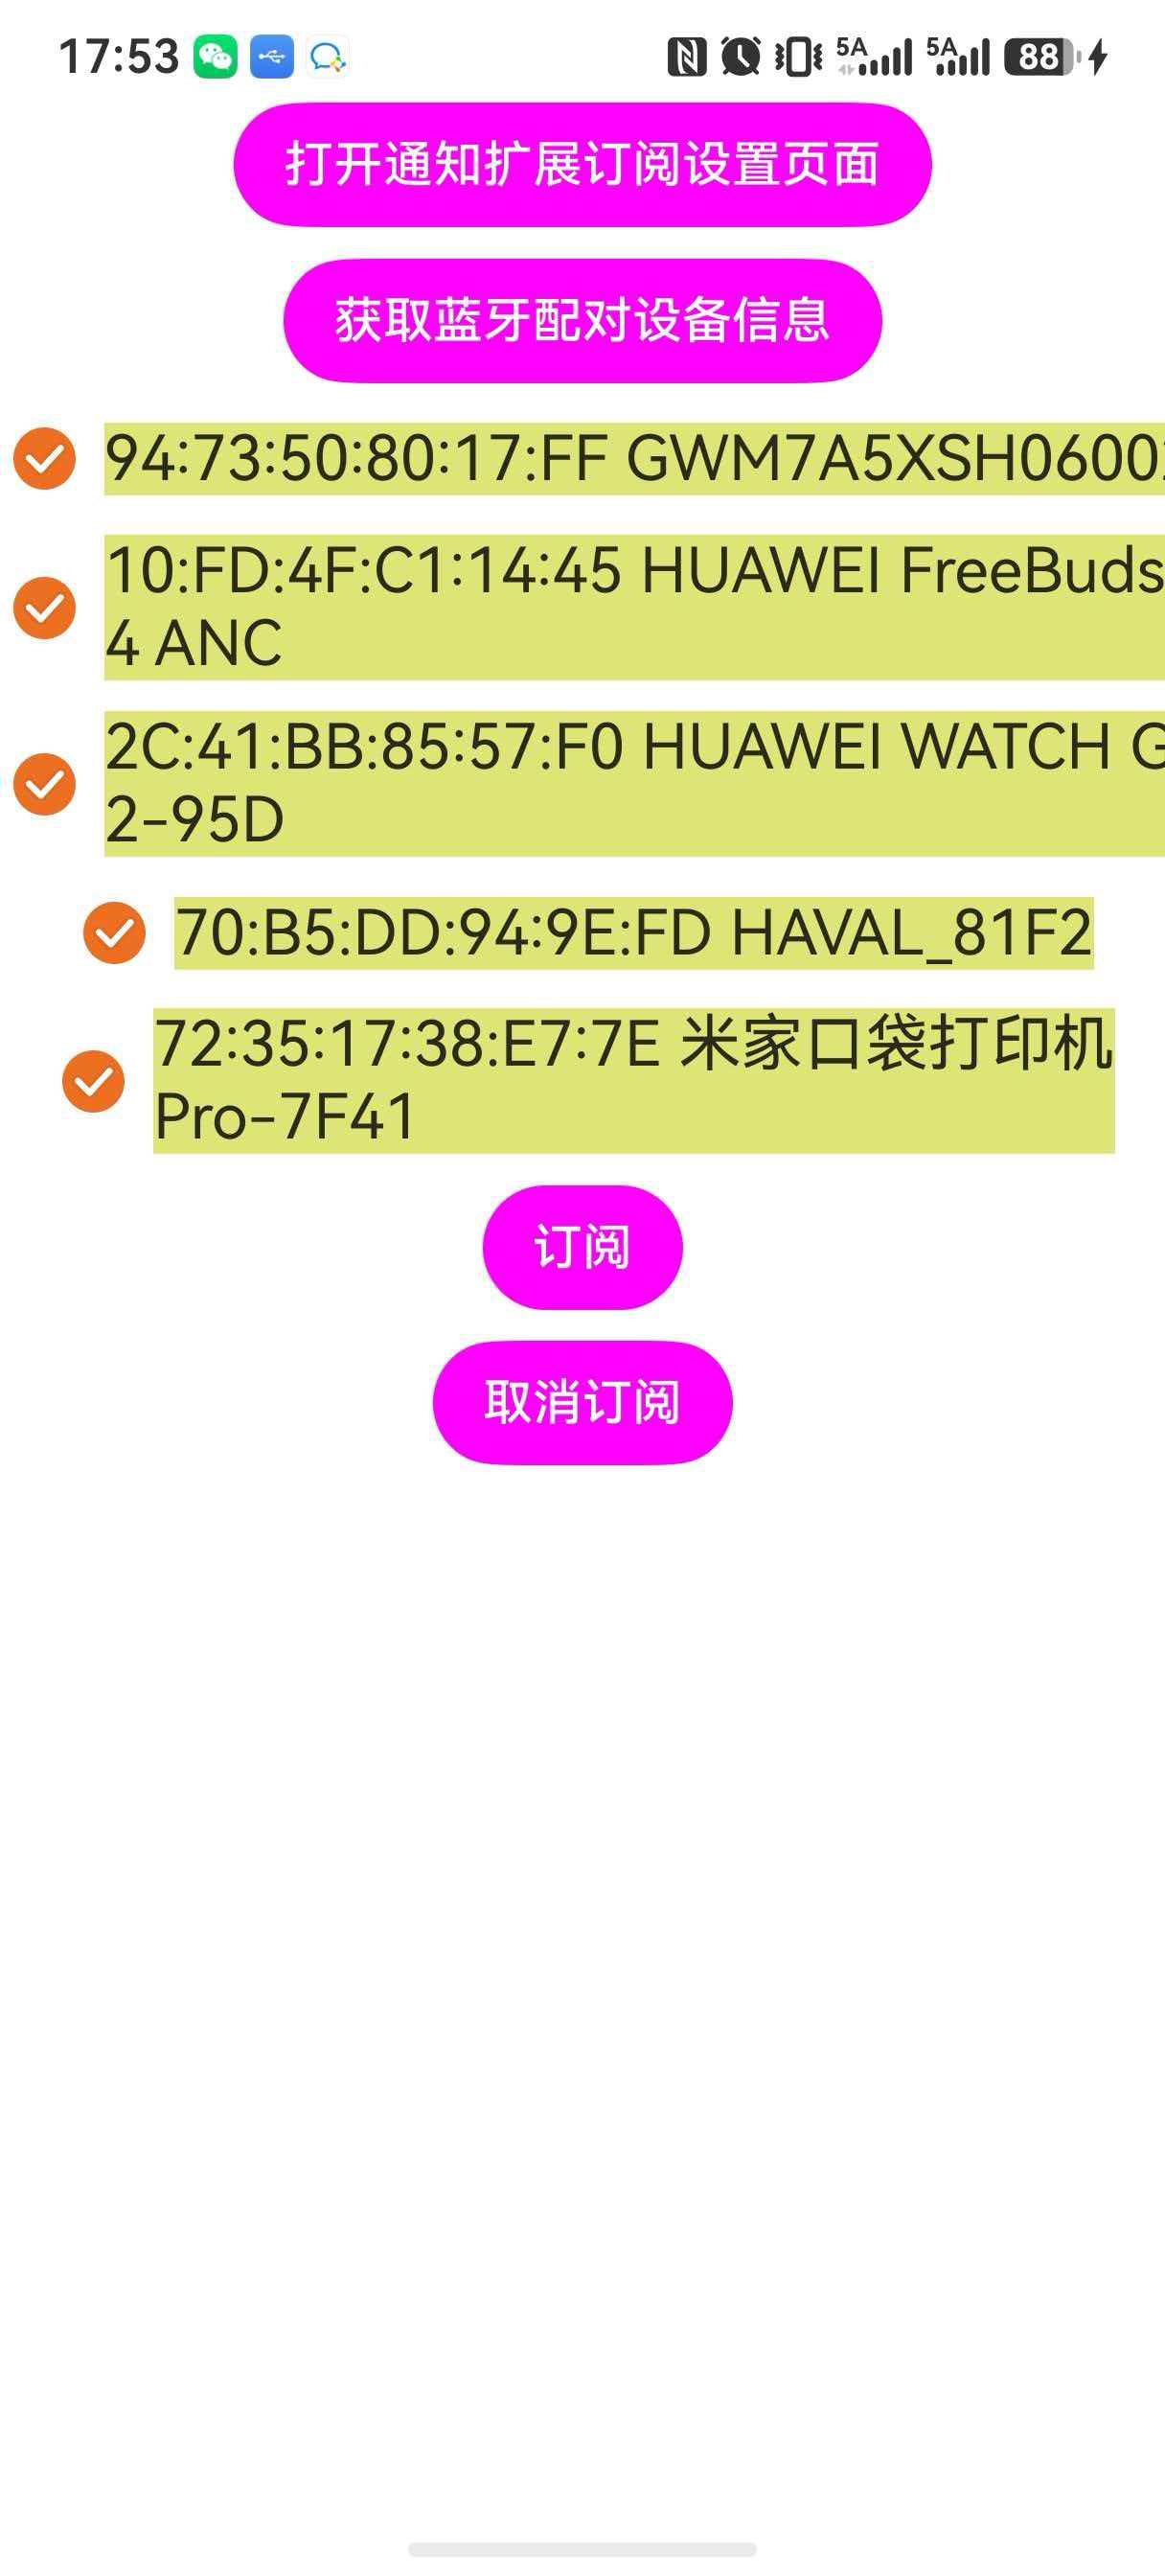
效果截图
相关代码
主页面
import { abilityAccessCtrl, common } from '@kit.AbilityKit';
import { notificationExtensionSubscription } from '@kit.NotificationKit';
import { HashSet } from '@kit.ArkTS';
import { connection } from '@kit.ConnectivityKit';
import { hilog } from '@kit.PerformanceAnalysisKit';
import { BusinessError } from '@ohos.base';

const DOMAIN = 0x0000;

@Entry
@Component
struct Index {
  @State message: string = 'Hello World';
  @State selectedAddr: HashSet<string> = new HashSet();
  @State devices: string[] = [];

  aboutToAppear(): void {
    //开启授权
    let atManager: abilityAccessCtrl.AtManager = abilityAccessCtrl.createAtManager();
    try {
      let context = this.getUIContext().getHostContext() as common.UIAbilityContext;
      atManager.requestPermissionsFromUser(context, ['ohos.permission.ACCESS_BLUETOOTH'],
        (err, _) => {
          hilog.error(DOMAIN, 'testTag', `failed to requestPermissionsFromUser ${err}`)
        });
    } catch (err) {
      hilog.error(DOMAIN, 'testTag', `failed to requestPermissionsFromUser ${err}`)
    }
    AppStorage.setOrCreate('event', 'requestPermissionsFromUser');
  }

  build() {
    RelativeContainer() {
      Column({ space: 10 }) {
        Button("打开通知扩展订阅设置页面").backgroundColor('#FFFF00FF')
          .onClick(async () => {
            try {
              let context = this.getUIContext().getHostContext() as common.UIAbilityContext;
              await notificationExtensionSubscription.openSubscriptionSettings(context);
            } catch (error) {
              hilog.error(DOMAIN, 'testTag', `failed to call openSubscriptionSettings ${error}`)
            }
            hilog.info(DOMAIN, 'testTag', `openSubscriberSettings success`);
          })
        Button("获取蓝牙配对设备信息").backgroundColor('#FFFF00FF')
          .onClick(async () => {
            try {
              // 获取已配对设备信息
              this.devices = connection.getPairedDevices();
            } catch (err) {
              hilog.error(DOMAIN, 'testTag', `errCode: ${err.code}, errMessage: ${err.message}`);
            }
            AppStorage.setOrCreate('event', 'queryBluetooth');
          })

        ForEach(this.devices, (item: string) => {
          Row({ space: 5 }) {
            Checkbox({ name: `${item} ${connection.getRemoteDeviceName(item)}`, group: 'checkboxGroup' })
              .select(false)
              .selectedColor(0xed6f21)
              .shape(CheckBoxShape.CIRCLE)
              .onChange((value: boolean) => {
                if (value) {
                  this.selectedAddr.add(item)
                } else {
                  this.selectedAddr.remove(item)
                }
              })
            Text(`${item} ${connection.getRemoteDeviceName(item)}`).fontSize(20)
              .backgroundColor(`${connection.getPairState(item) == 1 ? '#ff0d9d31'
                : connection.getPairState(item) == 2 ? '#ffdee578'
                  : '#8b838285'}`)
          }
        })

        Button("订阅").backgroundColor('#FFFF00FF')
          .onClick(async (e: ClickEvent) => {
            try {
              let subscribeInfo: notificationExtensionSubscription.NotificationExtensionSubscriptionInfo[] = new Array()
              this.selectedAddr.forEach((value, _) => {
                subscribeInfo.push({
                  addr: value!,
                  type: notificationExtensionSubscription.SubscribeType.BLUETOOTH
                })
              })
              notificationExtensionSubscription.subscribe(subscribeInfo).then(() => {
                hilog.info(DOMAIN, 'testTag', "subscribe success");
              }).catch((err: BusinessError) => {
                hilog.error(DOMAIN, 'testTag', `subscribe fail: ${JSON.stringify(err)}`);
              });
            } catch (error) {
              hilog.error(DOMAIN, 'testTag', `failed to call subscribe`)
            }
            AppStorage.setOrCreate('event', 'subscribe');
          })
        Button("取消订阅").backgroundColor('#FFFF00FF')
          .onClick(async (e: ClickEvent) => {
            try {
              let result = await notificationExtensionSubscription.unsubscribe();
              hilog.info(DOMAIN, 'testTag', `unsubscribe result ${result}`);
            } catch (error) {
              hilog.error(DOMAIN, 'testTag', `failed to call unsubscribe`)
            }
            AppStorage.setOrCreate('event', 'unsubscribe');
          })
      }
    }
    .height('100%')
    .width('100%')
  }
}
相关示例代码下载,如有帮助给个采纳谢谢
git init
git config core.sparsecheckout true
echo code/DocsSample/Notification/ThirdpartyWerableDemo/ > .git/info/sparse-checkout
git remote add origin https://gitee.com/openharmony/applications_app_samples.git
git pull origin master

不能通过 BLE 扫描到 deviceId 后,直接自动发起经典蓝牙(Bluetooth BR/EDR)配对连接。
原因是 HarmonyOS NEXT 的蓝牙分两套体系:
1、BLE(低功耗蓝牙)
主要用于:
- 扫描设备
- 广播发现
- GATT 服务通信
- 获取 BLE 设备标识
2、经典蓝牙(Classic Bluetooth)
主要用于:
- 音频设备
- 串口通信(SPP)
- HID 设备
- 文件传输
经典蓝牙配对属于系统级安全行为。
为什么不能直接自动配对?
HarmonyOS NEXT 对经典蓝牙配对有限制:
首次配对必须由用户主动确认。
系统会弹出配对确认框,用户需要:
点击确认
输入 PIN(如设备需要)
应用无法绕过系统弹窗,也不能静默自动点击。
这是系统安全机制,用于防止未授权连接。
BLE 扫描后能不能直接拿 deviceId 去经典蓝牙连接?
一般不能。
因为 BLE 的 deviceId 和经典蓝牙地址不是同一套标识。
即使是同一台物理设备:
BLE 广播 ID
Classic Bluetooth 地址
也可能不同,无法直接映射使用。
正确实现方式:
首次连接:
- 扫描发现目标设备
- 引导用户完成系统配对
- 系统保存配对关系
后续连接:
如果设备已经配对过,应用可以直接发起连接,实现自动重连,无需再次确认。
如果目标是“完全无感自动连接”,只有两种方案:
方案一:改用 BLE
优点:
- 可直接扫描连接
- 无需经典蓝牙配对弹窗
- 更适合 ArkTS 控制
适用于:
- IoT 设备
- 智能硬件
- 数据通信设备
方案二:系统级厂商能力
需要:
- 系统签名
- 特权权限
- 厂商定制能力
普通 HarmonyOS NEXT 第三方应用无法实现。
一句话总结:
BLE 扫描拿到的 deviceId 不能直接用于经典蓝牙自动配对;普通 HarmonyOS NEXT 应用首次经典蓝牙连接必须经过用户确认,完成配对后才能实现自动重连。
是的,给你梳理一下步骤吧。
步骤1:申请蓝牙权限在 module.json5配置文件中声明并动态申请蓝牙权限 ohos.permission.ACCESS_BLUETOOTH。
步骤2:导入所需模块
import { connection, ble } from '@kit.ConnectivityKit';
import { socket } from '@kit.ConnectivityKit';
import { BusinessError } from '@kit.BasicServicesKit';
步骤3:扫描 BLE 设备并获取地址以设备名称为过滤条件进行 BLE 扫描,获取目标设备的虚拟 MAC 地址 (deviceId)。
let targetName = 'MyDevice';
let bleAddress: string = '';

ble.on('BLEDeviceFind', (data) => {
  for (let i = 0; i < data.length; i++) {
    if (data[i].deviceName === targetName) {
      console.info(`发现目标设备:${data[i].deviceName},地址:${data[i].deviceId}`);
      ble.stopBLEScan();
      ble.off('BLEDeviceFind');
      bleAddress = data[i].deviceId; // 保存 BLE 虚拟地址
      // 触发后续配对流程
      startPairing(bleAddress);
      break;
    }
  }
});

// 开始扫描
ble.startBLEScan([{ name: targetName }], {
  interval: 500,
  dutyMode: ble.ScanDuty.SCAN_MODE_LOW_POWER,
  matchMode: ble.MatchMode.MATCH_MODE_AGGRESSIVE,
});
步骤4:发起经典蓝牙配对使用获取到的 deviceId调用 pairDevice接口发起配对。配对状态需通过订阅 bondStateChange事件监听。
function startPairing(deviceId: string) {
  // 订阅配对状态变化
  connection.on('bondStateChange', (connection.BondStateParam) => {
    console.info(`pair state = ${data.state}`);
    if (data.state === connection.BondState.BOND_STATE_BONDED) {
      console.info('设备已配对成功');
      // 配对成功后,可获取经典蓝牙地址并连接
      connectClassicBluetooth(data.deviceId);
    }
  });

  // 发起配对
  try {
    connection.pairDevice(deviceId, (err: BusinessError) => {
      if (err) {
        console.error(`配对失败: ${err.code}, ${err.message}`);
      } else {
        console.info('配对请求已发起');
      }
    });
  } catch (err) {
    console.error(`发起配对异常: ${(err as BusinessError).message}`);
  }
}
提醒你一下,配对过程中系统仍可能弹出授权对话框(如 PIN 码确认),具体取决于对端设备的配对方式。这是系统安全机制,无法完全绕过。
步骤5:获取经典蓝牙地址并建立连接设备配对成功后,系统会同时为其 BLE 和经典蓝牙协议生成虚拟地址。你需要从已配对设备列表中找出经典蓝牙地址,然后建立连接。
function connectClassicBluetooth(pairedDeviceId: string) {
  // 获取所有已配对设备
  let pairedDevices: Array<string> = connection.getPairedDevices();

  for (let i = 0; i < pairedDevices.length; i++) {
    let devAddress = pairedDevices[i];
    // 通过设备名称二次确认目标设备
    let classicName = connection.getRemoteDeviceName(devAddress);
    if (classicName === targetName && devAddress !== bleAddress) {
      console.info(`找到经典蓝牙地址: ${devAddress}`);
      // 建立经典蓝牙连接
      let sppOption: socket.SppOptions = {
        uuid: '00001101-0000-1000-8000-00805F9B34FB', // 示例 SPP UUID
        secure: true,
        type: 0
      };
      socket.sppConnect(devAddress, sppOption, (code, socketID) => {
        if (code === 0) {
          console.info(`经典蓝牙连接成功, socketID: ${socketID}`);
        } else {
          console.error(`连接失败,错误码: ${code}`);
        }
      });
      break;
    }
  }
}
整个过程是无需通过系统设置界面手动操作的,但配对时的用户授权弹窗仍可能由系统控制。
实现思路:
- 传统蓝牙扫描 -> 调用 pairDevice 发起配对 -> 监听 bondStateChange 到已配对 -> 调用 sppConnect 建立 SPP 连接。
- 不需要先走 BLE 扫描,经典蓝牙设备直接用传统蓝牙发现 connection.startBluetoothDiscovery 拿到 deviceId 即可。
但要注意,配对阶段官方明确会弹系统配对框,普通应用不能完全静默绕过用户确认。
先在模块里声明权限:
{
  "module": {
    "requestPermissions": [
      {
        "name": "ohos.permission.ACCESS_BLUETOOTH",
        "reason": "$string:module_desc",
        "usedScene": {
          "when": "inuse"
        }
      }
    ],
  }
}
示例代码: 扫描 -> 配对 -> SPP 连接
使用说明:
- 先把 TARGET_DEVICE_ID 改成你的目标设备地址;如果先留空,示例会拿扫描到的第一个设备做演示。
- 把 SPP_UUID 改成目标设备真实开放的 RFCOMM 服务 UUID;如果对端就是标准串口服务,可以先试 00001101-0000-1000-8000-00805F9B34FB。
- 运行后点击 Start Scan -> Pair -> Connect。第一次点击需要同意权限获取。
- 配对时系统会弹配对确认框,用户确认后才会继续走到 SPP 连接。
- 如果只想演示链路是否打通,保持示例里的 hello 测试包即可。
import { access, connection, socket } from '@kit.ConnectivityKit';
import { abilityAccessCtrl, common } from '@kit.AbilityKit';
import { BusinessError } from '@kit.BasicServicesKit';
const TARGET_DEVICE_ID: string = '';
const SPP_UUID: string = '00001101-0000-1000-8000-00805F9B34FB';
class ClassicBtSppFlow {
  onLog?: (msg: string) => void;

  private targetDeviceId: string = TARGET_DEVICE_ID;
  private clientSocketId: number = -1;
  private pendingStart: boolean = false;
  private connectingSpp: boolean = false;
  private foundTarget: boolean = false;

  private emitLog(msg: string): void {
    if (this.onLog) {
      this.onLog(msg);
    }
  }

  private onBtStateChange = (state: access.BluetoothState): void => {
    this.emitLog(`bluetooth state = ${state}`);
    if (state === access.BluetoothState.STATE_ON && this.pendingStart) {
      this.pendingStart = false;
      this.startDiscovery();
    }
  };

  private onDeviceFind = (devices: Array<string>): void => {
    if (this.foundTarget || devices.length === 0) {
      return;
    }

    this.emitLog(`scan result = ${JSON.stringify(devices)}`);

    let matched: string = '';
    for (let i = 0; i < devices.length; i++) {
      if (this.targetDeviceId.length === 0 || devices[i] === this.targetDeviceId) {
        matched = devices[i];
        break;
      }
    }

    if (matched.length === 0) {
      return;
    }

    this.foundTarget = true;
    this.targetDeviceId = matched;
    this.emitLog(`target found = ${matched}`);

    try {
      if (connection.isBluetoothDiscovering()) {
        connection.stopBluetoothDiscovery();
        this.emitLog('stopBluetoothDiscovery');
      }
    } catch (err) {
      let error = err as BusinessError;
      this.emitLog(`stop discovery failed: ${error.code}, ${error.message}`);
    }

    this.pairIfNeeded(matched);
  };

  private onBondStateChange = (data: connection.BondStateParam): void => {
    if (!data || data.deviceId !== this.targetDeviceId) {
      return;
    }

    this.emitLog(`bond state change: ${JSON.stringify(data)}`);

    if (data.state === connection.BondState.BOND_STATE_BONDED) {
      this.connectSpp(this.targetDeviceId);
    }
  };

  private onSppRead = (buffer: ArrayBuffer): void => {
    let data = new Uint8Array(buffer);
    this.emitLog(`spp read length = ${data.byteLength}, data = ${JSON.stringify(Array.from(data))}`);
  };

  start(): void {
    this.stop(false);

    this.pendingStart = false;
    this.connectingSpp = false;
    this.foundTarget = false;

    try {
      access.on('stateChange', this.onBtStateChange);
    } catch (err) {
      let error = err as BusinessError;
      this.emitLog(`subscribe bt state failed: ${error.code}, ${error.message}`);
    }

    try {
      connection.on('bluetoothDeviceFind', this.onDeviceFind);
    } catch (err) {
      let error = err as BusinessError;
      this.emitLog(`subscribe discovery failed: ${error.code}, ${error.message}`);
    }

    try {
      connection.on('bondStateChange', this.onBondStateChange);
    } catch (err) {
      let error = err as BusinessError;
      this.emitLog(`subscribe bond state failed: ${error.code}, ${error.message}`);
    }

    try {
      let state = access.getState();
      if (state !== access.BluetoothState.STATE_ON) {
        this.pendingStart = true;
        this.emitLog('bluetooth is off, request enable');
        access.enableBluetoothAsync().then(() => {
          this.emitLog('enableBluetoothAsync request sent');
        }).catch((error: BusinessError) => {
          this.emitLog(`enable bluetooth failed: ${error.code}, ${error.message}`);
        });
        return;
      }
    } catch (err) {
      let error = err as BusinessError;
      this.emitLog(`get bt state failed: ${error.code}, ${error.message}`);
      return;
    }

    this.startDiscovery();
  }

  stop(disconnectSocket: boolean = true): void {
    try {
      if (connection.isBluetoothDiscovering()) {
        connection.stopBluetoothDiscovery();
      }
    } catch (_) {
    }

    try {
      connection.off('bluetoothDeviceFind', this.onDeviceFind);
    } catch (_) {
    }

    try {
      connection.off('bondStateChange', this.onBondStateChange);
    } catch (_) {
    }

    try {
      access.off('stateChange', this.onBtStateChange);
    } catch (_) {
    }

    if (disconnectSocket && this.clientSocketId >= 0) {
      try {
        socket.off('sppRead', this.clientSocketId, this.onSppRead);
      } catch (_) {
      }

      try {
        socket.sppCloseClientSocket(this.clientSocketId);
        this.emitLog(`close client socket = ${this.clientSocketId}`);
      } catch (err) {
        let error = err as BusinessError;
        this.emitLog(`close socket failed: ${error.code}, ${error.message}`);
      }
    }

    this.clientSocketId = -1;
    this.pendingStart = false;
    this.connectingSpp = false;
    this.foundTarget = false;
  }

  private startDiscovery(): void {
    try {
      let discovering = connection.isBluetoothDiscovering();
      if (!discovering) {
        connection.startBluetoothDiscovery();
        this.emitLog('startBluetoothDiscovery');
      } else {
        this.emitLog('already discovering');
      }
    } catch (err) {
      let error = err as BusinessError;
      this.emitLog(`start discovery failed: ${error.code}, ${error.message}`);
    }
  }

  private pairIfNeeded(deviceId: string): void {
    try {
      let pairState = connection.getPairState(deviceId);
      this.emitLog(`current pair state = ${pairState}`);

      if (pairState === connection.BondState.BOND_STATE_BONDED) {
        this.emitLog('already bonded, skip pair');
        this.connectSpp(deviceId);
        return;
      }
    } catch (err) {
      let error = err as BusinessError;
      this.emitLog(`getPairState failed: ${error.code}, ${error.message}`);
    }

    try {
      connection.pairDevice(deviceId).then(() => {
        this.emitLog('pairDevice request sent');
      }).catch((error: BusinessError) => {
        this.emitLog(`pairDevice failed: ${error.code}, ${error.message}`);
      });
    } catch (err) {
      let error = err as BusinessError;
      this.emitLog(`pairDevice exception: ${error.code}, ${error.message}`);
    }
  }

  private connectSpp(deviceId: string): void {
    if (this.connectingSpp || this.clientSocketId >= 0) {
      return;
    }

    this.connectingSpp = true;

    let option: socket.SppOptions = {
      uuid: SPP_UUID,
      secure: false,
      type: socket.SppType.SPP_RFCOMM
    };

    this.emitLog(`start sppConnect: ${deviceId}`);

    try {
      socket.sppConnect(deviceId, option, (err, num: number) => {
        this.connectingSpp = false;

        if (err) {
          let error = err as BusinessError;
          this.emitLog(`sppConnect failed: ${error.code}, ${error.message}`);
          return;
        }

        this.clientSocketId = num;
        this.emitLog(`spp connected, clientSocketId = ${num}`);

        try {
          socket.on('sppRead', this.clientSocketId, this.onSppRead);
        } catch (readErr) {
          let error = readErr as BusinessError;
          this.emitLog(`subscribe sppRead failed: ${error.code}, ${error.message}`);
        }

        try {
          let buffer = new ArrayBuffer(5);
          let data = new Uint8Array(buffer);
          data[0] = 104;
          data[1] = 101;
          data[2] = 108;
          data[3] = 108;
          data[4] = 111;
          socket.sppWrite(this.clientSocketId, buffer);
          this.emitLog('spp write: hello');
        } catch (writeErr) {
          let error = writeErr as BusinessError;
          this.emitLog(`sppWrite failed: ${error.code}, ${error.message}`);
        }
      });
    } catch (err) {
      this.connectingSpp = false;
      let error = err as BusinessError;
      this.emitLog(`sppConnect exception: ${error.code}, ${error.message}`);
    }
  }
}

@Entry
@Component
struct ClassicBtSppPage {
  @State logs: string = [
    '1. Replace TARGET_DEVICE_ID if you already know the target device.',
    '2. If TARGET_DEVICE_ID is empty, the first discovered device will be used.',
    '3. Replace SPP_UUID with the UUID actually exposed by the target device.'
  ].join('\n');

  private flow: ClassicBtSppFlow = new ClassicBtSppFlow();

  aboutToAppear(): void {
    this.flow.onLog = (msg: string): void => {
      this.logs = `${msg}\n${this.logs}`;
    };
  }

  aboutToDisappear(): void {
    this.flow.stop();
  }
  context = getContext() as common.UIAbilityContext
  async requestBtPermission(context: common.UIAbilityContext): Promise<boolean> {
    let atManager = abilityAccessCtrl.createAtManager();
    try {
      let result = await atManager.requestPermissionsFromUser(context, [
        'ohos.permission.ACCESS_BLUETOOTH'
      ]);
      return result.authResults.length > 0 && result.authResults[0] === 0;
    } catch (err) {
      let error = err as BusinessError;
      console.error(`request permission failed: ${error.code}, ${error.message}`);
      return false;
    }
  }
  build() {
    Column({ space: 12 }) {
      Text('Classic Bluetooth -> Pair -> SPP')
        .fontSize(20)
        .fontWeight(FontWeight.Bold)

      Text(`TARGET_DEVICE_ID = ${TARGET_DEVICE_ID.length > 0 ? TARGET_DEVICE_ID : 'FIRST_FOUND_DEVICE'}`)
        .fontSize(12)

      Text(`SPP_UUID = ${SPP_UUID}`)
        .fontSize(12)

      Button('Start Scan -> Pair -> Connect')
        .width('100%')
        .onClick(() => {
          this.requestBtPermission(this.context)
          this.flow.start();
        })

      Button('Stop / Disconnect')
        .width('100%')
        .onClick(() => {
          this.flow.stop();
        })

      Scroll() {
        Text(this.logs)
          .width('100%')
          .fontSize(12)
          .textAlign(TextAlign.Start)
      }
      .width('100%')
      .layoutWeight(1)
    }
    .padding(16)
    .width('100%')
    .height('100%')
    .alignItems(HorizontalAlign.Start)
  }
}

经典蓝牙配对建议走传统蓝牙的发现/配对/连接链路,不建议用 BLE 扫描到的 deviceId 直接当作经典蓝牙配对入口。可以用 connection.startBluetoothDiscovery() 扫描传统蓝牙设备,订阅 connection.on(‘discoveryResult’)(API 18+)或 connection.on(‘bluetoothDeviceFind’) 获取设备地址,再按“配对与连接设备”和 SPP 文档发起配对/连接。BLE 广播可以作为业务上的辅助发现手段,但最终经典蓝牙连接仍应以传统蓝牙发现到的设备地址和系统配对流程为准。

在鸿蒙Next中,使用ArkTS通过@ohos.bluetooth接口实现经典蓝牙配对:
- 获取
bluetooth.getState()并调用enableBluetooth()开启蓝牙。 - 调用
startBluetoothDiscovery()扫描设备。 - 发现目标
BluetoothDevice后,调用device.pair()发起配对。 - 监听
bondStateChange回调确认配对成功。 - 配对成功后,通过
device.connect()建立连接。
需在module.json5中声明ohos.permission.ACCESS_BLUETOOTH及DISCOVER_BLUETOOTH权限。
在HarmonyOS Next中,经典蓝牙(BR/EDR)与BLE的扫描、配对是完全独立的两条链路,不能用BLE扫描得到的deviceId去发起经典蓝牙配对连接。
想要在App内直接完成经典蓝牙配对连接,直接用经典蓝牙相关API即可,不需要先走BLE。大致流程:
- 获取经典蓝牙管理对象:
bluetoothManager.getProfileInstance(bluetoothManager.PROFILE_BR) - 开启经典蓝牙并开始设备发现:调用
startBluetoothDiscovery,从回调中得到目标设备的BR侧deviceId。 - 拿到deviceId后,调用
startConnect或pairDevice发起连接,系统会自动触发配对流程(如果之前未配对)。 - 若需要自动确认配对,可事先通过
on('pinRequired')等配对事件回调,在回调里调用setConfirmPasskey或setPinCode完成自动应答。
简单说:直接走经典蓝牙发现→连接→自动配对,不要混用BLE的deviceId。