Flutter在Android中实现极光推送以及指定设备推送
Flutter在Android中实现极光推送完整视频教程地址: https://www.itying.com/goods-1120.html
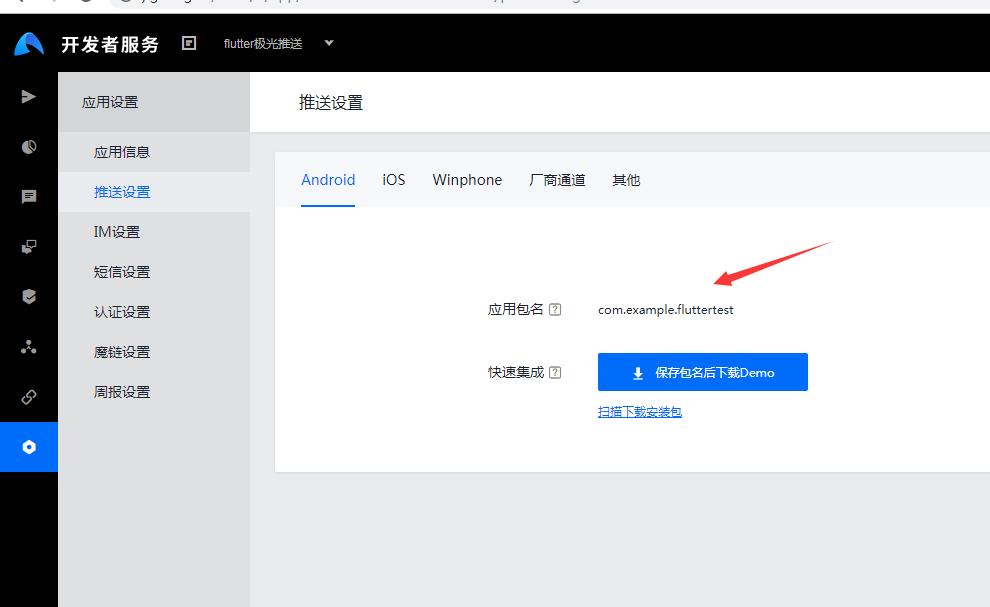
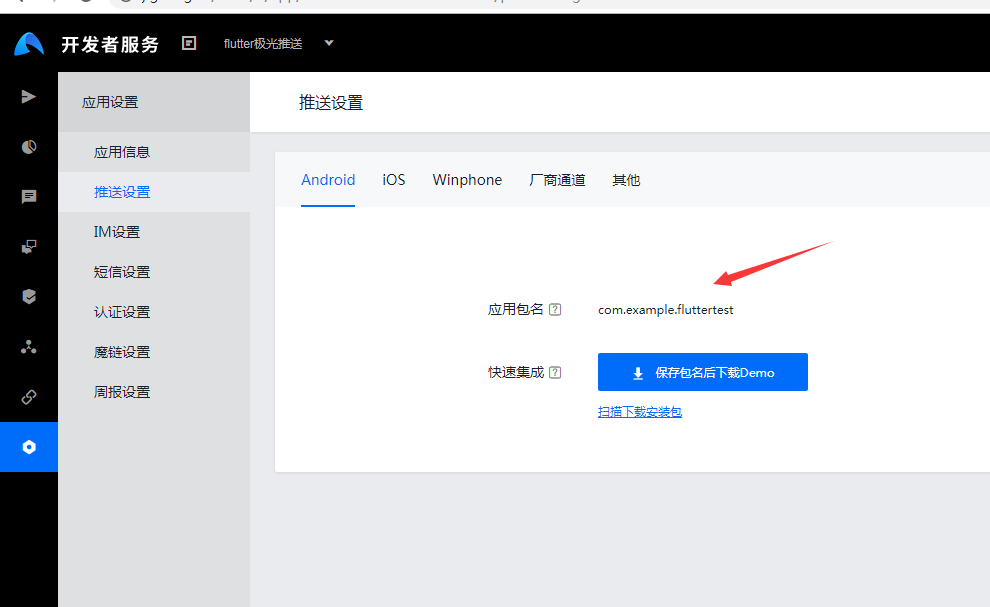
Flutter在Android中实现极光推送第一步:在极光推送官网注册账户创建应用、并配置应用包名称
**注意:**应用包名称需要和flutter项目的应用包名称统一


Flutter在Android中实现极光推送第二步:参考极光官方提供的jpush-flutter sdk集成极光推送
https://github.com/jpush/jpush-flutter-plugin
https://pub.dev/packages/jpush_flutter 安装 在工程 pubspec.yaml 中加入 dependencies
dependencies:
  jpush_flutter: 0.1.0
配置 Android: 在 /android/app/build.gradle 中添加下列代码:
android: {
  ....
  defaultConfig {
    applicationId "替换成自己应用 ID"
    ...
    ndk {
	//选择要添加的对应 cpu 类型的 .so 库。
	abiFilters 'armeabi', 'armeabi-v7a', 'x86', 'x86_64', 'mips', 'mips64', 'arm64-v8a',
    }

    manifestPlaceholders = [
        JPUSH_PKGNAME : applicationId,
        JPUSH_APPKEY : "appkey", // NOTE: JPush 上注册的包名对应的 Appkey.
        JPUSH_CHANNEL : "developer-default", //暂时填写默认值即可.
    ]
  }
}
Flutter在Android中实现极光推送完整代码
import 'package:flutter/material.dart';
import 'package:jpush_flutter/jpush_flutter.dart';

void main() => runApp(MyApp());

class MyApp extends StatelessWidget {
  // This widget is the root of your application.
  @override
  Widget build(BuildContext context) {
    return MaterialApp(
      title: 'Flutter Demo',
      theme: ThemeData(
        primarySwatch: Colors.blue,
      ),
      home: JpushPage(),
    );
  }
}

class JpushPage extends StatefulWidget {
  JpushPage({Key key}) : super(key: key);

  _JpushPageState createState() => _JpushPageState();
}

class _JpushPageState extends State<JpushPage> {
  @override
  void initState() {
    // TODO: implement initState
    super.initState();
    this.initJpush();
  }

  //监听极光推送 (自定义的方法)
  //https://github.com/jpush/jpush-flutter-plugin/blob/master/documents/APIs.md
  initJpush() async {
    JPush jpush = new JPush();
    //获取注册的id
    jpush.getRegistrationID().then((rid) {
      print("获取注册的id:$rid");
    });
    //初始化
    jpush.setup(
      appKey: "17d78ecf32c322db169a1d98",
      channel: "theChannel",
      production: false,
      debug: true, // 设置是否打印 debug 日志
    );

    //设置别名  实现指定用户推送
    jpush.setAlias("jg123").then((map) {
      print("设置别名成功");
    });


    try {
      //监听消息通知
      jpush.addEventHandler(
        // 接收通知回调方法。
        onReceiveNotification: (Map<String, dynamic> message) async {
          print("flutter onReceiveNotification: $message");
        },
        // 点击通知回调方法。
        onOpenNotification: (Map<String, dynamic> message) async {
          print("flutter onOpenNotification: $message");
        },
        // 接收自定义消息回调方法。
        onReceiveMessage: (Map<String, dynamic> message) async {
          print("flutter onReceiveMessage: $message");
        },
      );
    } catch (e) {
      print('极光sdk配置异常');
    }
  }

  @override
  Widget build(BuildContext context) {
    return Scaffold(
      appBar: AppBar(
        title: Text("极光推送demo"),
      ),
      body: Text("这是一个极光推送演示demo"),
    );
  }
}
更多关于Flutter在Android中实现极光推送以及指定设备推送的实战系列教程也可以访问 https://www.itying.com/category-92-b0.html
1 回复


