HarmonyOS 鸿蒙Next CustomDialog自定义弹窗不可以设置透明背景色?
HarmonyOS 鸿蒙Next CustomDialog自定义弹窗不可以设置透明背景色?
CustomDialog自定义弹窗的背景色不可以设置为透明吗?
宽和高都设置为100%,也不可以铺满全屏吗?
那么有什么方式可以代替这种效果?

设置 customStyle: true,
参考文档:https://developer.huawei.com/consumer/cn/doc/harmonyos-references-V5/ts-methods-custom-dialog-box-V5#customdialogcontrolleroptions%E5%AF%B9%E8%B1%A1%E8%AF%B4%E6%98%8E
[@CustomDialog](/user/CustomDialog)
struct CustomDialogExampleTwo {
controllerTwo?: CustomDialogController
build() {
Column() {
Text('我是第二个弹窗')
.fontSize(30)
.height(100)
Button('点我关闭第二个弹窗')
.onClick(() => {
if (this.controllerTwo != undefined) {
this.controllerTwo.close()
}
})
.margin(20)
}
}
}
[@CustomDialog](/user/CustomDialog)
[@Component](/user/Component)
struct CustomDialogExample {
[@Link](/user/Link) textValue: string
[@Link](/user/Link) inputValue: string
dialogControllerTwo: CustomDialogController | null = new CustomDialogController({
builder: CustomDialogExampleTwo(),
alignment: DialogAlignment.Bottom,
customStyle: true,
onWillDismiss:(dismissDialogAction: DismissDialogAction)=> {
console.info("reason=" + JSON.stringify(dismissDialogAction.reason))
console.log("dialog onWillDismiss")
if (dismissDialogAction.reason == DismissReason.PRESS_BACK) {
dismissDialogAction.dismiss()
}
if (dismissDialogAction.reason == DismissReason.TOUCH_OUTSIDE) {
dismissDialogAction.dismiss()
}
},
offset: { dx: 0, dy: -25 } })
controller?: CustomDialogController
// 若尝试在CustomDialog中传入多个其他的Controller,以实现在CustomDialog中打开另一个或另一些CustomDialog,那么此处需要将指向自己的controller放在所有controller的后面
cancel: () => void = () => {
}
confirm: () => void = () => {
}
build() {
Column() {
Text(‘Change text’).fontSize(20).margin({ top: 10, bottom: 10 })
TextInput({ placeholder: ‘’, text: this.textValue }).height(60).width(‘90%’)
.onChange((value: string) => {
this.textValue = value
})
Text(‘Whether to change a text?’).fontSize(16).margin({ bottom: 10 })
Flex({ justifyContent: FlexAlign.SpaceAround }) {
Button(‘cancel’)
.onClick(() => {
if (this.controller != undefined) {
this.controller.close()
this.cancel()
}
}).backgroundColor(0xffffff).fontColor(Color.Black)
Button(‘confirm’)
.onClick(() => {
if (this.controller != undefined) {
this.inputValue = this.textValue
this.controller.close()
this.confirm()
}
}).backgroundColor(0xffffff).fontColor(Color.Red)
}.margin({ bottom: 10 })
Button(<span class="hljs-string">'点我打开第二个弹窗'</span>)
.onClick(() => {
<span class="hljs-keyword">if</span> (<span class="hljs-keyword">this</span>.dialogControllerTwo != <span class="hljs-literal">null</span>) {
<span class="hljs-keyword">this</span>.dialogControllerTwo.open()
}
})
.margin(<span class="hljs-number">20</span>)
}.borderRadius(<span class="hljs-number">10</span>)
<span class="hljs-comment">// 如果需要使用border属性或cornerRadius属性,请和borderRadius属性一起使用。</span>
}
}
@Entry
@Component
struct CustomDialogUser {
@State textValue: string = ‘’
@State inputValue: string = ‘click me’
dialogController: CustomDialogController | null = new CustomDialogController({
builder: CustomDialogExample({
cancel: ()=> { this.onCancel() },
confirm: ()=> { this.onAccept() },
textValue: $textValue,
inputValue: $inputValue
}),
cancel: this.exitApp,
autoCancel: true,
onWillDismiss:(dismissDialogAction: DismissDialogAction)=> {
console.info(“reason=” + JSON.stringify(dismissDialogAction.reason))
console.log(“dialog onWillDismiss”)
if (dismissDialogAction.reason == DismissReason.PRESS_BACK) {
dismissDialogAction.dismiss()
}
if (dismissDialogAction.reason == DismissReason.TOUCH_OUTSIDE) {
dismissDialogAction.dismiss()
}
},
alignment: DialogAlignment.Bottom,
offset: { dx: 0, dy: -20 },
gridCount: 4,
customStyle: true,
cornerRadius: 10,
})
// 在自定义组件即将析构销毁时将dialogController置空
aboutToDisappear() {
this.dialogController = null // 将dialogController置空
}
onCancel() {
console.info(‘Callback when the first button is clicked’)
}
onAccept() {
console.info(‘Callback when the second button is clicked’)
}
exitApp() {
console.info(‘Click the callback in the blank area’)
}
build() {
Column() {
Button(this.inputValue)
.onClick(() => {
if (this.dialogController != null) {
this.dialogController.open()
}
}).backgroundColor(0x317aff)
}.width(‘100%’).margin({ top: 5 })
}
}
整理了一下,老哥发的代码
[@Entry](/user/Entry)
[@Component](/user/Component)
struct CustomDialogUser {
dialogController: CustomDialogController | null = new CustomDialogController({
builder: CustomDialogExample(),
autoCancel: true, //点击遮罩层是否退出
onWillDismiss: (dismissDialogAction: DismissDialogAction) => {
if (dismissDialogAction.reason == DismissReason.PRESS_BACK) {
dismissDialogAction.dismiss()
}
if (dismissDialogAction.reason == DismissReason.TOUCH_OUTSIDE) {
dismissDialogAction.dismiss()
}
},
alignment: DialogAlignment.Top,
offset: { dx: 0, dy: 0 },
customStyle: true, // true -> 自定义样式,如果弹窗不设置背景色,则背景变为透明
cornerRadius: 0,
})
build() {
Column() {
Button(‘弹窗click’)
.onClick(() => {
if (this.dialogController != null) {
this.dialogController.open()
}
}).backgroundColor(0x317aff)
}.width(‘100%’).margin({ top: 5 })
}
}
@CustomDialog
@Component
struct CustomDialogExample {
controller: CustomDialogController
build() {
Stack({ alignContent: Alignment.Bottom }) {
Column() {
}.width(<span class="hljs-string">'100%'</span>).height(<span class="hljs-string">'100%'</span>).onClick(() => {
<span class="hljs-keyword">this</span>.controller.close()
})
Image($r(<span class="hljs-string">'app.media.screenshort_image'</span>)).width(<span class="hljs-number">240</span>).objectFit(ImageFit.Cover).margin({ bottom: <span class="hljs-number">100</span> })
Column() {
}.width(<span class="hljs-string">'100%'</span>).height(<span class="hljs-number">100</span>).backgroundColor(<span class="hljs-string">'#ff5500'</span>).border({ radius: { topLeft: <span class="hljs-number">10</span>, topRight: <span class="hljs-number">10</span> } })
}
.width(<span class="hljs-string">'100%'</span>)
.height(<span class="hljs-string">'100%'</span>)
.backgroundColor(<span class="hljs-string">'#66000000'</span>) <span class="hljs-comment">//设置弹窗背景色透明度</span>
.borderRadius(<span class="hljs-number">0</span>)
<span class="hljs-comment">// customStyle 设置为true,如果想要自定义透明背景色,就要设置 .width('100%').height('100%')</span>
<span class="hljs-comment">// 如果需要使用border属性或cornerRadius属性,请和borderRadius属性一起使用。</span>
}
}
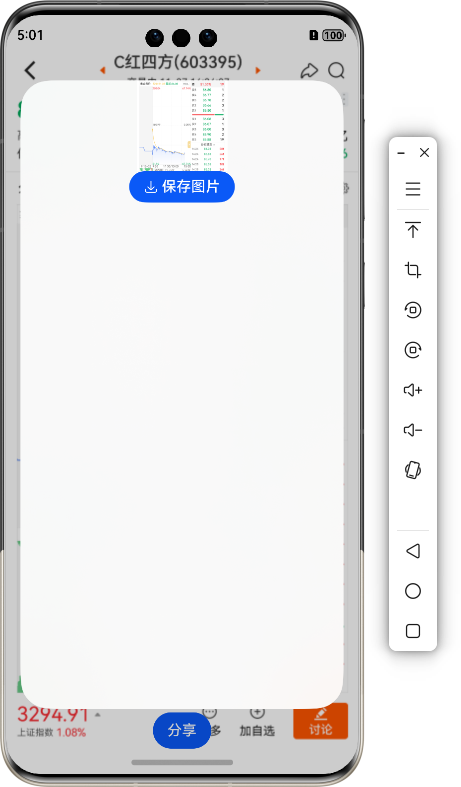
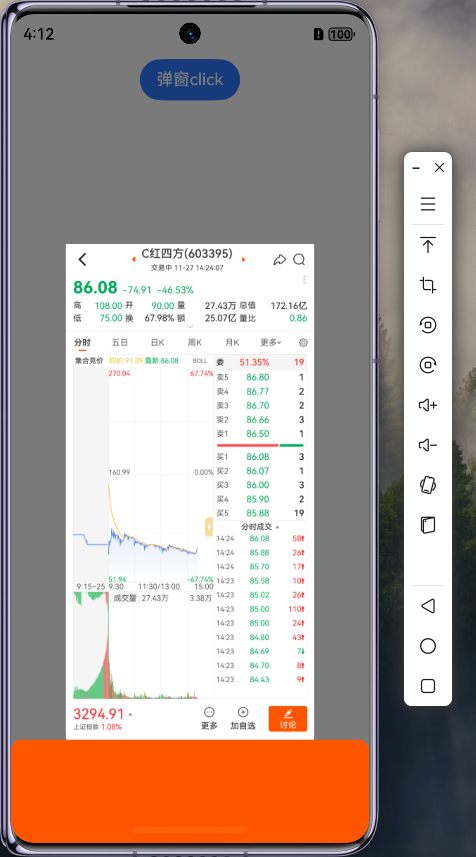
效果图

HarmonyOS 鸿蒙Next CustomDialog自定义弹窗可以设置透明背景色。
在HarmonyOS中,自定义弹窗(CustomDialog)的背景色是可以通过设置相关属性来调整的。若要实现透明背景色,可以尝试以下方法:
- 设置maskColor属性:将CustomDialog的maskColor属性设置为Color.Transparent(透明色),这样蒙层就会变为透明,从而间接实现背景色的透明效果。
- 调整Dialog的背景色:在构建CustomDialog时,可以通过设置背景色为rgba格式(如rgba(0,0,0,0)表示完全透明)来实现透明背景。
请注意,在设置透明背景色时,要确保没有其他属性(如背景模糊、阴影等)干扰透明效果的实现。如果设置了这些属性,可能需要相应地调整它们以确保透明效果正确显示。
如果尝试上述方法后仍然无法实现透明背景色,可能是代码中存在其他干扰因素。此时,建议仔细检查代码,或参考HarmonyOS的官方文档进行进一步的调试。如果问题依旧没法解决请联系官网客服,官网地址是:https://www.itying.com/category-93-b0.html。


