HarmonyOS 鸿蒙Next Button按钮,如何修改边框弧度
HarmonyOS 鸿蒙Next Button按钮,如何修改边框弧度
Button按钮,如何修改边框弧度
3 回复
使用
borderRadius(30)
      Button('取消', { type: ButtonType.Normal })
        .borderRadius(30)
        .width('45%')
        .fontColor("#01ae66")
        .backgroundColor(Color.White)
        .borderWidth(1)
        .borderColor('#ffa09f9f')
更多关于HarmonyOS 鸿蒙Next Button按钮,如何修改边框弧度的实战系列教程也可以访问 https://www.itying.com/category-93-b0.html

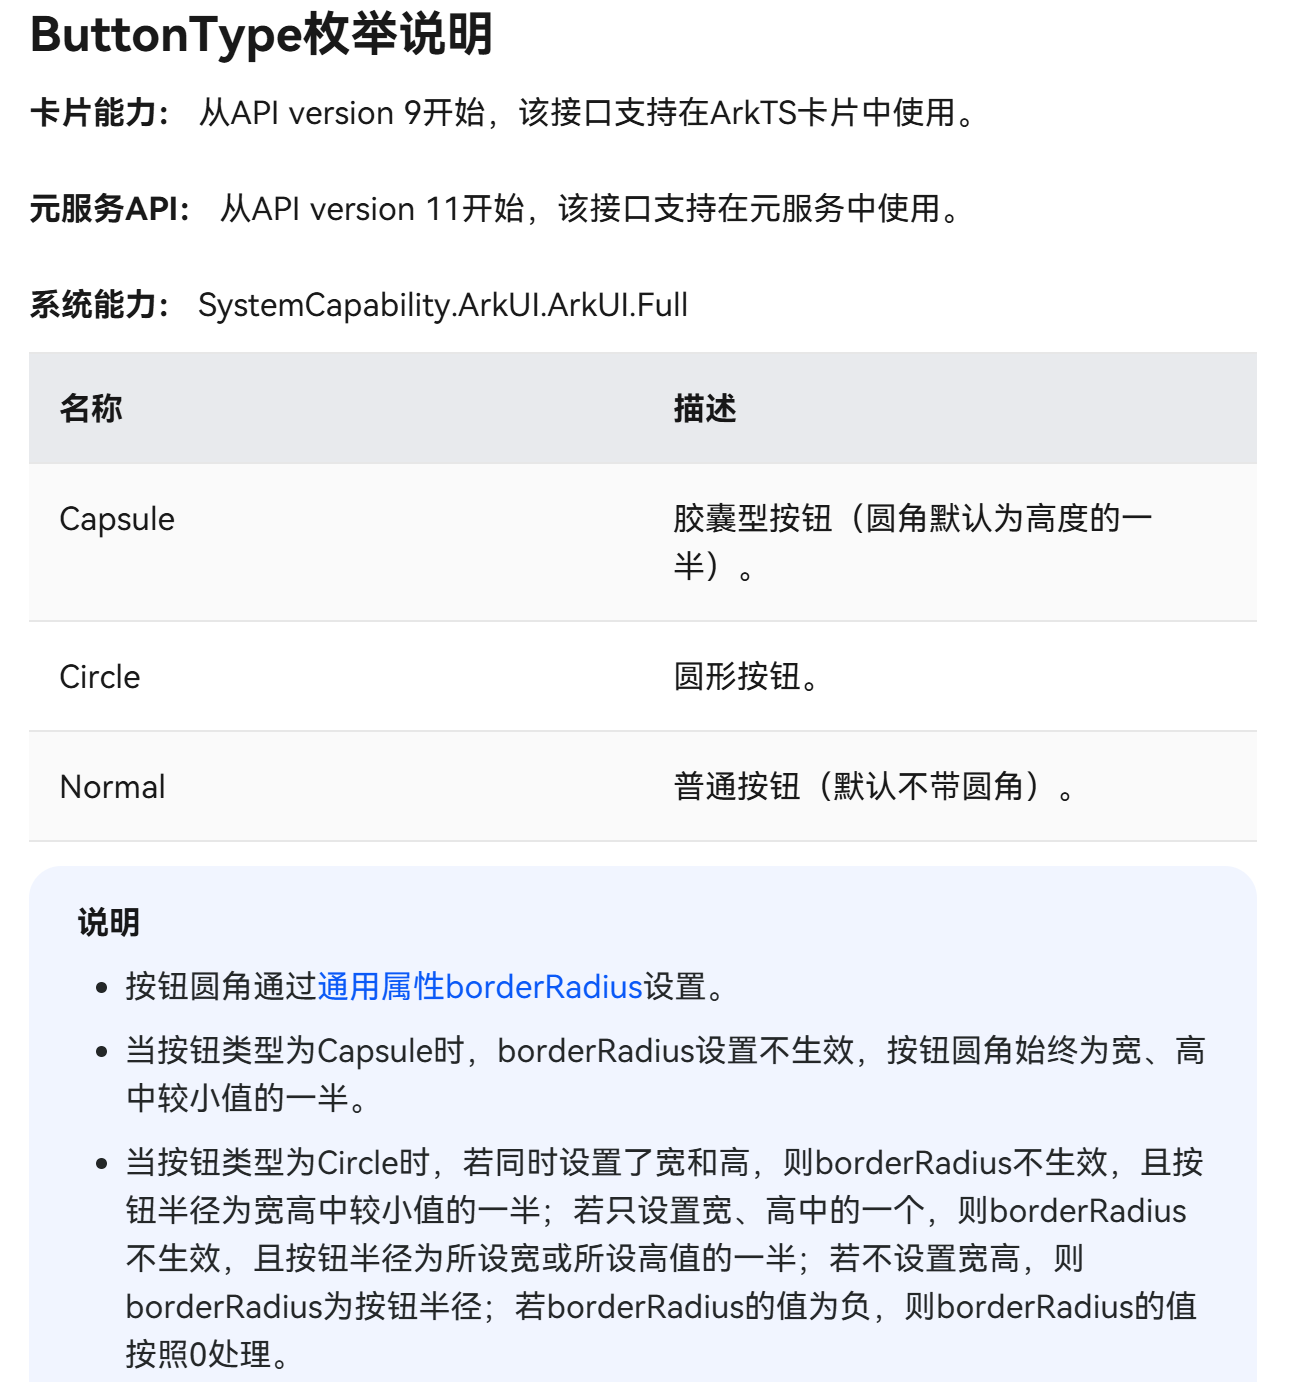
Capsule,Circle样式是固定的,想要其他效果就选择Normal,然后通过borderRadius设置
在HarmonyOS中,修改Next Button按钮的边框弧度通常涉及到自定义绘制或者使用系统提供的样式属性调整。以下是实现该需求的一种方法:
-
使用Shape Drawable: 创建一个新的XML文件(例如
button_shape.xml)在res/drawable目录下,定义所需的圆角形状。<shape xmlns:android="http://schemas.android.com/apk/res/android"> <solid android:color="#FFFFFF"/> <corners android:radius="16dp"/> <!-- 设置圆角弧度 --> <stroke android:width="2dp" android:color="#000000"/> </shape> -
在Button中引用Shape Drawable: 在你的布局文件中,为Next Button设置背景为刚创建的
button_shape.xml。<Button android:layout_width="wrap_content" android:layout_height="wrap_content" android:text="Next" android:background="@drawable/button_shape"/> -
调整Button的其他属性: 根据需要调整Button的其他属性,如文字大小、颜色等。
这种方法通过自定义背景Drawable来实现按钮的圆角效果。如果使用了自定义组件或者样式系统,确保正确应用这些更改。
如果问题依旧没法解决请联系官网客服,官网地址是:https://www.itying.com/category-93-b0.html


