Flutter地图服务插件kakao_map_plugin的使用
Flutter地图服务插件kakao_map_plugin的使用
kakao_map_plugin 是一个用于在Flutter应用中集成카카오 지도的插件。它并非基于原生库,而是利用了JavaScript库来实现,并且依赖于webview_flutter包,因此在使用时需要注意Android和iOS的最低版本要求。
开始使用
公共配置
- 获取JavaScript Key:从카카오开发者中心申请一个javascript key。
- 添加依赖:在项目的
pubspec.yaml文件中添加kakao_map_plugin依赖项。
dependencies:
kakao_map_plugin: [最新版本]- 初始化API密钥:由于
AuthRepository是单例模式,所以只需要在调用KakaoMapwidget之前进行一次初始化即可。这里我们选择在main函数中执行此操作。
void main() {
  AuthRepository.initialize(appKey: '你的javascript key');
}
如果需要使用诸如关键词搜索、分类搜索等功能,则还需要设置基础URL:
void main() {
  AuthRepository.initialize(appKey: '你的javascript key', baseUrl: 'http://localhost');
}
平台特定配置
Android
- 在
AndroidManifest.xml中添加网络权限及允许明文传输的设置:
<manifest>
    <!-- webview_flutter 需要的互联网访问权限 -->
    <uses-permission android:name="android.permission.INTERNET" />

    <application
        android:usesCleartextTraffic="true">
        ...
    </application>
</manifest>
iOS
- 修改
Info.plist以包含必要的安全性和嵌入视图预览设置:
<dict>
    <key>NSAppTransportSecurity</key>
      <dict>
        <key>NSAllowsArbitraryLoads</key>
        <true/>
        <key>NSAllowsArbitraryLoadsInWebContent</key>
        <true/>
      </dict>
    <key>io.flutter.embedded_views_preview</key>
    <true/>
</dict>
示例代码
以下是一些基本的地图功能示例,包括创建地图、添加标记、聚类器以及绘制圆形、折线、多边形和矩形等。
基本地图创建
Scaffold(
  body: KakaoMap(),
);
地图创建回调
Scaffold(
  body: KakaoMap(
    onMapCreated: ((controller) {
      mapController = controller;
    }),
  ),
);
添加标记
Set<Marker> markers = {};

Scaffold(
  body: KakaoMap(
    onMapCreated: ((controller) async {
      mapController = controller;

      markers.add(Marker(
        markerId: UniqueKey().toString(),
        latLng: await mapController.getCenter(),
      ));

      setState(() {});
    }),
    markers: markers.toList(),
    center: LatLng(37.3608681, 126.9306506),
  ),
);
使用聚类器
Clusterer? clusterer;

Scaffold(
  body: KakaoMap(
    onMapCreated: ((controller) async {
      mapController = controller;

      Set<Marker> markers = {};
      // ... 添加多个Marker ...

      clusterer = Clusterer(
        markers: markers.toList(),
        minLevel: 6,
        gridSize: 45,
        calculator: [30, 60],
        texts: ['少', '中等', '多'],
        styles: [
          ClustererStyle(
            width: 50,
            height: 50,
            background: Colors.blue.withOpacity(0.8),
            borderRadius: 25,
            color: Colors.white,
            textAlign: 'center',
            lineHeight: 60,
          ),
          // ... 更多样式 ...
        ],
      );

      setState(() {});
    }),
    clusterer: clusterer,
    center: LatLng(37.3608681, 126.9306506),
  ),
);
绘制图形(圆、折线、多边形、矩形)
Set<Circle> circles = {};
Set<Polyline> polylines = {};
Set<Polygon> polygons = {};
Set<Rectangle> rectangles = {};

Scaffold(
  appBar: AppBar(
    title: Text(widget.title ?? selectedTitle),
  ),
  body: KakaoMap(
    onMapCreated: ((controller) async {
      mapController = controller;

      circles.add(
        Circle(
          circleId: circles.length.toString(),
          center: LatLng(33.450701, 126.570667),
          strokeWidth: 5,
          strokeColor: Colors.red,
          strokeOpacity: 0.5,
          strokeStyle: StrokeStyle.longDashDotDot,
          fillColor: Colors.black,
          fillOpacity: 0.7,
          radius: 50,
        ),
      );

      polylines.add(
        Polyline(
          polylineId: 'polyline_${polylines.length}',
          points: [
            LatLng(33.452344169439975, 126.56878163224233),
            LatLng(33.452739313807456, 126.5709308145358),
            LatLng(33.45178067090639, 126.5726886938753)
          ],
          strokeColor: Colors.purple,
        ),
      );

      polygons.add(
        Polygon(
          polygonId: 'polygon_${polygons.length}',
          points: [
            LatLng(33.45133510810506, 126.57159381623066),
            LatLng(33.44955812811862, 126.5713551811832),
            LatLng(33.449986291544086, 126.57263296172184),
            LatLng(33.450682513554554, 126.57321034054742),
            LatLng(33.451346760004206, 126.57235740081413)
          ],
          strokeWidth: 4,
          strokeColor: Colors.blue,
          strokeOpacity: 1,
          strokeStyle: StrokeStyle.shortDashDot,
          fillColor: Colors.black,
          fillOpacity: 0.3,
        ),
      );

      rectangles.add(
        Rectangle(
          rectangleId: 'rectangle_${rectangles.length}',
          rectangleBounds: LatLngBounds(
            LatLng(33.42133510810506, 126.53159381623066),
            LatLng(33.44955812811862, 126.5713551811832),
          ),
          strokeWidth: 6,
          strokeColor: Colors.blue,
          strokeOpacity: 1,
          strokeStyle: StrokeStyle.dot,
          fillColor: Colors.black,
          fillOpacity: 0.7,
        ),
      );

      setState(() {});
    }),
    circles: circles.toList(),
    polylines: polylines.toList(),
    polygons: polygons.toList(),
    rectangles: rectangles.toList(),
    center: LatLng(33.450701, 126.570667),
  ),
);更多详细的示例可以参考kakao_map_plugin GitHub仓库中的example目录。
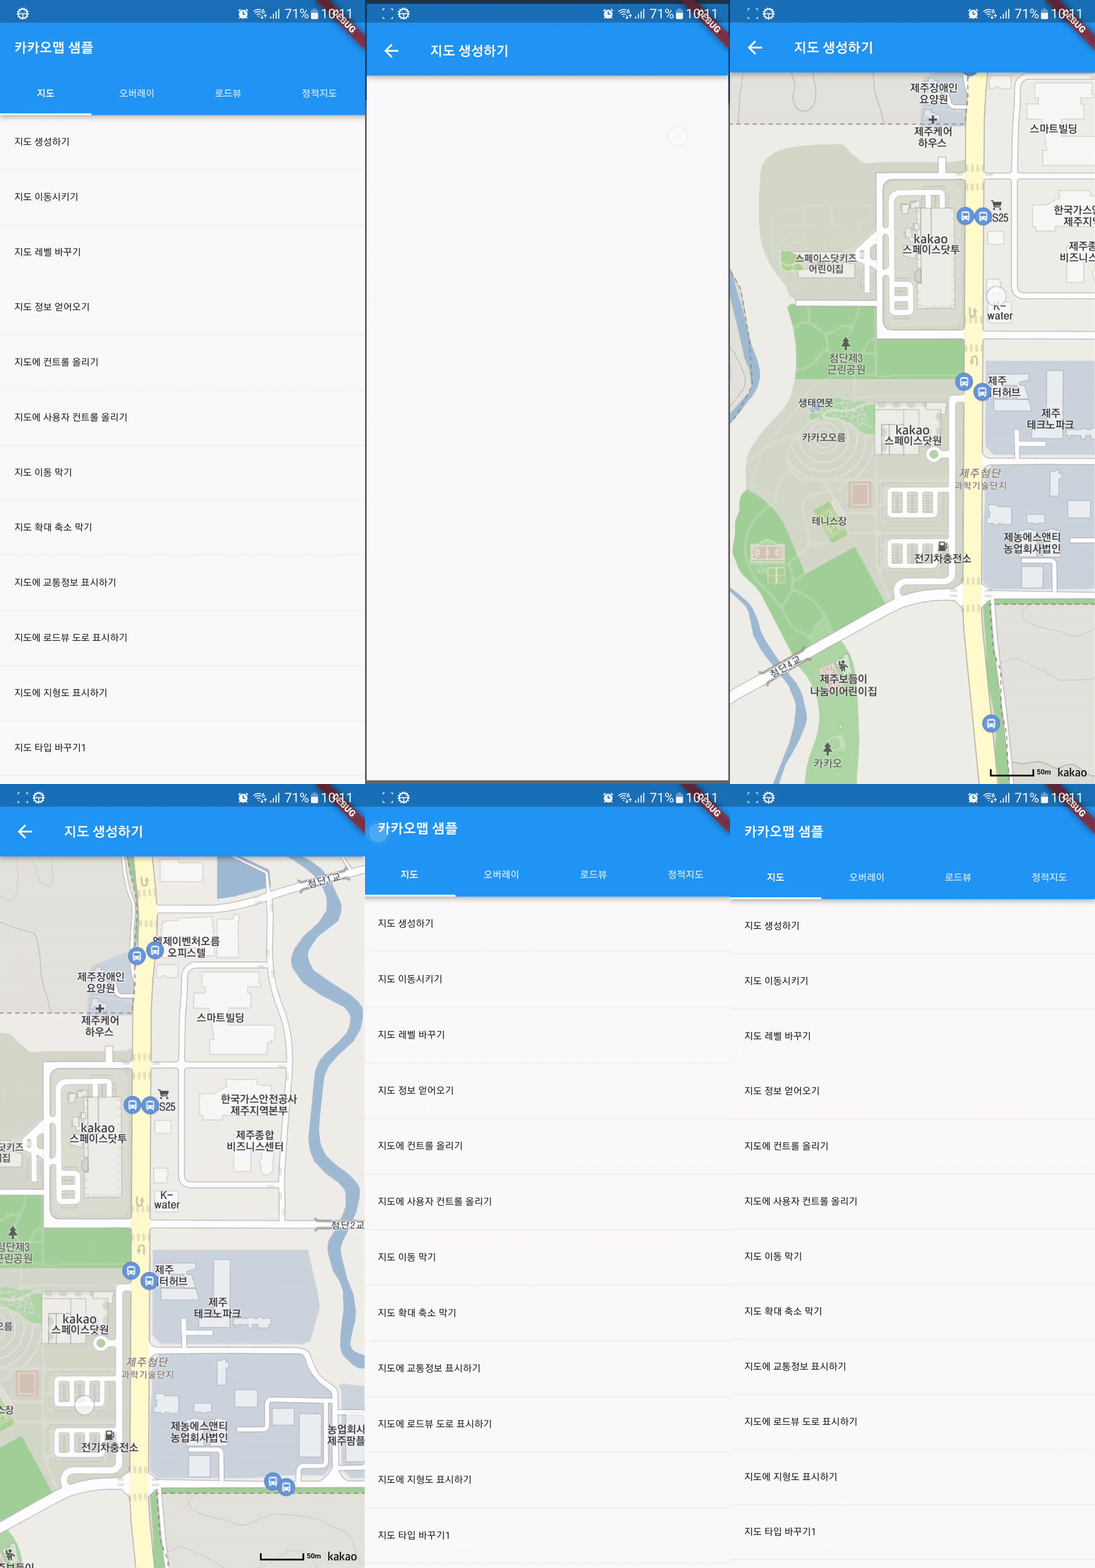
运行效果

通过以上步骤和示例代码,你应该能够顺利地将卡卡奥地图集成到你的Flutter应用程序中,并实现各种地图交互功能。
更多关于Flutter地图服务插件kakao_map_plugin的使用的实战系列教程也可以访问 https://www.itying.com/category-92-b0.html
当然,以下是一个关于如何在Flutter项目中使用kakao_map_plugin插件的示例代码。这个插件允许你在Flutter应用中集成和使用Kakao Map服务。
首先,你需要在你的Flutter项目中添加kakao_map_plugin依赖。打开你的pubspec.yaml文件,并在dependencies部分添加以下内容:
dependencies:
  flutter:
    sdk: flutter
kakao_map_plugin: ^最新版本号 # 请替换为实际的最新版本号然后运行flutter pub get来获取依赖。
接下来,你需要获取Kakao Map的API密钥。这通常涉及到在Kakao开发者网站上注册你的应用并获取相应的API密钥。
一旦你有了API密钥,你可以在你的Flutter项目中配置和使用Kakao Map。以下是一个基本的示例,展示如何在Flutter应用中显示一个Kakao Map。
- 在
android/app/src/main/AndroidManifest.xml中添加API密钥:
<application
    ... >
    <meta-data
        android:name="com.kakao.sdk.android.api_key"
        android:value="你的Kakao API密钥" />
    ...
</application>- 在
ios/Runner/Info.plist中添加API密钥(如果你也支持iOS):
<key>KakaoSDKApiKey</key>
<string>你的Kakao API密钥</string>- 创建一个Flutter页面来显示Kakao Map:
import 'package:flutter/material.dart';
import 'package:kakao_map_plugin/kakao_map_plugin.dart';

void main() {
  runApp(MyApp());
}

class MyApp extends StatelessWidget {
  @override
  Widget build(BuildContext context) {
    return MaterialApp(
      title: 'Flutter Kakao Map Demo',
      theme: ThemeData(
        primarySwatch: Colors.blue,
      ),
      home: MapScreen(),
    );
  }
}

class MapScreen extends StatefulWidget {
  @override
  _MapScreenState createState() => _MapScreenState();
}

class _MapScreenState extends State<MapScreen> {
  late KakaoMapController _mapController;

  @override
  Widget build(BuildContext context) {
    return Scaffold(
      appBar: AppBar(
        title: Text('Kakao Map Demo'),
      ),
      body: KakaoMap(
        onMapCreated: (controller) {
          _mapController = controller;
          // 你可以在这里设置地图的初始位置
          _mapController.moveCamera(CameraUpdate.newLatLng(LatLng(37.566535, 126.977969))); // 例如:首尔的中心
        },
        apiKey: "你的Kakao API密钥",  // 也可以考虑从环境变量或配置文件中读取
        options: KakaoMapOptions(
          mapTypeId: MapTypeId.ROADMAP,
        ),
      ),
    );
  }
}
在这个示例中,我们创建了一个简单的Flutter应用,它包含一个显示Kakao Map的页面。KakaoMap组件负责渲染地图,并通过onMapCreated回调让我们可以访问KakaoMapController来操作地图(例如移动相机位置)。
请确保你已经正确设置了API密钥,并且你的应用有适当的权限来访问网络(特别是Kakao Map服务)。
这个示例应该能帮助你在Flutter项目中集成和使用Kakao Map服务。根据你的具体需求,你可能需要进一步定制和扩展这个示例。


