Flutter智能广告横幅插件smart_banner的使用
Flutter智能广告横幅插件smart_banner的使用
smart_banner 是一个用于在Flutter Web应用顶部显示智能广告横幅的插件。该插件灵感来源于 smart-app-banner 和 react-smartbanner。
您可以在线试用示例:在线示例
使用方法
要使用 smart_banner 插件,请将您的视图包裹在 SmartBannerScaffold 小部件中。如果您希望在应用程序顶部显示持久横幅,可能需要直接在 MaterialApp.builder 属性中使用它。
示例代码
import 'package:flutter/material.dart';
import 'package:provider/provider.dart';
import 'package:smart_banner/smart_banner.dart';

class BannerModel extends ChangeNotifier {
  BannerPosition _position = BannerPosition.top;
  BannerPosition get position => _position;
  set position(BannerPosition value) {
    _position = value;
    notifyListeners();
  }

  BannerStyle _style = BannerStyle.ios;
  BannerStyle get style => _style;
  set style(BannerStyle value) {
    _style = value;
    notifyListeners();
  }
}

void main() {
  runApp(
    ChangeNotifierProvider(
      create: (_) => BannerModel(),
      child: const MyApp(),
    ),
  );
}

class MyApp extends StatelessWidget {
  const MyApp({super.key});

  @override
  Widget build(BuildContext context) {
    final bannerModel = context.watch<BannerModel>();

    return MaterialApp(
      debugShowCheckedModeBanner: false,
      builder: (context, child) {
        if (child != null) {
          final icon = Image.network(
            'https://upload.wikimedia.org/wikipedia/commons/c/cd/Facebook_logo_%28square%29.png',
          );

          return SmartBannerScaffold(
            isShown: true,
            style: bannerModel.style,
            position: bannerModel.position,
            properties: BannerProperties(
              title: 'Facebook',
              buttonLabel: 'VIEW',
              androidProperties: BannerPropertiesAndroid(
                packageName: 'com.facebook.katana',
                storeText: 'In Google Play',
                priceText: 'Free',
                icon: icon,
              ),
              iosProperties: BannerPropertiesIOS(
                appId: '284882215',
                storeText: 'On the App Store',
                priceText: 'Free',
                icon: icon,
              ),
            ),
            child: child,
          );
        }
        return const SizedBox.shrink();
      },
      home: const MyHomePage(),
    );
  }
}

class MyHomePage extends StatefulWidget {
  const MyHomePage({super.key});

  @override
  State<MyHomePage> createState() => _MyHomePageState();
}

class _MyHomePageState extends State<MyHomePage> {
  @override
  Widget build(BuildContext context) {
    final bannerModel = context.watch<BannerModel>();

    return Scaffold(
      appBar: AppBar(
        title: const Text('Flutter Demo Home Page'),
      ),
      body: Center(
        child: Column(
          mainAxisSize: MainAxisSize.min,
          children: [
            ElevatedButton(
              onPressed: () => SmartBannerScaffold.showBanner(context),
              child: const Text('Show Banner'),
            ),
            ElevatedButton(
              onPressed: () => Navigator.push(
                context,
                MaterialPageRoute(
                  builder: (_) => const MyHomePage(),
                ),
              ),
              child: const Text('Push Page'),
            ),
            DropdownButton<BannerPosition>(
              value: bannerModel.position,
              items: BannerPosition.values
                  .map((e) => DropdownMenuItem(value: e, child: Text(e.name)))
                  .toList(),
              onChanged: (position) {
                if (position != null) {
                  bannerModel.position = position;
                }
              },
            ),
            DropdownButton<BannerStyle>(
              value: bannerModel.style,
              items: BannerStyle.values
                  .map((e) => DropdownMenuItem(value: e, child: Text(e.name)))
                  .toList(),
              onChanged: (style) {
                if (style != null) {
                  bannerModel.style = style;
                }
              },
            ),
          ],
        ),
      ),
    );
  }
}
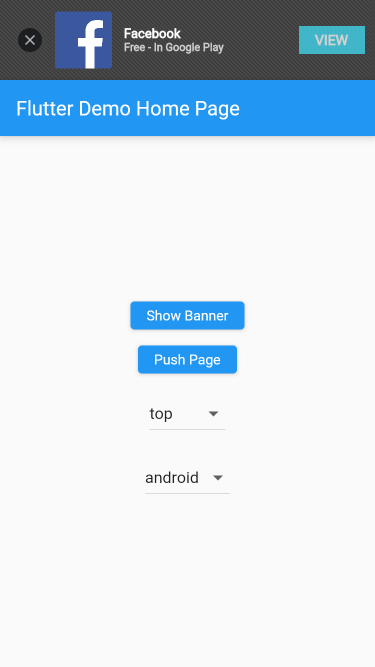
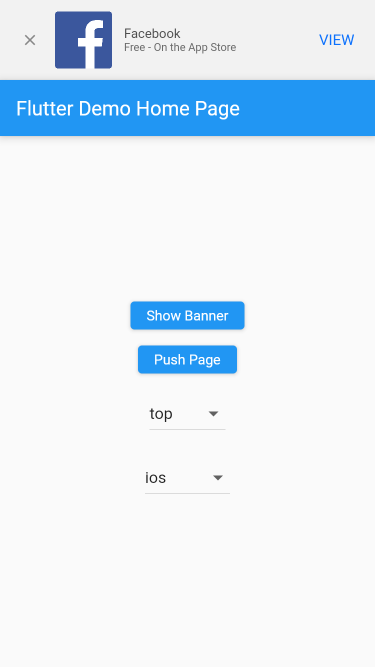
截图


更多完整示例请参见 example。
以上内容展示了如何在Flutter项目中集成和使用 `smart_banner` 插件,并提供了完整的示例代码以供参考。更多关于Flutter智能广告横幅插件smart_banner的使用的实战系列教程也可以访问 https://www.itying.com/category-92-b0.html
更多关于Flutter智能广告横幅插件smart_banner的使用的实战系列教程也可以访问 https://www.itying.com/category-92-b0.html
当然,下面是一个关于如何在Flutter项目中使用smart_banner插件来实现智能广告横幅的示例代码。这个插件允许你轻松地在你的应用中集成智能广告横幅。
首先,你需要在你的pubspec.yaml文件中添加smart_banner依赖:
dependencies:
  flutter:
    sdk: flutter
  smart_banner: ^x.y.z  # 请替换为最新版本号
然后运行flutter pub get来安装依赖。
接下来,你可以在你的Flutter应用中按照以下步骤使用smart_banner:
- 导入包:
在你的Dart文件中导入smart_banner包:
import 'package:smart_banner/smart_banner.dart';
- 初始化SmartBanner:
在你的MyApp或主页面组件中初始化SmartBanner。你可以设置一些可选参数,比如广告单元ID、测试设备ID等。
void main() {
  runApp(MyApp());
}

class MyApp extends StatelessWidget {
  @override
  Widget build(BuildContext context) {
    return MaterialApp(
      home: SmartBannerExample(),
    );
  }
}

class SmartBannerExample extends StatefulWidget {
  @override
  _SmartBannerExampleState createState() => _SmartBannerExampleState();
}

class _SmartBannerExampleState extends State<SmartBannerExample> {
  @override
  void initState() {
    super.initState();

    // 初始化SmartBanner
    SmartBanner.init(
      adUnitId: 'ca-app-pub-xxxxxxxxxxxxxxxx/xxxxxxxxxx', // 替换为你的广告单元ID
      testDevices: <String>[
        'YOUR_TEST_DEVICE_ID', // 替换为你的测试设备ID,如果是生产环境可以移除这一行
      ],
      listener: (SmartBannerEvent event, Map<String, dynamic> args) {
        if (event == SmartBannerEvent.loaded) {
          print('Ad loaded.');
        } else if (event == SmartBannerEvent.failedToLoad) {
          print('Ad failed to load: ${args['error']}');
        } else if (event == SmartBannerEvent.opened) {
          print('Ad opened.');
        } else if (event == SmartBannerEvent.closed) {
          print('Ad closed.');
        } else if (event == SmartBannerEvent.leftApplication) {
          print('User left application.');
        }
      },
    );
  }

  @override
  Widget build(BuildContext context) {
    return Scaffold(
      appBar: AppBar(
        title: Text('Smart Banner Example'),
      ),
      body: Center(
        child: Column(
          mainAxisAlignment: MainAxisAlignment.center,
          children: <Widget>[
            // 在这里你可以添加其他UI组件
            SizedBox(height: 20),
            Text('Smart Banner will show here if available.'),
          ],
        ),
      ),
    );
  }
}
- 显示广告横幅:
通常,smart_banner插件会自动处理广告的显示和布局。但是,如果你想在特定位置显示广告横幅,你可以使用SmartBanner.showBanner()方法(注意,这个方法可能因插件版本而异,请参考具体版本的文档)。在大多数情况下,插件会自动在底部显示广告横幅。
注意:在某些情况下,你可能需要在AndroidManifest.xml和Info.plist文件中添加必要的权限和配置,以确保广告能够正确显示。具体配置请参考smart_banner插件的官方文档。
这个示例代码展示了如何在Flutter项目中集成和使用smart_banner插件来显示智能广告横幅。请确保你已经替换了广告单元ID和测试设备ID为你自己的值,并且遵循了插件的官方文档中的其他配置要求。


