Flutter应用更新管理插件update_helper的使用
Flutter应用更新管理插件update_helper的使用
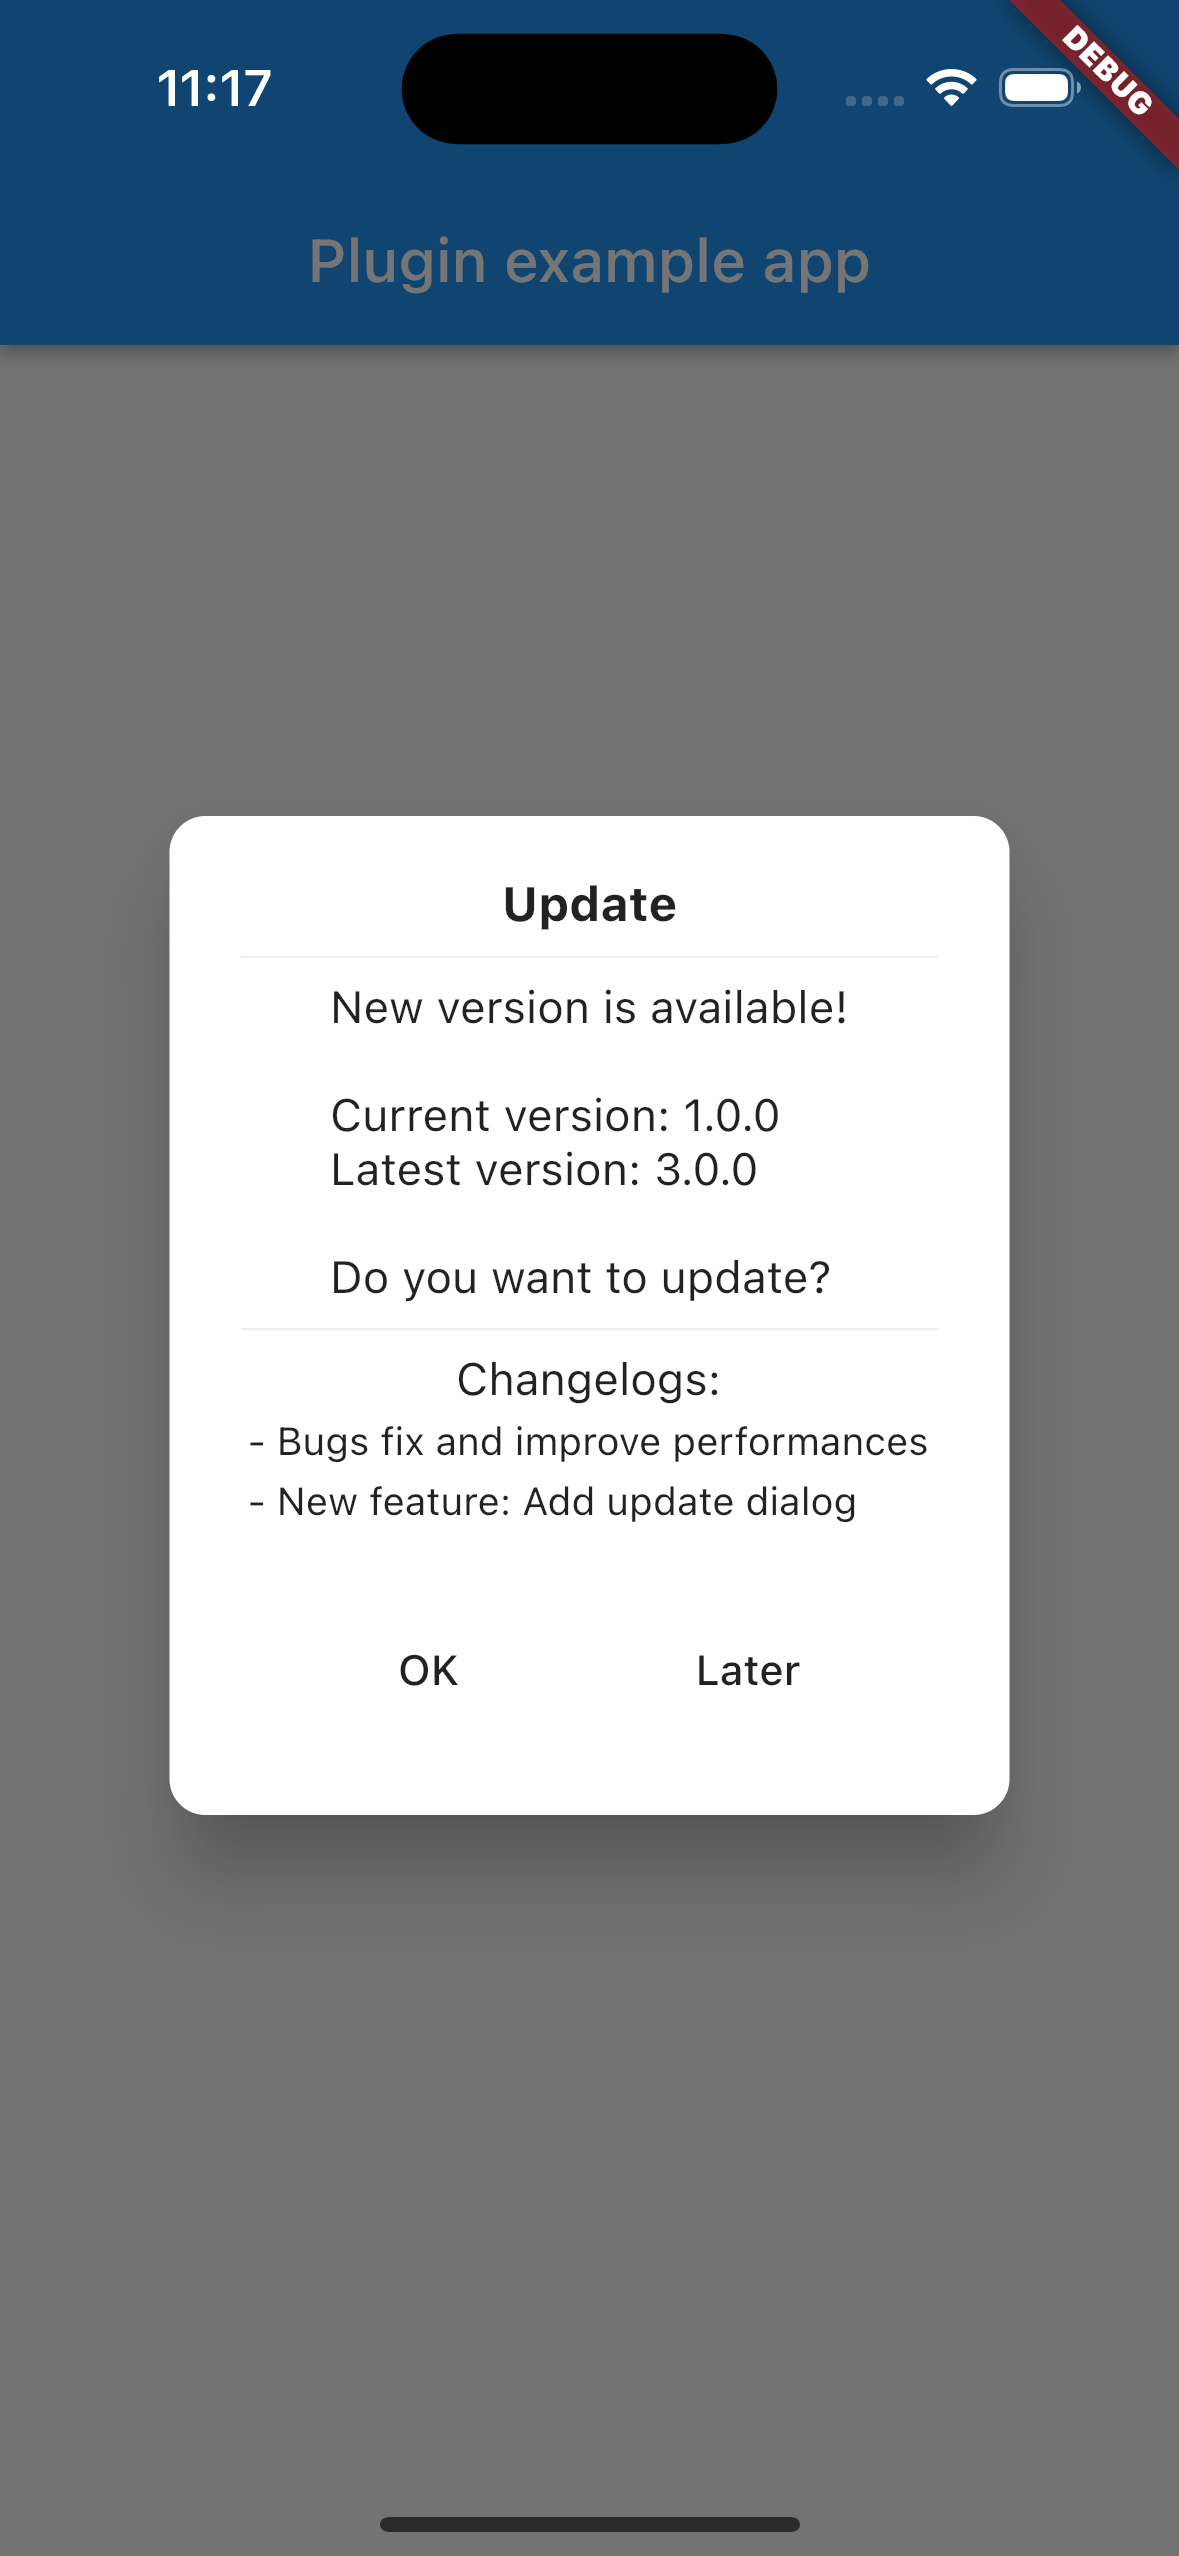
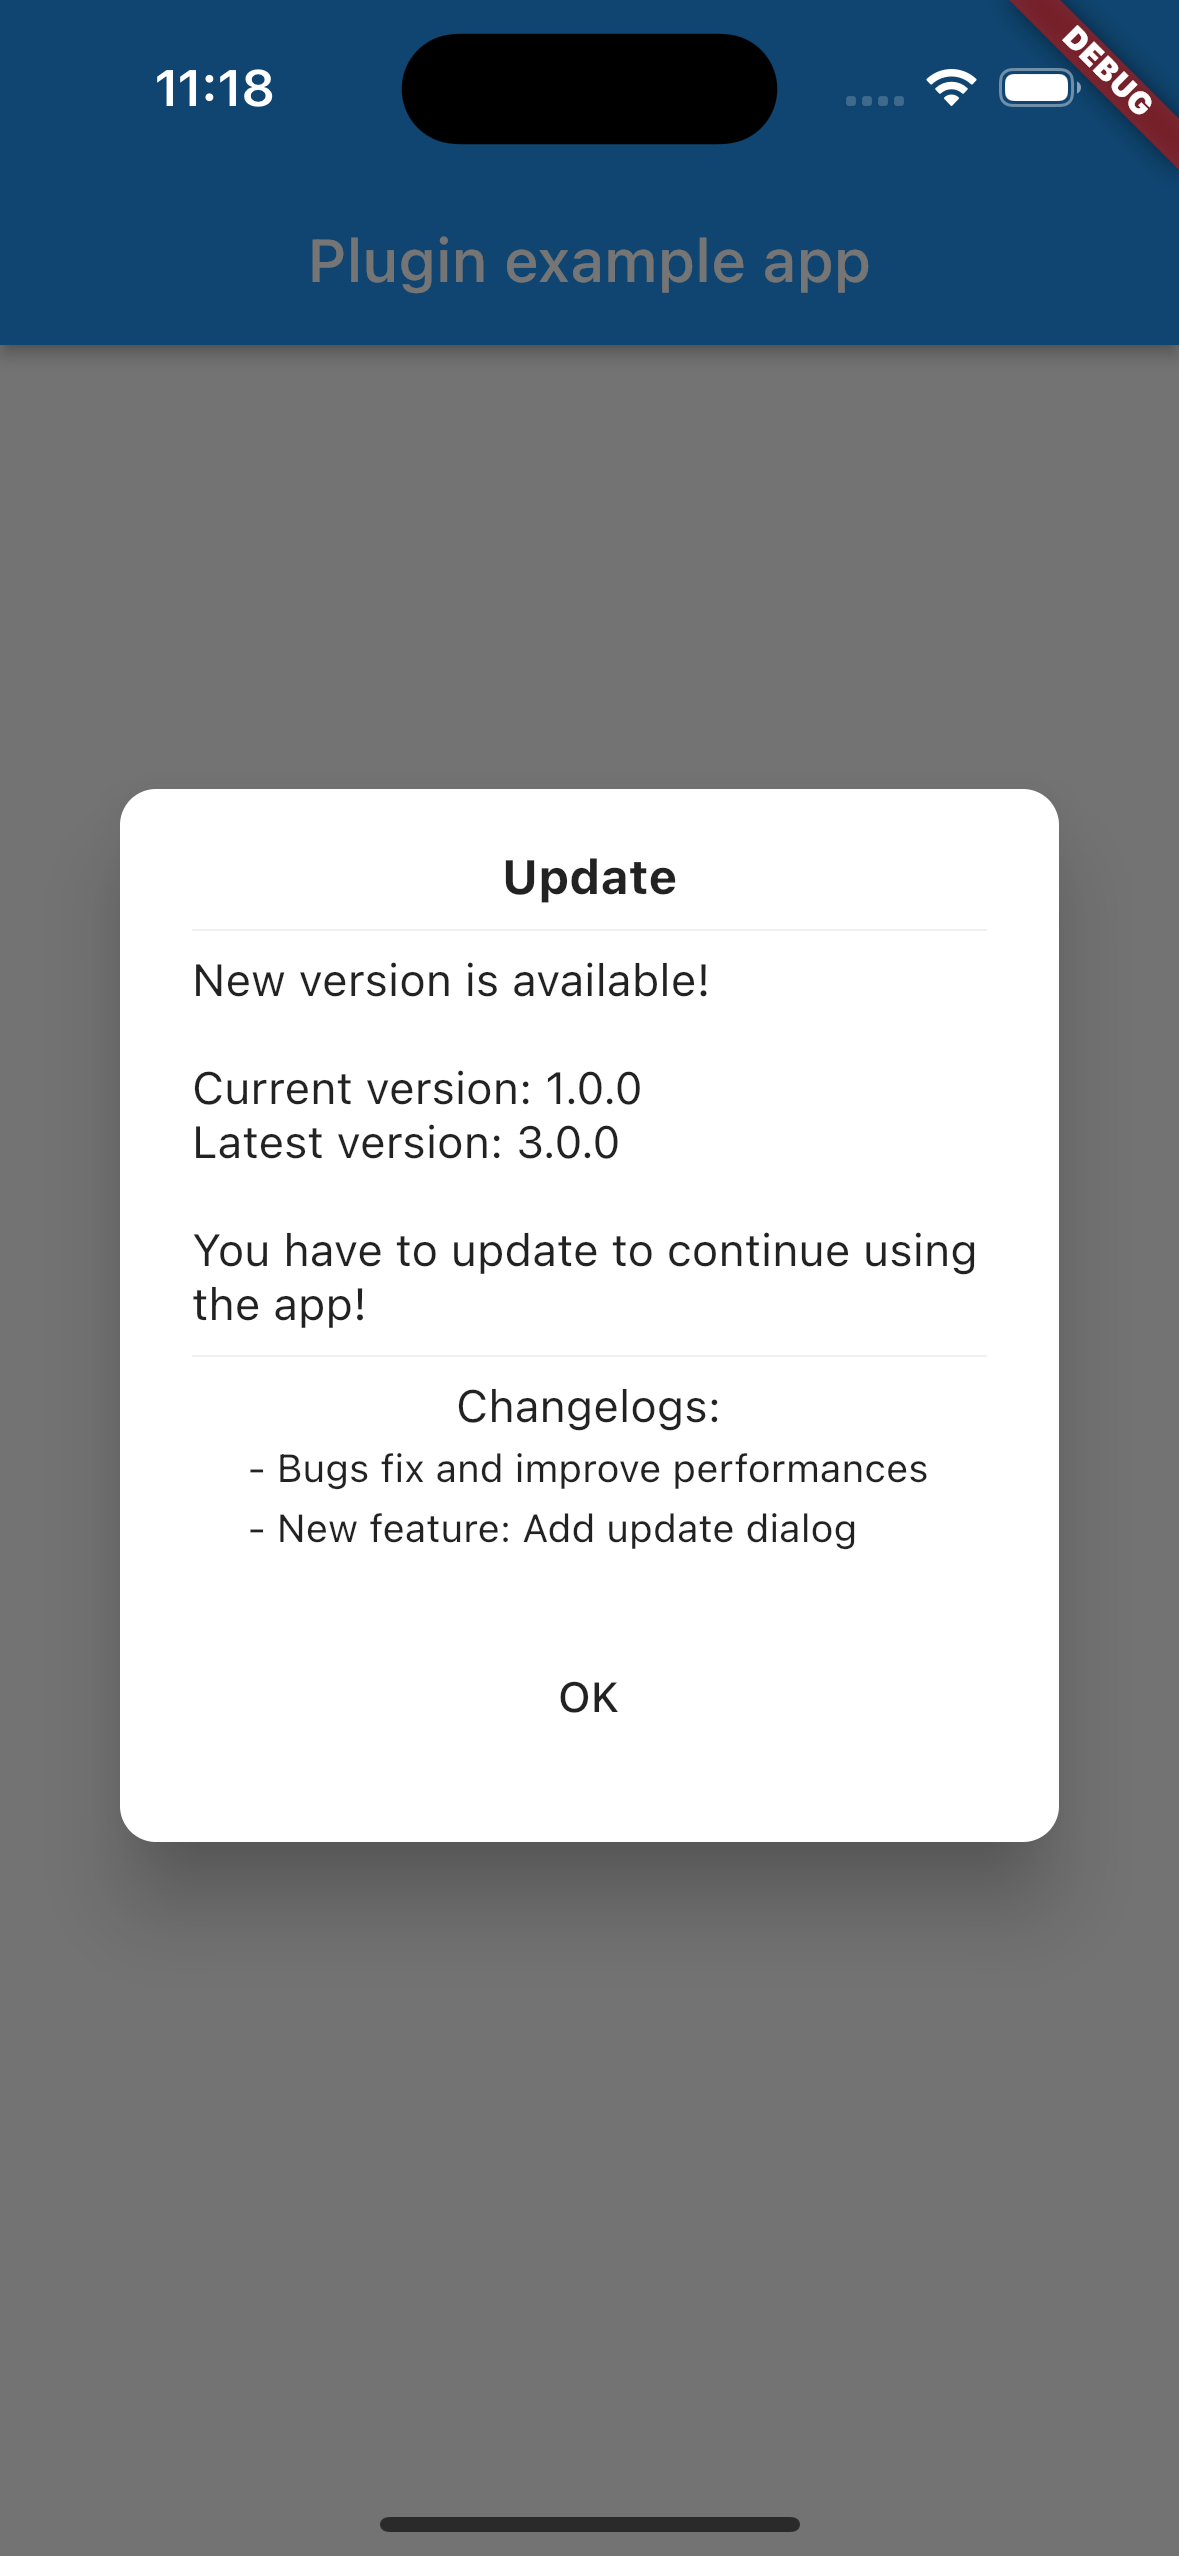
update_helper 是一个帮助你更轻松地控制更新对话框的Flutter插件。它还支持强制用户更新以继续使用应用程序的功能。
插件功能
- 控制更新对话框。
- 支持强制更新。
- 可配置的更新信息和日志。
- 自定义对话框支持。
示例截图


使用方法
版本格式
版本号必须为 major.minor.patch 格式,例如 1.0.0。
简单用法
import 'package:flutter/material.dart';
import 'package:update_helper/update_helper.dart';

void main() {
  runApp(MyApp());
}

class MyApp extends StatelessWidget {
  @override
  Widget build(BuildContext context) {
    return MaterialApp(
      home: HomeScreen(),
    );
  }
}

class HomeScreen extends StatefulWidget {
  @override
  _HomeScreenState createState() => _HomeScreenState();
}

class _HomeScreenState extends State<HomeScreen> {
  final updateHelper = UpdateHelper.instance;

  @override
  void initState() {
    super.initState();
    WidgetsBinding.instance.addPostFrameCallback((_) async {
      await updateHelper.initial(
        context: context,
        updateConfig: UpdateConfig(
          defaultConfig: UpdatePlatformConfig(latestVersion: '3.0.0'),
        ),
        // forceUpdate: true, // 如果需要强制更新,请取消注释此行
      );
    });
  }

  @override
  Widget build(BuildContext context) {
    return Scaffold(
      appBar: AppBar(
        title: Text('Update Helper Example'),
      ),
      body: Center(
        child: Text('Check your console for update dialog logs.'),
      ),
    );
  }
}
高级用法
final latestVersion = '1.0.0';
final bannedVersions = ['<=0.9.0'];

final updateHelper = UpdateHelper.instance;

await updateHelper.initial(
    context: context,
    updateConfig: UpdateConfig(
        defaultConfig: UpdatePlatformConfig(latestVersion: latestVersion),
    ),
    title: 'Update',
    content: 'A new version is available!\n\n'
        'Current version: %currentVersion\n'
        'Latest version: %latestVersion\n\n'
        'Would you like to update?',
    bannedVersions: bannedVersions,
    onlyShowDialogWhenBanned: false,
    forceUpdateContent: 'A new version is available!\n\n'
        'Current version: %currentVersion\n'
        'Latest version: %latestVersion\n\n'
        'Please update to continue using the app.',
    changelogsText: 'Changelogs',
    changelogs: [
        'Improve performances',
        'Minor bugfixes',
    ],
    failToOpenStoreError:'Got an error when trying to open the Store, '
        'please update the app manually. '
        '\nSorry for the inconvenience.\n(Logs: %error)',
);
自定义对话框
await updateHelper.initial(
    context: context,
    updateConfig: UpdateConfig(
        defaultConfig: UpdatePlatformConfig(latestVersion: latestVersion),
    ),
    dialogBuilder: (context, config) {
        return AlertDialog.adaptive(
              title: const Text('Update'),
              content: const Text(
                  'This is a custom dialog.\n\nWould you like to update?'),
              actions: [
                TextButton(
                    onPressed: config.onOkPressed, child: const Text('OK')),
                TextButton(
                  onPressed: config.onLaterPressed,
                  child: Text(
                    'Later',
                    style: TextStyle(color: Theme.of(context).disabledColor),
                  ),
                ),
              ],
        );
    }
);
其他功能
打开应用商店
UpdateHelper.openStore();
注意事项
%currentVersion和%latestVersion会被替换为实际版本号。forceUpdate和bannedVersions不可同时使用。onlyShowDialogWhenBanned: 仅在当前版本被禁止或forceUpdate为true时显示更新对话框。- 更多关于
bannedVersions的使用请参考 satisfied_version 插件。 changelogsText和changelogs用于显示变更日志。- 当无法打开应用商店时,会显示错误日志,可以通过
failToOpenStoreError参数自定义错误信息。
以上是 update_helper 插件的基本使用方法及示例代码,希望能帮助你在Flutter应用中更好地实现应用更新管理功能。
更多关于Flutter应用更新管理插件update_helper的使用的实战系列教程也可以访问 https://www.itying.com/category-92-b0.html
更多关于Flutter应用更新管理插件update_helper的使用的实战系列教程也可以访问 https://www.itying.com/category-92-b0.html
当然,以下是如何在Flutter应用中使用update_helper插件进行应用更新管理的示例代码。update_helper插件通常用于检查新版本、下载更新包并提示用户安装。需要注意的是,实际插件的使用可能会因版本和平台的不同而有所变化,以下代码基于一个假设的插件接口。
首先,确保在pubspec.yaml文件中添加update_helper插件依赖:
dependencies:
  flutter:
    sdk: flutter
  update_helper: ^x.y.z  # 替换为实际版本号
然后,运行flutter pub get来安装依赖。
接下来,在你的Flutter应用中,你可以按照以下步骤使用update_helper插件:
- 初始化插件:
在你的主文件(通常是main.dart)中,初始化UpdateHelper插件。
import 'package:flutter/material.dart';
import 'package:update_helper/update_helper.dart';

void main() {
  runApp(MyApp());
}

class MyApp extends StatelessWidget {
  @override
  Widget build(BuildContext context) {
    return MaterialApp(
      home: HomeScreen(),
    );
  }
}

class HomeScreen extends StatefulWidget {
  @override
  _HomeScreenState createState() => _HomeScreenState();
}

class _HomeScreenState extends State<HomeScreen> {
  late UpdateHelper updateHelper;

  @override
  void initState() {
    super.initState();
    updateHelper = UpdateHelper();
    checkForUpdates();
  }

  void checkForUpdates() async {
    try {
      bool isUpdateAvailable = await updateHelper.checkForUpdates();
      if (isUpdateAvailable) {
        showUpdateDialog();
      }
    } catch (e) {
      print("Error checking for updates: $e");
    }
  }

  void showUpdateDialog() {
    showDialog(
      context: context,
      builder: (BuildContext context) {
        return AlertDialog(
          title: Text("Update Available"),
          content: Text("A new version of the app is available. Do you want to update?"),
          actions: <Widget>[
            TextButton(
              onPressed: () {
                Navigator.of(context).pop();
              },
              child: Text("Later"),
            ),
            TextButton(
              onPressed: () async {
                try {
                  await updateHelper.downloadAndUpdate();
                  // Optionally navigate to a splash screen or show a success message
                } catch (e) {
                  print("Error downloading update: $e");
                  // Show an error message to the user
                }
              },
              child: Text("Update Now"),
            ),
          ],
        );
      },
    );
  }

  @override
  Widget build(BuildContext context) {
    return Scaffold(
      appBar: AppBar(
        title: Text("Home Screen"),
      ),
      body: Center(
        child: Text("Welcome to the Home Screen"),
      ),
    );
  }
}
- 配置插件(假设插件需要一些配置):
某些插件可能需要配置,如API密钥或检查更新的URL。这通常会在插件的文档中说明。例如,如果UpdateHelper需要配置,你可以在initState方法中进行设置:
@override
void initState() {
  super.initState();
  updateHelper = UpdateHelper(
    apiKey: "your_api_key", // 如果插件需要API密钥
    updateUrl: "https://yourserver.com/updates.json" // 如果插件需要指定更新URL
  );
  checkForUpdates();
}
- 处理下载和安装:
上面的showUpdateDialog方法中已经包含了下载和安装的示例。实际实现可能会根据插件的功能有所不同。一些插件可能会提供进度监听或安装后的回调。
请注意,这只是一个假设性的示例代码,因为update_helper插件可能并不真实存在或具有上述API。实际使用时,请查阅插件的官方文档和示例代码,以确保正确实现应用更新管理功能。如果update_helper是一个假想的插件名称,你可能需要查找一个实际存在的Flutter应用更新管理插件,如flutter_app_updater或其他类似插件,并根据其文档进行实现。


