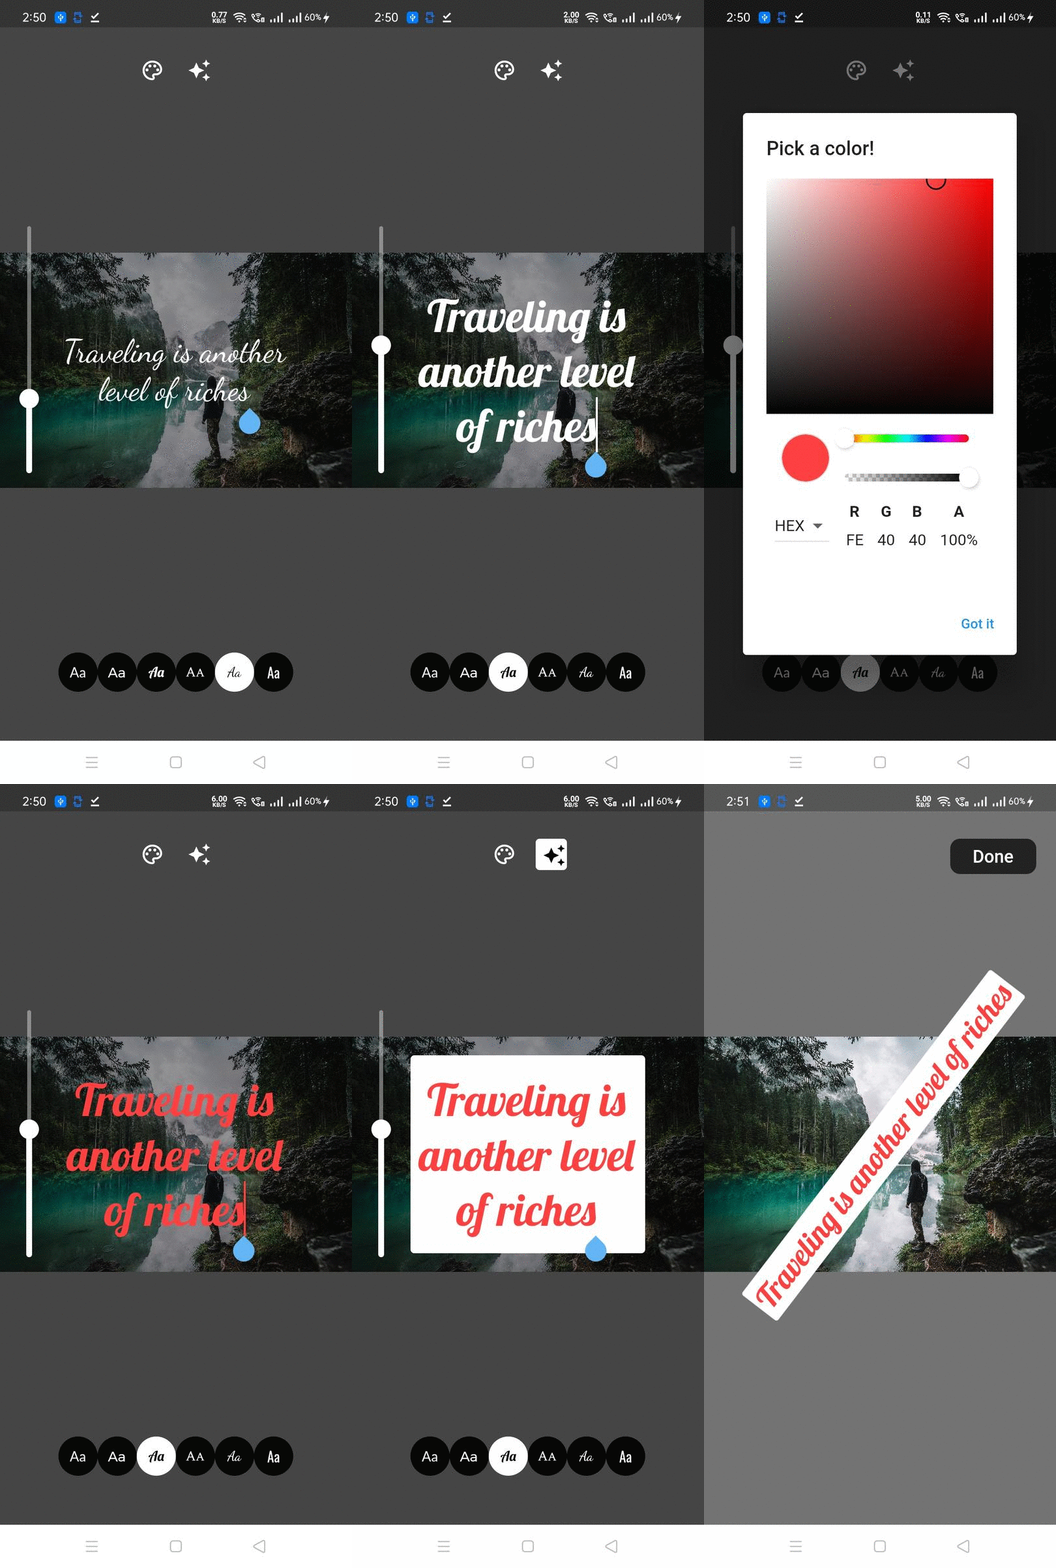
Flutter故事设计插件story_designer的使用
Flutter故事设计插件 story_designer 的使用
story_designer 是一个用于创建类似Instagram故事的Flutter插件。您可以使用此插件编辑图片,并通过添加其他内容(如文本)来制作故事。

开始使用
首先,在您的pubspec.yaml文件中添加依赖:
dependencies:
  story_designer: ^2.1.0
然后运行flutter pub get来安装依赖。
使用方法
在您的Flutter应用中,可以这样使用StoryDesigner:
示例代码
以下是一个完整的示例demo,展示了如何使用story_designer插件来编辑图片并生成故事:
import 'dart:io';
import 'package:flutter/material.dart';
import 'package:image_picker/image_picker.dart';
import 'package:story_designer/story_designer.dart';

void main() {
  runApp(new MaterialApp(
    debugShowCheckedModeBanner: false,
    home: MyApp(),
  ));
}

class MyApp extends StatefulWidget {
  [@override](/user/override)
  _MyAppState createState() => _MyAppState();
}

class _MyAppState extends State<MyApp> {
  [@override](/user/override)
  Widget build(BuildContext context) {
    return Scaffold(
      appBar: AppBar(
        title: Text('Story Designer Example'),
      ),
      body: Center(
        child: Column(
          mainAxisAlignment: MainAxisAlignment.center,
          crossAxisAlignment: CrossAxisAlignment.center,
          children: [
            TextButton(
              onPressed: () async {
                final picker = ImagePicker();
                await picker.getImage(source: ImageSource.gallery).then((file) async {
                  if (file != null) { // 确保选择了图片
                    File editedFile = await Navigator.of(context).push(
                      MaterialPageRoute(
                        builder: (context) => StoryDesigner(
                          filePath: file.path,
                        ),
                      ),
                    );

                    // ------- 您现在有了editedFile

                    if (editedFile != null) {
                      print('Edited File Path: ' + editedFile.path);
                    }
                  } else {
                    print("No image selected.");
                  }
                });
              },
              child: Text('Pick Image'),
            ),
          ],
        ),
      ),
    );
  }
}
更多关于Flutter故事设计插件story_designer的使用的实战系列教程也可以访问 https://www.itying.com/category-92-b0.html
更多关于Flutter故事设计插件story_designer的使用的实战系列教程也可以访问 https://www.itying.com/category-92-b0.html
当然,以下是如何在Flutter项目中使用story_designer插件的一个简单示例。story_designer是一个用于设计和展示故事的Flutter插件,非常适合制作故事书或叙事应用。
首先,确保你已经在pubspec.yaml文件中添加了story_designer依赖:
dependencies:
  flutter:
    sdk: flutter
  story_designer: ^最新版本号  # 请替换为实际的最新版本号
然后运行flutter pub get来安装依赖。
接下来,让我们创建一个简单的Flutter应用来使用story_designer插件。
1. 导入必要的包
在你的Dart文件中(比如main.dart),首先导入story_designer包:
import 'package:flutter/material.dart';
import 'package:story_designer/story_designer.dart';
2. 定义故事页面数据
定义一些故事页面数据。每个页面可以包含文本、图片等。
List<StoryPage> storyPages = [
  StoryPage(
    backgroundColor: Colors.white,
    imagePath: 'assets/images/page1.jpg',  // 确保你有这个图片资源
    texts: [
      StoryText(
        text: '这是第一页的故事内容。',
        textStyle: TextStyle(fontSize: 24, color: Colors.black),
        position: Offset(20, 240),
      ),
    ],
  ),
  StoryPage(
    backgroundColor: Colors.grey[200]!,
    imagePath: 'assets/images/page2.jpg',
    texts: [
      StoryText(
        text: '这是第二页的故事内容。',
        textStyle: TextStyle(fontSize: 24, color: Colors.black),
        position: Offset(20, 240),
      ),
    ],
  ),
  // 可以继续添加更多页面
];
3. 使用StoryDesigner组件展示故事
在你的MyApp或主组件中使用StoryDesigner组件来展示故事。
void main() {
  runApp(MyApp());
}

class MyApp extends StatelessWidget {
  @override
  Widget build(BuildContext context) {
    return MaterialApp(
      title: 'Flutter Story Designer Demo',
      theme: ThemeData(
        primarySwatch: Colors.blue,
      ),
      home: Scaffold(
        appBar: AppBar(
          title: Text('Flutter Story Designer Demo'),
        ),
        body: Center(
          child: StoryDesigner(
            pages: storyPages,
            onPageChanged: (int pageIndex) {
              print('当前页面: $pageIndex');
            },
          ),
        ),
      ),
    );
  }
}
4. 确保图片资源
在pubspec.yaml中添加你的图片资源:
flutter:
  assets:
    - assets/images/page1.jpg
    - assets/images/page2.jpg
    # 其他图片资源
完整代码示例
# pubspec.yaml
name: flutter_story_designer_demo
description: A new Flutter project.

version: 1.0.0+1

environment:
  sdk: ">=2.12.0 <3.0.0"

dependencies:
  flutter:
    sdk: flutter
  story_designer: ^最新版本号  # 请替换为实际的最新版本号

flutter:
  assets:
    - assets/images/page1.jpg
    - assets/images/page2.jpg
// main.dart
import 'package:flutter/material.dart';
import 'package:story_designer/story_designer.dart';

List<StoryPage> storyPages = [
  StoryPage(
    backgroundColor: Colors.white,
    imagePath: 'assets/images/page1.jpg',
    texts: [
      StoryText(
        text: '这是第一页的故事内容。',
        textStyle: TextStyle(fontSize: 24, color: Colors.black),
        position: Offset(20, 240),
      ),
    ],
  ),
  StoryPage(
    backgroundColor: Colors.grey[200]!,
    imagePath: 'assets/images/page2.jpg',
    texts: [
      StoryText(
        text: '这是第二页的故事内容。',
        textStyle: TextStyle(fontSize: 24, color: Colors.black),
        position: Offset(20, 240),
      ),
    ],
  ),
];

void main() {
  runApp(MyApp());
}

class MyApp extends StatelessWidget {
  @override
  Widget build(BuildContext context) {
    return MaterialApp(
      title: 'Flutter Story Designer Demo',
      theme: ThemeData(
        primarySwatch: Colors.blue,
      ),
      home: Scaffold(
        appBar: AppBar(
          title: Text('Flutter Story Designer Demo'),
        ),
        body: Center(
          child: StoryDesigner(
            pages: storyPages,
            onPageChanged: (int pageIndex) {
              print('当前页面: $pageIndex');
            },
          ),
        ),
      ),
    );
  }
}
这个示例展示了如何使用story_designer插件在Flutter应用中创建和展示一个简单的故事。你可以根据需要进一步自定义和扩展这个故事设计。


