Flutter底部导航栏页面过渡插件bottom_bar_page_transition的使用
Flutter底部导航栏页面过渡插件bottom_bar_page_transition的使用
bottom_bar_page_transition 是一个Flutter包,用于在底部导航栏切换页面时显示过渡动画。以下是该插件的详细使用说明和完整示例。
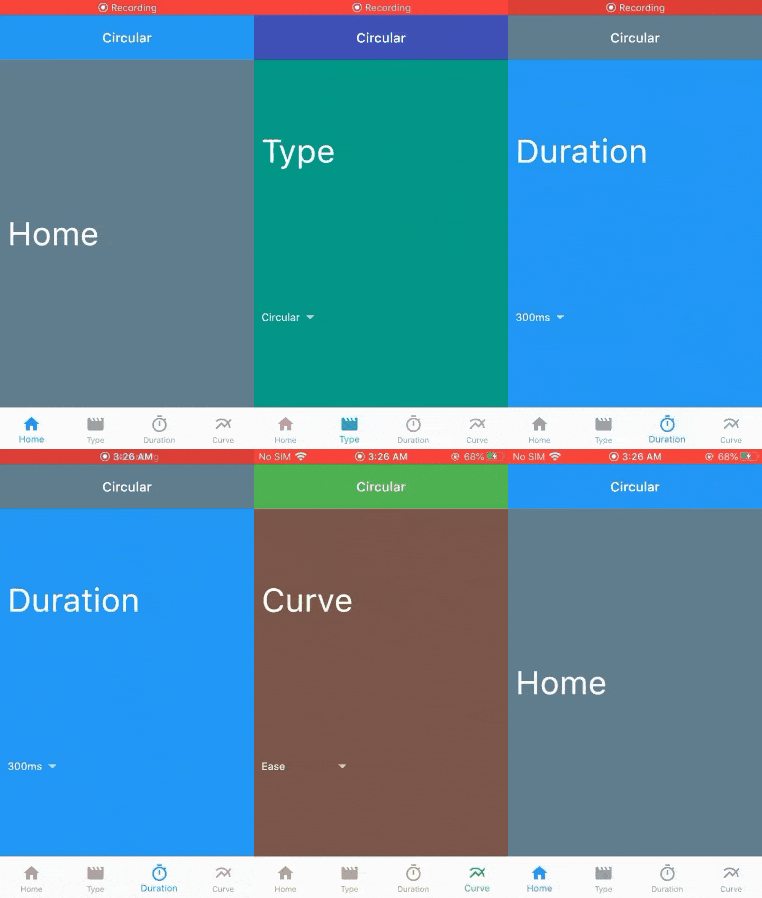
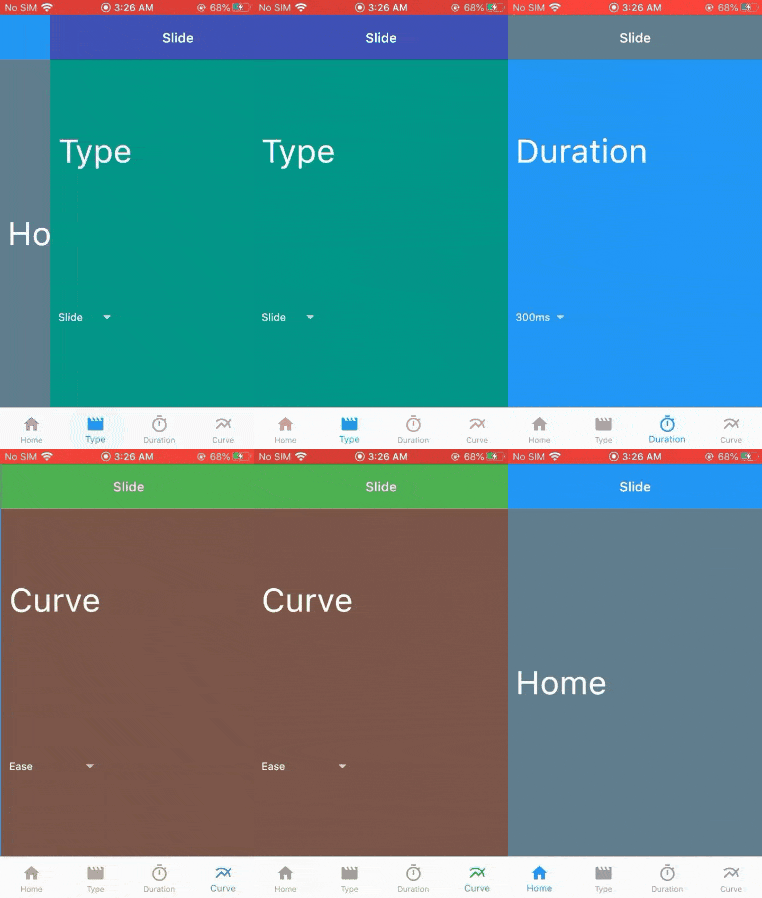
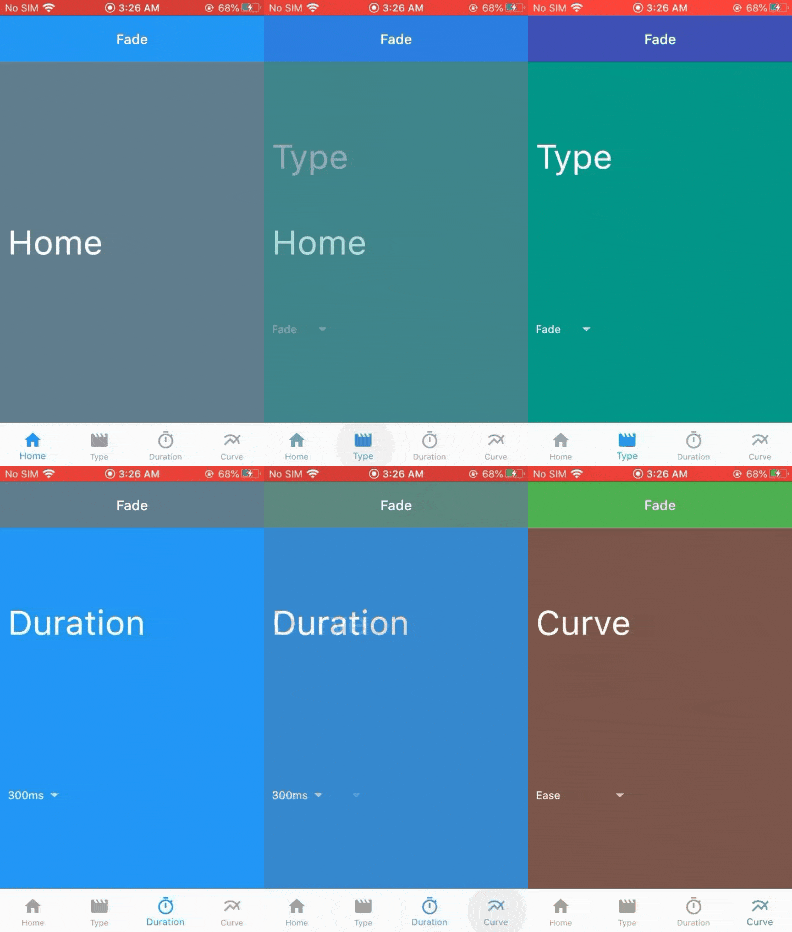
预览
以下是不同类型的过渡效果预览:


特性
- 可以在底部导航栏切换页面时显示动画。
- 通过给小部件添加全局键来避免重新初始化小部件。
开始使用
安装
要在项目中使用此包,请在 pubspec.yaml 文件中添加 bottom_bar_page_transition 作为依赖项。
dependencies:
  bottom_bar_page_transition: ^版本号
在你的 Dart 文件中导入库:
import 'package:bottom_bar_page_transition/bottom_bar_page_transition.dart';
在 build 方法中使用:
return Scaffold(
      body: BottomBarPageTransition(
        builder: (_, index) => _getBody(index), // 返回页面内容
        currentIndex: _currentPage, // 当前显示页面索引
        totalLength: totalPage, // 总页面数
        transitionType: transitionType, // 过渡类型
        transitionDuration: duration, // 动画持续时间
        transitionCurve: curve, // 动画曲线
      ),
      bottomNavigationBar: _getBottomBar(), // 底部导航栏
    );
创建 _getBody(int index) 方法来返回页面内容:
Widget _getBody(int index) {
    return CustomScrollView(
      // key:_keys[index] // 添加键以避免动画结束后重新初始化子小部件
      slivers: <Widget>[
        SliverAppBar(
          title: Text('Page $index'), // 页面标题
        ),
        SliverFillRemaining(
          child: Center(child: Text('Page $index')), // 页面内容
        )
      ],
    );
}
创建 _getBottomBar() 方法来创建底部导航栏:
Widget _getBottomBar() {
    return BottomNavigationBar(
        currentIndex: _currentPage,
        onTap: (index) {
          _currentPage = index;
          setState(() {}); // 更新当前页面索引
        },
        selectedItemColor: Colors.blue, // 选中项颜色
        unselectedItemColor: Colors.grey, // 未选中项颜色
        type: BottomNavigationBarType.fixed,
        items: List.generate(
            totalPage,
            (index) => BottomNavigationBarItem(
                  icon: Icon(icons[index]), // 图标
                  label: names[index], // 标签
                )));
}
参数描述
- builder: 返回小部件内容的函数。
- currentIndex: 当前显示页面的索引。
- totalLength: 总页数。
- transitionType: 过渡类型,可以是
circle、slide或fade。 - transitionDuration: 动画持续时间。
- transitionCurve: 动画曲线,用于调整动画随时间变化的速度。
完整示例代码
以下是一个完整的示例代码,展示了如何使用 bottom_bar_page_transition 插件:
import 'package:bottom_bar_page_transition/bottom_bar_page_transition.dart';
import 'package:flutter/material.dart';

void main() {
  runApp(MyApp());
}

class MyApp extends StatelessWidget {
  [@override](/user/override)
  Widget build(BuildContext context) {
    return MaterialApp(
      title: 'Flutter Demo',
      debugShowCheckedModeBanner: false,
      theme: ThemeData(
        visualDensity: VisualDensity.adaptivePlatformDensity,
      ),
      home: CircularHomePage(),
    );
  }
}

class CircularHomePage extends StatefulWidget {
  [@override](/user/override)
  _CircularHomePageState createState() => _CircularHomePageState();
}

class _CircularHomePageState extends State<CircularHomePage> with TickerProviderStateMixin {
  static const int totalPage = 4;
  static const List<String> names = ['Home', 'Type', 'Duration', 'Curve'];

  List<IconData> icons = [Icons.home, Icons.movie, Icons.timer, Icons.multiline_chart];

  static const List<Color> colors = [Colors.blueGrey, Colors.teal, Colors.blue, Colors.brown];

  int _currentPage = 0;

  Duration duration = Duration(milliseconds: 300);
  Curve curve = Curves.ease;
  TransitionType transitionType = TransitionType.circular;
  String selectedDuration = '300ms';
  String selectedTransactionType = 'Circular';
  String selectedCurve = 'Ease';

  [@override](/user/override)
  Widget build(BuildContext context) {
    return Scaffold(
      body: BottomBarPageTransition(
        builder: (_, index) => _getBody(index),
        currentIndex: _currentPage,
        totalLength: totalPage,
        transitionType: transitionType,
        transitionDuration: duration,
        transitionCurve: curve,
      ),
      bottomNavigationBar: _getBottomBar(),
    );
  }

  Widget _getBottomBar() {
    return BottomNavigationBar(
        currentIndex: _currentPage,
        onTap: (index) {
          _currentPage = index;
          setState(() {});
        },
        selectedItemColor: Colors.blue,
        unselectedItemColor: Colors.grey,
        type: BottomNavigationBarType.fixed,
        items: List.generate(
            totalPage,
            (index) => BottomNavigationBarItem(
                  icon: Icon(icons[index]),
                  label: names[index],
                )));
  }

  Widget _getBody(int index) {
    return CustomScrollView(
      slivers: <Widget>[
        SliverAppBar(
          title: Text(selectedTransactionType),
          backgroundColor: <Color>[Colors.blue, Colors.indigo, Colors.blueGrey, Colors.green][index],
        ),
        SliverFillRemaining(
          child: Container(
            color: colors[index],
            padding: EdgeInsets.all(10),
            child: Column(
              crossAxisAlignment: CrossAxisAlignment.stretch,
              mainAxisAlignment: MainAxisAlignment.spaceAround,
              children: <Widget>[
                Text(names[index], style: TextStyle(fontSize: 50, color: Colors.white)),
                if (index == 1)
                  _getMenuButton(
                      <String>['Circular', 'Slide', 'Fade'],
                      selectedTransactionType,
                      (_) => setState(() {
                            selectedTransactionType = _;
                            if (_ == 'Circular')
                              transitionType = TransitionType.circular;
                            else if (_ == 'Slide')
                              transitionType = TransitionType.slide;
                            else if (_ == 'Fade')
                              transitionType = TransitionType.fade;
                          })),
                if (index == 2)
                  _getMenuButton(
                      <String>['300ms', '500ms', '1s', '2s'],
                      selectedDuration,
                      (_) => setState(() {
                            selectedDuration = _;
                            if (_ == '300ms')
                              duration = Duration(milliseconds: 300);
                            else if (_ == '500ms')
                              duration = Duration(milliseconds: 500);
                            else if (_ == '1s')
                              duration = Duration(seconds: 1);
                            else if (_ == '2s') duration = Duration(seconds: 2);
                          })),
                if (index == 3)
                  _getMenuButton(
                      <String>['Ease', 'EaseIn', 'Elastic In Out', 'Bounce In Out'],
                      selectedCurve,
                      (_) => setState(() {
                            selectedCurve = _;
                            if (_ == 'Ease')
                              curve = Curves.ease;
                            else if (_ == 'EaseIn')
                              curve = Curves.easeIn;
                            else if (_ == 'Elastic In Out')
                              curve = Curves.elasticInOut;
                            else if (_ == 'Bounce In Out')
                              curve = Curves.bounceInOut;
                          })),
              ],
            ),
          ),
        )
      ],
    );
  }

  _getMenuButton(List<String> list, String selectedValue, ValueChanged<String> onSelected) {
    return Theme(
        data: ThemeData.dark(),
        child: DropdownButton(
            underline: SizedBox(),
            value: selectedValue,
            items: List.generate(
                list.length,
                (index) => DropdownMenuItem<String>(
                      child: Text(list[index]),
                      value: list[index],
                    )),
            onChanged: onSelected));
  }
}
更多关于Flutter底部导航栏页面过渡插件bottom_bar_page_transition的使用的实战系列教程也可以访问 https://www.itying.com/category-92-b0.html
更多关于Flutter底部导航栏页面过渡插件bottom_bar_page_transition的使用的实战系列教程也可以访问 https://www.itying.com/category-92-b0.html
当然,下面是一个关于如何在Flutter项目中使用bottom_bar_page_transition插件来实现底部导航栏页面过渡效果的代码案例。这个插件允许你在Flutter应用中创建更加流畅和吸引人的页面切换动画。
首先,确保你已经在pubspec.yaml文件中添加了bottom_bar_page_transition依赖:
dependencies:
  flutter:
    sdk: flutter
  bottom_bar_page_transition: ^x.y.z  # 请替换为最新版本号
然后,运行flutter pub get来安装依赖。
接下来是一个完整的示例代码,展示了如何使用bottom_bar_page_transition来实现底部导航栏的页面过渡效果:
import 'package:flutter/material.dart';
import 'package:bottom_bar_page_transition/bottom_bar_page_transition.dart';

void main() {
  runApp(MyApp());
}

class MyApp extends StatelessWidget {
  @override
  Widget build(BuildContext context) {
    return MaterialApp(
      home: BottomBarPageTransitionScaffold(
        controller: BottomBarPageTransitionController(),
        items: [
          BottomBarPageTransitionItem(
            icon: Icons.home,
            title: 'Home',
            page: HomePage(),
          ),
          BottomBarPageTransitionItem(
            icon: Icons.search,
            title: 'Search',
            page: SearchPage(),
          ),
          BottomBarPageTransitionItem(
            icon: Icons.add,
            title: 'Add',
            page: AddPage(),
          ),
          BottomBarPageTransitionItem(
            icon: Icons.account_circle,
            title: 'Profile',
            page: ProfilePage(),
          ),
        ],
        initialSelection: 0, // 初始选中的页面索引
        bottomNavigationBar: (int index, BottomBarPageTransitionController controller) {
          return BottomNavigationBar(
            items: [
              BottomNavigationBarItem(icon: Icons.home, label: 'Home'),
              BottomNavigationBarItem(icon: Icons.search, label: 'Search'),
              BottomNavigationBarItem(icon: Icons.add, label: 'Add'),
              BottomNavigationBarItem(icon: Icons.account_circle, label: 'Profile'),
            ],
            currentIndex: index,
            onTap: (int newIndex) {
              controller.animateToPage(newIndex);
            },
          );
        },
      ),
    );
  }
}

class HomePage extends StatelessWidget {
  @override
  Widget build(BuildContext context) {
    return Center(
      child: Text('Home Page'),
    );
  }
}

class SearchPage extends StatelessWidget {
  @override
  Widget build(BuildContext context) {
    return Center(
      child: Text('Search Page'),
    );
  }
}

class AddPage extends StatelessWidget {
  @override
  Widget build(BuildContext context) {
    return Center(
      child: Text('Add Page'),
    );
  }
}

class ProfilePage extends StatelessWidget {
  @override
  Widget build(BuildContext context) {
    return Center(
      child: Text('Profile Page'),
    );
  }
}
在这个示例中,我们使用了BottomBarPageTransitionScaffold来包裹我们的页面。这个widget负责处理底部导航栏的页面过渡动画。BottomBarPageTransitionItem用于定义每个底部导航项及其对应的页面。
bottomNavigationBar参数接收一个函数,这个函数返回一个BottomNavigationBar,用于实际显示底部导航项。当用户点击某个导航项时,我们通过controller.animateToPage(newIndex)来触发页面过渡动画。
每个页面(HomePage、SearchPage、AddPage、ProfilePage)都是一个简单的StatelessWidget,仅显示一个文本。你可以根据需要替换这些页面为你自己的内容。
这样,你就能够在Flutter应用中实现带有流畅过渡动画的底部导航栏了。


