Flutter粘性分区列表插件flutter_sticky_section_list的使用
Flutter粘性分区列表插件flutter_sticky_section_list的使用
flutter_sticky_section_list 是一个用于在Flutter应用中实现粘性分区列表的插件。下面是一个完整的示例demo,展示如何使用这个插件。
示例代码
首先,我们需要创建一个基本的Flutter应用,并引入 flutter_sticky_section_list 插件。以下是完整的示例代码:
import 'package:flutter/material.dart';
import 'package:flutter_sticky_section_list/sticky_section_list.dart';

void main() {
  runApp(MyApp());
}

class MyApp extends StatelessWidget {
  // This widget is the root of your application.
  @override
  Widget build(BuildContext context) {
    return MaterialApp(
      title: 'StickySectionList',
      theme: ThemeData(
        primarySwatch: Colors.blue,
        visualDensity: VisualDensity.adaptivePlatformDensity,
      ),
      home: MyHomePage(title: 'StickySectionList'),
    );
  }
}

class MyHomePage extends StatefulWidget {
  MyHomePage({Key? key, required this.title}) : super(key: key);
  final String title;

  @override
  _MyHomePageState createState() => _MyHomePageState();
}

class _MyHomePageState extends State<MyHomePage> {
  @override
  Widget build(BuildContext context) {
    return Scaffold(
        appBar: AppBar(title: Text(widget.title)),
        body: Container(
          // 设置背景颜色为蓝色
          color: Colors.blue,
          child: StickySectionList(
              delegate: StickySectionListDelegate(
            // 返回分区的数量
            getSectionCount: () => 10,
            // 返回每个分区中的项目数量
            getItemCount: (sectionIndex) => 10,
            // 构建分区头部
            buildSection: (context, sectionIndex) => Container(
              // 设置分区头部背景颜色为红色
              color: Colors.red,
              child: Text("section:$sectionIndex"),
              padding: EdgeInsets.all(10), // 设置内边距
            ),
            // 构建每个分区中的项目
            buildItem: (context, sectionIndex, itemIndex) => Container(
              // 设置项目背景颜色为白色
              color: Colors.white,
              child: Text("item:$itemIndex"),
              padding: EdgeInsets.all(10), // 设置内边距
            ),
          )),
        ));
  }
}
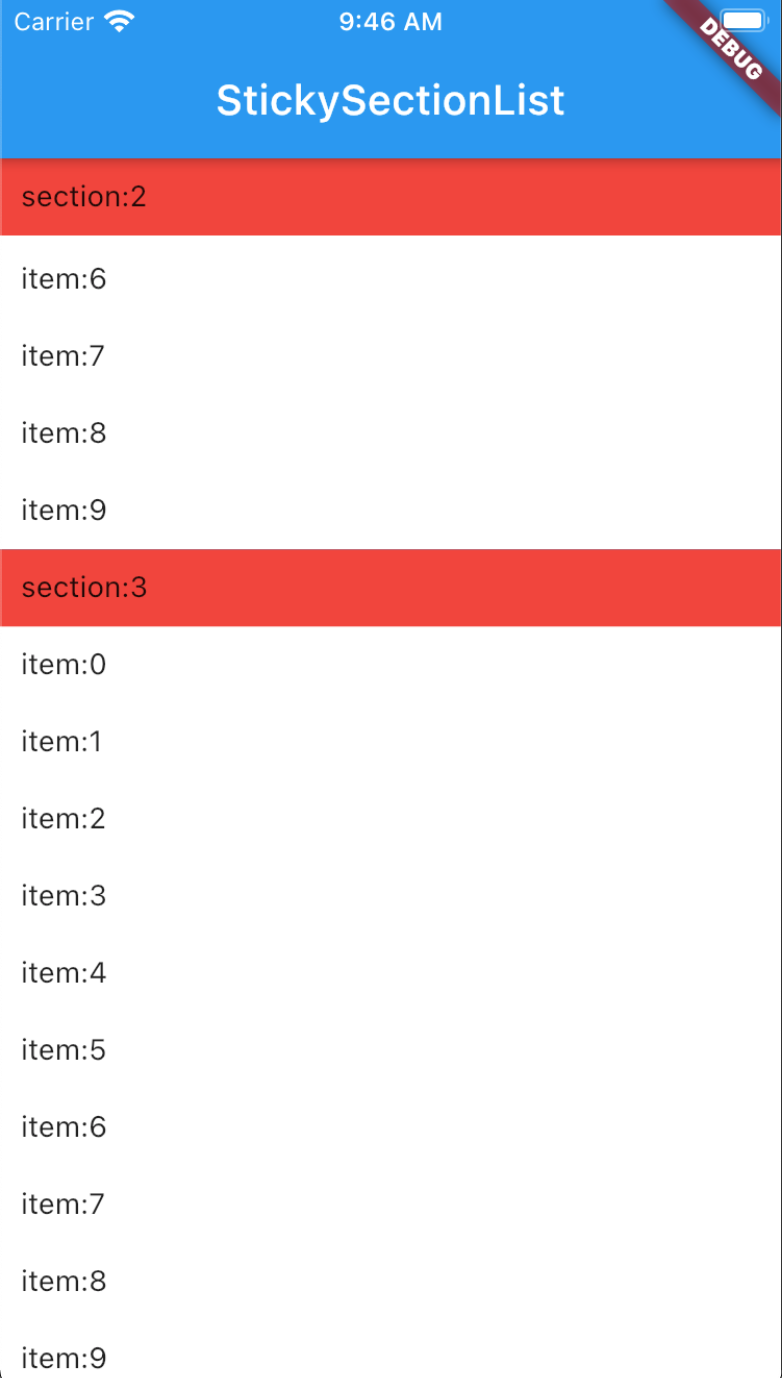
运行效果截图
以下是运行上述代码的效果截图:

代码解释
-
导入必要的包:
import 'package:flutter/material.dart';
import 'package:flutter_sticky_section_list/sticky_section_list.dart';
这里我们导入了Flutter的基本组件和
flutter_sticky_section_list插件。 -
创建主应用类:
class MyApp extends StatelessWidget {
  @override
  Widget build(BuildContext context) {
    return MaterialApp(
      title: 'StickySectionList',
      theme: ThemeData(
        primarySwatch: Colors.blue,
        visualDensity: VisualDensity.adaptivePlatformDensity,
      ),
      home: MyHomePage(title: 'StickySectionList'),
    );
  }
}
这个类是应用的根部件,设置了主题和主页。
-
创建主页面类:
class MyHomePage extends StatefulWidget {
  MyHomePage({Key? key, required this.title}) : super(key: key);
  final String title;

  @override
  _MyHomePageState createState() => _MyHomePageState();
}
这个类定义了主页面,并管理其状态。
-
构建粘性分区列表:
class _MyHomePageState extends State<MyHomePage> {
  @override
  Widget build(BuildContext context) {
    return Scaffold(
        appBar: AppBar(title: Text(widget.title)),
        body: Container(
          color: Colors.blue,
          child: StickySectionList(
              delegate: StickySectionListDelegate(
            getSectionCount: () => 10,
            getItemCount: (sectionIndex) => 10,
            buildSection: (context, sectionIndex) => Container(
              color: Colors.red,
              child: Text("section:$sectionIndex"),
              padding: EdgeInsets.all(10),
            ),
            buildItem: (context, sectionIndex, itemIndex) => Container(
              color: Colors.white,
              child: Text("item:$itemIndex"),
              padding: EdgeInsets.all(10),
            ),
          )),
        ));
  }
}
更多关于Flutter粘性分区列表插件flutter_sticky_section_list的使用的实战系列教程也可以访问 https://www.itying.com/category-92-b0.html
更多关于Flutter粘性分区列表插件flutter_sticky_section_list的使用的实战系列教程也可以访问 https://www.itying.com/category-92-b0.html
当然,我可以为你提供一个关于如何使用 flutter_sticky_section_list 插件的示例代码。flutter_sticky_section_list 是一个用于在 Flutter 中创建粘性分区列表的插件,它允许你创建带有粘性头部(或尾部)的分区列表。
首先,确保你已经在 pubspec.yaml 文件中添加了 flutter_sticky_section_list 依赖:
dependencies:
  flutter:
    sdk: flutter
  flutter_sticky_section_list: ^x.y.z  # 请替换为最新版本号
然后运行 flutter pub get 来获取依赖。
以下是一个使用 flutter_sticky_section_list 创建粘性分区列表的示例代码:
import 'package:flutter/material.dart';
import 'package:flutter_sticky_section_list/flutter_sticky_section_list.dart';

void main() {
  runApp(MyApp());
}

class MyApp extends StatelessWidget {
  @override
  Widget build(BuildContext context) {
    return MaterialApp(
      title: 'Flutter Sticky Section List Demo',
      theme: ThemeData(
        primarySwatch: Colors.blue,
      ),
      home: MyHomePage(),
    );
  }
}

class MyHomePage extends StatelessWidget {
  final List<SectionData> sectionDataList = [
    SectionData(
      title: 'Section 1',
      items: ['Item 1-1', 'Item 1-2', 'Item 1-3'],
    ),
    SectionData(
      title: 'Section 2',
      items: ['Item 2-1', 'Item 2-2'],
    ),
    SectionData(
      title: 'Section 3',
      items: ['Item 3-1', 'Item 3-2', 'Item 3-3', 'Item 3-4'],
    ),
  ];

  @override
  Widget build(BuildContext context) {
    return Scaffold(
      appBar: AppBar(
        title: Text('Sticky Section List Demo'),
      ),
      body: StickySectionList(
        sectionDataList: sectionDataList,
        itemBuilder: (context, index, sectionData, itemData) {
          return ListTile(
            title: Text(itemData),
          );
        },
        headerBuilder: (context, index, sectionData) {
          return Container(
            color: Colors.blue[300],
            padding: EdgeInsets.symmetric(horizontal: 16.0, vertical: 8.0),
            child: Text(
              sectionData.title,
              style: TextStyle(color: Colors.white),
            ),
          );
        },
      ),
    );
  }
}

class SectionData {
  final String title;
  final List<String> items;

  SectionData({required this.title, required this.items});
}
在这个示例中:
MyApp是应用程序的根 widget。MyHomePage是主页面,包含粘性分区列表。SectionData是一个简单的数据类,用于存储每个分区的标题和项。StickySectionListwidget 用于创建粘性分区列表。它接受以下参数:sectionDataList:一个包含SectionData实例的列表。itemBuilder:一个用于构建分区中每个项的回调。headerBuilder:一个用于构建分区头部的回调。
运行这个代码,你将看到一个带有粘性头部的分区列表,每个分区头部都会随着用户滚动而保持在其分区项的顶部。


