


Flutter引导气泡插件guide_bubble的使用
Flutter引导气泡插件guide_bubble的使用
特性
开始使用
在你的 pubspec.yaml 文件中添加以下依赖:
dependencies:
  guide_bubble: ^1.0.0
然后运行 flutter pub get。
使用指南
guide_bubble 插件可以用来创建一个带有提示气泡的引导页面。以下是一个简单的示例:
GuideBubbleWidget(
  key: bubbleKey,
  textPadding: const EdgeInsets.only(top: 8, left: 12, right: 12, bottom: 8),
  bubbleMargin: 5,
  text: const Text(
    'This is an overlay, This is an overlay, This is an overlay,This is an overlay,This is an overlay,This is an overlay,',
    style: TextStyle(color: Colors.white),
  ),
  bgColor: const Color(0xFF7F5EFF),
  borderRadius: BorderRadius.circular(12),
  downImg: Image.asset(
    'assets/images/lm_arrow_down.png',
    fit: BoxFit.fill,
  ),
  upImg: Transform(
    alignment: Alignment.center,
    transform: Matrix4.rotationX(180 * 3.1415927 / 180), // 180度,也可以使用pi
    child: Image.asset('assets/images/lm_arrow_down.png', fit: BoxFit.fill)),
  location: BubbleLocation.auto,
  onTap: () {
    GuideBubbleWidgetState status = bubbleKey.currentState! as GuideBubbleWidgetState;
    status.removeView();
  },
)
示例代码
以下是一个完整的示例代码,展示了如何使用 guide_bubble 插件:
import 'package:flutter/material.dart';
import 'package:guide_bubble/guide_bubble.dart';
void main() {
runApp(MyApp());
}
class MyApp extends StatelessWidget {
final GlobalKey dependentViewKey = GlobalKey();
final GlobalKey bubbleKey = GlobalKey();
OverlayEntry? entry;
MyApp({super.key});
[@override](/user/override)
Widget build(BuildContext context) {
return MaterialApp(
home: Stack(
children: [
Container(
margin: const EdgeInsets.only(
top: 100,
left: 0,
),
child: Container(
key: dependentViewKey,
padding: const EdgeInsets.all(8.0),
color: Colors.blue,
child: GestureDetector(
onTap: () {
GuideBubbleWidgetState status =
bubbleKey.currentState! as GuideBubbleWidgetState;
if (status.isShow()) {
status.removeView();
return;
} else {
status.showOverlay(dependentViewKey);
}
},
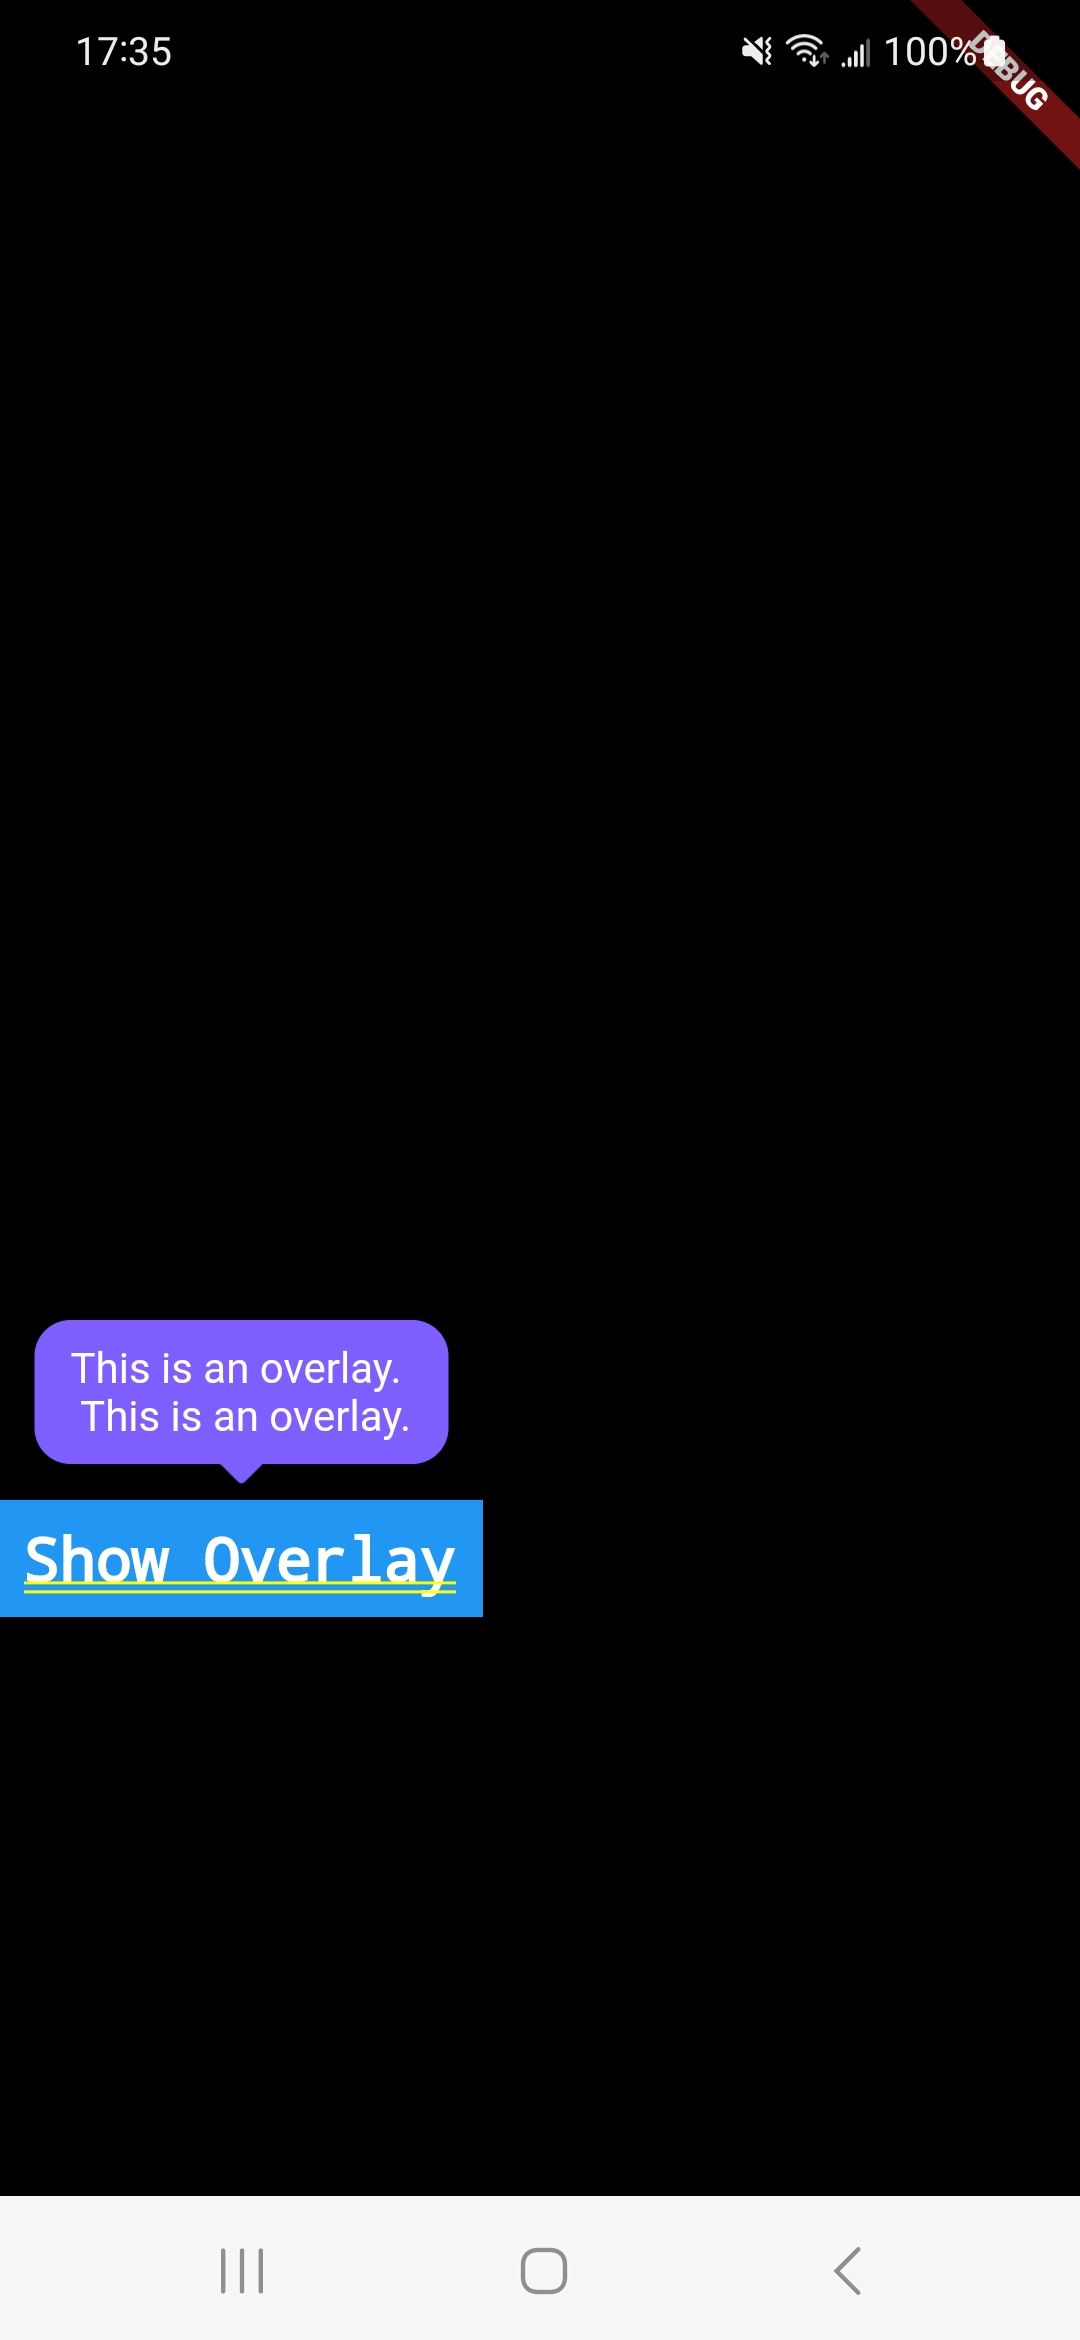
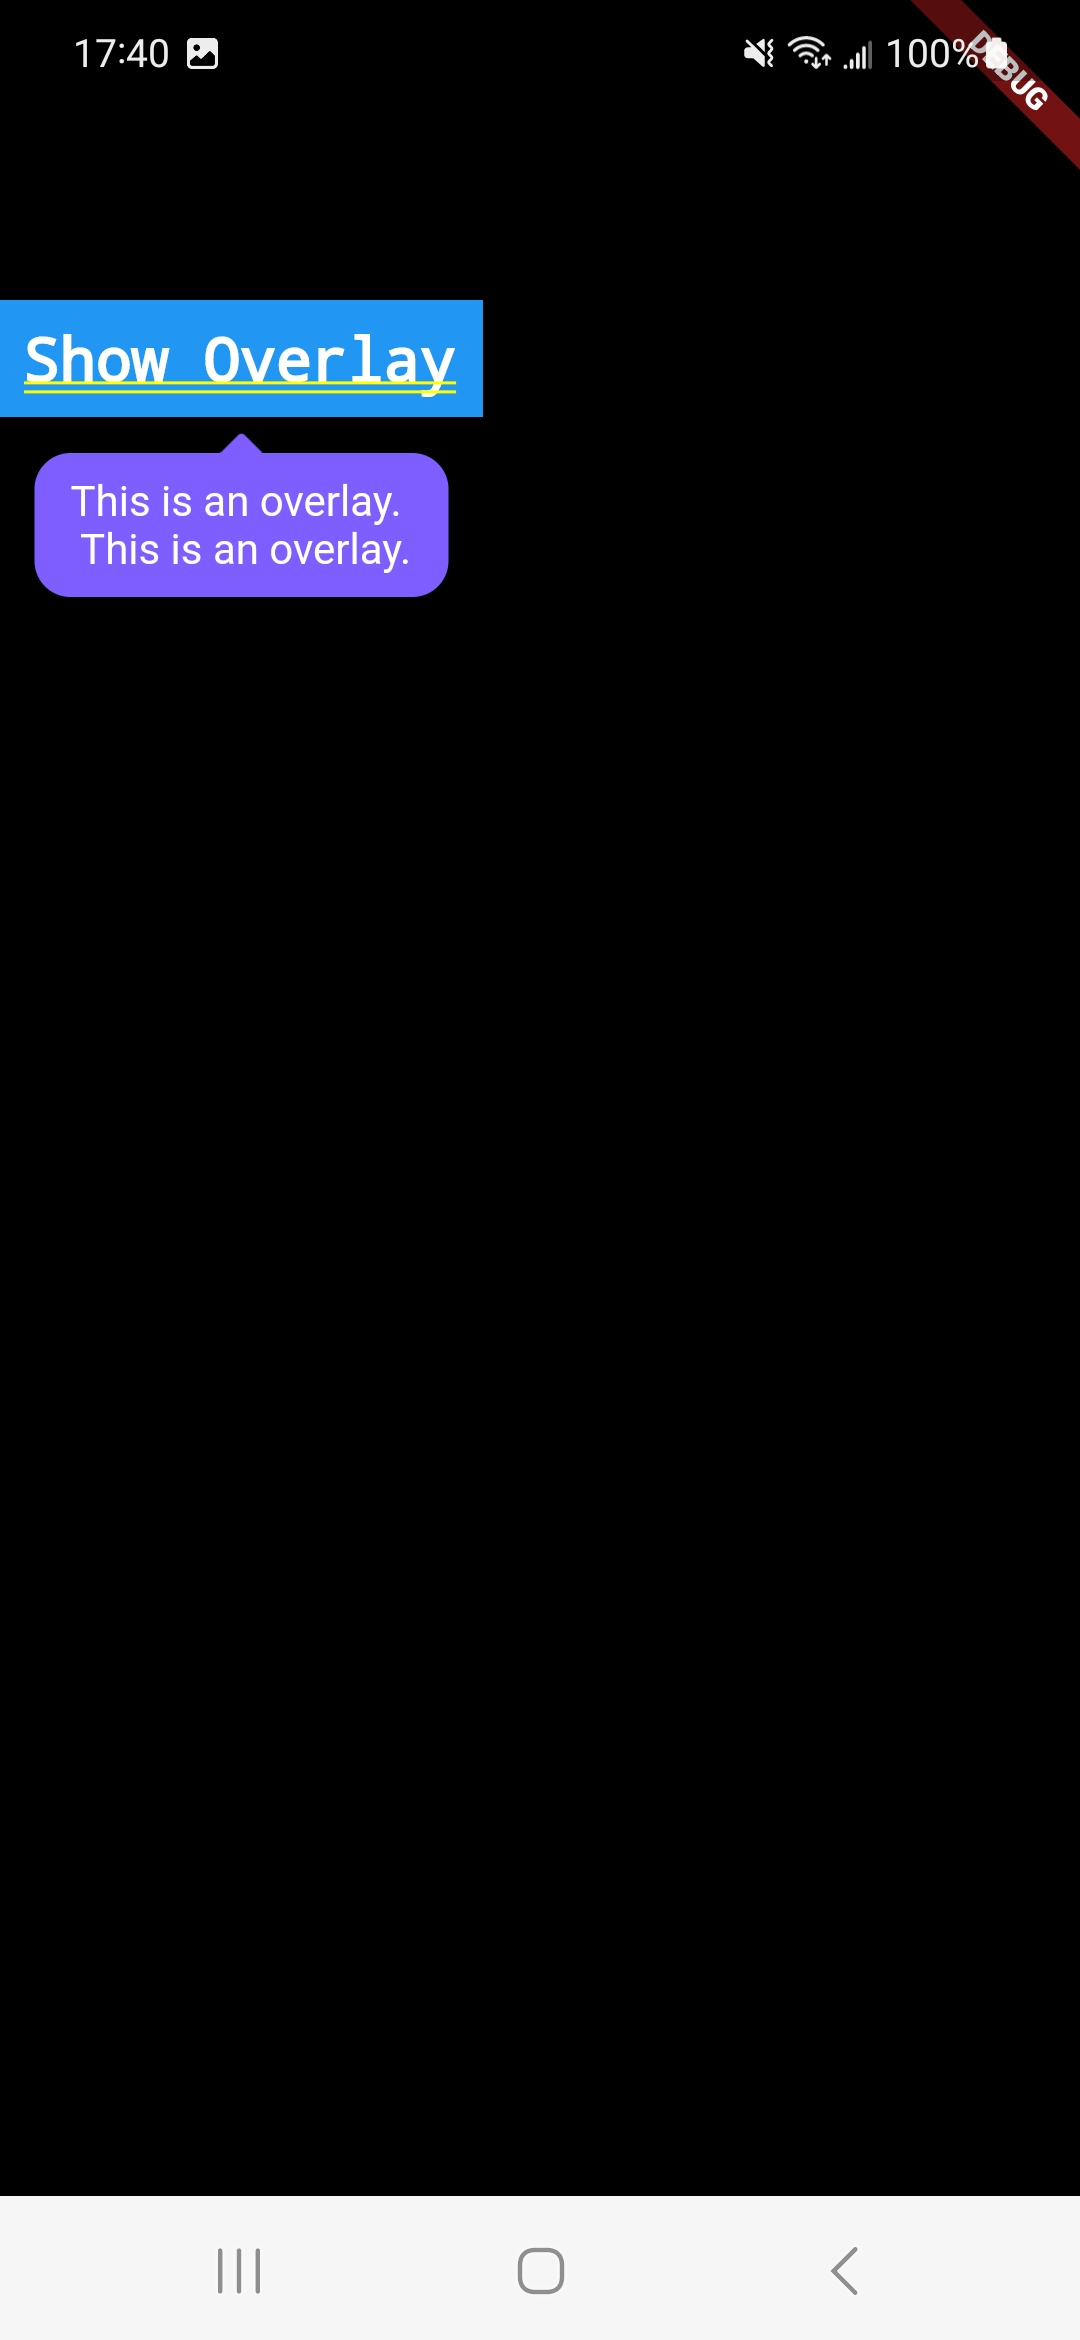
child: const Text(
'Show Overlay',
style: TextStyle(
color: Colors.white,
fontSize: 20,
),
)),
),
),
GuideBubbleWidget(
key: bubbleKey,
textPadding:
const EdgeInsets.only(top: 8, left: 12, right: 12, bottom: 8),
bubbleMargin: 5,
text: const Text(
'This is an overlay.\n This is an overlay.',
style: TextStyle(color: Colors.white),
),
bgColor: const Color(0xFF7F5EFF),
borderRadius: BorderRadius.circular(12),
downImg: Image.asset(
'assets/images/lm_arrow.png',
fit: BoxFit.fill,
),
upImg: Transform(
alignment: Alignment.center,
transform:
Matrix4.rotationX(180 * 3.1415927 / 180), // 180度,也可以使用pi
child: Image.asset('assets/images/lm_arrow.png',
fit: BoxFit.fill)),
location: BubbleLocation.auto,
onTap: () {
GuideBubbleWidgetState status =
bubbleKey.currentState! as GuideBubbleWidgetState;
status.removeView();
},
),
],
),
);
}
}
更多关于Flutter引导气泡插件guide_bubble的使用的实战教程也可以访问 https://www.itying.com/category-92-b0.html
1 回复

更多关于Flutter引导气泡插件guide_bubble的使用的实战系列教程也可以访问 https://www.itying.com/category-92-b0.html
当然,以下是如何在Flutter项目中使用guide_bubble插件来实现引导气泡的示例代码。guide_bubble插件可以帮助你在应用中创建用户引导气泡,以突出显示特定功能或区域。
步骤 1: 添加依赖
首先,你需要在pubspec.yaml文件中添加guide_bubble依赖。
dependencies:
  flutter:
    sdk: flutter
  guide_bubble: ^x.y.z  # 请替换为最新版本号
然后运行flutter pub get来安装依赖。
步骤 2: 导入插件
在你的Dart文件中导入guide_bubble插件。
import 'package:guide_bubble/guide_bubble.dart';
步骤 3: 使用GuideBubble
以下是一个简单的示例,展示如何在Flutter应用中使用GuideBubble。
import 'package:flutter/material.dart';
import 'package:guide_bubble/guide_bubble.dart';

void main() {
  runApp(MyApp());
}

class MyApp extends StatelessWidget {
  @override
  Widget build(BuildContext context) {
    return MaterialApp(
      home: GuideBubbleExample(),
    );
  }
}

class GuideBubbleExample extends StatefulWidget {
  @override
  _GuideBubbleExampleState createState() => _GuideBubbleExampleState();
}

class _GuideBubbleExampleState extends State<GuideBubbleExample> {
  final GlobalKey _targetKey = GlobalKey();
  late GuideBubbleController _guideBubbleController;

  @override
  void initState() {
    super.initState();
    _guideBubbleController = GuideBubbleController(context);

    // 显示引导气泡3秒后自动隐藏
    Future.delayed(Duration(seconds: 3), () {
      _showGuideBubble();
    });
  }

  void _showGuideBubble() {
    _guideBubbleController.showBubble(
      targetKey: _targetKey,
      bubbleContent: BubbleContent(
        title: Text('引导标题'),
        description: Text('这是引导气泡的描述内容。'),
        footer: BubbleFooter(
          onSkip: () => _guideBubbleController.dispose(),
          onNext: () => {}, // 你可以在这里添加下一个引导逻辑
        ),
      ),
      bubblePosition: BubblePosition.top,
      autoHideDuration: Duration(seconds: 5),
      onBubbleHidden: () {
        print('气泡已隐藏');
      },
    );
  }

  @override
  Widget build(BuildContext context) {
    return Scaffold(
      appBar: AppBar(
        title: Text('Guide Bubble Example'),
      ),
      body: Center(
        child: Column(
          mainAxisAlignment: MainAxisAlignment.center,
          children: <Widget>[
            Container(
              key: _targetKey,
              width: 100,
              height: 100,
              color: Colors.blue,
              child: Center(child: Text('目标区域')),
            ),
            SizedBox(height: 20),
            ElevatedButton(
              onPressed: () {
                // 手动显示引导气泡
                _showGuideBubble();
              },
              child: Text('显示引导气泡'),
            ),
          ],
        ),
      ),
    );
  }

  @override
  void dispose() {
    _guideBubbleController.dispose();
    super.dispose();
  }
}
解释
- 依赖添加: 在
pubspec.yaml中添加guide_bubble依赖。 - 导入插件: 在Dart文件中导入
guide_bubble。 - 初始化控制器: 在
initState方法中初始化GuideBubbleController。 - 显示引导气泡: 使用
_guideBubbleController.showBubble方法来显示引导气泡,可以指定目标GlobalKey、气泡内容、位置以及自动隐藏时间等。 - 处理气泡隐藏事件: 可以在
onBubbleHidden回调中处理气泡隐藏后的逻辑。 - 手动显示按钮: 添加一个按钮,用于手动触发引导气泡的显示。
这个示例展示了如何在Flutter中使用guide_bubble插件来创建引导气泡,并处理气泡的显示和隐藏事件。你可以根据实际需求进一步自定义气泡的内容和样式。