


HarmonyOS鸿蒙Next中日期选择功能实现
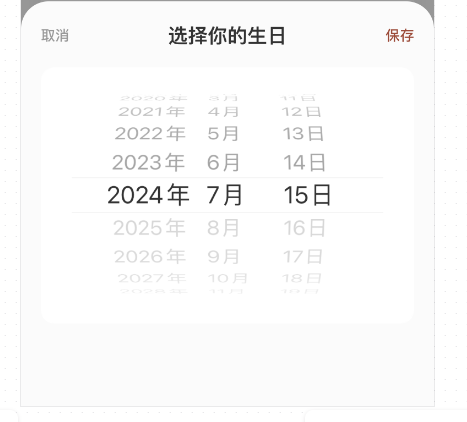
HarmonyOS鸿蒙Next中日期选择功能实现 这种日期样式有参考吗
更多关于HarmonyOS鸿蒙Next中日期选择功能实现的实战教程也可以访问 https://www.itying.com/category-93-b0.html
3 回复

import { Configuration } from '@ohos/utils/Index';

let config: Configuration = globalThis.config as Configuration

@CustomDialog
export struct CustomDatePickerDialog {
  controller: CustomDialogController
  cancel?: () => void
  confirm?: (date: Date) => void
  @Prop selectedDate: Date = new Date()
  //开始日期,默认1930-1-1
  startDate = new Date("1930-1-1")
  //结束日期,默认今天
  endDate = new Date()

  build() {
    Column() {
      Row() {
        Text('取消').fontColor('#999999')
          .width(40).onClick(() => {
          if (this.cancel) {
            this.controller.close()
            this.cancel
          }
        })
        Text('日期选择').fontColor('#222222').fontSize(16).layoutWeight(1).textAlign(TextAlign.Center)
        Text('确定').fontColor(config.content_style.color).width(40).onClick(() => {
          if (this.confirm) {
            this.controller.close()
            this.confirm(this.selectedDate)
          }

        })
      }.height(50).padding({ left: 10, right: 10 })

      DatePicker({
        selected: this.selectedDate,
        start: this.startDate,
        end: this.endDate
      }).disappearTextStyle({ color: Color.Gray, font: { size: '16fp', weight: FontWeight.Bold } })
        .textStyle({ color: '#ff182431', font: { size: '18fp', weight: FontWeight.Normal } })
        .selectedTextStyle({ color: config.content_style.color, font: { size: '26fp', weight: FontWeight.Regular } })
        .onDateChange((value: Date) => {
          this.selectedDate = value
        })
    }.backgroundColor(Color.White)
  }
}
使用的地方:
datePickerController: CustomDialogController = new CustomDialogController({
  builder: CustomDatePickerDialog({
    cancel: () => {

    },
    confirm: (date: Date) => {
      this.birthDay = DateUtil.getInstance().getDateFormatForOtherStyle(new Date(date))
      this.viewModel.userInfoEdit(this.userInfo, "birthday", this.birthDay, false)
    },
  }),
  alignment: DialogAlignment.Bottom,
  isModal: true,

  cornerRadius: ResManager.getDimenSize(DimenEnum.privacy_disagree_border_Radius),
  autoCancel: true,
  customStyle: true
})
更多关于HarmonyOS鸿蒙Next中日期选择功能实现的实战系列教程也可以访问 https://www.itying.com/category-93-b0.html


在HarmonyOS鸿蒙Next中,日期选择功能可以通过DatePicker组件实现。首先,在XML布局文件中添加DatePicker组件,设置其属性如mode(日期模式)和startDate、endDate(日期范围)。然后在Java或TS代码中监听DatePicker的onDateChanged事件,获取用户选择的日期并处理相应逻辑。例如:
<DatePicker
    ohos:id="$+id:datePicker"
    ohos:height="match_content"
    ohos:width="match_content"
    ohos:mode="date"
    ohos:startDate="2023-01-01"
    ohos:endDate="2023-12-31"/>
DatePicker datePicker = (DatePicker) findComponentById(ResourceTable.Id_datePicker);
datePicker.setDateChangedListener((view, year, month, day) -> {
    String selectedDate = year + "-" + (month + 1) + "-" + day;
    // 处理选择日期逻辑
});
通过这种方式,您可以轻松实现日期选择功能。