


HarmonyOS 鸿蒙Next中canvas画一棵随机树但是不显示
HarmonyOS 鸿蒙Next中canvas画一棵随机树但是不显示 代码如下:
@Entry
@Component
struct Index {
  @State message: string = 'Hello World';
  //用来配置CanvasRenderingContext2D对象的参数,包括是否开启抗锯齿,true表明开启抗锯齿。
  private settings: RenderingContextSettings = new RenderingContextSettings(true);
  //用来创建CanvasRenderingContext2D对象,通过在canvas中调用CanvasRenderingContext2D对象来绘制。
  private context: CanvasRenderingContext2D = new CanvasRenderingContext2D(this.settings);

  drawBranch(v0: number[], thick: number, length: number, dit: number) {
    if (thick < 10 && Math.random() < 0.3) {
      return
    }
    if (thick < 2) {
      this.context.beginPath()
      this.context.arc(v0[0], v0[1], 10, 0, 2 * Math.PI)
      this.context.fillStyle = Math.random() < 0.5 ? "#fff" : "#f40"
      this.context.fill()
      return
    }
    this.context.beginPath()
    this.context.moveTo(v0[0], v0[1])
    const v1 = [v0[0] + length * Math.cos(dit * Math.PI / 180), v0[1] + length * Math.sin(dit * Math.PI / 180)]
    this.context.moveTo(v1[0], v1[1])
    this.context.strokeStyle = "#333"
    this.context.lineCap = "round"
    this.context.lineWidth = thick
    this.context.stroke()
    // 递归
    this.drawBranch(v1, thick * 0.8, length * 0.8, dit + Math.random() * 30)
    this.drawBranch(v1, thick * 0.8, length * 0.8, dit - Math.random() * 30)
  }

  build() {
    RelativeContainer() {
      Canvas(this.context)
        .alignRules({
          center: { anchor: '__container__', align: VerticalAlign.Center },
          middle: { anchor: '__container__', align: HorizontalAlign.Center }
        })
        .width(300)
        .height(300)
        .backgroundColor('#F5DC62')

        .onReady(() => {
          this.context.translate(150, 300)
          this.context.scale(1, -1)
          this.drawBranch([0, 0], 30, 200, 90)
        })
    }
    .height('100%')
    .width('100%')
  }
}
但是运行之后效果如下:
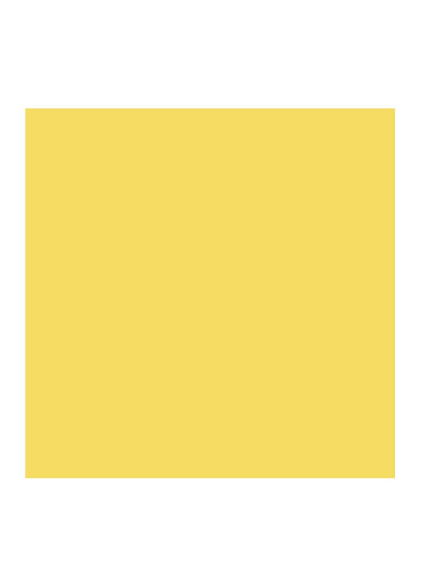
画布确实有颜色,但是里面没东西
更多关于HarmonyOS 鸿蒙Next中canvas画一棵随机树但是不显示的实战教程也可以访问 https://www.itying.com/category-93-b0.html

显式调用beginPath()和stroke()确保路径渲染
- 递归终止条件改为基于线宽阈值
- 使用三角函数计算子节点坐标时正确转换角度为弧度
- 设置合理初始坐标和背景色
- 通过
save()/restore()管理绘图状态
验证方式:
- 确保Canvas组件设置
backgroundColor - 初始坐标
[200,500]需适配实际设备分辨率 - 调整
length * 0.8系数控制分支长度衰减速度
更多关于HarmonyOS 鸿蒙Next中canvas画一棵随机树但是不显示的实战系列教程也可以访问 https://www.itying.com/category-93-b0.html

已经在代码中标注了您代码中存在的问题,并进行了修复
@Entry
@Component
struct Index {
  @State message: string = 'Hello World';  // ✅ 修复:使用正确的类型声明

  //用来配置CanvasRenderingContext2D对象的参数,包括是否开启抗锯齿,true表明开启抗锯齿。
  private settings: RenderingContextSettings = new RenderingContextSettings(true);
  //用来创建CanvasRenderingContext2D对象,通过在canvas中调用CanvasRenderingContext2D对象来绘制。
  private context: CanvasRenderingContext2D = new CanvasRenderingContext2D(this.settings);

  drawBranch(v0: number[], thick: number, length: number, dit: number) {
    // ✅ 修复:改进终止条件
    if (thick < 1) {
      return
    }

    if (thick < 2) {
      this.context.beginPath()
      this.context.arc(v0[0], v0[1], 10, 0, 2 * Math.PI)
      this.context.fillStyle = Math.random() < 0.5 ? "#fff" : "#f40"
      this.context.fill()
      return
    }

    this.context.beginPath()
    this.context.moveTo(v0[0], v0[1])
    const v1 = [v0[0] + length * Math.cos(dit * Math.PI / 180), v0[1] + length * Math.sin(dit * Math.PI / 180)]

    // ✅ 修复:正确传递坐标参数
    this.context.lineTo(v1[0], v1[1]);  // 传递x和y坐标,而不是数组

    this.context.strokeStyle = "#333"
    this.context.lineCap = "round"
    this.context.lineWidth = thick
    this.context.stroke()

    // 递归 - 添加一些随机性但保持树的形状
    const angleVariation = 20 + Math.random() * 20; // 20-40度的角度变化
    this.drawBranch(v1, thick * 0.8, length * 0.8, dit + angleVariation)
    this.drawBranch(v1, thick * 0.8, length * 0.8, dit - angleVariation)
  }

  build() {
    RelativeContainer() {
      Canvas(this.context)
        .alignRules({
          center: { anchor: '__container__', align: VerticalAlign.Center },
          middle: { anchor: '__container__', align: HorizontalAlign.Center }
        })
        .width(300)
        .height(300)
        .backgroundColor('#F5DC62')
        .onReady(() => {
          this.context.translate(150, 300)
          this.context.scale(1, -1)
          this.drawBranch([0, 0], 30, 200, 90)
        })
    }
    .height('100%')
    .width('100%')
  }
}
运行效果
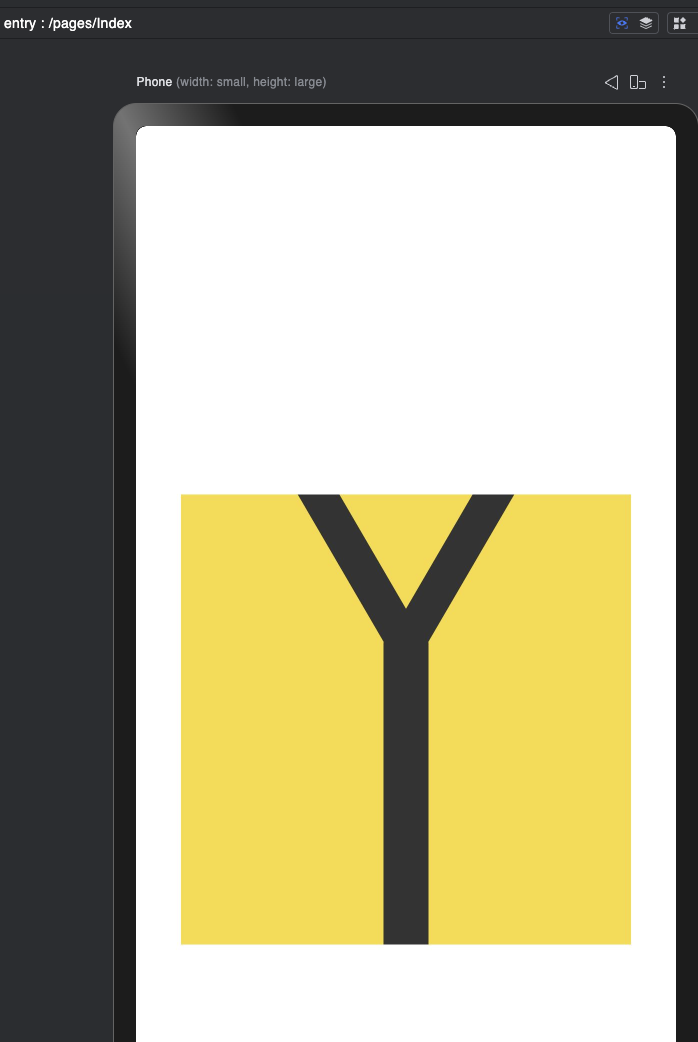

关键问题解析(原代码为什么没东西)
-
核心绘制步骤缺失
原代码中,计算出终点 v1 后,只调用了 this.context.moveTo(v1[0], v1[1]) ,没有调用 lineTo(v1[0], v1[1]) 连接起点和终点,导致“路径未形成”, stroke() 无法绘制出线段。 -
递归终止条件不合理
-
原条件 thick < 10 && Math.random() < 0.3 会让粗树枝(如初始30)直接返回,无法进入后续绘制;
-
增加 length < 5 阈值,避免细枝无限递归,同时调整概率让花朵更容易生成。
- 初始参数过大导致渲染异常
- 原初始树枝 thick: 30 (太粗,300x300画布装不下)、 length: 200 (太长,超出画布),调整为 thick:15 、 length:80 ,适配画布大小。
- 花朵半径过大
原 arc 半径10,在细枝末端会显得突兀且可能超出画布,缩小为3后更协调。

在HarmonyOS Next中,Canvas绘制随机树不显示可能是由于未正确设置Canvas尺寸或未调用绘制方法导致。请检查Canvas组件是否已设置width和height属性,并确认drawTree方法是否在组件挂载后执行。另外,确保使用ArkTS声明式语法正确绑定CanvasContext,绘制指令需在onReady回调中完成。

检查代码发现,在绘制树枝时缺少了lineTo操作。在drawBranch方法中,虽然调用了moveTo设置起点,但没有使用lineTo绘制到终点,导致路径为空。修改如下:
在计算v1坐标后,添加:
this.context.lineTo(v1[0], v1[1])
完整修改后的drawBranch方法:
drawBranch(v0: number[], thick: number, length: number, dit: number) {
  if (thick < 10 && Math.random() < 0.3) {
    return
  }
  if (thick < 2) {
    this.context.beginPath()
    this.context.arc(v0[0], v0[1], 10, 0, 2 * Math.PI)
    this.context.fillStyle = Math.random() < 0.5 ? "#fff" : "#f40"
    this.context.fill()
    return
  }
  this.context.beginPath()
  this.context.moveTo(v0[0], v0[1])
  const v1 = [v0[0] + length * Math.cos(dit * Math.PI / 180), v0[1] + length * Math.sin(dit * Math.PI / 180)]
  this.context.lineTo(v1[0], v1[1]) // 添加这行
  this.context.strokeStyle = "#333"
  this.context.lineCap = "round"
  this.context.lineWidth = thick
  this.context.stroke()
  // 递归
  this.drawBranch(v1, thick * 0.8, length * 0.8, dit + Math.random() * 30)
  this.drawBranch(v1, thick * 0.8, length * 0.8, dit - Math.random() * 30)
}
添加lineTo后,路径就能正确绘制到终点位置,树枝就会显示出来。