


HarmonyOS鸿蒙Next中开发启动页面,怎么设置全屏
HarmonyOS鸿蒙Next中开发启动页面,怎么设置全屏 通常启动页面都是全屏显示,怎么设置全屏

在进入启动页时设置为全屏模式然后隐藏状态栏,在即将结束启动页面时,在设置显示状态栏显示即可。
示例:退出页面时,调用setSpecificSystemBarEnabled启用状态栏,再调用setWindowLayoutFullscreen接口刷新布局使设置生效。
// EntryAbility.ets

onWindowStageCreate(windowStage: window.WindowStage): void {
  // Main window is created, set main page for this ability
  hilog.info(0x0000, 'testTag', '%{public}s', 'Ability onWindowStageCreate');

  windowStage.loadContent('pages/GridImage', (err) => {
    if (err.code) {
      hilog.error(0x0000, 'testTag', 'Failed to load the content. Cause: %{public}s', JSON.stringify(err) ?? '');
      return;
    }
    hilog.info(0x0000, 'testTag', 'Succeeded in loading the content.');

    let windowClass: window.Window = windowStage.getMainWindowSync(); // 获取应用主窗口
    // 1. 设置窗口全屏
    let isLayoutFullScreen = true;
    windowClass.setWindowLayoutFullScreen(isLayoutFullScreen);
    // 2. 缓存window窗口对象
    AppStorage.setOrCreate('windowClass', windowClass);
  });
}
import { window } from '@kit.ArkUI';

@Entry
@Component
struct GridImage {
  @State message: string = 'Hello World';
  @State isVisible: boolean = true;
  @State isVisibleButton: boolean = true;
  data: number[] = [];
  windowClass = AppStorage.get<window.Window>('windowClass') as window.Window;

  aboutToAppear(): void {
    for (let i = 0; i < 40; i++) {
      this.data.push(i);
    }
  }

  build() {
    Stack() {
      Grid() {
        ForEach(this.data, (item: number, index: number) => {
          GridItem() {
            Image($r('app.media.startIcon'))
              .width('100%')
              .objectFit(ImageFit.Cover)
              .onClick(() => {
                let isLayoutFullScreen = true;
                this.windowClass.setWindowLayoutFullScreen(isLayoutFullScreen);
                this.windowClass.setSpecificSystemBarEnabled('status', false);
                this.windowClass.setSpecificSystemBarEnabled('navigationIndicator', false);
                this.isVisible = !this.isVisible;
              })
          }
          .aspectRatio(1)
        }, (item: number, index: number) => JSON.stringify(item) + index)
      }
      .visibility(this.isVisible ? Visibility.Visible : Visibility.None)
      .columnsTemplate('1fr 1fr 1fr 1fr')
      .rowsGap(2)
      .columnsGap(2)
      .height('100%')
      .width('100%')

      Image($r('app.media.startIcon'))
        .objectFit(ImageFit.Contain)
        .width('100%')
        .visibility(this.isVisible ? Visibility.None : Visibility.Visible)
        .onClick(() => {
          let isLayoutFullScreen = false;
          this.windowClass.setSpecificSystemBarEnabled('status', true);
          this.windowClass.setSpecificSystemBarEnabled('navigationIndicator', true);
          this.windowClass.setWindowLayoutFullScreen(isLayoutFullScreen);
          this.isVisible = !this.isVisible;
        })
    }
  }
}
相关文档:【窗口全屏布局方案】
更多关于HarmonyOS鸿蒙Next中开发启动页面,怎么设置全屏的实战系列教程也可以访问 https://www.itying.com/category-93-b0.html

简易启动页是每个UIAbility都必须配置的能力,开发者通过配置module.json5文件中的abilities标签的startWindowIcon和startWindowBackground字段,实现简易启动页的配置。
说明
- startWindowIcon用于展示应用图标,不会随窗口尺寸进行缩放。建议开发者避免设计针对单个产品全屏尺寸的startWindowIcon图标资源,防止在其他尺寸设备的显示效果无法自动适配。
- 全屏资源的展示建议采用配置增强启动页。
在创建的UIAbility模板中,简易启动页相关字段的默认配置如下:
"startWindowIcon": "$media:startIcon",
"startWindowBackground": "$color:start_window_background",
全屏资源的展示建议采用配置增强启动页。

{
  "startWindowType": "REQUIRED_SHOW",
  "startWindowColorModeType": "FOLLOW_SYSTEM",
  "startWindowAppIcon": "$media:icon",
  "startWindowIllustration": "$media:illustration",
  "startWindowBrandingImage": "$media:brand",
  "startWindowBackgroundColor": "$color:start_window_background",
  "startWindowBackgroundImage": "$media:bgImage",
  "startWindowBackgroundImageFit": "Contain"
}
参考地址
https://developer.huawei.com/consumer/cn/doc/harmonyos-guides/launch-page-config#配置增强启动页

Image($r('app.media.launch_icon'))
.width('100%')
.height('100%')
.expandSafeArea([SafeAreaType.SYSTEM], [SafeAreaEdge.TOP, SafeAreaEdge.BOTTOM])
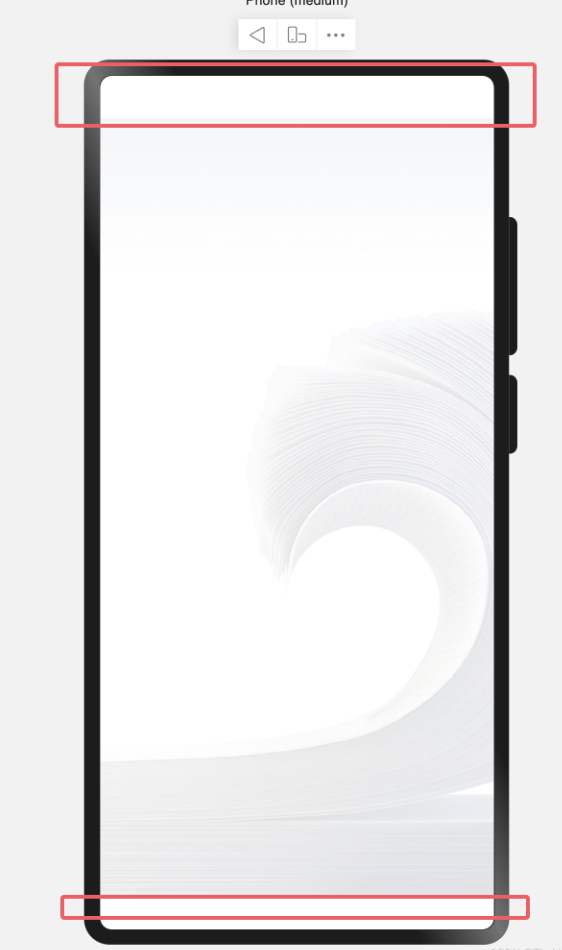
只需要给Image加上安全区域就行了,效果非常棒:

一、通常在设置启动页的时候,需要注意的状态栏颜色要一致,我们只需要在EntryAbility的onCreate方法加上下述代码
//1、设置全屏
// 获取主窗口实例
const windowClass = windowStage.getMainWindowSync();
// 设置窗口布局为全屏模式
windowClass.setWindowLayoutFullScreen(true);
// 获取系统状态栏区域信息
const avoidAreaTop = windowClass.getWindowAvoidArea(window.AvoidAreaType.TYPE_SYSTEM);
// 获取导航指示器区域信息
const avoidAreaBottom = windowClass.getWindowAvoidArea(window.AvoidAreaType.TYPE_NAVIGATION_INDICATOR);
// 获取顶部区域高度
const topRectHeight = avoidAreaTop.topRect.height;
// 获取底部区域高度
const bottomRectHeight = avoidAreaBottom.bottomRect.height;
// 将顶部区域高度存入全局应用存储
AppStorage.setOrCreate('topHeight', px2vp(topRectHeight));
// 将底部区域高度存入全局应用存储
AppStorage.setOrCreate('bottomHeight', px2vp(bottomRectHeight));
// 将窗口对象存入全局应用存储
AppStorage.setOrCreate('windowStage', windowStage)
//AppStorage.setOrCreate('enableDarkMode', true);
// AppStorage.setOrCreate('isFollowSystemSetting', true);

// 2. 设置导航条隐藏
windowClass.setSpecificSystemBarEnabled('navigationIndicator', false).then(() => {
  console.info('Succeeded in setting the navigation indicator to be invisible.');
}).catch((err: BusinessError) => {
  console.error(`Failed to set the navigation indicator to be invisible. Code is ${err.code}, message is ${err.message}`);
});
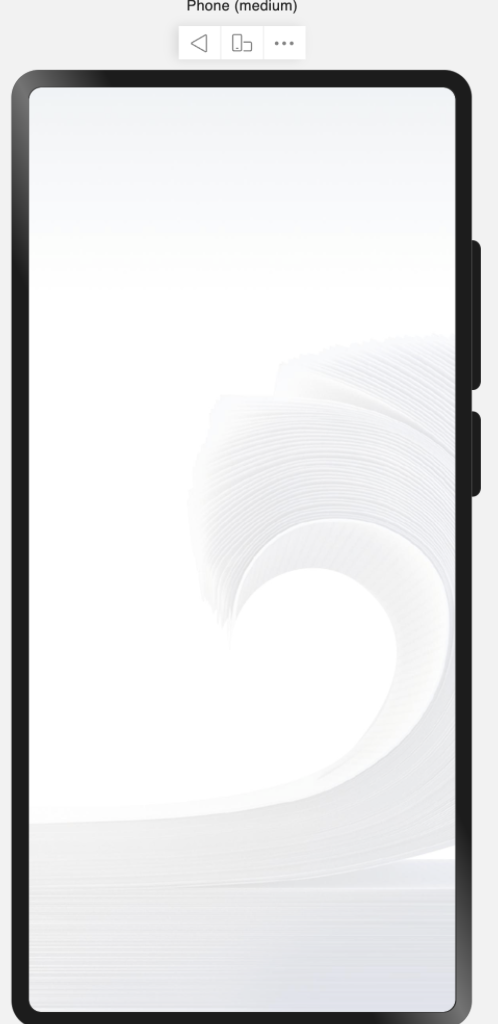
二、效果如下:


在HarmonyOS Next中,可以通过设置UIAbility的启动窗口属性来实现全屏启动页。具体操作如下:
-
在UIAbility的
onWindowStageCreate生命周期回调中设置:onWindowStageCreate(windowStage: window.WindowStage) { // 获取主窗口 let mainWindow = windowStage.getMainWindow() // 设置全屏显示 mainWindow.setWindowLayoutFullScreen(true) // 隐藏系统栏(状态栏和导航栏) mainWindow.setWindowSystemBarEnable(['status', 'navigation']) } -
在
module.json5配置文件中声明权限(如果需要隐藏系统栏):{ "module": { "requestPermissions": [ { "name": "ohos.permission.SYSTEM_FLOAT_WINDOW" } ] } }
关键点说明:
setWindowLayoutFullScreen(true):设置窗口为全屏布局模式setWindowSystemBarEnable([]):通过传入空数组来隐藏所有系统栏,或传入['status', 'navigation']控制具体显示哪些系统栏- 全屏设置应在窗口显示前完成,确保启动时即生效
这样配置后,应用启动时将直接以全屏模式显示启动页面,符合常见的启动页设计规范。