


HarmonyOS鸿蒙Next中头像圆形裁剪功能源码实现和步骤讲解
HarmonyOS鸿蒙Next中头像圆形裁剪功能源码实现和步骤讲解
头像圆形裁剪功能源码实现和步骤讲解

可以通过图片处理模块的pixelMap方法对图片进行编辑裁剪。
其中包括但不限于:
- pixelMap.crop方法,可以根据输入的尺寸对图片进行裁剪。
- pixelMap.opacity方法,可以通过设置透明比率对图片设置透明效果。
- pixelMap.scale方法,可以根据输入的宽高对图片进行缩放。
- pixelMap.rotate方法,可以根据输入的角度对图片进行旋转。
- pixelMap.flip方法,可以根据输入的条件对图片进行翻转。
以下示例代码为pixelMap.crop图片裁剪方法的使用:
// Crop 4:3
class RegionItem {
  /**
   * width coordinate.
   */
  x: number;
  /**
   * height coordinate.
   */
  y: number;
  constructor(x: number, y: number) {
    this.x = x;
    this.y = y;
  }
}
export async function cropCommon(pixelMap: PixelMap, cropWidth: number, cropHeight: number, cropPosition: RegionItem) {
  pixelMap.crop({
    size: {
      width: cropWidth,
      height: cropHeight
    },
    x: cropPosition.x,
    y: cropPosition.y
  });
}
// Pass in three parameters: image. PixelMap, image width, and image height. After obtaining the cropped image width and height,
// pass the parameters into the cropCommon method
export async function banner(pixelMap: PixelMap, width: number, height: number) {
  if (width <= height) {
    const cropWidth = width;
    const cropHeight = Math.floor(width * 0.75);
    const cropPosition = new RegionItem(0, Math.floor((height - cropHeight) / 2));
    cropCommon(pixelMap, cropWidth, cropHeight, cropPosition);
    return;
  }
  if (width * 0.75 >= height) {
    const cropWidth = Math.floor(height / 0.75);
    const cropHeight = height;
    const cropPosition = new RegionItem(Math.floor((width - cropWidth) / 2), 0);
    cropCommon(pixelMap, cropWidth, cropHeight, cropPosition);
    return;
  }
  const cropWidth = width;
  const cropHeight = Math.floor(width * 0.75);
  const cropPosition = new RegionItem(0, Math.floor((height - cropHeight) / 2));
  cropCommon(pixelMap, cropWidth, cropHeight, cropPosition);
}
更多关于HarmonyOS鸿蒙Next中头像圆形裁剪功能源码实现和步骤讲解的实战系列教程也可以访问 https://www.itying.com/category-93-b0.html

一、结论
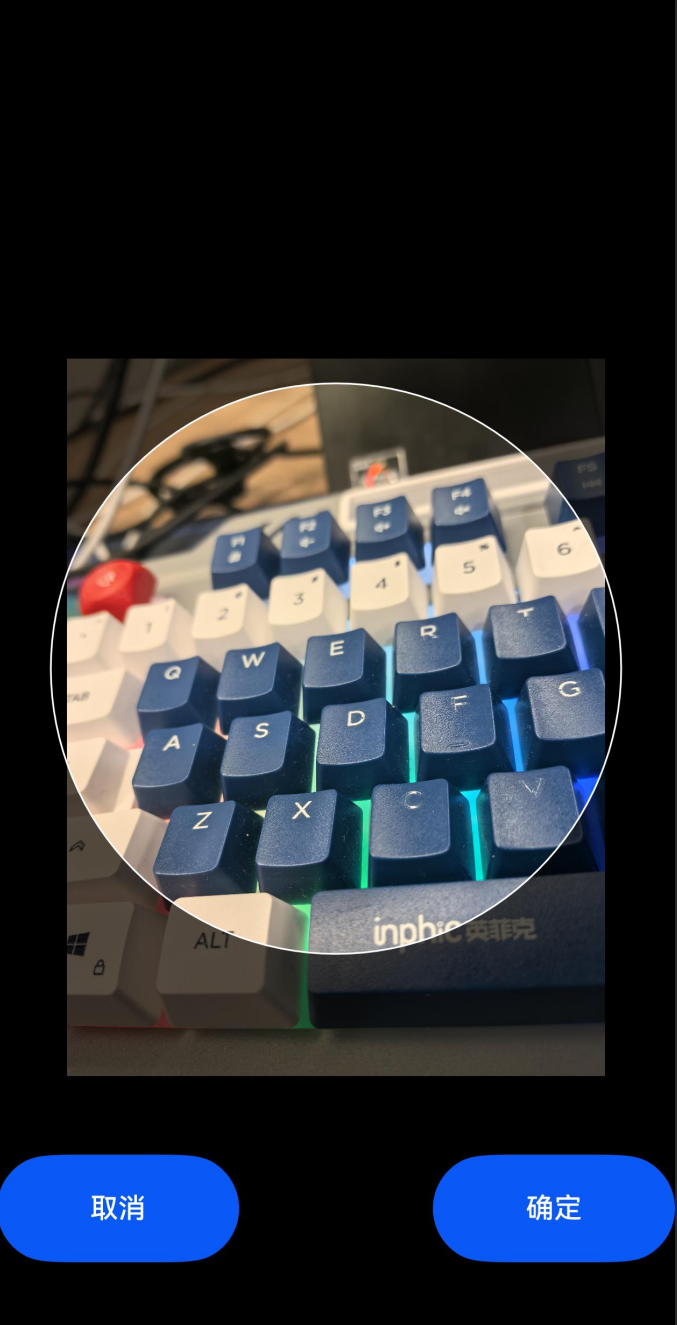
1、首先使用Canvas来实现取景框,画出圆形边框和遮罩。
2、通过监听点击手势TapGesture,缩放手势PinchGesture,拖动手势PanGesture进行手势操作的功能实现。
3、使用矩阵变换控制图片的放大缩小和平移形态。 通过对矩阵变换参数mMatrix的赋值,将矩阵变换参数赋值给image控件。实现手势操作和图片操作的同步。 该参数拥有四维坐标,只需要通过手势操作调整四个参数即可实现。通过.transform(this.mMatrix)赋值给image控件。
通过image的.onComplete(this.onLoadImgComplete)函数回调,获取图片控件的宽高和内容宽高等参数。以此为基准,手势操作调整的都是这些值。
二、代码实现和详细解释
import router from '@ohos.router';
import { CropMgr, ImageInfo } from '../manager/CropMgr'; // 单例缓存图片信息,可以自己创建
import { image } from '@kit.ImageKit';
import Matrix4 from '@ohos.matrix4';
import FS from '@ohos.file.fs';

export class LoadResult {
  width: number = 0;
  height: number = 0;
  componentWidth: number = 0;
  componentHeight: number = 0;
  loadingStatus: number = 0;
  contentWidth: number = 0;
  contentHeight: number = 0;
  contentOffsetX: number = 0;
  contentOffsetY: number = 0;
}


@Entry
@Component
export struct CropPage {
  private TAG: string = "CropPage";

  private mRenderingContextSettings: RenderingContextSettings = new RenderingContextSettings(true);
  private mCanvasRenderingContext2D: CanvasRenderingContext2D = new CanvasRenderingContext2D(this.mRenderingContextSettings);

  // 加载图片
  @State mImg: PixelMap | undefined = undefined;
  // 图片矩阵变换参数
  @State mMatrix: object = Matrix4.identity()
    .translate({ x: 0, y: 0 })
    .scale({ x: 1, y: 1});

  @State mImageInfo: ImageInfo = new ImageInfo();

  private tempScale = 1;
  private startOffsetX: number = 0;
  private startOffsetY: number = 0;

  aboutToAppear(): void {
    console.log(this.TAG, "aboutToAppear start");
    let temp = CropMgr.Ins().mSourceImg;
    console.log(this.TAG, "aboutToAppear temp: " + JSON.stringify(temp));
    this.mImg = temp;
    console.log(this.TAG, "aboutToAppear end");
  }

  private getImgInfo(){
    return this.mImageInfo;
  }

  onClickCancel = ()=>{
    router.back();
  }

  onClickConfirm = async ()=>{
    if(!this.mImg){
      console.error(this.TAG, " onClickConfirm mImg error null !");
      return;
    }

    // 存当前裁剪的图
	// ...
    router.back();
  }

  /**
   * 复制图片
   * @param pixel
   * @returns
   */
  async copyPixelMap(pixel: PixelMap): Promise<PixelMap> {
    const info: image.ImageInfo = await pixel.getImageInfo();
    const buffer: ArrayBuffer = new ArrayBuffer(pixel.getPixelBytesNumber());
    await pixel.readPixelsToBuffer(buffer);
    const opts: image.InitializationOptions = {
      editable: true,
      pixelFormat: image.PixelMapFormat.RGBA_8888,
      size: { height: info.size.height, width: info.size.width }
    };
    return image.createPixelMap(buffer, opts);
  }

  /**
   * 图片加载回调
   */
  private onLoadImgComplete = (msg: LoadResult) => {
    this.getImgInfo().loadResult = msg;
    this.checkImageScale();
  }

  /**
   * 绘制画布中的取景框
   */
  private onCanvasReady = ()=>{
    if(!this.mCanvasRenderingContext2D){
      console.error(this.TAG, "onCanvasReady error mCanvasRenderingContext2D null !");
      return;
    }
    let cr = this.mCanvasRenderingContext2D;
    // 画布颜色
    cr.fillStyle = '#AA000000';
    let height = cr.height;
    let width = cr.width;
    cr.fillRect(0, 0, width, height);

    // 圆形的中心点
    let centerX = width / 2;
    let centerY = height / 2;
    // 圆形半径
    let radius = Math.min(width, height) / 2 - px2vp(100);
    cr.globalCompositeOperation = 'destination-out'
    cr.fillStyle = 'white'
    cr.beginPath();
    cr.arc(centerX, centerY, radius, 0, 2 * Math.PI);
    cr.fill();

    cr.globalCompositeOperation = 'source-over';
    cr.strokeStyle = '#FFFFFF';
    cr.beginPath();
    cr.arc(centerX, centerY, radius, 0, 2 * Math.PI);
    cr.closePath();

    cr.lineWidth = 1;
    cr.stroke();
  }

  build() {
    RelativeContainer() {
      // 黑色底图
      Row().width("100%").height("100%").backgroundColor(Color.Black)

      // 用户图
      Image(this.mImg)
        .objectFit(ImageFit.Contain)
        .width('100%')
        .height('100%')
        .transform(this.mMatrix)
        .alignRules({
          center: { anchor: '__container__', align: VerticalAlign.Center },
          middle: { anchor: '__container__', align: HorizontalAlign.Center }
        })
        .onComplete(this.onLoadImgComplete)

      // 取景框
      Canvas(this.mCanvasRenderingContext2D)
        .width('100%')
        .height('100%')
        .alignRules({
          center: { anchor: '__container__', align: VerticalAlign.Center },
          middle: { anchor: '__container__', align: HorizontalAlign.Center }
        })
        .backgroundColor(Color.Transparent)
        .onReady(this.onCanvasReady)
        .clip(true)
        .backgroundColor("#00000080")

      Row(){
        Button("取消")
          .size({
            width: px2vp(450),
            height: px2vp(200)
          })
          .onClick(this.onClickCancel)

        Blank()

        Button("确定")
          .size({
            width: px2vp(450),
            height: px2vp(200)
          })
          .onClick(this.onClickConfirm)
      }
      .width("100%")
      .height(px2vp(200))
      .margin({ bottom: px2vp(500) })
      .alignRules({
        center: { anchor: '__container__', align: VerticalAlign.Bottom },
        middle: { anchor: '__container__', align: HorizontalAlign.Center }
      })
      .justifyContent(FlexAlign.Center)

    }
    .width("100%").height("100%")
    .priorityGesture(
      // 点击手势
      TapGesture({
        // 点击次数
        count: 2,
        // 一个手指
        fingers: 1
      }).onAction((event: GestureEvent)=>{
        console.log(this.TAG, "TapGesture onAction start");
        if(!event){
          return;
        }
        if(this.getImgInfo().scale != 1){
          this.getImgInfo().scale = 1;
          this.getImgInfo().offsetX = 0;
          this.getImgInfo().offsetY = 0;
          this.mMatrix = Matrix4.identity()
            .translate({
              x: this.getImgInfo().offsetX,
              y: this.getImgInfo().offsetY
            })
            .scale({
              x: this.getImgInfo().scale,
              y: this.getImgInfo().scale
            })
        }else{
          this.getImgInfo().scale = 2;
          this.mMatrix = Matrix4.identity()
            .translate({
              x: this.getImgInfo().offsetX,
              y: this.getImgInfo().offsetY
            })
            .scale({
              x: this.getImgInfo().scale,
              y: this.getImgInfo().scale
            })
        }

        console.log(this.TAG, "TapGesture onAction end");
      })
    )
    .gesture(GestureGroup(
      GestureMode.Parallel,
      // 缩放手势
      PinchGesture({
        // 两指缩放
        fingers: 2
      })
        .onActionStart(()=>{
          console.log(this.TAG, "PinchGesture onActionStart");
          this.tempScale = this.getImgInfo().scale;
        })
        .onActionUpdate((event)=>{
          console.log(this.TAG, "PinchGesture onActionUpdate" + JSON.stringify(event));
          if(event){
            this.getImgInfo().scale = this.tempScale * event.scale;
            this.mMatrix = Matrix4.identity()
              .translate({
                x: this.getImgInfo().offsetX,
                y: this.getImgInfo().offsetY
              })
              .scale({
                x: this.getImgInfo().scale,
                y: this.getImgInfo().scale
              })
          }
        })
        .onActionEnd(()=>{
          console.log(this.TAG, "PinchGesture onActionEnd");

        })
      ,
      // 拖动手势
      PanGesture()
        .onActionStart(()=>{
          console.log(this.TAG, "PanGesture onActionStart");
          this.startOffsetX = this.getImgInfo().offsetX;
          this.startOffsetY = this.getImgInfo().offsetY;
      })
        .onActionUpdate((event)=>{
          console.log(this.TAG, "PanGesture onActionUpdate" + JSON.stringify(event));
          if(event){
            let distanceX: number = this.startOffsetX + vp2px(event.offsetX) / this.getImgInfo().scale;
            let distanceY: number = this.startOffsetY + vp2px(event.offsetY) / this.getImgInfo().scale;
            this.getImgInfo().offsetX = distanceX;
            this.getImgInfo().offsetY = distanceY;
            this.mMatrix = Matrix4.identity()
              .translate({
                x: this.getImgInfo().offsetX,
                y: this.getImgInfo().offsetY
              })
              .scale({
                x: this.getImgInfo().scale,
                y: this.getImgInfo().scale
              })
          }
        })
        .onActionEnd(()=>{
          console.log(this.TAG, "PanGesture onActionEnd");
        })
    ))
  }
}
interface LoadResult {
  width: number;
  height: number;
  componentWidth: number;
  componentHeight: number;
  loadingStatus: number;
  contentWidth: number;
  contentHeight: number;
  contentOffsetX: number;
  contentOffsetY: number;
}

@Component
export struct CropView {
  private TAG: string = "CropView";

  private mRenderingContextSettings: RenderingContextSettings = new RenderingContextSettings(true);
  private mCanvasRenderingContext2D: CanvasRenderingContext2D = new CanvasRenderingContext2D(this.mRenderingContextSettings);

  @Link mImg: PixelMap;


  private onLoadImgComplete = (msg: LoadResult) => {

  }

  private onCanvasReady = ()=>{
    if(!this.mCanvasRenderingContext2D){
      console.error(this.TAG, "onCanvasReady error mCanvasRenderingContext2D null !");
      return;
    }
    let cr = this.mCanvasRenderingContext2D;
    // 画布颜色
    cr.fillStyle = '#AA000000';
    let height = cr.height;
    let width = cr.width;
    cr.fillRect(0, 0, width, height);

    // 圆形的中心点
    let centerX = width / 2;
    let centerY = height / 2;
    // 圆形半径
    let radius = Math.min(width, height) / 2 - 100;
    cr.globalCompositeOperation = 'destination-out'
    cr.fillStyle = 'white'
    cr.beginPath();
    cr.arc(centerX, centerY, radius, 0, 2 * Math.PI);
    cr.fill();

    cr.globalCompositeOperation = 'source-over';
    cr.strokeStyle = '#FFFFFF';
    cr.beginPath();
    cr.arc(centerX, centerY, radius, 0, 2 * Math.PI);
    cr.closePath();

    cr.lineWidth = 1;
    cr.stroke();
  }

  build() {
    Stack() {
      // 黑色底图
      Row().width("100%").height("100%").backgroundColor(Color.Black)

      // 用户图
      Image(this.mImg)
        .objectFit(ImageFit.Fill)
        .width('100%')
        .aspectRatio(1)
        .onComplete(this.onLoadImgComplete)

      // 取景框
      Canvas(this.mCanvasRenderingContext2D)
        .width('100%')
        .height('100%')
        .backgroundColor(Color.Transparent)
        .onReady(this.onCanvasReady)
        .clip(true)
        .backgroundColor("#00000080")

    }.width("100%").height("100%")
  }
}

鸿蒙Next中头像圆形裁剪功能通过PixelMap和Effect实现。主要步骤:1. 使用Image组件加载图片资源。2. 通过PixelMap API获取图像数据。3. 创建CircleEffect并设置半径参数。4. 使用RenderNode将Effect应用到PixelMap。5. 将处理后的PixelMap设置为Image显示。关键代码涉及Image、PixelMap、CircleEffect和RenderNode的配合使用。

在HarmonyOS Next中实现头像圆形裁剪功能,主要涉及Image组件、Canvas绘制和图形变换。以下是核心实现步骤和源码解析:
一、核心实现步骤
- 获取原始图片:通过
Image组件加载或从系统选择图片。 - 创建画布:使用
Canvas组件作为绘制容器。 - 圆形裁剪绘制:
- 通过
CanvasRenderingContext2D的arc()方法绘制圆形路径。 - 使用
clip()方法将绘制区域限制为圆形。 - 调用
drawImage()将图片绘制到圆形区域内。
- 通过
- 导出结果:通过
Canvas的toDataURL()或toPixelMap()获取裁剪后的图像数据。
二、关键代码示例
// 1. 创建Canvas组件
Canvas(this.context)
  .width('100%')
  .height('100%')
  .onReady(() => {
    this.drawCircularAvatar();
  })

// 2. 圆形裁剪绘制方法
private drawCircularAvatar() {
  const ctx = this.context.getContext('2d') as CanvasRenderingContext2D;
  const img = new Image();

  // 加载图片
  img.src = 'path/to/avatar.jpg';
  img.onload = () => {
    const diameter = Math.min(img.width, img.height);

    // 开始绘制路径
    ctx.beginPath();
    // 绘制圆形(圆心坐标x, y, 半径, 起始角, 结束角)
    ctx.arc(diameter/2, diameter/2, diameter/2, 0, Math.PI * 2);
    ctx.clip(); // 裁剪为圆形

    // 绘制图片(调整到圆形区域内)
    ctx.drawImage(img, 0, 0, diameter, diameter);

    // 可选:绘制圆形边框
    ctx.lineWidth = 2;
    ctx.strokeStyle = '#FFFFFF';
    ctx.stroke();
  };
}

// 3. 获取裁剪后的图像数据
const pixelMap = await this.context.toPixelMap();
// 或获取Base64数据
const dataURL = this.context.toDataURL();
三、注意事项
- 性能优化:大图片建议先压缩再绘制,避免内存占用过高。
- 自适应布局:通过
Rect获取容器尺寸,实现响应式圆形裁剪。 - 交互增强:可结合
PanGesture和PinchGesture实现手势缩放和移动功能。
四、扩展功能
- 添加边框、阴影等视觉效果
- 支持实时预览和调整裁剪区域
- 集成图片滤镜和色彩调整
此实现方案充分利用了HarmonyOS Next的图形绘制能力,通过Canvas的路径裁剪功能高效完成圆形头像处理。