


HarmonyOS鸿蒙Next中如何实现毛玻璃(模糊)效果?
HarmonyOS鸿蒙Next中如何实现毛玻璃(模糊)效果? 背景图片需添加毛玻璃效果,提升UI层次感。
4 回复

Column () {
}
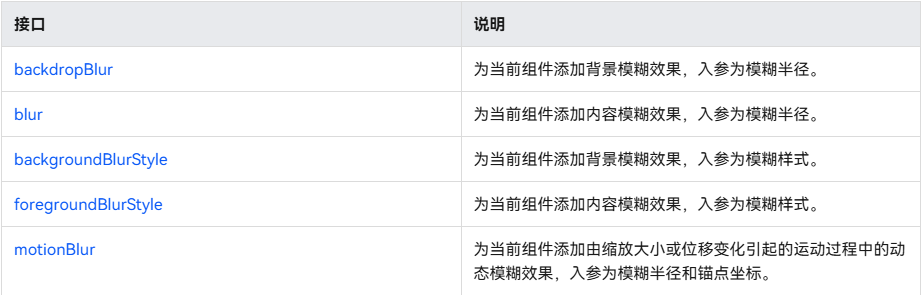
.backgroundColor('rgba(153, 153, 153, 0.50)')
.backdropBlur(50)
更多关于HarmonyOS鸿蒙Next中如何实现毛玻璃(模糊)效果?的实战系列教程也可以访问 https://www.itying.com/category-93-b0.html

通过Image组件的blur方法实现,opacity示例代码:
/**
 * @author J.query
 * @date 2025/12/23 09:07
 * @email j-query@foxmail.com
 * Description:
 */

@Entry
@Component
struct BlurEffect {
  build() {
    Stack() {
      // 背景图片
      Image('网络图片地址')
        .width('100%')
        .height('100%')
      // 毛玻璃层
      Image('网络图片地址')
        .width('100%')
        .height('100%')
        .blur(20) // 模糊半径20
        .opacity(0.8)
      // 内容区域
      Column() {
        Text('毛玻璃效果')
          .fontSize(20)
          .fontColor(Color.White)
      }
      .alignItems(HorizontalAlign.Center)
      .justifyContent(FlexAlign.Center)
    }
    .width('100%')
    .height('100%')
  }
}

效果:背景图片呈现模糊效果,文字清晰可读。

在HarmonyOS Next中实现毛玻璃效果,可以使用EffectComponent组件并设置blur样式。具体步骤:
- 导入
@ohos.graphics.effectComponent模块。 - 在UI中创建
EffectComponent。 - 设置
blurStyle属性,通过radius参数调整模糊半径。
示例代码:
import { EffectComponent } from '@ohos.graphics.effectComponent';

// 在build函数中
EffectComponent()
  .blurStyle({ radius: 10 })
  .backgroundBlurStyle(BlurStyle.THIN)
通过调整模糊半径和背景模糊样式控制毛玻璃强度。
