


HarmonyOS 鸿蒙Next中关于挖孔避让的问题
HarmonyOS 鸿蒙Next中关于挖孔避让的问题
如题,我在设计自定义标题栏的时候发现一个问题,如果通过
const cutOut: window.AvoidArea = this.windowClass.getWindowAvoidArea(window.AvoidAreaType.TYPE_CUTOUT)
width = px2vp(cutOut.topRect.width)
获取挖孔的长宽
我想让标题栏左侧通过.padding({left: width})
避让挖孔区域的时候出现了这样一个问题
比如我的有一个平板设备 ,横屏状态下的挖孔区域是左上角,这个时候我的标题栏左边组件就会离开边缘一个挖孔的区域(如图1),而我看系统原生的组件则会贴紧侧边(如图2)
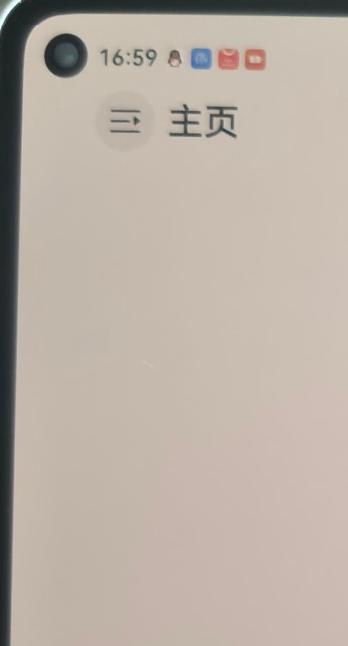
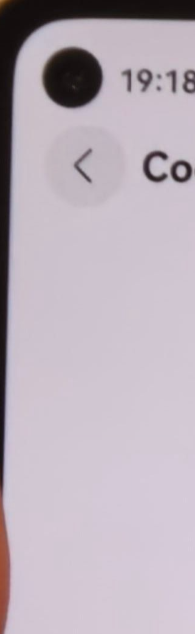
请问我想要实现类似于系统标题栏的根据相对位置避让的效果要怎么写呢
更多关于HarmonyOS 鸿蒙Next中关于挖孔避让的问题的实战教程也可以访问 https://www.itying.com/category-93-b0.html

开发者您好,关于挖孔避让的问题,您可参考官方的文档:挖孔避让案例,如何完成挖孔屏的适配。
更多关于HarmonyOS 鸿蒙Next中关于挖孔避让的问题的实战系列教程也可以访问 https://www.itying.com/category-93-b0.html

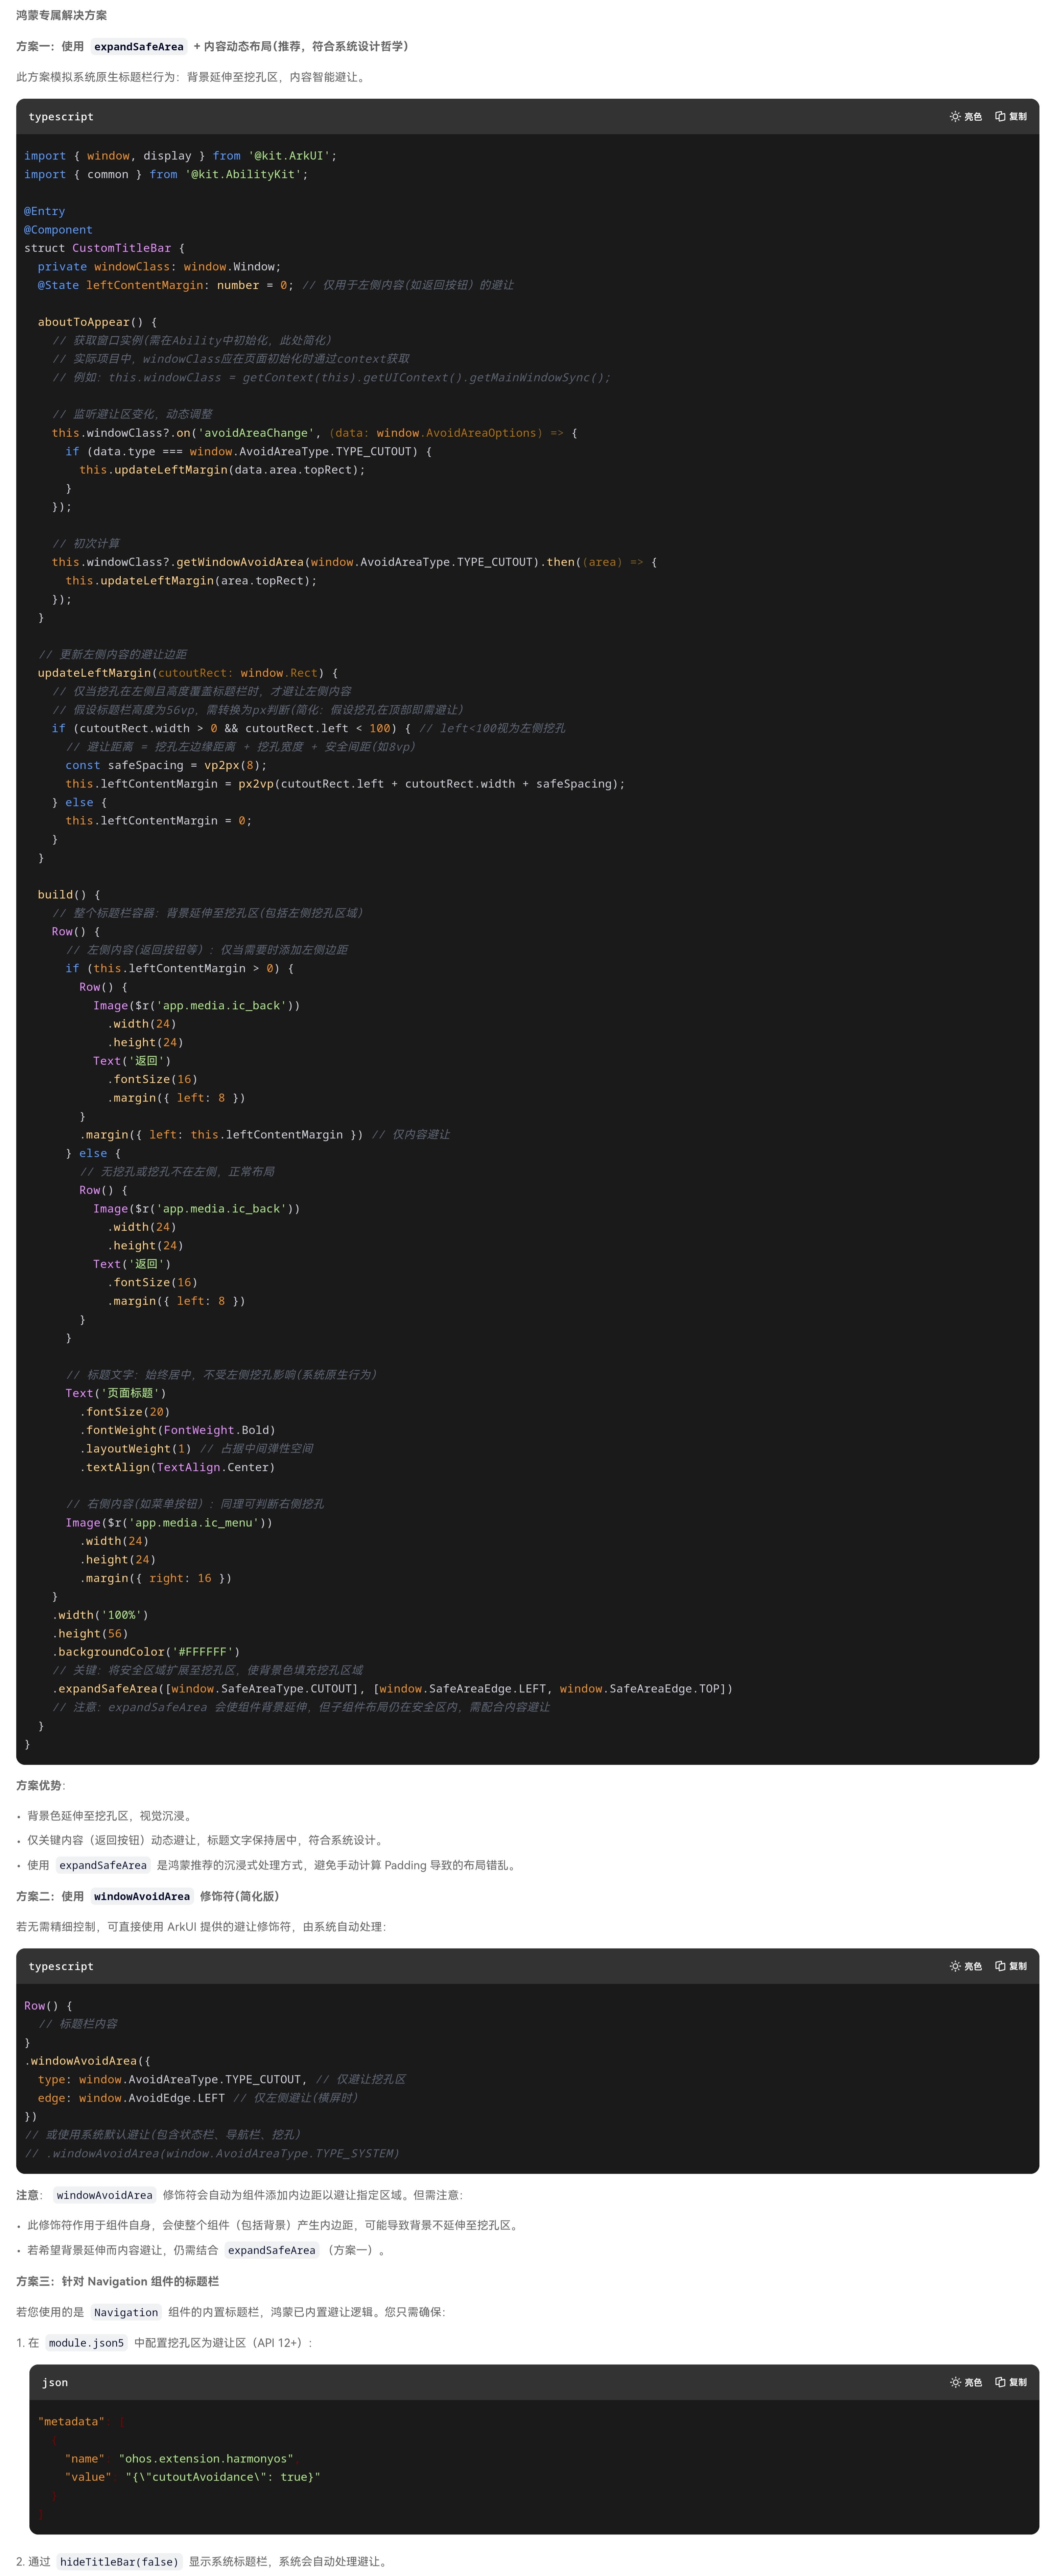

您的代码问题:对整个Row容器设置左侧Padding,导致背景和内容一起右移,左侧留白。正确做法是:背景延伸( expandSafeArea ),仅内容避让(动态调整内容边距)。

1.优先使用 expandSafeArea 处理背景延伸,实现沉浸式视觉。
2.内容避让需精细化:仅对可能被遮挡的子组件(如返回按钮)动态计算边距,而非整个容器。
3.善用系统能力:windowAvoidArea 修饰符可简化避让,但需理解其作用范围;Navigation 等系统组件已内置避让逻辑,优先使用。
4.单位注意:鸿蒙中布局单位推荐使用 vp(虚拟像素),计算时需通过 vp2px / px2vp 转换。

官方挖孔屏适配:https://developer.huawei.com/consumer/cn/doc/harmonyos-faqs/faqs-arkui-274
使用setWindowLayoutFullScreen和setWindowSystemBarEnable将窗口设置为全屏并隐藏顶部状态栏。
onWindowStageCreate(windowStage: window.WindowStage): void {
  AppStorage.setOrCreate('context', this.context);
  windowStage.getMainWindow((err: BusinessError, window: window.Window) => {
    // The settings window is displayed in full screen
    window.setWindowLayoutFullScreen(true)
      .then(() => {
        console.info('Succeeded in setting the window layout to full-screen mode.');
      }).catch((err: BusinessError) => {
      console.error(`Failed to set the window layout to full-screen mode. Cause code: ${err.code}, message: ${err.message}`);
    });
    // Set the top status bar to be hidden
    let names: Array<'status' | 'navigation'> = [];
    window.setWindowSystemBarEnable(names)
      .then(() => {
        console.info('Succeeded in setting the system bar to be invisible.');
      }).catch((err: BusinessError) => {
      console.error(`Failed to set the system bar to be invisible. Cause code: ${err.code}, message: ${err.message}`);
    });
  })
  // ...
}
使用getDefaultDisplaySync获取同步display对象,再通过其异步方法getCutoutInfo回调获取挖孔区域信息,然后根据这些信息计算偏移量,实现对不可用区域的适配。
import { display, window } from '@kit.ArkUI';
import { common } from '@kit.AbilityKit';
import { BusinessError, batteryInfo } from '@kit.BasicServicesKit';
import { hilog } from '@kit.PerformanceAnalysisKit';

class TextMargin {
  left: number = 0; // Status bar left offset
  right: number = 0; // Status bar right offset
}

@Entry
@Component
struct Index {
  @State date: Date = new Date();
  @State currentTime: string = ''; // Top status bar time
  @State boundingRect: display.Rect[] = []; // Unavailable area data
  @State screenWidth: number = 0; // Screen width
  @State displayClass: display.Display | null = null;
  @State topTextMargin: TextMargin = { left: 0, right: 0 }; // Top status bar offset
  @StorageLink('context') context: common.UIAbilityContext | undefined = AppStorage.get('context'); // Get UIAbilityContext

  aboutToAppear(): void {
    try {
      this.displayClass = display.getDefaultDisplaySync();
      display.getDefaultDisplaySync().getCutoutInfo((err, data) => {
        if (err.code !== 0) {
          console.log('getCutoutInfo failed. error is:', JSON.stringify(err));
          return;
        }
        this.boundingRect = data.boundingRects;
        this.topTextMargin = this.getBoundingRectPosition();
      })
    } catch (error) {
      let err = error as BusinessError;
      hilog.error(0x000, 'testTag', `err.code=${err.code}, err.message=${err.message}`);
    }
    // Get hour
    let hours = this.date.getHours();
    // Get minute
    let minutes = this.date.getMinutes();
    // Add 0 before minute if less than 10
    this.currentTime = hours.toString() + ':' + (minutes < 10 ? '0' + minutes : minutes.toString());
  }

  // Reset window to initial state when leaving the page
  aboutToDisappear() {
    if (this.context !== undefined) {
      window.getLastWindow(this.context, async (err, data) => {
        if (err.code !== 0) {
          console.log('getLastWindow failed. error is:', JSON.stringify(err));
          data.setWindowSystemBarEnable(['status', 'navigation'])
            .then(() => {
              hilog.info(0x000, 'testTag', `setWindowSystemBarEnable succeed.`);
            })
            .catch((err: BusinessError) => {
              hilog.error(0x000, 'testTag',
                `setWindowSystemBarEnable failed. err.code=${err.code}, err.message=${err.message}`);
            })
          data.setWindowLayoutFullScreen(false)
            .then(() => {
              hilog.info(0x000, 'testTag', `setWindowLayoutFullScreen succeed.`);
            })
            .catch((err: BusinessError) => {
              hilog.error(0x000, 'testTag',
                `setWindowLayoutFullScreen failed. err.code=${err.code}, err.message=${err.message}`);
            })
        }
      })
    }
  }

  /**
   * Calculate the left and right margins of the unusable areas of the punch hole screen
   * @returns {TextMargin} Objects that include left/right offsets
   */
  getBoundingRectPosition(): TextMargin {
    if (this.boundingRect !== null && this.displayClass !== null && this.boundingRect[0] !== undefined) {
      // Distance from the right of the unavailable area to the right edge of the screen: screen width minus left width and unavailable area width
      let boundingRectRight: number =
        this.displayClass.width - (this.boundingRect[0].left + this.boundingRect[0].width);
      // Distance from the left of the unavailable area to the left edge of the screen: can be obtained directly by getCutoutInfo
      let boundingRectLeft: number = this.boundingRect[0].left;
      // For some devices, if the unavailable area is in the middle, the difference between the left and right distances is less than 10 pixels, treat it as being in the middle
      if (Math.abs(boundingRectLeft - boundingRectRight) <= 10) {
        return { left: 0, right: 0 };
      }
      if (boundingRectLeft > boundingRectRight) {
        // Unavailable area on the right
        return { left: 0, right: this.displayClass.width - boundingRectLeft };
      } else if (boundingRectLeft < boundingRectRight) {
        // Unavailable area on the left
        return { left: this.boundingRect[0].left + this.boundingRect[0].width, right: 0 };
      }
    }
    return { left: 0, right: 0 };
  }

  build() {
    Stack() {
      Image($r('app.media.digging_hole_screen_2048game'))
        .objectFit(ImageFit.Fill)
        .width('100%')
        .height('100%')
        .onClick(() => {
          try {
            this.getUIContext().getPromptAction().showToast({
              message: 'This function is not yet developed',
              duration: 2000
            })
          } catch (error) {
            let err = error as BusinessError;
            hilog.error(0x000, 'testTag', `showToast failed. err.code=${err.code}, err.message=${err.message}`);
          }
        })
      Column() {
        Flex({ direction: FlexDirection.Row, justifyContent: FlexAlign.SpaceBetween }) {
          Text(this.currentTime) // Time
            .fontSize(16)
            .fontColor(Color.Black)
            .fontWeight(FontWeight.Regular)
            .padding({ left: 12 })
            .margin({
              left: this.getUIContext().px2vp(this.topTextMargin.left),
              top: 14
            }) // The obtained offset is in px and needs to be converted
          Text(batteryInfo.batterySOC.toString() + '%')// Battery level
            .fontSize(16)
            .fontColor(Color.Black)
            .fontWeight(FontWeight.Regular)
            .padding({ right: 16 })
            .margin({
              right: this.getUIContext().px2vp(this.topTextMargin.right),
              top: 14
            }) // The obtained offset is in px and needs to be converted
        }
        .width('100%')
      }
      .width('100%')
    }
    .width('100%')
    .height('100%')
    .alignContent(Alignment.TopStart)
  }
}
还可以参考一下官方示例:https://gitcode.com/HarmonyOS_Samples/Immersive

系统的适配策略是:横屏时,挖孔在侧边 → 内容可以延伸到挖孔下方(挖孔不遮挡主要内容);竖屏时,挖孔在顶部 → 内容需要下移避让(挖孔会遮挡内容),而你的代码无条件应用 padding,导致横屏时也留出了不必要的空白。
建议方案:动态监测屏幕方向,横屏时不避让侧边挖孔;用 ignoresSafeArea 让背景延伸到挖孔下方;内容区域根据方向动态调整 padding


可以通过AvoidAreaType.TYPE_CUTOUT来获取挖孔区域信息
public onAvoidAreaChange: (avoidOptions: window.AvoidAreaOptions) => void =
  (avoidOptions: window.AvoidAreaOptions) => {
    if (avoidOptions.type === window.AvoidAreaType.TYPE_SYSTEM) {
      // Default area of the system.
      this.mainWindowInfo.avoidSystem = avoidOptions.area;
    } else if (avoidOptions.type === window.AvoidAreaType.TYPE_CUTOUT) {
      // Cutout area.
      this.mainWindowInfo.avoidCutout = avoidOptions.area;
      this.updateAvoidPadding(avoidOptions.area);
    } else if (avoidOptions.type === window.AvoidAreaType.TYPE_SYSTEM_GESTURE) {
      // Side return gesture area.
      this.mainWindowInfo.avoidSystemGesture = avoidOptions.area;
    } else if (avoidOptions.type === window.AvoidAreaType.TYPE_KEYBOARD) {
      // Fixed soft keyboard area.
      this.mainWindowInfo.avoidKeyboard = avoidOptions.area;
    } else if (avoidOptions.type === window.AvoidAreaType.TYPE_NAVIGATION_INDICATOR) {
      // Bottom navigation bar.
      this.mainWindowInfo.avoidNavigationIndicator = avoidOptions.area;
    }
  };
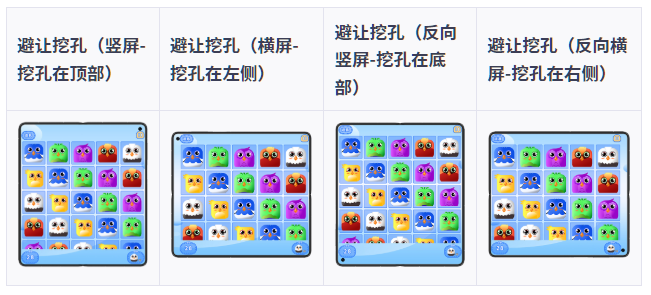
根据挖孔区方位,确定避让方向,并记录在状态变量avoidAreaPadding中。
- 挖孔区在顶部,则顶部避让 = 挖孔区距屏幕顶部边缘的距离 + 挖孔区域的高度。
- 挖孔区在左侧,则左侧避让 = 挖孔区距屏幕左侧边缘的距离 + 挖孔区域的宽度。
- 挖孔区在右侧,则右侧避让 = 屏幕宽度 - 挖孔区距屏幕左侧边缘的距离。
- 挖孔区在底部,则底部避让 = 屏幕高度 - 挖孔区距屏幕顶部距离。
参考地址
不建议只用 cutOut.topRect.width 做固定左边距。挖孔避让要判断挖孔实际落在哪条边,并监听变化。建议监听 on(‘avoidAreaChange’) 的 AvoidAreaType.TYPE_CUTOUT,分别检查 topRect / leftRect / rightRect / bottomRect:顶部才加 top,左侧才加 left,右侧才加 right,底部才加 bottom。横屏左侧挖孔应按 leftRect.left + leftRect.width 算左侧避让;如果只是标题栏左侧按钮可能碰到挖孔,不要整条标题栏整体 padding,而是只给可能重叠的按钮组加局部避让。系统标题栏看起来贴边,本质上也是按控件位置局部避让,不是简单全栏缩进。参考:https://developer.huawei.com/consumer/cn/doc/best-practices/bpta-multi-device-window-immersive
可以通过获取屏幕横向断点来做吧,具体在文档中直接搜断点或者响应式布局,获取到断点后switch case或者if判断来返回避让值到panding,比如检测到lg断点就返回10,sm就返回0,

在HarmonyOS Next中,挖孔避让可通过设置安全区域(SafeArea)或使用系统提供的避让区域API实现。利用ArkUI组件的safeAreaInsets属性或Window窗口的displayCutout接口获取打孔区域,调整布局参数(如margin、padding)避开切口。对于非全屏场景,系统默认自动避让。
您遇到的现象是因为对整个标题栏容器设置了 padding,导致背景也被推开;而系统标题栏背景是全屏延伸的,仅内容部分避让摄像头。
HarmonyOS 中 window.getWindowAvoidArea(AvoidAreaType.TYPE_CUTOUT) 返回的是挖孔在窗口中的绝对区域(含状态栏高度)。如果标题栏本身在状态栏下方,这个偏移是多余的;如果标题栏需沉浸到状态栏区域(全屏),应该让容器 width: '100%' 不加 padding,而仅对内部可交互元素做避让。
实现要点:
- 获取挖孔的
topRect或leftRect(横屏可能在左/右侧)。 - 将标题栏容器设置为全宽,背景绘制到边缘。
- 内部元素(如返回按钮、标题文本)根据挖孔位置动态设置
margin或padding。
示例代码:
import window from '@ohos.window';
import { display } from '@kit.ArkUI';

@Entry
@Component
struct TitleBar {
  @State leftMargin: number = 16; // 默认间距
  private windowClass: window.Window = window.getLastWindow(getContext(this));

  aboutToAppear() {
    this.calculateAvoidArea();
  }

  async calculateAvoidArea() {
    try {
      const avoidArea = this.windowClass.getWindowAvoidArea(window.AvoidAreaType.TYPE_CUTOUT);
      const cutoutRect = avoidArea.topRect;  // 或 leftRect / rightRect 按设备方向
      // 判断挖孔是否在左侧(横屏平板常见)
      if (cutoutRect.left === 0 && cutoutRect.top === 0) {
        // 将左侧内容偏移到挖孔右侧(仅影响内部元素)
        this.leftMargin = px2vp(cutoutRect.width) + 16; // 额外保留一点间距
      }
    } catch (e) {
      console.error('get avoid area failed');
    }
  }

  build() {
    Row() {
      // 内部元素:返回按钮
      Image($r('app.media.back_icon'))
        .width(24).height(24)
        .margin({ left: this.leftMargin })
      Text('标题')
        .fontSize(20)
        .margin({ left: 12 })
    }
    .width('100%')
    .height(56)
    .backgroundColor('#FF4794FF')
    // 不设置 padding,让背景延伸
  }
}
关键区别:
- 整个 Row 不设置
padding,保证背景贴边。 - 仅对需要避让的控件(如返回按钮)动态调整
leftMargin。 - 若挖孔在顶部,可能还要考虑安全区域,把标题栏往下放一点,这里仅处理左侧避让。
这样就能实现和系统标题栏一样的效果:背景铺满,内容自适应避开摄像头。