


HarmonyOS鸿蒙Next中如何截取部分图片内容
HarmonyOS鸿蒙Next中如何截取部分图片内容 现在有一张图片,我需要截取其中X坐标为10,宽度为20,高度为20的区域图片形成一个新图片,应该怎么开发?
5 回复

import { image } from '@kit.ImageKit'
import { resourceManager } from '@kit.LocalizationKit'
import { common } from '@kit.AbilityKit'
@Entry
@ComponentV2
struct Demo {
@Local crop?: PixelMap
@Local res: Resource = $r("app.media.simple_img2");
build() {
Column() {
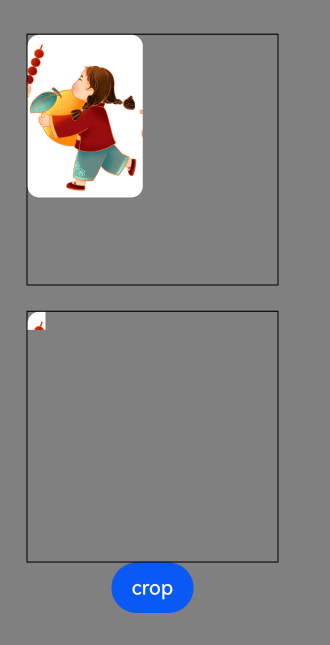
Image(this.res).size({ width: 200, height: 200 }).objectFit(ImageFit.TOP_START)
.border({ width: 1 })
Blank().height(20)
Image(this.crop).size({ width: 200, height: 200 }).objectFit(ImageFit.TOP_START)
.border({ width: 1 })
Button("crop").onClick(() => {
const buffer = this.getFileBuffer(this.res);
const imageSource: image.ImageSource = image.createImageSource(buffer);
const imgInfo = imageSource.getImageInfoSync(0);
//裁剪区域,单位像素
let region: image.Region = {
x: 0,
y: 0,
size: {
width: 50,
height: 50
}
};
let pixelMap = imageSource.createPixelMapSync({
index: 0,
desiredSize: imgInfo.size
});
pixelMap.cropSync(region);
this.crop = pixelMap;
})
}
.width('100%')
.height('100%')
.justifyContent(FlexAlign.Center)
.backgroundColor(Color.Grey)
}
getFileBuffer(res: Resource): ArrayBuffer | undefined {
try {
const context: Context = this.getUIContext().getHostContext() as common.UIAbilityContext;
const resourceMgr: resourceManager.ResourceManager = context.resourceManager;
// 获取资源文件内容,返回Uint8Array。
// const fileData: Uint8Array = await resourceMgr.getMediaContent(res.id);
const fileData: Uint8Array = resourceMgr.getMediaContentSync(res.id);
console.info('Successfully get the RawFileContent.');
// 转为ArrayBuffer并返回。
const buffer: ArrayBuffer = fileData.buffer.slice(0);
return buffer;
} catch (error) {
console.error(`Failed to get the RawFileContent with error: ${error}.`);
return undefined;
}
}
}
更多关于HarmonyOS鸿蒙Next中如何截取部分图片内容的实战系列教程也可以访问 https://www.itying.com/category-93-b0.html


一、最简单方案:使用 Image 组件自带裁剪(推荐)
如果你只是UI 显示裁剪后的区域,不用生成新图片,用这个:
Image($r('app.media.your_image')) // 替换成你的图片资源
  .width(20)
  .height(20)
  .objectFit(ImageFit.CROP) // 裁剪模式
  .clip(new Rect({
    x: 10,    // 起始X
    y: 0,     // 起始Y
    width: 20,
    height: 20
  }))
✅ 优点:性能最好、代码最少、纯 UI 渲染、不耗内存
二、真正生成一张新图片(PixelMap 裁剪)
如果你需要生成新图片资源、保存、传递,必须用 PixelMap 裁剪:
完整代码
import { image } from '@kit.ImageKit';
import { util } from '@kit.ArkTS';

// 裁剪图片:x=10,宽20,高20
async function cropImage(originalPixelMap: image.PixelMap) {
  // 裁剪区域配置
  const cropRegion = {
    size: {
      width: 20,
      height: 20
    },
    x: 10,  // 你要的X起点
    y: 0
  };

  // 执行裁剪
  const croppedPixelMap = await originalPixelMap.crop(cropRegion);

  // croppedPixelMap 就是你要的新图片
  return croppedPixelMap;
}
如何从资源图片获取 PixelMap
// 获取图片资源 → 转 PixelMap
async function getPixelMapFromResource() {
  const resourceManager = getContext().resourceManager;
  const imageSource = image.createImageSource(
    $r('app.media.your_image').getAttribute('id')
  );
  return await imageSource.createPixelMap();
}
在HarmonyOS Next中,可借助ImageSource与PixelMap裁剪图片:通过ImageSource.createFromFile加载源图,调用createPixelMap并传入Region(指定裁剪区域),返回的PixelMap即为截取内容。也可用Canvas的clipRect配合drawPixelMap实现。
在HarmonyOS Next中,截取图片局部可通过@ohos.multimedia.image模块实现,利用createPixelMap设置解码区域参数即可获取指定区域的PixelMap。以下示例演示如何从图片中截取X=10、Y=0(需指定Y坐标,假设为0)、宽20、高20的区域:
import image from '@ohos.multimedia.image';
import fs from '@ohos.file.fs';

async function cropImage() {
  try {
    // 读取图片文件,获取ArrayBuffer
    let file = fs.openSync('/path/to/your/image.jpg', fs.OpenMode.READ_ONLY);
    let buf = new ArrayBuffer(fs.statSync(file.fd).size);
    fs.readSync(file.fd, buf);
    fs.closeSync(file);

    // 创建图片源
    let imageSource = image.createImageSource(buf);

    // 设置解码参数,裁剪区域
    let decodingOptions: image.DecodingOptions = {
      desiredRegion: {
        size: { height: 20, width: 20 },
        x: 10,
        y: 0 // 需明确Y坐标,根据实际设置
      }
    };

    // 生成裁剪后的PixelMap
    let pixelMap = await imageSource.createPixelMap(decodingOptions);

    // 此时pixelMap即为截取后的图片,可显示或保存
    console.info('裁剪完成,宽:' + pixelMap.getImageInfoSync().size.width);
  } catch (err) {
    console.error('裁剪失败:' + JSON.stringify(err));
  }
}
若需将截取后的PixelMap保存为新图片,可使用image.packing接口:
let packOpts: image.PackingOption = { format: "image/jpeg", quality: 100 };
let imagePacker = image.createImagePacker();
let arrayBuffer = await imagePacker.packToData(pixelMap, packOpts);
// 将arrayBuffer写入文件即完成保存
注意:实际开发中需确保Y坐标值,图片源区域不能超出原始尺寸,否则会报错。