HarmonyOS 鸿蒙Next二级吸顶如何实现
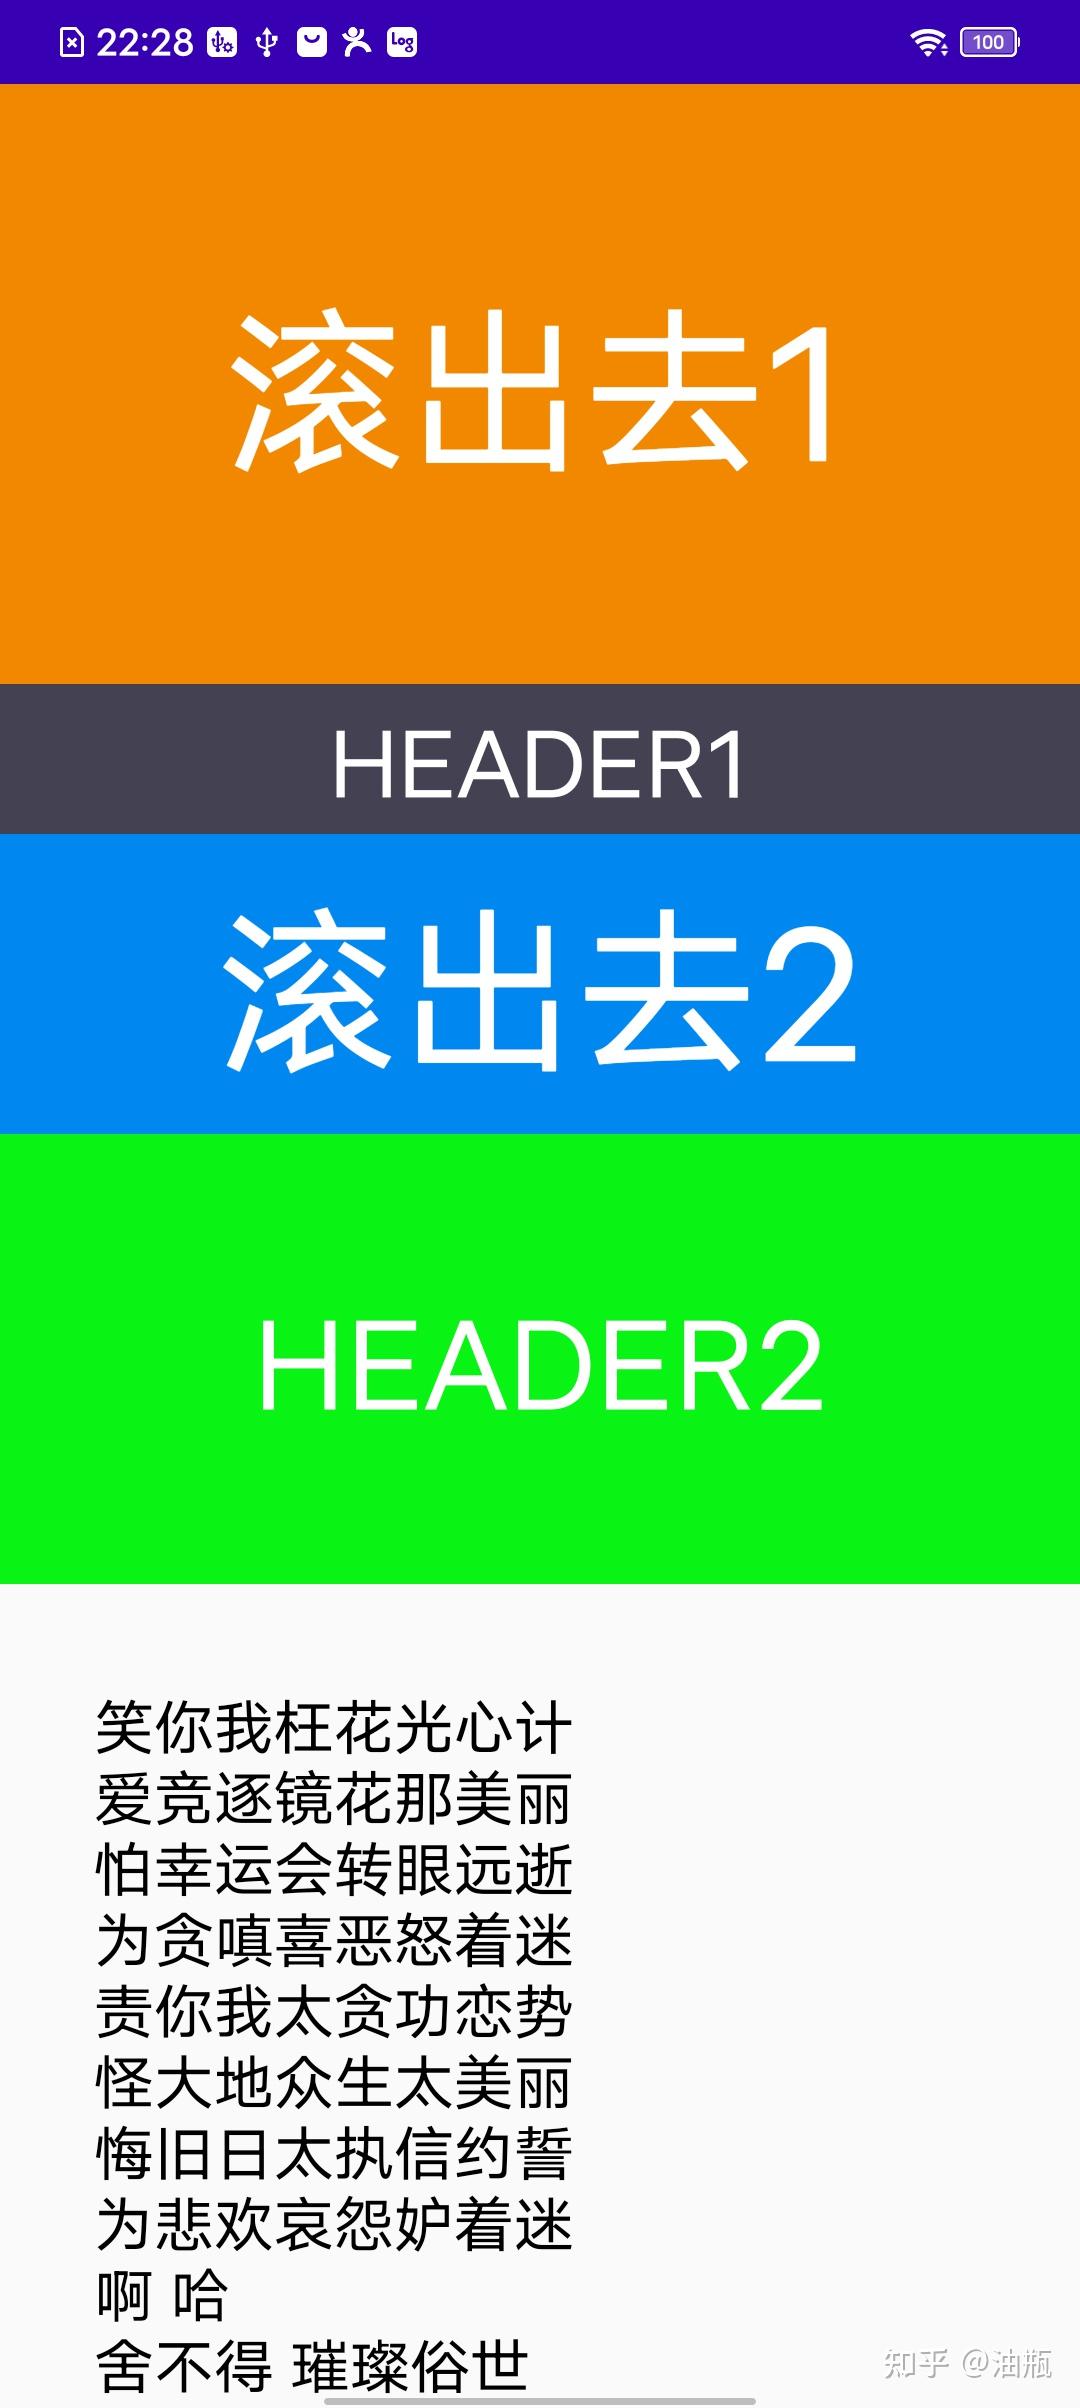
HarmonyOS 鸿蒙Next二级吸顶如何实现 如图所示,往上滑的时候,header1和header2都吸顶怎么实现有大佬知道怎么实现吗?

更多关于HarmonyOS 鸿蒙Next二级吸顶如何实现的实战系列教程也可以访问 https://www.itying.com/category-93-b0.html
4 回复
可以参考一下我的方案,第一层吸顶用scroll嵌套list实现,第二层是利用ListItemGroup的sticky属性实现的,demo如下:
@Entry
@Component
struct ListItemGroupExample {
  private timeTable: TimeTable[] = [
    {
      title: 'Header2-0',
      projects: ['内容1']
    },
    {
      title: 'Header2-1',
      projects: ['内容2']
    },
    {
      title: 'Header2-2',
      projects: ['内容3']
    }
  ]

  @Builder
  itemHead(text: string, index: number) {
    if (index==0) {
      Text().height(0)
    } else {
      Text(text).width("100%").textAlign(TextAlign.Center).fontColor(Color.Black)
        .height(index==1 ? 100 : 200).backgroundColor(index==1 ? Color.Pink : Color.Green)
    }
  }

  build() {
    Scroll() {
      Column() {
        Text("滚出去1")
          .width("100%")
          .height(200)
          .backgroundColor('#0080DC')
          .textAlign(TextAlign.Center)
        Column() {
          // 第一层吸顶效果主要是通过设置nestedScroll属性以及父组件设置高度100%实现
          Text("Header1")
            .width("100%")
            .height(100)
            .backgroundColor(Color.Orange)
            .textAlign(TextAlign.Center)
            .fontColor(Color.Black)
          List() {
            ForEach(this.timeTable, (item: TimeTable, index) => {
              ListItemGroup({ header: this.itemHead(item.title, index) }) {
                ForEach(item.projects, (project: string) => {
                  ListItem() {
                    Text(project)
                      .width("100%")
                      .height(800)
                      .fontSize(20)
                      .textAlign(TextAlign.Center)
                      .backgroundColor(Color.Gray)
                  }
                }, (item: string) => item)
              }
            })
          }
          .sticky(StickyStyle.Header)
          .scrollBar(BarState.Off)
          .width("100%")
          .height("calc(100% - 100vp)")
          .backgroundColor(Color.Blue)
          .edgeEffect(EdgeEffect.Spring)
          .nestedScroll({
            scrollForward: NestedScrollMode.PARENT_FIRST,
            scrollBackward: NestedScrollMode.SELF_FIRST
          })
        }.height("100%")
      }
    }
    .edgeEffect(EdgeEffect.Spring)
    .friction(0.6)
    .backgroundColor(Color.White)
    .scrollBar(BarState.Off)
    .width('100%')
    .height('100%')
  }
}

interface TimeTable {
  title: string;
  projects: string[];
}
楼主若有更好的方法可以交流一下哈
更多关于HarmonyOS 鸿蒙Next二级吸顶如何实现的实战系列教程也可以访问 https://www.itying.com/category-93-b0.html
大哥,你简直是我的指路明灯,

我的方法就没有你那么优雅了,我是通过控制HEADER1的显隐来达到吸顶的效果的,还是你的方法好!
@Entry
@Component
struct ScrollCeiling {
  scroller: Scroller = new Scroller()
  itemData: Array<number> = [0, 1, 2, 3, 4, 5, 6, 7, 8, 9]
  tabTitles: Array<string> = ['Tab1', 'Tab2', 'Tab3']
  isFirstChange: boolean = false;
  maxDistance: number = 0; // Tabs和标题栏的最大距离
  minGlobalY: number = 89.6923076923077; // Tabs距离屏幕顶部的最小距离,该距离=标题栏+状态栏
  @State isCeiled: boolean = false; // Tabs是否是吸顶状态
  @State titleBarAlpha: number = 0;

  @Builder
  tabContentData(tabTitle: string) {
    TabContent() {
      List() {
        ForEach(this.itemData, (item: number) => {
          ListItem() {
            Text(`${item}`)
              .height(80)
              .width('100%')
              .textAlign(TextAlign.Center)
              .backgroundColor(0xDDDDDD)
              .margin({ bottom: 5 })
          }
        })
      }
      .nestedScroll({
        scrollForward: NestedScrollMode.PARENT_FIRST,
        scrollBackward: NestedScrollMode.SELF_FIRST
      })
    }.tabBar(tabTitle)
    .padding({ top: 5, bottom: 5 })
    .borderWidth(1)
    .borderColor(Color.Red)
  }

  build() {
    Stack({ alignContent: Alignment.TopStart }) {
      Image($r('app.media.bear'))
      Column() {
        Stack() {
          Column()
            .width('100%')
            .height(50)
            .backgroundColor('#99ff00ff')
            .opacity(this.titleBarAlpha)
          Text('标题栏')
            .textAlign(TextAlign.Center)
            .width('100%')
            .height(50)
        }
        .borderWidth(1)
        .borderColor('#99ff00')

        Scroll(this.scroller) {
          Column() {
            Image($r('app.media.app_icon')).height(70)
            Text('HEADER')
              .textAlign(TextAlign.Center)
              .width('100%')
              .backgroundColor('#00ff00')
              .height(50)
            Image($r('app.media.app_icon')).height(70)

            Stack({ alignContent: Alignment.TopStart }) {
              Tabs() {
                ForEach(this.tabTitles, (title: string) => {
                  this.tabContentData(title)
                })
              }
              .padding({ top: this.isCeiled ? 50 : 0 })
              .borderWidth(2)
              .onAreaChange((oldArea, newArea) => {
                console.log('newArea.position:' + newArea.globalPosition.y)
                if (!this.isFirstChange) {
                  this.isFirstChange = true;
                  this.maxDistance = Number(newArea.globalPosition.y) - this.minGlobalY;
                }
                this.titleBarAlpha = 1 - ((Number(newArea.globalPosition.y) - this.minGlobalY) / this.maxDistance);
                console.log('alpha:' + this.titleBarAlpha)
                this.isCeiled = this.minGlobalY === newArea.globalPosition.y;
              })

              Text('HEADER')
                .textAlign(TextAlign.Center)
                .width('100%')
                .backgroundColor('#00ff00')
                .height(50)
                .visibility(this.isCeiled ? Visibility.Visible : Visibility.None)
            }
          }
          .width('100%')
          .alignItems(HorizontalAlign.Center)
        }
        .width('100%')
        .align(Alignment.Center)
        .scrollBar(BarState.Off)
      }
    }
  }
}
在HarmonyOS(鸿蒙)系统中实现Next二级吸顶效果,通常涉及UI布局和滚动事件的处理。以下是一个简要的实现思路:
-
布局设计:
- 使用
DirectionalLayout或StackLayout等容器来组织你的UI元素。 - 一级和二级吸顶元素应分别放置在布局中的合适位置,初始时二级吸顶元素可能隐藏或位于正常流中。
- 使用
-
滚动监听:
- 为包含列表或可滚动内容的容器添加滚动监听器。
- 在滚动事件中判断当前滚动的位置,以及哪个元素应该被吸顶。
-
动态调整布局:
- 当滚动到需要二级吸顶的位置时,通过修改布局参数(如
margin或padding)或改变元素的父容器来实现吸顶效果。 - 可能需要调整其他元素的布局以适应吸顶元素的变化。
- 当滚动到需要二级吸顶的位置时,通过修改布局参数(如
-
状态管理:
- 使用状态变量来跟踪当前是否处于二级吸顶状态,以便在滚动方向改变或用户交互时能够正确恢复布局。
实现时,注意性能优化,避免频繁布局调整导致的性能问题。同时,确保在不同屏幕尺寸和分辨率下都能正确显示。
如果问题依旧没法解决请联系官网客服, 官网地址是 https://www.itying.com/category-93-b0.html


